Configuring Local Pop-Up Menus

You can configure a local pop-up menu from the EMC’s Page Design module. A Local Pop-up Menu button saves touchscreen page space by eliminating individually hard-coded menu item buttons. You can add multiple menu items to the Local Pop-up Menu. When this button is pressed, all of the items appear in a pop-up window in the same order in which they were configured in the Page Design module.

To configure a Local Pop-up Menu:

  1. Sign in to EMC.
  2. Select the Enterprise, property, revenue center, or zone, click Configuration, and then click Page Design.
  3. Insert a new page record, or select an existing page.
  4. On the Edit tab, select the page area in which to define the Local Pop-up Menu button.
  5. Click Button.
  6. On the General subtab, enter the button name in the Legend field.
  7. From the Type drop-down list, select Function.
  8. Click the black arrow beneath the Type drop-down list.
  9. Select the Local Menu Popup function.
  10. Position and size the button on the page. Use the Style arrow to change the color.
  11. To add menu items to the pop-up button, click Edit Popup Entries.

    Figure 9-11 Page Design Button Configuration
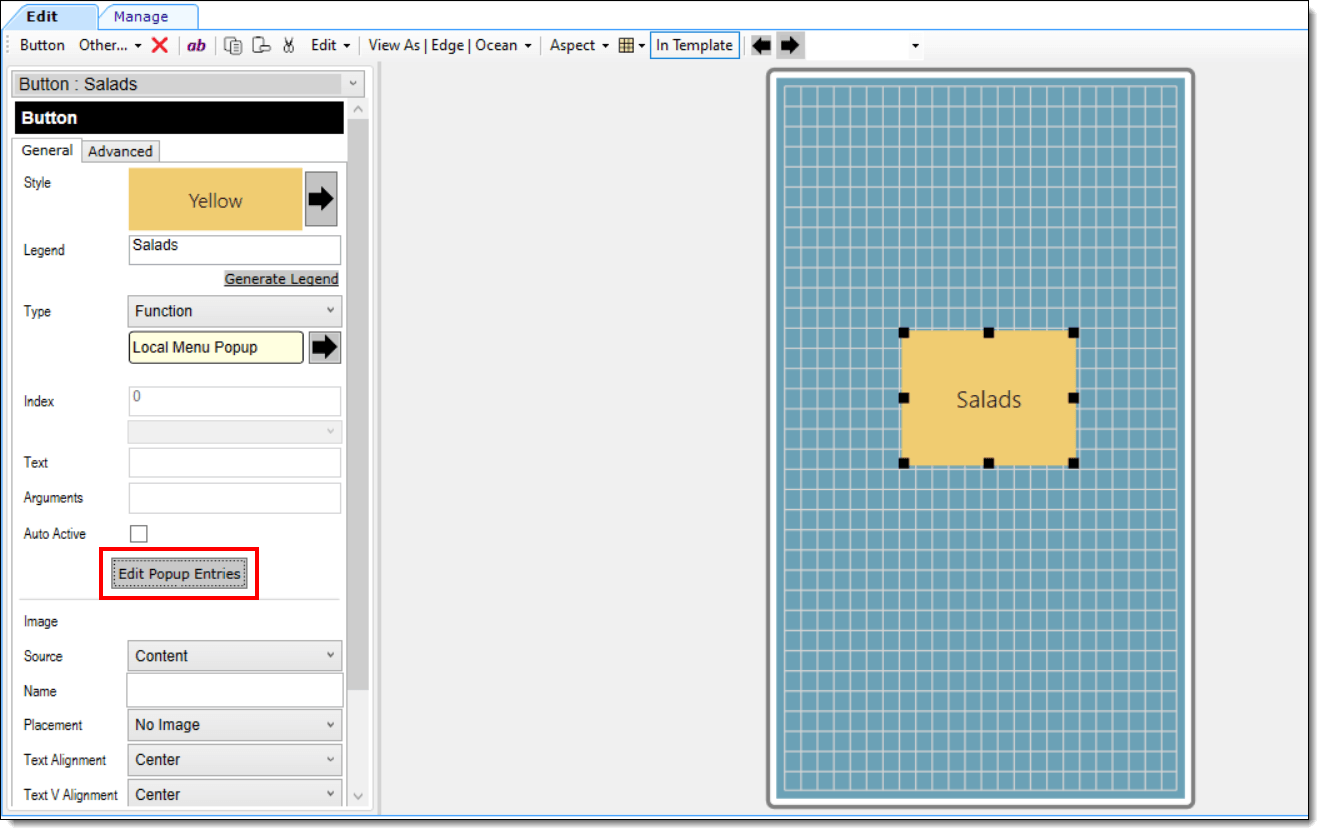

    This image shows the Page Design module when configuring the Local Menu Pop-up button.
  12. Click the Add button.

    Figure 9-12 Page Design - Edit Popup Entries Window
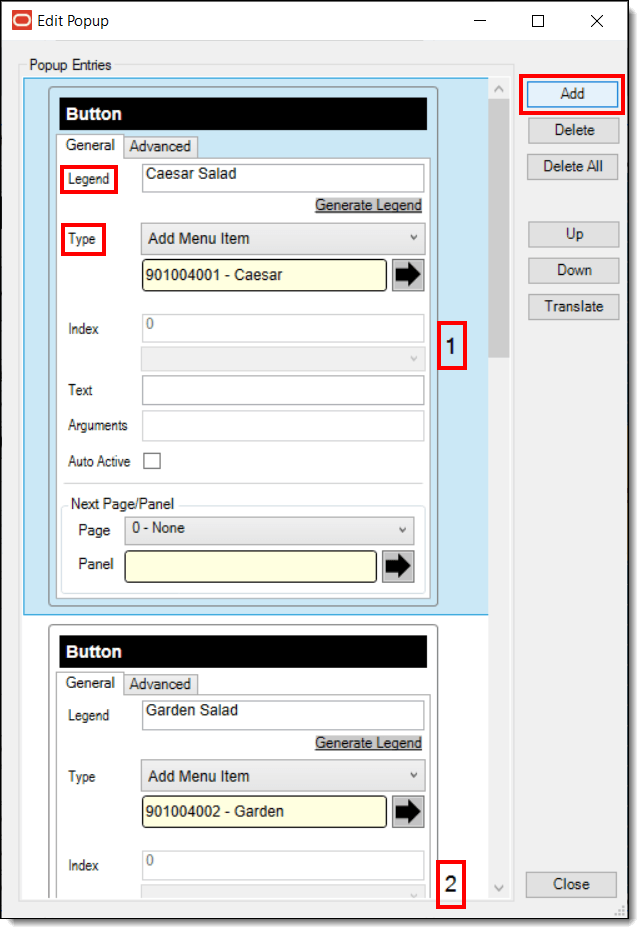

    This image shows the Edit Popup entries window as menu items are added to the Local Menu Pop-up button.
  13. From the Type drop-down list, select Add Menu Item.
  14. From the Legend field, enter the name of the menu item (as you want it to read in the pop-up menu list on the device).

    Note:

    As you enter multiple menu items to the Local Menu Pop-up button, your entries are numbered adjacent to each added item in descending order.
  15. When you are finished adding menu items, click Close, and then click Save.
  16. Update the database, and then test your Local Menu Pop-up button.