6 Mounting Options for the TM-P80II
Oracle provides a mounting bracket (P/N 7622619) for the TM-P80II that can be set up as a desktop mount or a wall mount unit.
Mounting Bracket for Epson Mobilink TM-P80II Plus Thermal Receipt Printer — What’s in the Box
-
1x – Printer bracket
-
1x – Screw for attaching bracket to printer
-
1x – Hex key
Note:
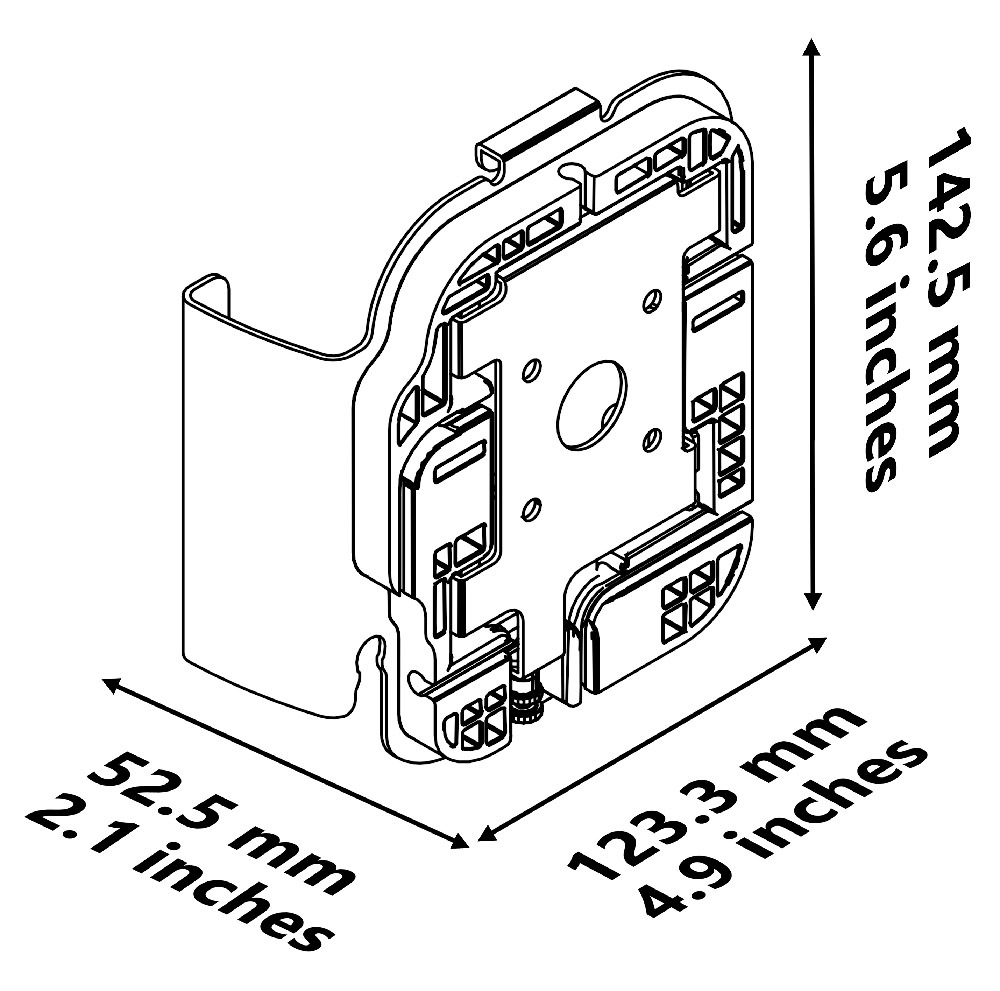
Printer cable ships in a separate box and must be ordered separately (P/N 7622619).Figure 6-1 Dimensions for Mounting Bracket for Epson Mobilink TM-P80II Plus Thermal Receipt Printer
Installing the Mounting Bracket for Epson Mobilink TM-P80II Plus Thermal Receipt Printer
-
Oracle 2.5mm hex key (included) or equivalent
-
Philips screwdriver
-
Drill and drill bit appropriate for your wall type
-
4x wall anchors and screws appropriate for your wall type
Wall Mount Installation
-
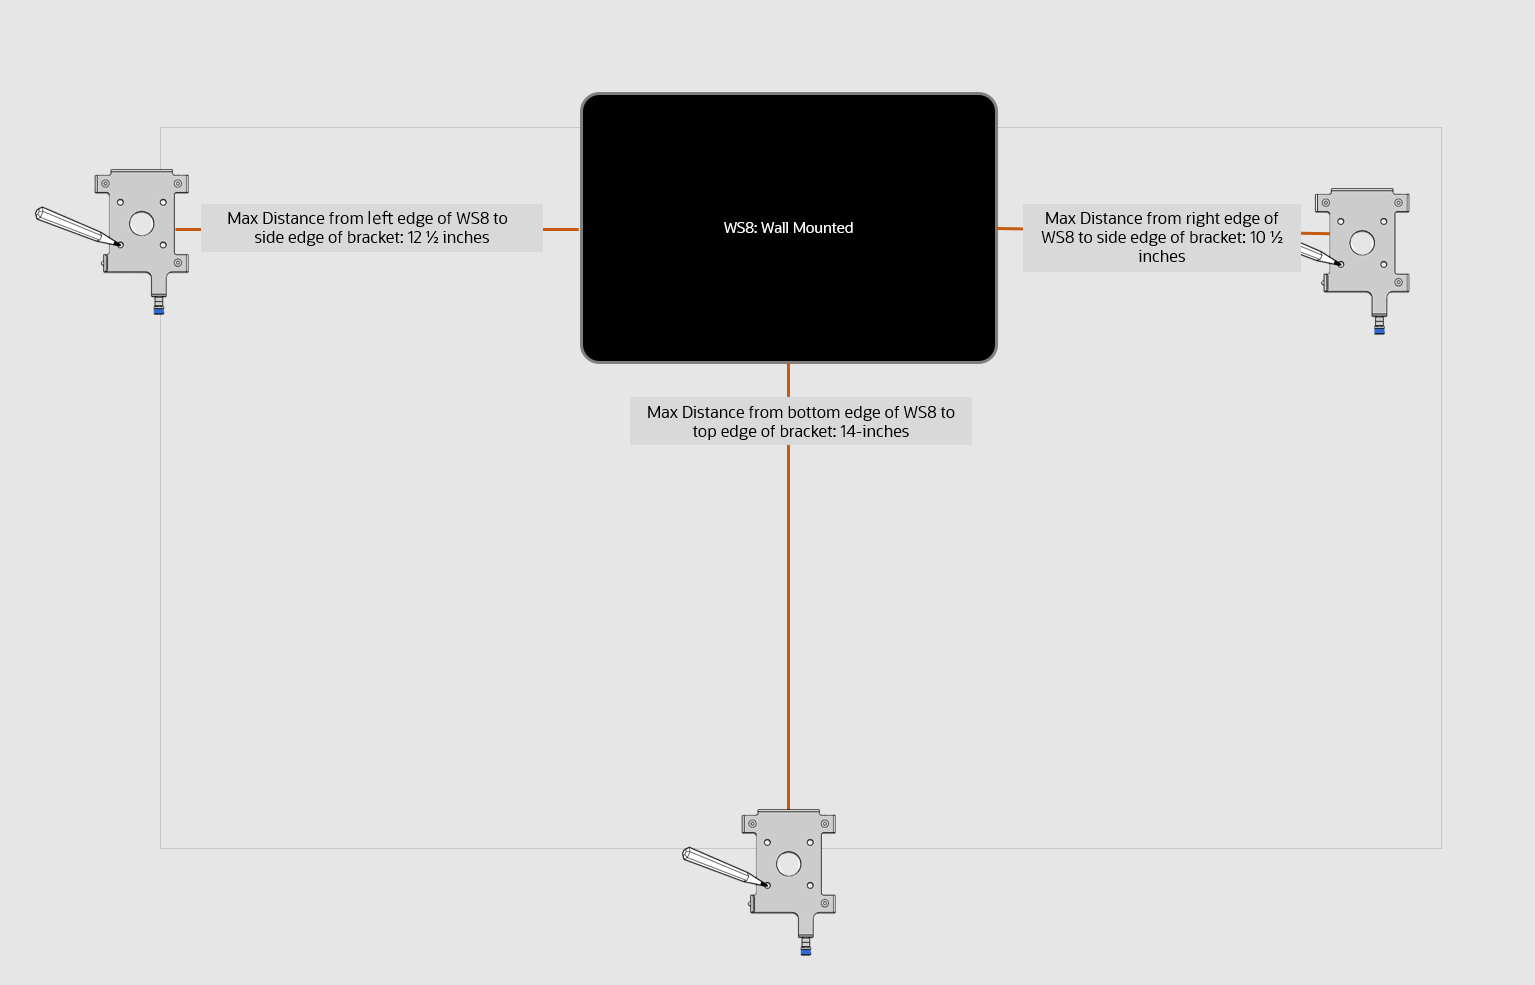
Choose an installation location within range of your Oracle workstation’s USB port.
-
Max distance from left edge of Workstation 8 to side edge of bracket: 12.5 inches
-
Max distance from right edge of Workstation 8 to side edge of bracket: 10.5 inches
-
Max distance from bottom edge of Workstation 8 to top edge of bracket: 14 inches
Figure 6-2 TM-P80II Wall Mounting Guidelines
-
-
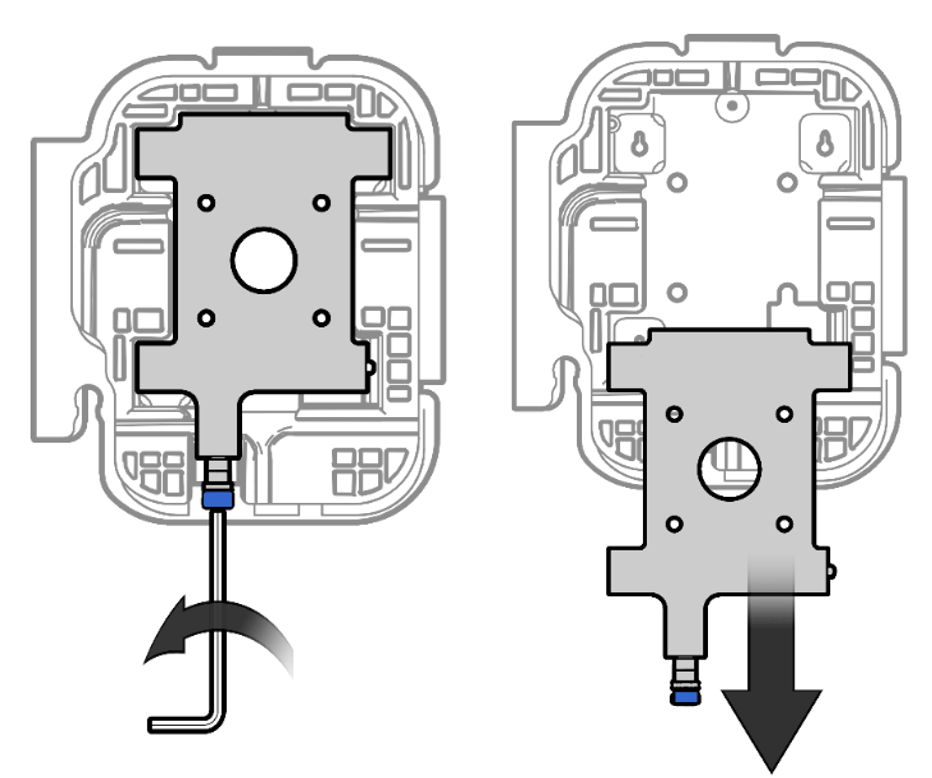
Loosen the captive screw that secures the wall mount plate to the bracket using the included 2.5mm hex key, and then slide the wall mount plate down to release it. Set aside the plate.
Figure 6-3 Removing the Wall Mount Plate from the Bracket
-
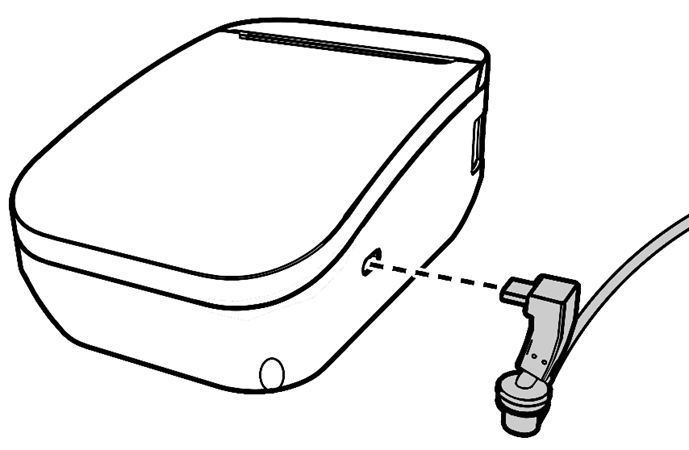
Connect the USB cable to the printer.
Figure 6-4 Connecting the Printer Cable
-
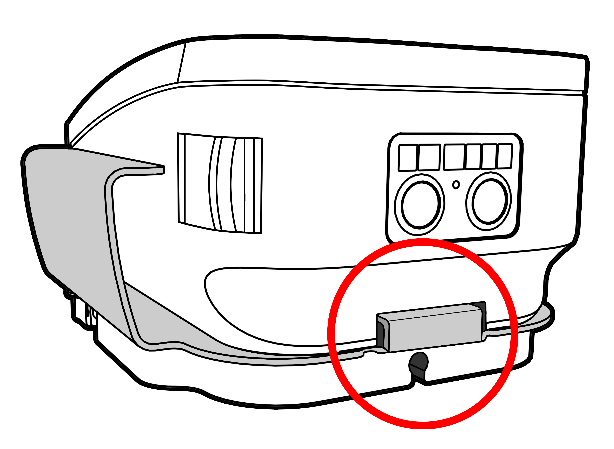
Insert the right-angle security tab of the bracket into the center slot on the printer as you slide the printer into the bracket.
Figure 6-5 Inserting the Right-Angle Security Tab
-
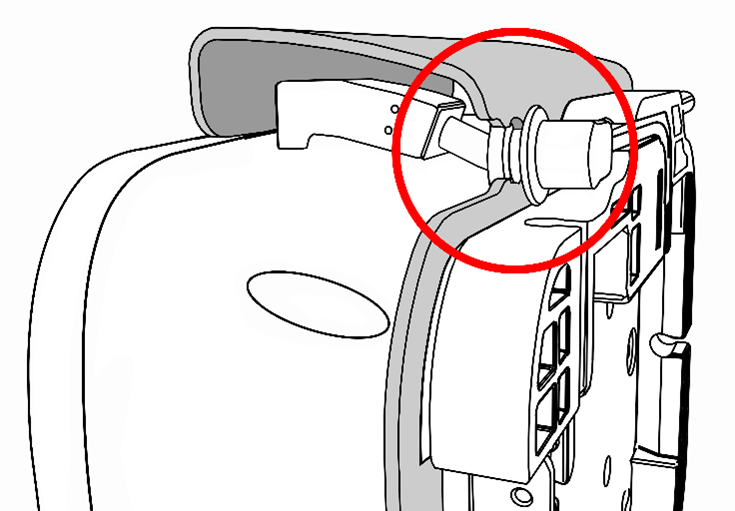
Ease the cable into the slot in the bracket cable shield.
Figure 6-6 Easing the Printer Cable Into the Bracket Shield Slot
-
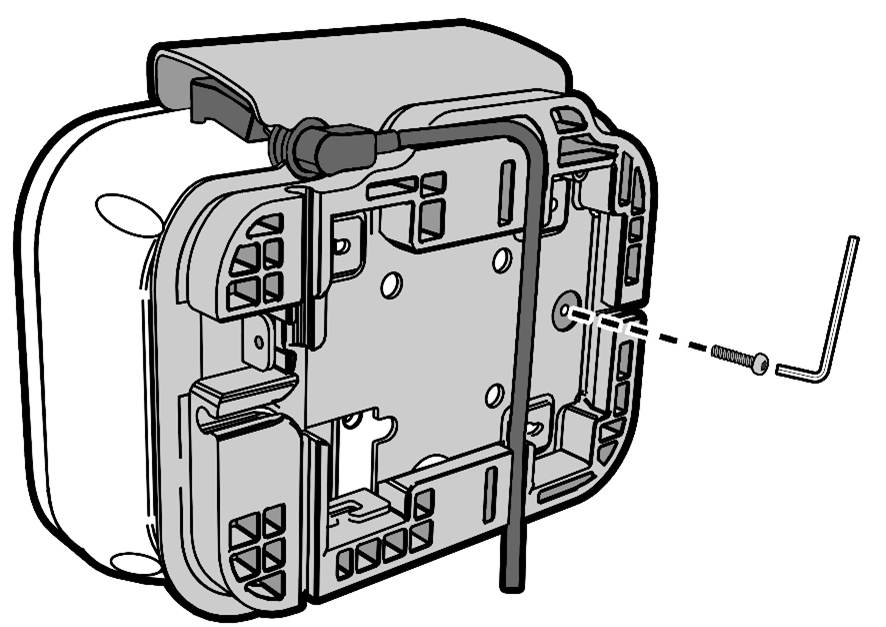
Install the included screw to secure the bracket assembly to the printer and then route the printer cable through the grooves in the rubber base. Select a routing path and exit point based on your workstation location.
Figure 6-7 Installing the Security Screw and Routing the Printer Cable
-
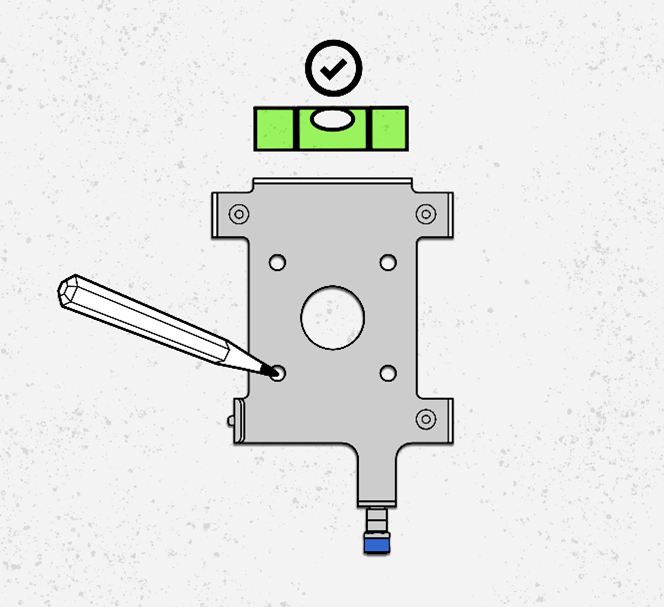
While holding the wall mount plate level, mark the four holes on the wall.
Figure 6-8 Marking Screw Holes
-
Drywall/concrete/masonry walls: Use the appropriate drill bit to drill the four holes.
-
Install 4x wall anchors suitable for the wall type.
-
Use 4x screws to attach the wall mount to the wall anchors.
-
-
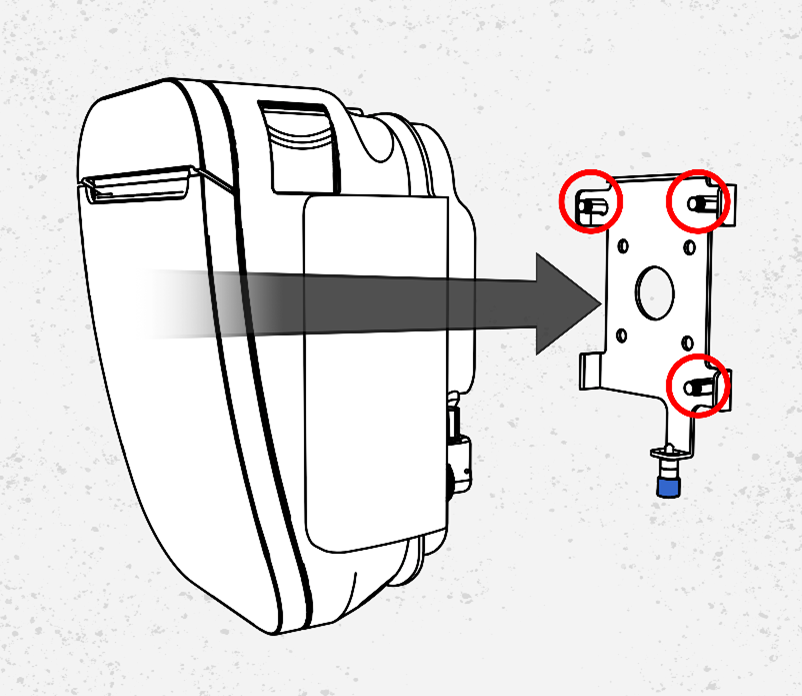
Hang the printer/bracket assembly on the wall by inserting it into the three posts on the wall mount plate.
Figure 6-9 Installing the Prtiner/Bracket Assembly on the Wall Plate
-
Connect the printer cable to the USB port on your Oracle workstation.
Installing the Bracket on a Cash Drawer
Follow Wall Mount Installation steps 1-6, and then place the printer/bracket assembly on the top surface of the cash drawer. The bracket includes magnets to secure the printer in place.