Flexibility in Primary Key Identification for Follow-up Records

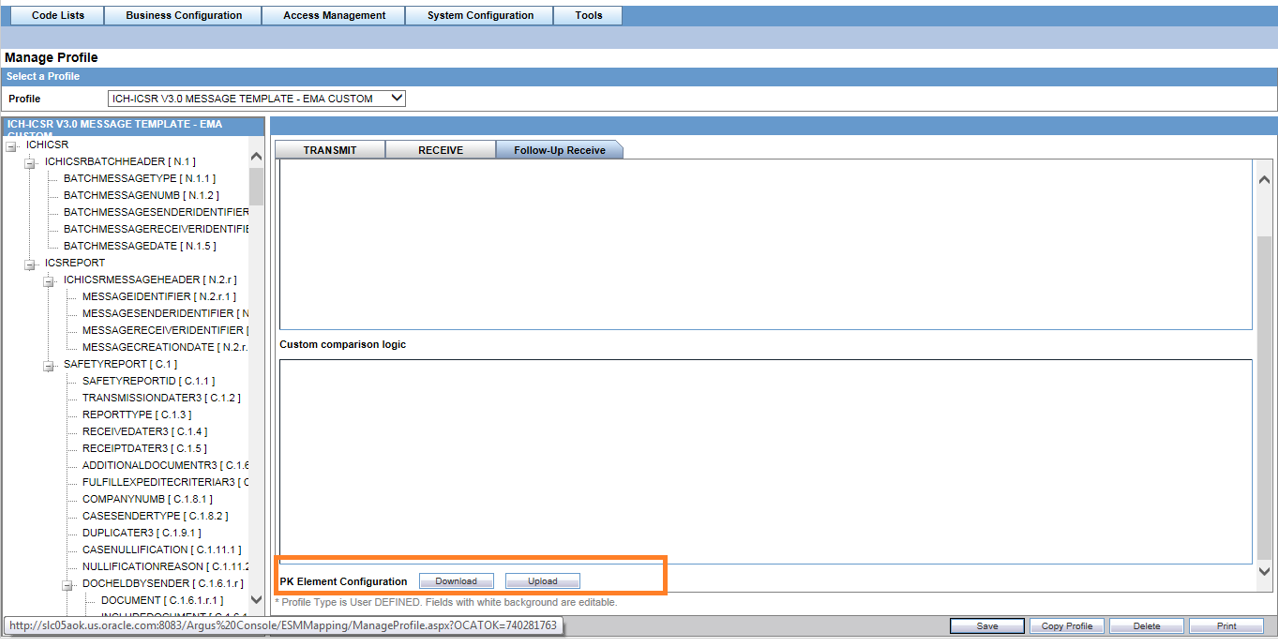
  1. Configure the Primary Keys from System Configuration > Interchange Mapping > Manage Profile > Follow-up Receive tab.
    Primary key element configuration
  2. To change the primary key for a profile:
    1. Select the profile.
    2. Go to the profile's Follow-up Receive tab and click the Download button.
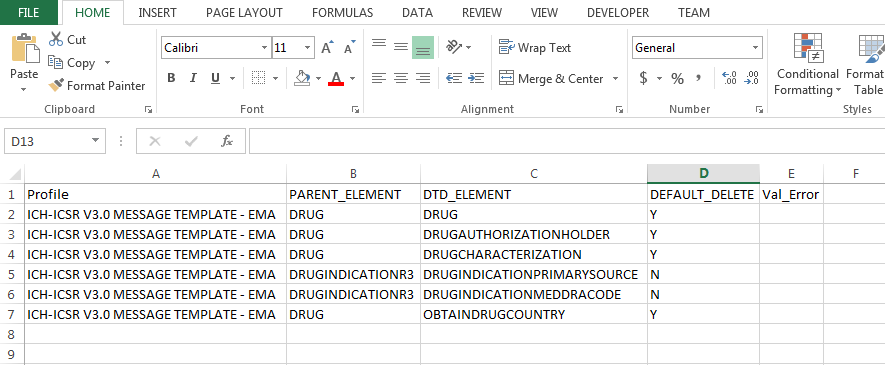
    This downloads a CSV file with all the PKs for the profile.CSV file
  3. Modify the CSV file as per the following logic:
    Column Name Description
    PROFILE The name of the profile for which file is uploaded. In case of a mismatch, an error is pushed into the Val_Error column.
    PARENT_ELEMENT The elements that have child elements in the current profile. In case of an incorrect entry, an error is pushed into the Val_Error column.
    DTD_ELEMENT The elements that are true child elements (i.e. they are the exact root node of the XML). In case of an incorrect entry, an error is pushed into the Val_Error column.
    DEFAULT_DELETE Contains “Y” or “N” values. The “Y” value denotes that the repeater element is marked for Deletion in case it mismatches the incoming file. The “N” value denotes that the repeater block is not marked for deletion. In case of any other value exists in the column, an error is pushed to the VAL_Error column.
    VAL_ERROR Present only in CSV files and if there are errors in the file upload.

    Note:

    Verify that none of the columns contains blank rows. If so, an error is pushed to the VAL_ERROR column.
  4. After making changes in the CSV file, upload the file using the Upload button.
All the validations are executed. If there are any errors, the file that contains the error in the VAL_ERROR column is pushed back to user from the browser. Additionally, the uploaded file data is not reflected into the database configurations (i.e., only a file without any validation errors is committed to the database).

Note:

All these operations are performed during the upload user action.