8 Quick Postings
The Quick Postings function allows you to perform postings by batch to a single account or multiple accounts.
Quick Posting to Single Account
This function is extremely useful when you have a large quantity of guest checks to post at a time, for example Laundry or Telephone. The function applies to Guest, Crew, Group, and System Accounts.
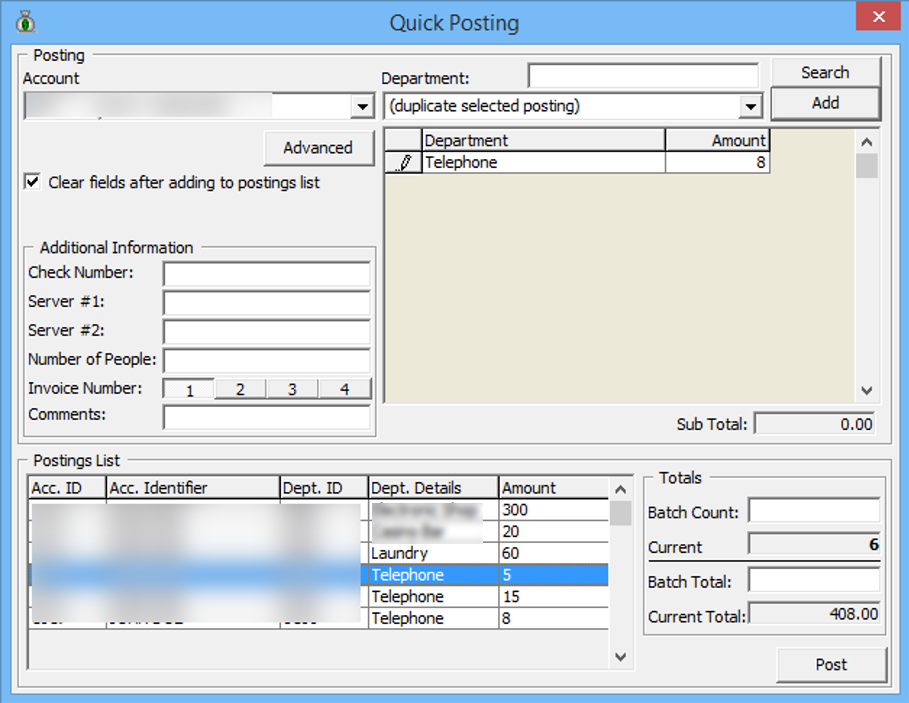
Figure 8-1 Quick Posting Window
-
From the Cashier File menu, select the Quick Posting option.
-
Select the Account using the drop-down list, navigate to Department, select the department code and enter the value to post.
-
In the Additional Information section, insert the check number, Server#1, if any, and select the invoice number to post to. The System default Invoice is 1.
-
Click Add to add the account to the Posting List grid. Repeat step 3 until all checks are added to the Posting List.
-
Note and tally the current count and current totals with physical guest checks.
-
Click Post to confirm the posting.
Quick Posting to Multiple Account
Quick Posting to Multiple Account allows you to post transactions to many Guest, Crews, Group, and System Accounts.
-
From the Cashier menu, select the Quick Posting option.
-
Under the Account field, click Advanced.
-
In the Multiple Accounts selection window, select the Status and Account Type from the drop-down list.
-
Select the account name from the Non Selected Accounts pane, and then click Add to add the account singly or Add All> to add all account listed or use the Criteria Add>. See next section to select accounts using Criteria Add.
-
The account selected are shown in the Selected Account.
-
Click OK to return to the Quick Posting window.
-
Navigate to the Department field, select the department code, and enter the value to post.
-
In the Additional Information section, insert the Check number, Server#1, if any, and select the invoice number to post to. The System default Invoice is 1.
-
Click Add to add the account to the Posting List grid.
Selecting Account Using Criteria Option
The criteria options are made available to further filter the accounts based on the criteria entered, for example by embarkation/disembarkation date, cabin category, VIP status, nationality, and so on.
-
In the Multiple Accounts Selection window, click Criteria Add>.
-
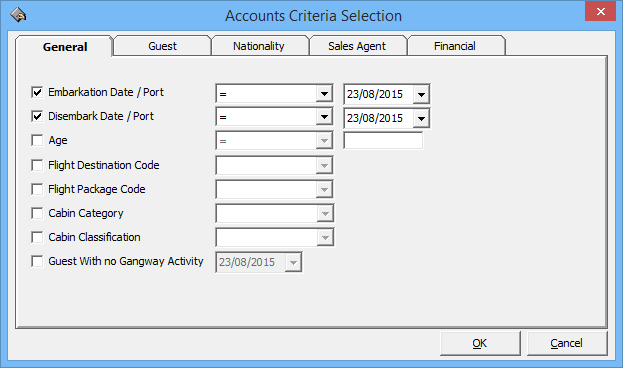
Select the options from the drop-down list in the General tab, then navigate to the Guest tab.
Figure 8-2 Account Selection Criteria
-
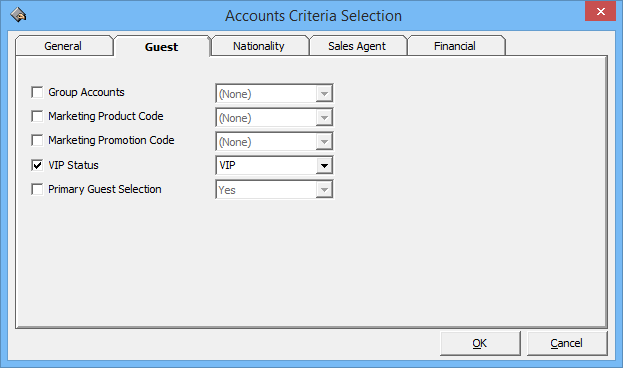
In the Guest tab, select from the available options using the drop-down list, continue to select from the remaining tabs if required, and then click OK to return to the Multiple Account Selection window.
Figure 8-3 Account Selection Criteria — Guest
Note:
Tabs in Accounts Criteria Selection may vary depending on the Guest Type selected in the Multiple Account Selection window.
Quick Posting Status
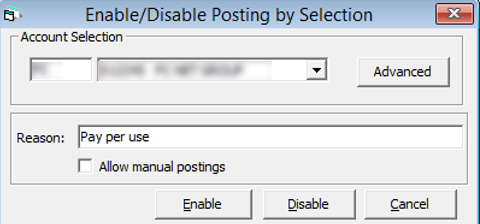
Quick Posting Status allows you to Enable/Disable the account posting status by batch.
Figure 8-4 Enable/Disable Posting Selection
-
From the Cashier File menu, select Quick Posting Status from the drop-down list.
-
In the Enable/Disable Posting by Selection window, select the account from the drop-down list or click Advanced to select multiple accounts.
-
Insert a reason in the Reason field.
-
Select Allow manual postings if manual posting is allowed in Disabled accounts.
-
Select one of the option - Enable or Disable the account.
Quick Discount
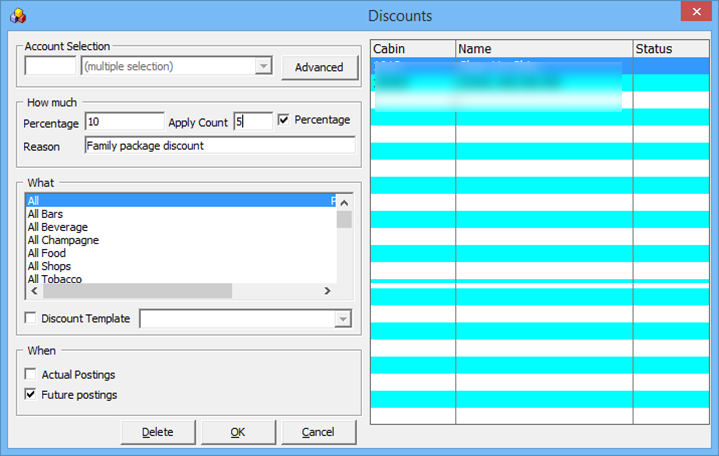
Figure 8-5 Quick Discount Window
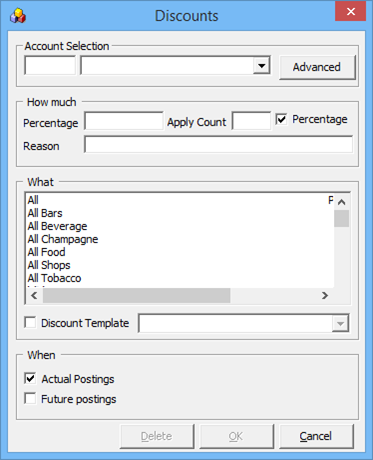
Quick Discount to Multiple Guest by Percentage/Value
Quick Check-Out
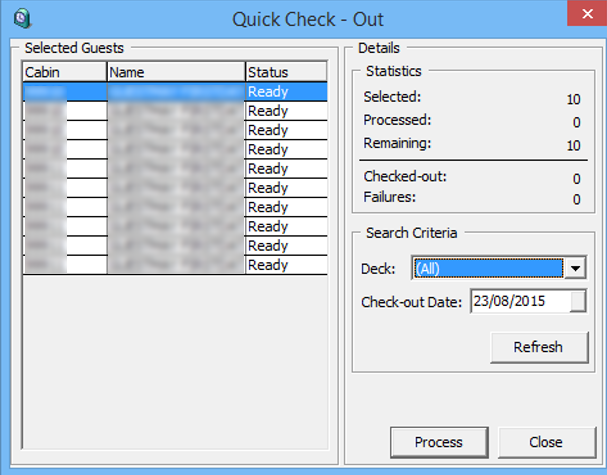
Quick Check-Out allows you to check-out passenger’s by Deck and selected Check-out Date.
Figure 8-7 Quick Check Out
-
From the Cashier File menu, select the Quick Discount option.
-
Repeat steps 2 to 5 of Quick Posting to Multiple Account and click OK to return to the Discounts window.
-
At the Selected Guest section, the cabin number and name of passengers due to check-out appear. The total selected accounts appears in the Statistic section.
-
Click Process and then select Yes at the confirmation prompt to proceed. This updates the number of records processed and its status in the Statistic section.
-
Click Close to return to the Main Window.
Quick Service Charge Posting
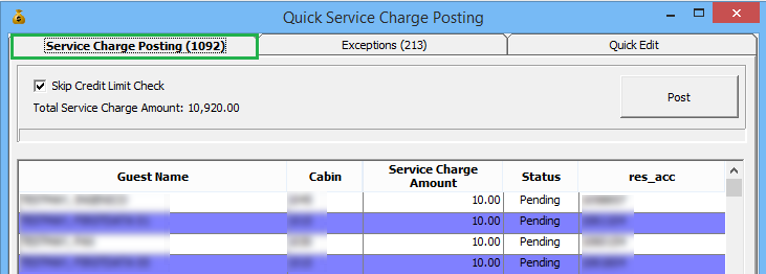
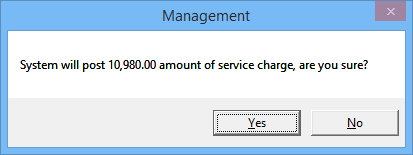
The Quick Service Charge Posting is a function that posts service charges in bulk or individually based on the criteria set up in the Quick Edit tab.
Posting a Service Charge by Batch
Figure 8-9 Service Charge Prompt
Disabling Service Charge Posting
-
Repeat above steps 1 to 5.
-
Select Disable Service Charge Posting, and click Update.
-
Updated accounts appear in the Exception tab and and Guest Handling, Guest Info, and Cabin Information sections.
