4 Voyage Task Overview
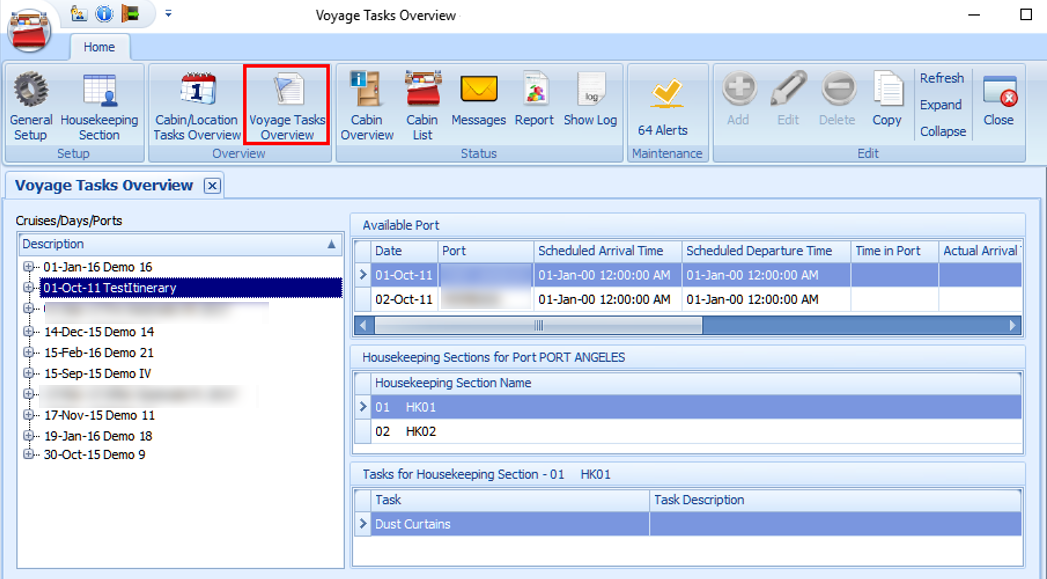
The system generates the tasks for the public locations during a system date change.
Figure 4-1 Voyage Task Overview

Table 4-1 Voyage Task Field Definition
| Header | Definition |
|---|---|
|
Cruise/Days/Ports |
Tree view list of the voyage/cruise. |
|
Available Port |
The port details for a selected port day. |
|
Housekeeping Section Name |
The assigned housekeeping section for the selected port. |
|
Task for Housekeeping Section |
List the specific tasks assigned to the selected housekeeping section. |
Adding New Location Tasks to Port
-
From the Home tab, click the Voyage Tasks Overview.
-
Select the port from the cruise day and click Add on the ribbon bar.
-
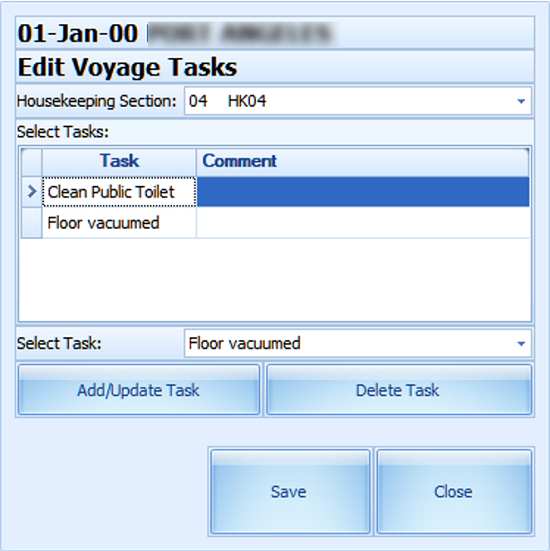
At the New Voyage Tasks window, select the Housekeeping section and task from the drop-down list.
Figure 4-2 New Voyage Tasks

-
Click Add/Update Task to add or click Delete Task to delete.
-
Click Save to save the record.
-
Repeat the above steps to add different tasks to another housekeeping section.
-
The tasks assigned to the section appear when you select the section name under the Housekeeping Section.
Copying a Task to another Port/Voyage
You can copy the same location task to a future cruise port as a recurring task.
-
Select the cruise from Cruises/Days/Port and click Copy on the ribbon bar.
-
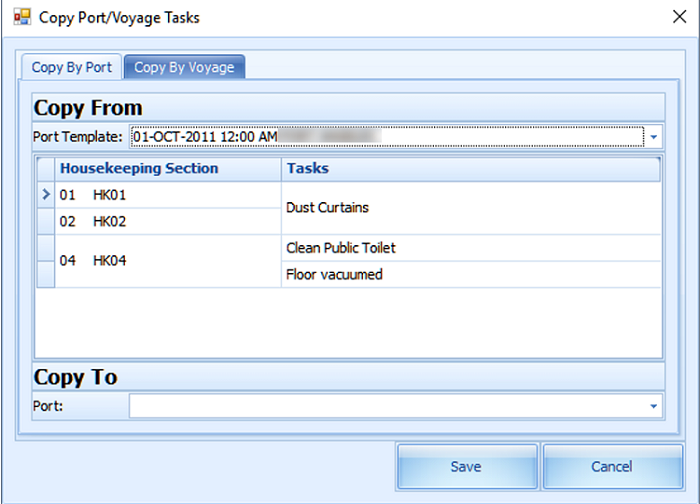
At the Copy Port/Voyage Tasks window, select Copy by Port.
-
Select Port Template from the drop-down list. The task for the current port populates accordingly.
Figure 4-3 Copy Port/Voyage Tasks

-
On Copy To select the Port to copy this information to and click Save.
-
To copy the task by Voyage, navigate to the Copy by Voyage tab.
-
Select the Voyage Template to copy from and then select the Voyage.
-
Click Save to complete the process.