Setting Up a Harbour/Port
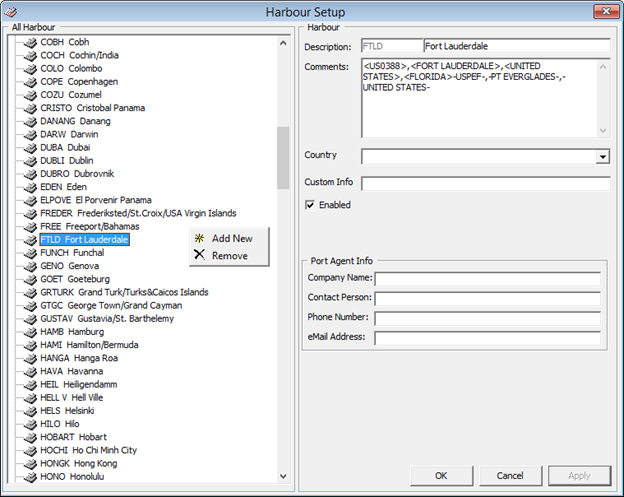
Figure 9-11 Harbour Setup

- From the Administration Menu, select System Setup, and then Harbour Setup under the sub-category.
- In the left pane of the Harbour Setup window, right-click and select Add New to add a new code.
- In the Description field, enter the short code and description of the harbour name.
- In the Comment field, enter the ISO Port Codes using an angle bracket <> and comma as separator, if any. The system also inserts the standard ISO Port codes from APIS during installation/update in the Comment field.
- Select the Country, if any, from the drop-down list.
- In the Port Agent Info section, enter the Port Agent information and click Apply to save the entry. The Enabled checkbox is selected by default. Deselect the checkbox to disable the code from the selection window.