3. Configure Okta as an Identity Provider in OCI IAM Identity Domain
Create an IdP for Okta on the OCI Console.
- In the OCI Console in the domain you are working in, click Security and then click Identity providers.
- Click Add IdP and then click Add SAML IdP.
- Enter a name for the SAML IdP, for example, Okta. Click Next.
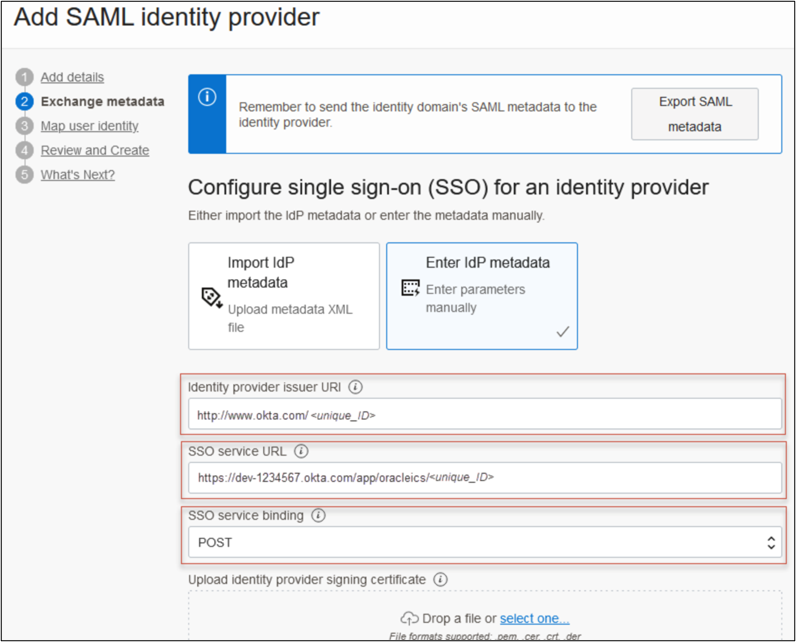
- On the Exchange metadata page, ensure that Enter IdP metadata is selected.
- Enter the following from step 6 in 2. Create an Application in Okta for OCI IAM Identity Domain.
- For Identity provider issuer URI: Enter the ID.
- For SSO service URL: Enter the SingleSignOnService URL.
- For SSO service binding: Select POST.
- For Upload identity provider signing certificate: Use the .pem file of the Okta certification.

- On the Map attributes page:
- For Requested NameId format, choose None.
- For Identity provider user attribute: Choose SAML assertion Name ID.
- For Identity Domain user attribute: Choose UserName.
- Click Next.
- Review and click Create IDP.
- On the What's Next page, click Activate and then click Add to IdP policy.
- Click Default Identity Provider Policy to open it and then click the Actions menu ( ) for the rule and click Edit IdP rule.
- Click in Assign identity providers and then click Okta to add it to the list.
- Click Save changes.
- Download the SP Certificate.
- In the OCI Console in the domain in which you are working, click Security and then click Identity providers.
- Click Okta.
- On the Okta IdP page, click Service Provider metadata.
- Click Download next to Service Provider signing certificate to download the SP signing certificate and save it.