Step 3: Configure OCI IAM Identity Domain as an Enterprise Application in Azure AD
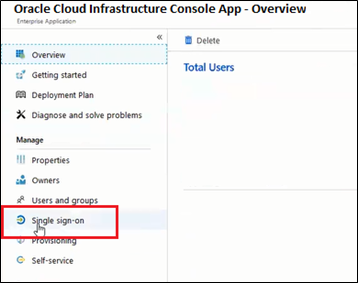
- Under the Manage section, select Single sign-on.

- Select SAML to configure the single sign-on. The Set up Single Sign-On with SAML page appears.
- At the top of the page, click Upload metadata file.

- Locate the federation metadata file (metadata.xml)
you downloaded from Oracle Cloud Infrastructure in Step 1 and upload
it here. After you upload the file, the following Basic SAML Configuration
fields are automatically populated:
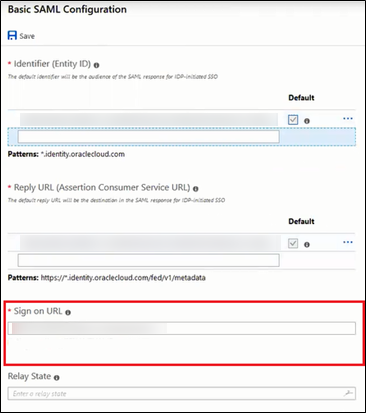
- Identifier (Entity ID)
- Reply URL (Assertion Consumer Service URL)
- In the Basic SAML Configuration section,
click Edit. On the Basic SAML Configuration
pane, enter the following required information:
- Sign on URL:
-
Enter the OPERA Cloud User Interface URL for your OPERA Cloud Environment if you have a single OPERA Cloud environment.
For example: https://customerocua.oraclehospitality.eu-frankfurt-1.ocs.oraclecloud.com/IDENTITY/operacloud/ where IDENTITY is the ENTERPRISE ID of the customer.
Or
-
Enter the OPERA Cloud Identity Management Portal URL if you have multiple OPERA Cloud environments.
For example: https://ocimqa.oraclehospitality.us-phoenix-1.ocs.oraclecloud.com/IDENTITY/ocimportal/ where IDENTITY is the ENTERPRISE ID of the customer.
-

- Sign on URL:
- Click Save.