Manually Adding CCTRANS Role through OIM
The OPERA Admin user will create CCTRANS role using Oracle Identity Management (OIM) manually.
-
Log in to OPERA Cloud using the URL provided.
-
Enter your Admin User Name and Password in the fields provided.
-
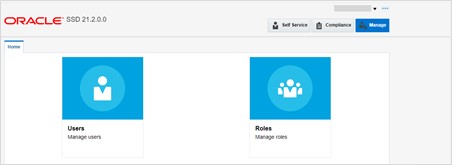
From the Side menu, select Identity Management.
The Oracle Identity Management screen appears.

-
Click the Manage tab and select the Roles tab to manually create a role.
The Role Information screen appears.

-
Click Create .
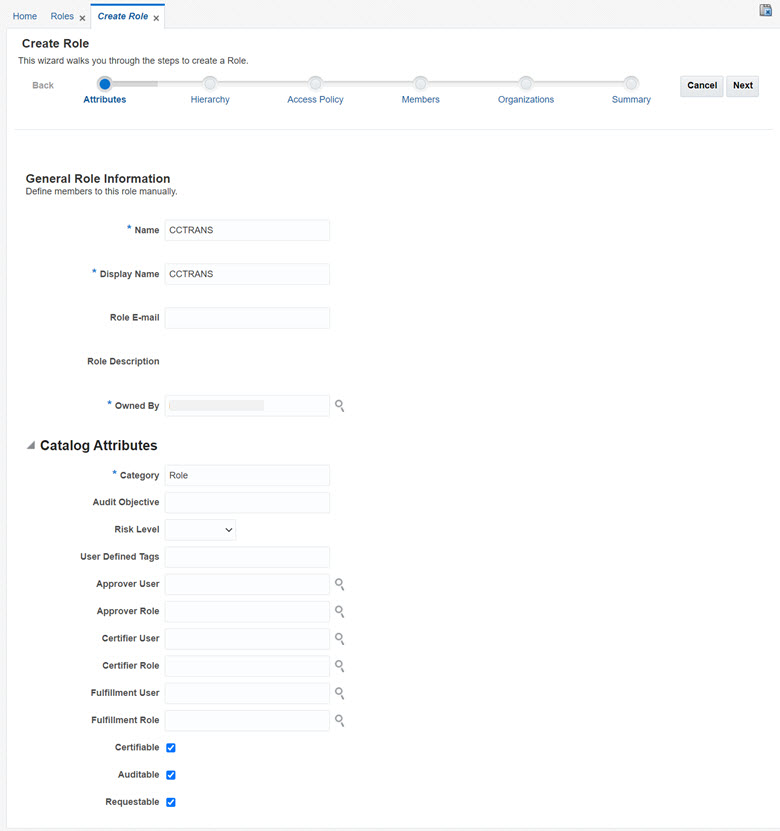
The Create Role screen appears.
-
Under General Role Information , specify values for the fields:
-
Name: Enter name of the role.
-
Display Name: This field is automatically displayed based on the Role Name.
-
Role E-mail: Enter email id of the role.
-
Role Description: Enter description of the role.
-
Owned By: Enter the role owner details. Click
 to search
and select owner. If a value of the Owned By field is not specified,
then it takes the logged-in user as the role owner.
-
-
Under Catalog Attributes, specify values for the attributes.
-
Catalog: Enter the Catalog name.
-
Audit Objective: Enter the Audit Objective.
-
Risk Level: Select Risk level as, High Risk, Medium Risk, or Low Risk.
-
User Defined Tags: Enter user defined tags.
-
Approver User: Click
 to select the approver
user.
-
Approver Role: Click
 to select the approver
role.
-
Certifier User: Click
 to select the certifier
user.
-
Certifier Role: Click
 to select the certifier
role.
-
Fulfillment User: Click
 to select the fulfillment
user.
-
Fulfillment Role: Click
 to select the fulfillment
role.
-
Certifiable: Select to enable the role to appear in the certification.
-
Auditable: Select to enable the role to appear in audit.
-
Requestable: Select to mark the role as Requestable entity.
Note:
A role can be created without role hierarchy, associated access policies and role members. -
-
Click Next until you reach Organization page.
-
In the Organizations page, you can specify the organizations to which this role will be published.
To assign organization:
-
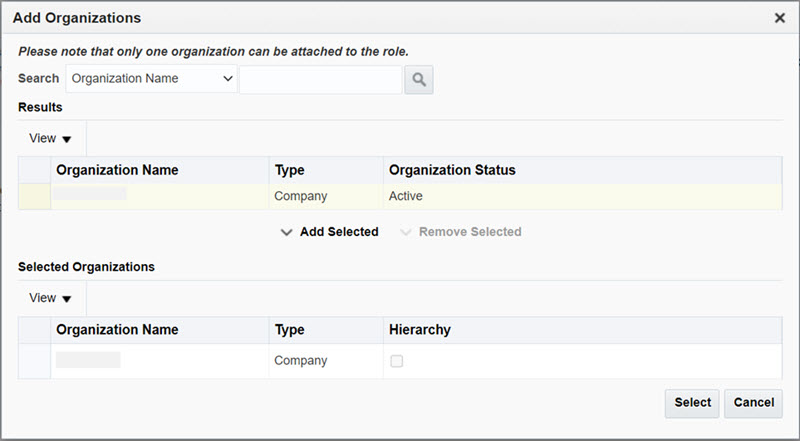
Click Add Organizations.The search panel appears.
-
From the list of Organizations, select the required organization and click Add Selected to add it to Selected Organization list.
If you want to deselect any organization from Selected Organization list click Remove Selected.
-
Click Select. The Organizations tab is displayed with the Organization to which this role will be published.

-
Click Next.The Summary page of the Create Role is displayed. It displays the role summary information of the role that will be created.
-
-
Click Finish. The role is created successfully.