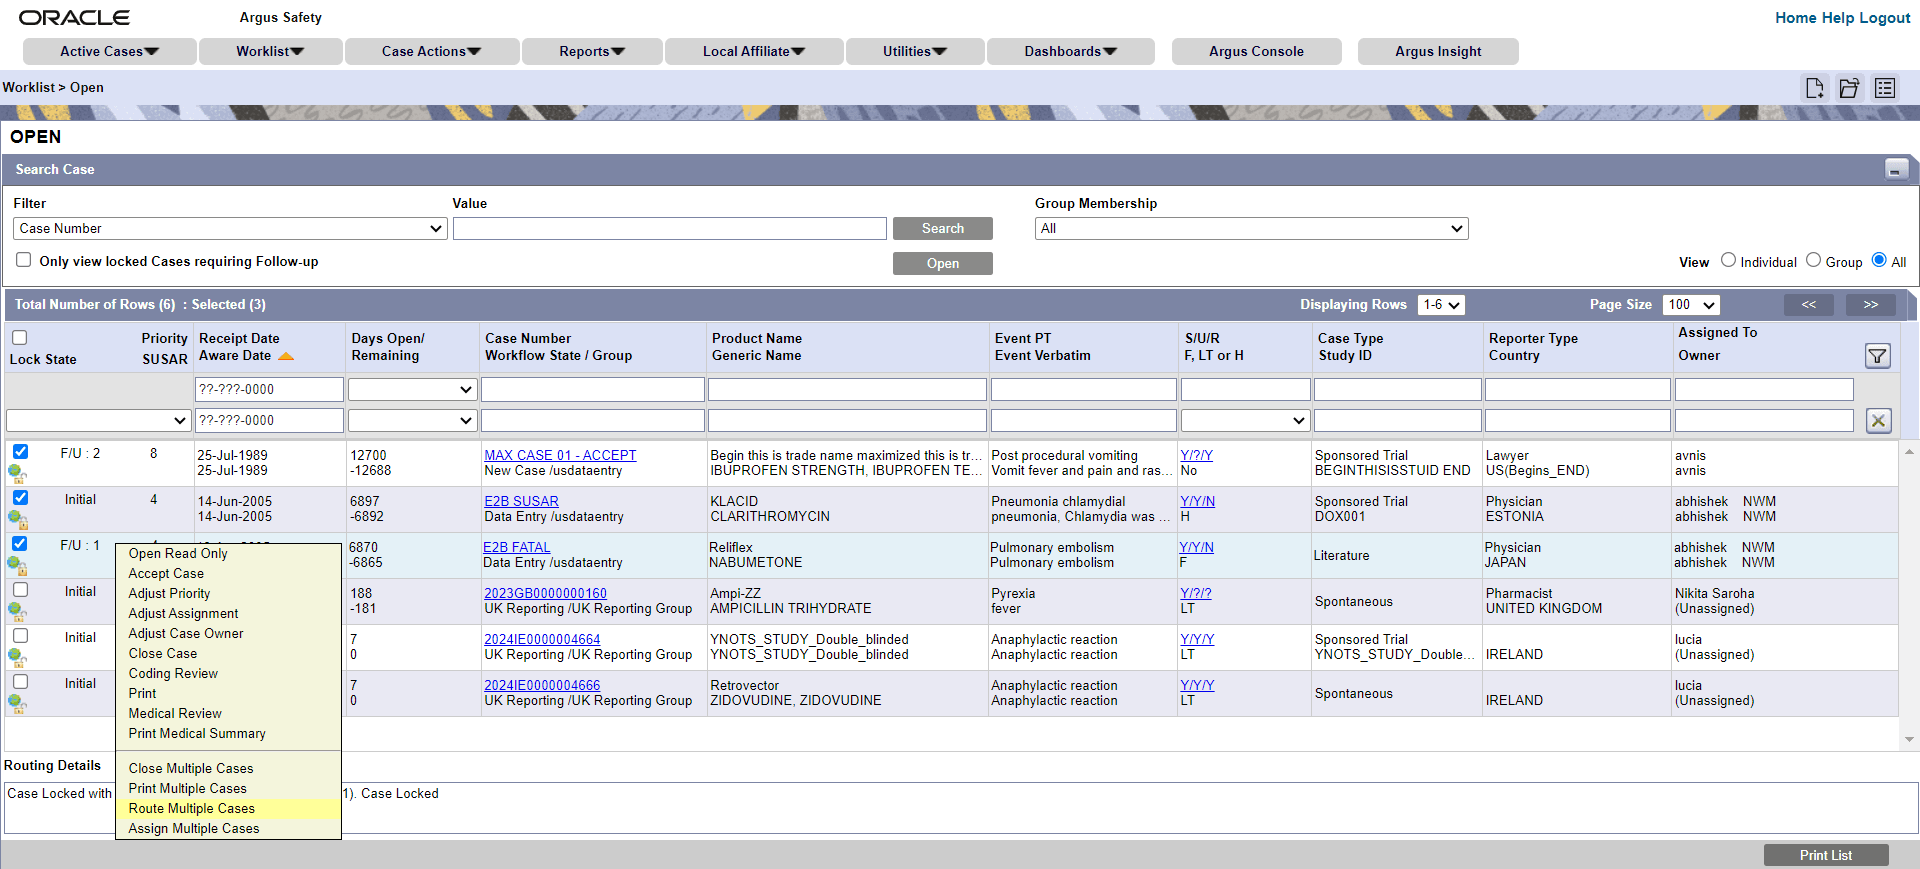
Route multiple cases to another workflow state
- You can route multiple cases to another workflow state from:
Worklist > NewWorklist > OpenCase Actions > Open
Case Actions > Open, you can either select a single case or multiple cases. - Select multiple cases and then right-click.
- Select the Route Multiple Cases option.

Note:
You can select the Route Multiple Cases option only if you have the Workflow Manager role assigned. - If the Enable Checklist on Route option is set in
Console > User Configuration, then the Checklist based on the workflow rule is displayed under the Current State and Date values. - If all selected cases are in the same workflow state, then you can select the next workflow state from the list displayed in the Route to Next State dropdown. The default value is set to Current. If there is only one next logical workflow state match, then that workflow state is displayed by default in the Route to Next State dropdown.
- In the Route to User dropdown, you can select from a list of users. If there is a single workflow rule that matches for the next logical workflow state for all selected cases, then the dropdown will display the user list in accordance to the Group configured in that workflow rule. If not, all users irrespective of configured groups are displayed.
- In the Password field, enter your password. You are required
to re-authenticate when the Require Password on Route option
is set in
Console > System Configuration > Workflow > Rulesand when you select any matching workflow rule that is displayed above the dotted line in the Route to Next State dropdown.
Parent topic: Process cases