Issuing a discrepancy

The Discrepancy Sampler uses the ODM Export interface to search the sites, patients, visits, forms, and section, and displays items that have values.

  1. Start the Discrepancy Sampler tool and connect to a study.
  2. Select the Issue Discrepancy tab.
  3. Click Get Sites.
  4. Select a site.
  5. Select a subject.
  6. Select a visit.
  7. Select a form.
  8. Select a section.
    A list of items and their values appears. Only the items that have values are listed.
  9. Double-click the item for which you want to issue a discrepancy.
    Alternatively, you can provide information in the Add an Item by DBUID or Add and Item by GUID areas and click Add to Queue.
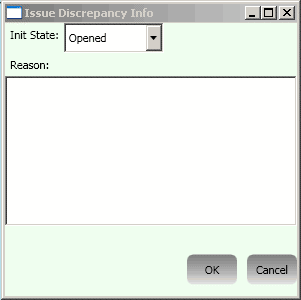
    The Issue Discrepancy Info window appears.

    Figure 2-2 Issue Discrepancy Info

    Screenshot of the Issue Discrepancy pop up window awaiting user input.
  10. In the Init State field, select the state in which to open the discrepancy.
  11. Type a reason for the discrepancy, and click OK.
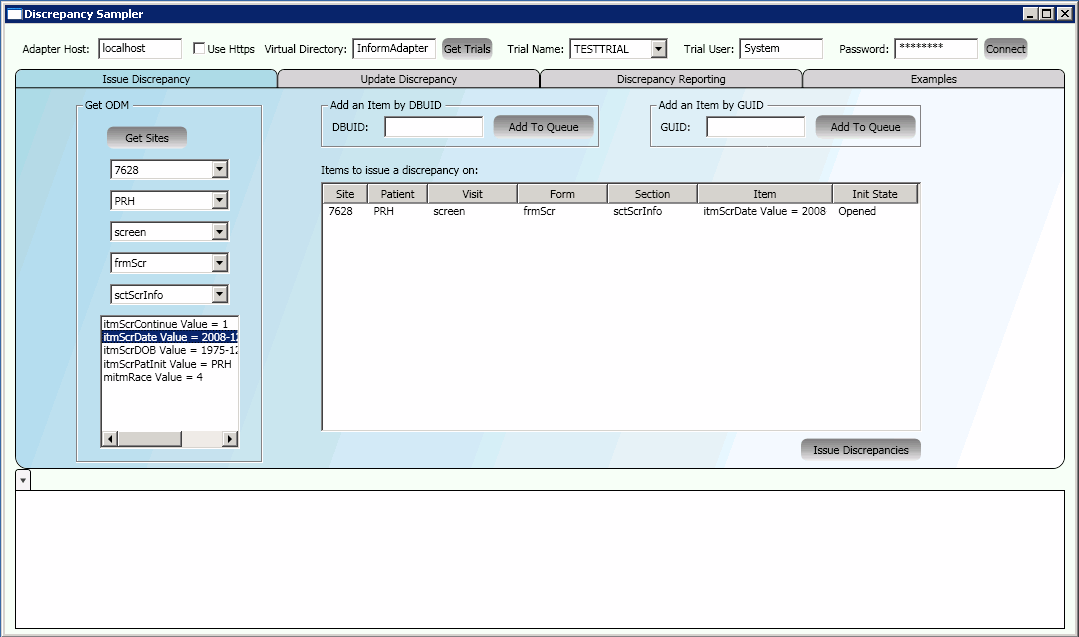
    The discrepancy appears in the Items to issue a discrepancy on queue.

    Figure 2-3 Discrepancy Sampler - Issue added to queue

    Screenshot of Discrepancy Sampler with an Issue added to the Items to issue a discrepancy on queue.
  12. To add more discrepancies to the queue so they can be issued in the same call to the Issue operation, repeat steps 3 through 11.
  13. For discrepancies in the queue, you can:
  14. To issue all the discrepancies in the queue, click Issue Discrepancies.
    The Issue response XML appears in the results pane. All the results from the queue you processed appear in the same tab. The queue becomes empty.
  15. To issue additional discrepancies, repeat steps 3 through 9 to create a new queue. When you click Issue Discrepancies, the discrepancies in the queue are processed and appear in a new tab in the results pane.
  16. To enlarge the contents of a tab in the results pane, double-click the tab.
(Optional) Enter the result of the procedure here.