POM and Customer Modules Management
A required implementation step for RAP will be to synchronize customer modules from Retail Home to POM to set up your starting batch processes and turn off any processes you are not using. The steps below explain the general process for syncing POM and Retail Home, which are used by Retail Insights and Science applications to set up the nightly batches. They are also required for the RAP common components used by all the modules.
-
Log in to the Retail Home application as a user with the
RETAIL_HOME_ADMIN(orRETAIL_HOME_ADMIN_PREPROD) user role. -
Navigate to Settings → Application Administration → Customer Modules Management.
-
Configure your batch modules as needed, disabling any components which you do not plan to implement, then click the Save button to complete the setup.
-
Now log in to the POM application URL with a user granted the
BATCH_ADMINISTRATOR_JOBor pre-prod equivalent role. -
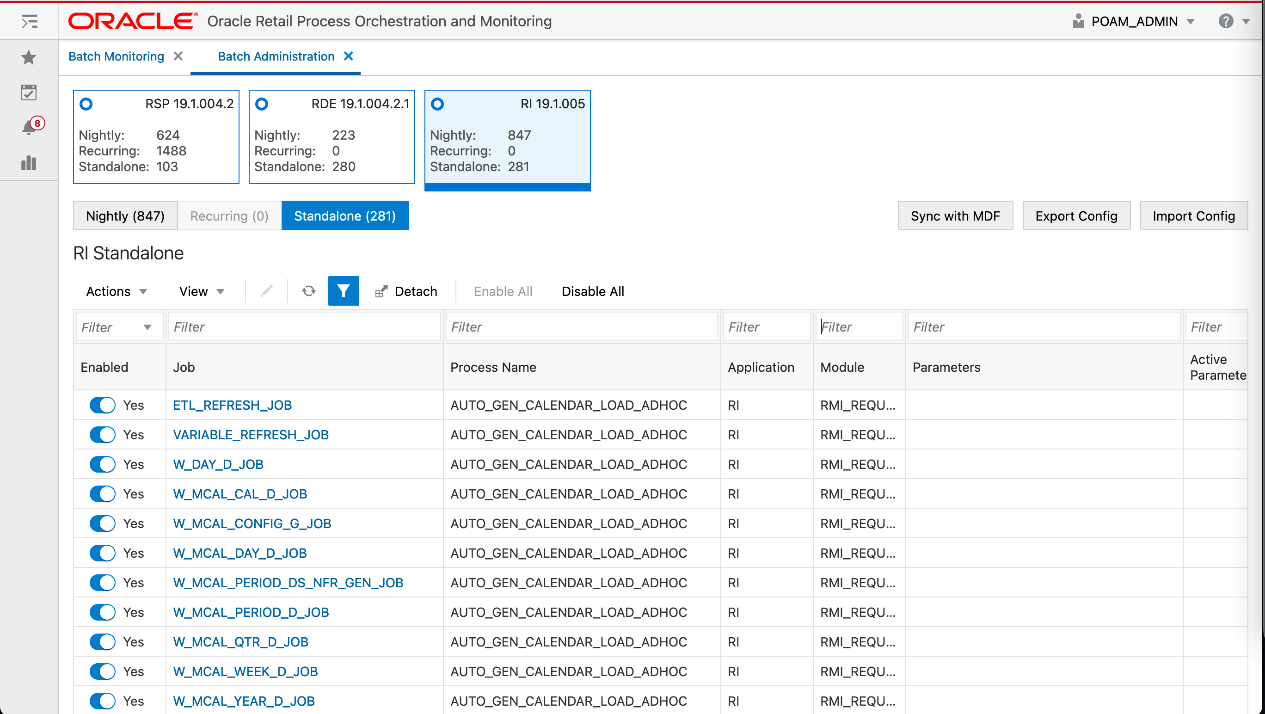
Navigate to Tasks → Batch Administration.
-
Click on the tile named RI <Release_#> to view the RI batch jobs, which should be loaded into the table below the tiles.

-
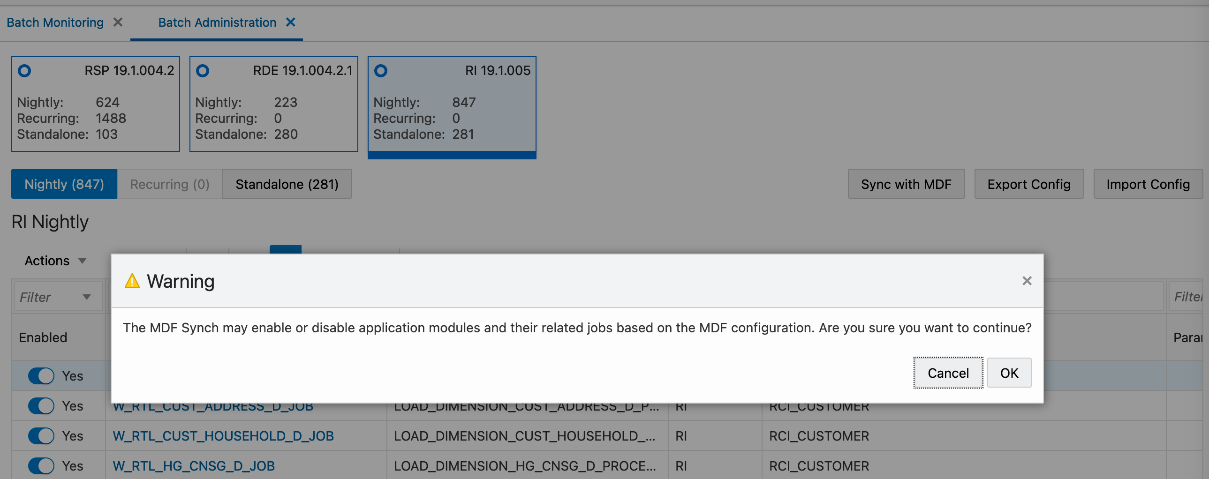
Click the Sync with MDF button (above the table) and then click the OK button in the Warning message popup. Once clicked, the Platform Services calls are initiated between Retail Home and POM to sync the module status.

-
While the modules are synchronizing, you will see a message: 'Some features are disabled while a schedule is being synced'. Do not attempt to modify the schedule or make other changes while the sync is in progress.

-
Once the sync is complete, a JSON file with the batch schedule summary is downloaded. This file contains the current and previous status of an application and module in MDF and POM after sync. For example: {"scheduleName":"RI","synced":true,"enabledModules":[{"state":"MATCHED_MODULE","mdfStatus":"ENABLED","prevMdfStatusInPom":"ENABLED","prevStatusInPom":"ENABLED","publishToPom":true,"applicationName":"RI","moduleName":"RMI_SI_ONORDER","matchedModule":true},…
-
Click the Nightly or the Standalone tab above the table and enter a filter for the Module column (based on the modules that were activated or deactivated) and press Enter. The jobs will be enabled or disabled based on the setup in Customer Modules Management.
-
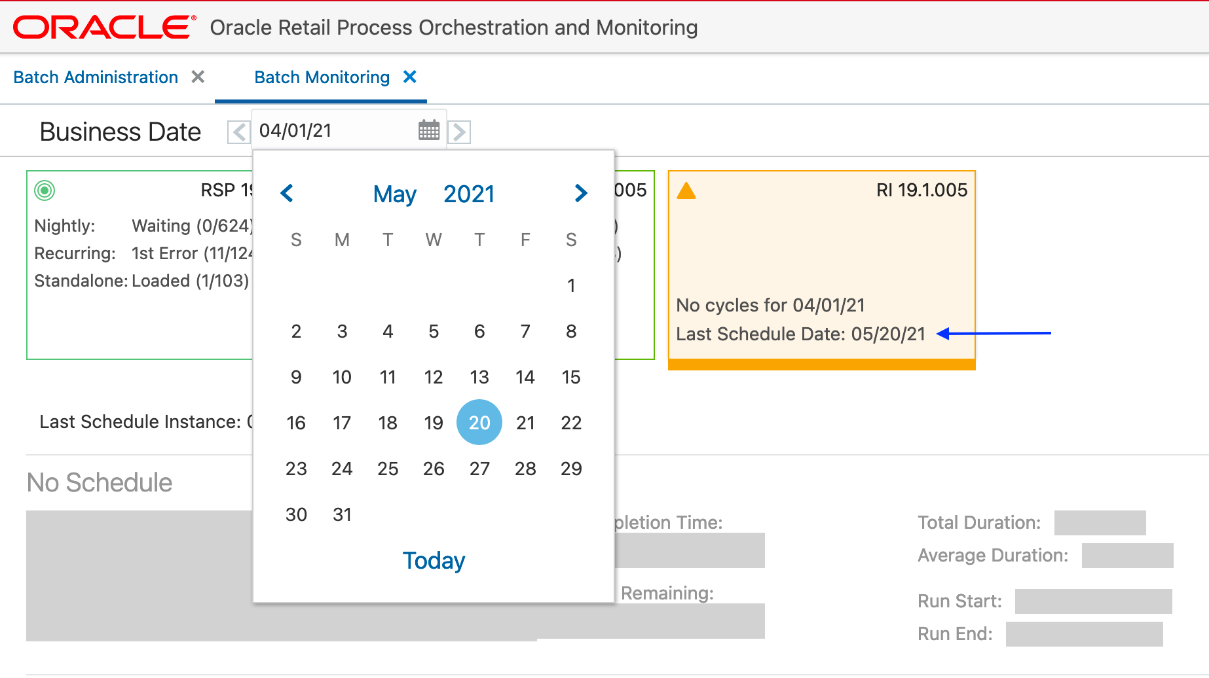
Navigate to Tasks → Batch Monitoring. Click on the same application tile as before. If the batch jobs are not listed, change the Business Date option to the 'Last Schedule Date' shown on the tile.

-
Once the date is changed, the batch jobs are loaded in the table. Click the Restart Schedule button so that module changes are reflected in the new schedule. Click OK on the confirmation pop-up. After a few seconds, a 'Restarted' message is displayed.
-
In the same screen, filter the Job column (for example,'W_HOUSEHOLD') to check the status of jobs. The status is either 'Loaded' or 'Disabled' based on the configuration in the Customer Modules Management screen in Retail Home.
Note:
A specific module in Retail Home may appear under several applications, and jobs within a module may be used by multiple processes in POM. The rule for synchronizing modules is, if a given POM job is enabled in at least one module, it will be enabled in POM (even if it is disabled in some other modules). Only when a job is not needed for any modules will it be disabled.