Steps for Creating Client
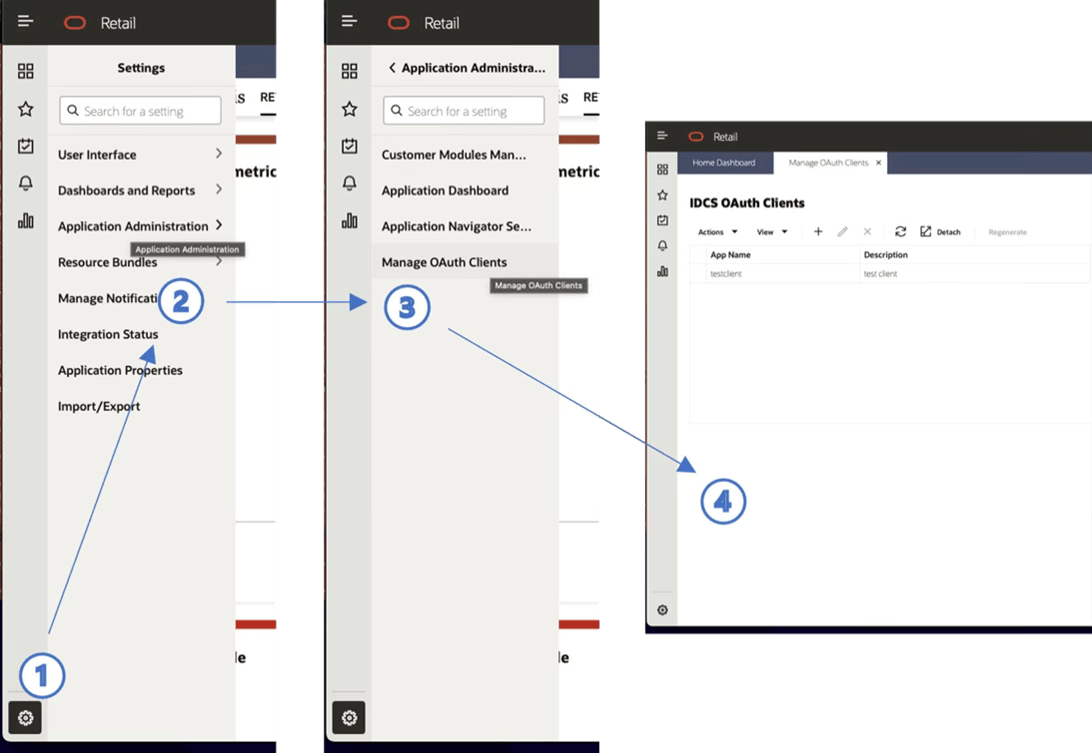
In a supported browser, navigate to Oracle Retail Home for one of your environments (for example, PROD, STG, UAT). Refer to Figure "OAuth 2.0 Client Creation Flow Diagram" for the first four steps.
- Select the settings icon (a gear) in the lower left of the Oracle Retail Home
screen. If you do not see the settings icon, you may be experiencing one of several
problems:
-
You do not have administator privileges
-
Groups have not propagated yet
-
You need to log out and log back in to refresh your group associations
-
- Select the Application Administration menu item
- Select the Manage OAUTH Clients menu item
- On the Manage OAUTH Clients page, select the + button.
Figure 4-1 OAuth 2.0 Client Creation Flow Diagram

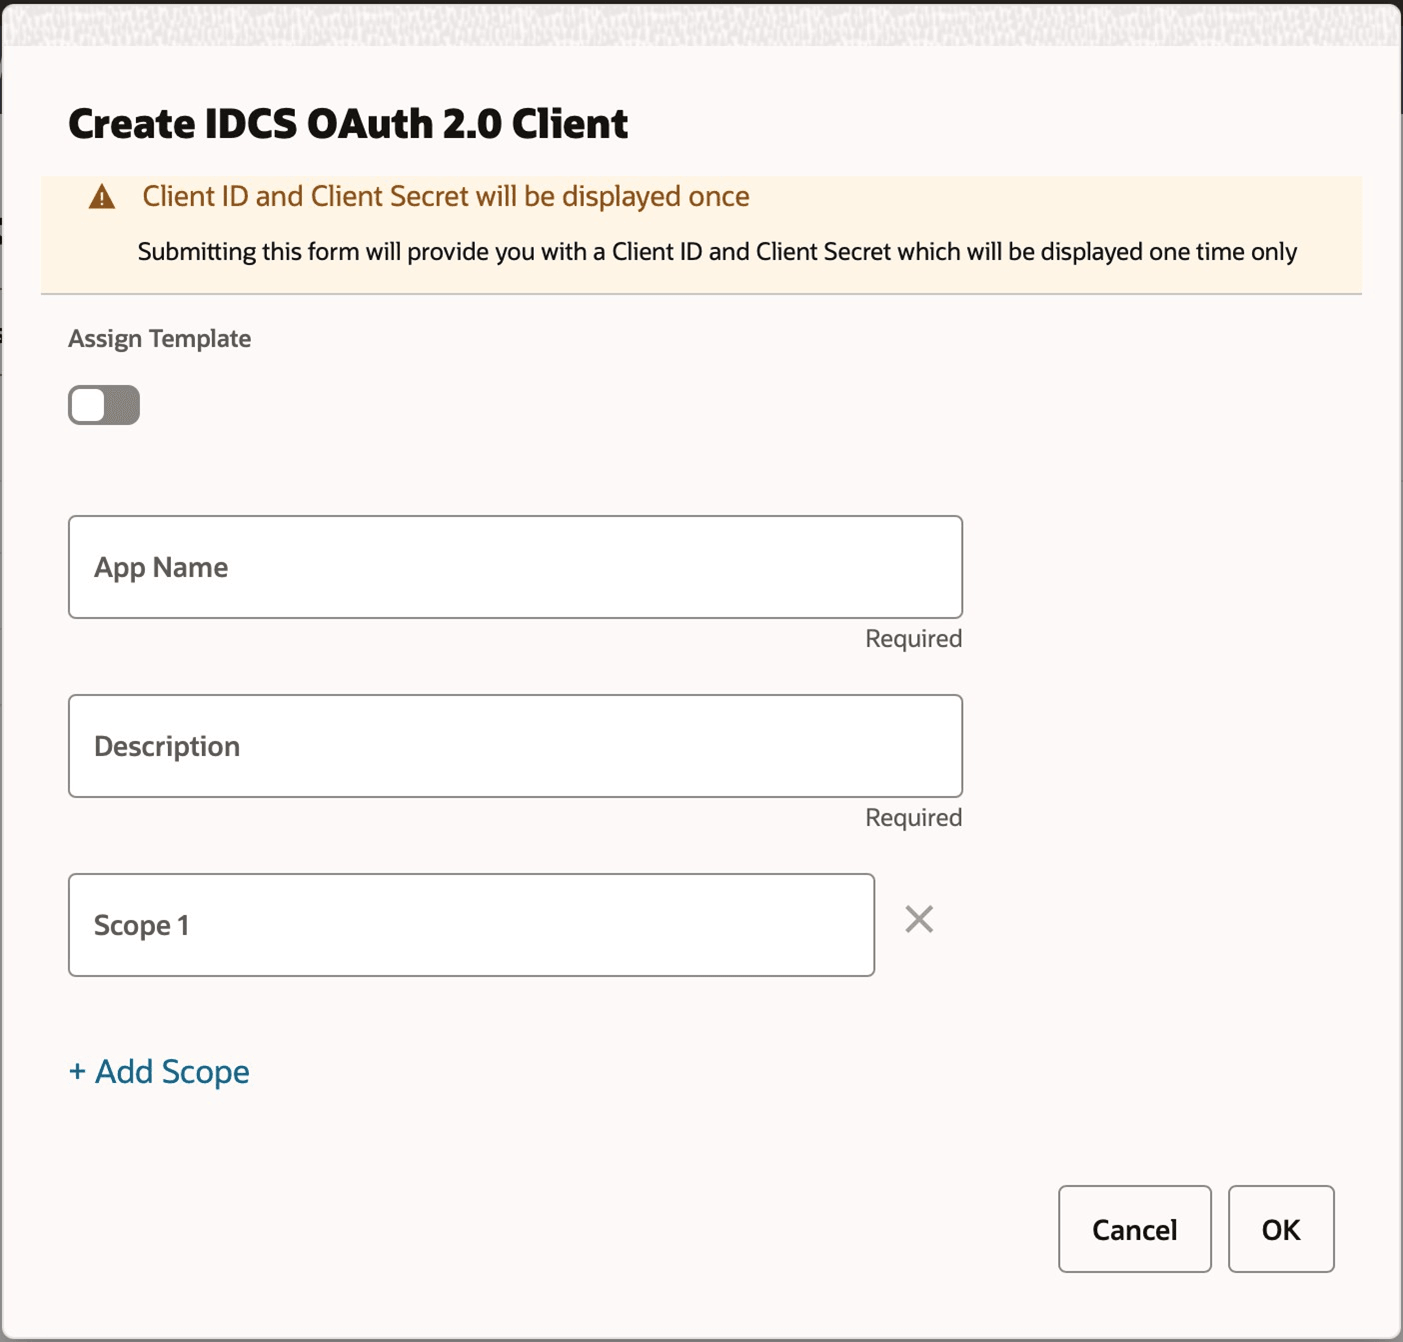
- A popup dialog will appear. See Figure "Create IDCS OAuth 2.0 Client". Provide an App Name and Description. Leave Scope blank.
- Select OK.
Figure 4-2 Create IDCS OAuth 2.0 Client

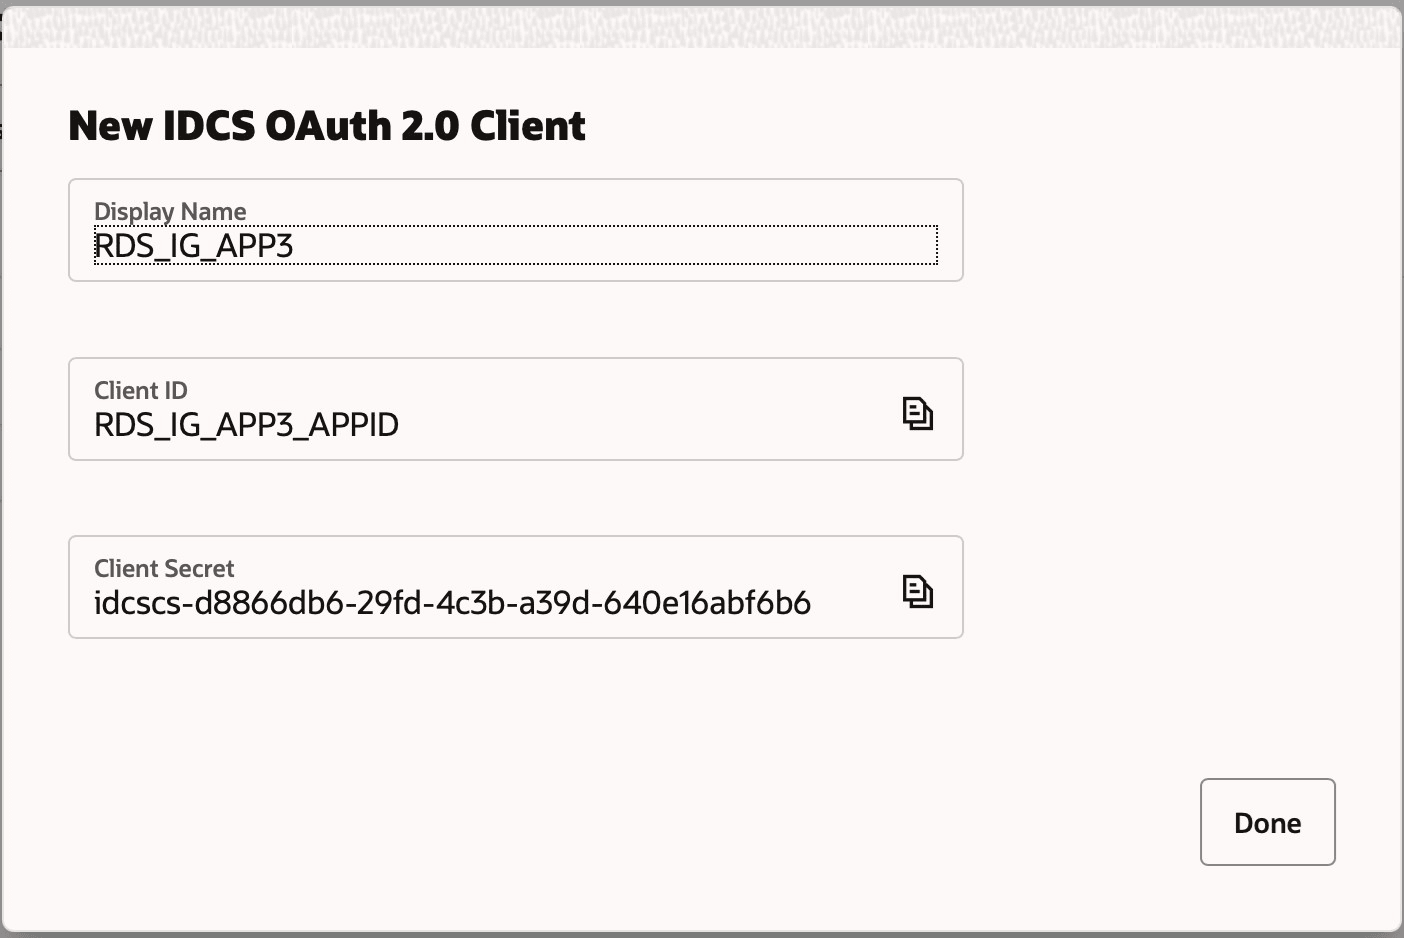
- A new dialog window will appear with a Display Name, Client ID, and
Client Secret. See Figure "New IDCS OAuth 2.0 Client". Retain this
information! It will not be displayed again. Select Done when the
information has been copied.
Figure 4-3 New IDCS OAuth 2.0 Client

Consult the Retail Home Application Administration Guide for additional details on managing OAUTH clients.
Remember that the OCI IAM service is rate-limited (see API Rate Limits). Best practice is to reuse tokens until they expire (one hour). If you encounter a 429 error when requesting a token or authenticating, you have hit the rate limit. When you encounter a rate limit, back off for one minute to reset the rate limiter.
Before proceeding:
- Verify that a client ID and secret can be created in Retail Home.
- Retain the client ID and secret for future use.
Remember, there is no need to create multiple OAuth clients for each environment. A single OAuth client can be used across all environments secured by a given IDCS.