9 OAS Cache Usage
Caching is a feature in Oracle Analytics where a report can be cached for better performance. Enabling the cache helps to set some part of the disk space to be used for caching. Once the caching is enabled, the reports that are frequently run are stored for faster retrieval. Caching is enabled in RI cloud environments, but it requires also requires a batch program be kept enabled in your nightly batch in order to work. The feature includes:
-
Setting up cache
-
Clearing cache after the batch is run
-
Re-caching the reports after the original cache is cleared.
The obiee_clear_cache program is a part of the nightly batch runs and clears the cache. This will be run at the end of the batch cycle. Additional caching reports agents can be added for caching reports as additional tasks in the agent.
-
Step 1: Setup Caching
-
Step 2: Setup parameters for Caching in ra.env
-
Step 3: Clearing Cache using the clear cache script.
Step1: Set up OAS Caching
-
Go to Enterprise Manager https://nsh00amu.us.oracle.com:7002/em
-
Login with wlsadmin/weblogic userid and password
-
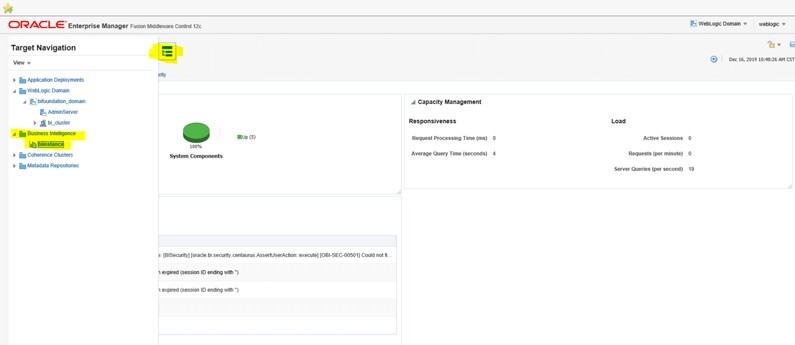
Click the Menu icon to open the Target Navigation menu.
Figure 9-1 Target Navigation Menu
-
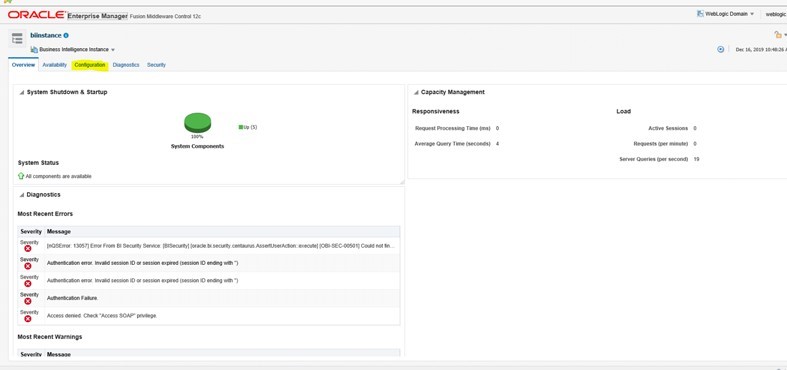
Expand the Business Intelligence menu item and click biinstance. The Overview tab appears.
Figure 9-2 Overview Tab
-
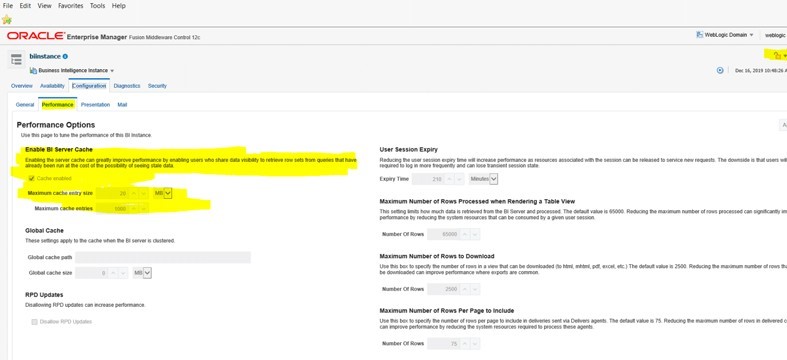
Click the Configuration tab.
Figure 9-3 Configuration Tab
-
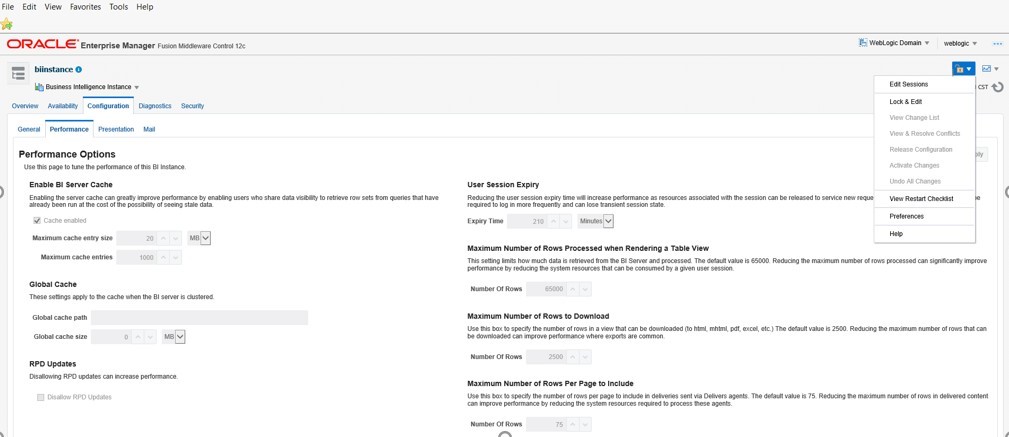
Go to the top right hand corner, click Lock and Edit. Modify and then Activate after you complete editing.
Figure 9-4 Lock and Edit
Step 2: Setup Parameters for OAS Caching in ra.env
-
OAS Caching also needs the entry in the wallet for rh.biuser as obiee-user-alias: Ensure that bi administrator role is available for the rh.biuser in OAS.
-
Ra.env contains changes when the installer is run, following need to be validated.
-
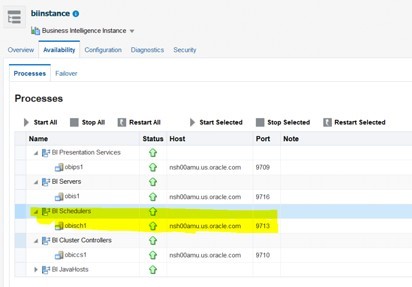
Non Clustered Environments need to have the variable OBIEE_SEC_SCH_ SERVER and OBIEE_SEC_SCH_PORT as null. Variable OBIEE_PRI_SCH_ PORT need to be 9713 and OBIEE_PRI_SCH_SERVER should have the right name of the application server.
-
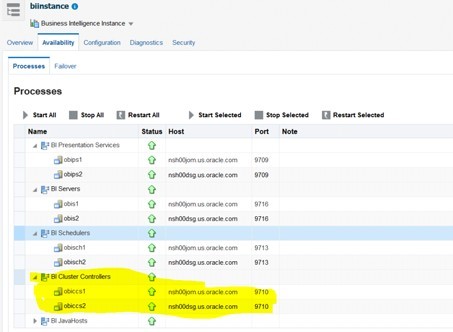
Clustered Environments need to have both OBIEE_PRI_SCH_PORT and OBI-EE_SEC_SCH_PORT as 9710. OBIEE_PRI_SCH_SERVER need to have Primary OBIEE server information and OBIEE_SEC_SCH_SERVER need to have the secondary OBIEE Server Information.
-
For Single Node/ Non-Clustered Environment
-
input.obiee.pri.sch.server= Node-1-Host name
-
input.obiee.sec.sch.server=
-
input.obiee.pri.sch.port= 9713 (obisch1service name)
-
input.obiee.sec.sch.port=
To find out the port Numbers Log into the Enterprise Manager in WLS Example of the link is:
http://nsh00amu.us.oracle.com:7001/em
-
Go to Enterprise Manager https://nsh00amu.us.oracle.com:7002/em
-
Login with wlsadmin/weblogic userid and password
-
Click the Menu icon to open the Target Navigation menu.
Figure 9-5 Target Navigation Menu

-
Expand the Business Intelligence menu item and click biinstance. The Overview tab appears.
-
Click the Availability tab.
Figure 9-6 Availability Tab - Non-Clustered Environment
For Clustered Environments
-
input.obiee.pri.sch.server= Node-1-Host name
-
input.obiee.sec.sch.server= Node-2-Host name
-
input.obiee.pri.sch.port= 9710 (obiccs1 service port)
-
input.obiee.sec.sch.port= 9710 (obiccs2 service port)
Figure 9-7 Availability Tab - Clustered Environment
Step3: Delete and Recreate the Clear Cache Agent
Perform the following procedure to clear the cache agent deletion.
-
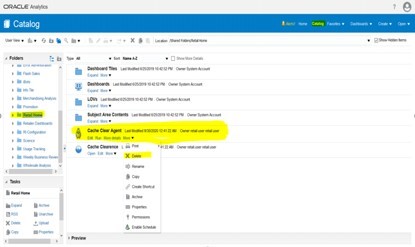
Navigate to Analytics URL -> go to Catalog -> Retail Home. Click the More menu and select Delete to delete the agent.
Figure 9-8 Delete the Agent
-
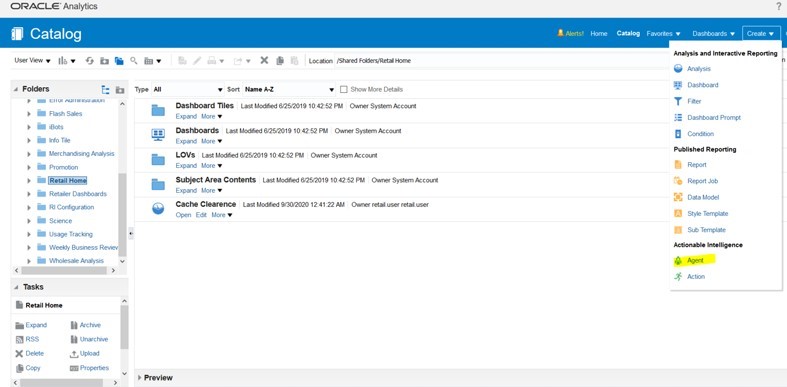
In the upper right of the page, click the Create menu and select Agent.
Figure 9-9 Create Agent
-
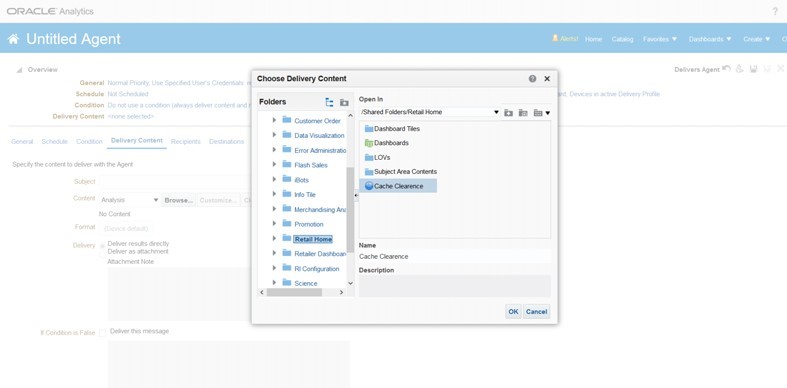
From the Choose Delivery Content pop-up, select Cache Clearance.
Figure 9-10 Choose Delivery Content
-
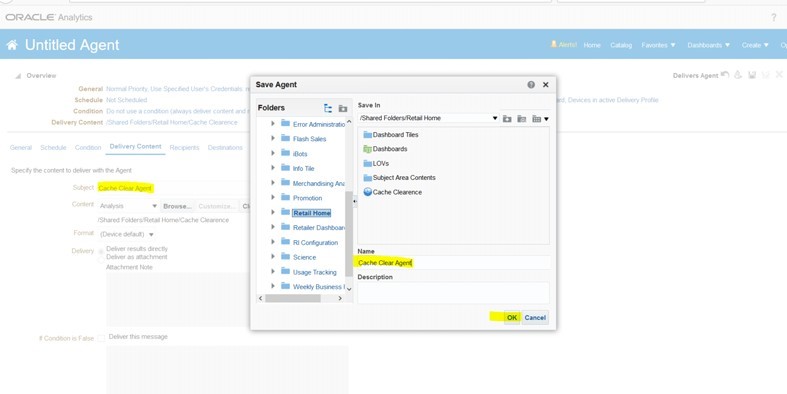
Save as Cache Clear Agent in the Shared/Retail Home Folder.
Figure 9-11 Save as Cache Clear Agent
