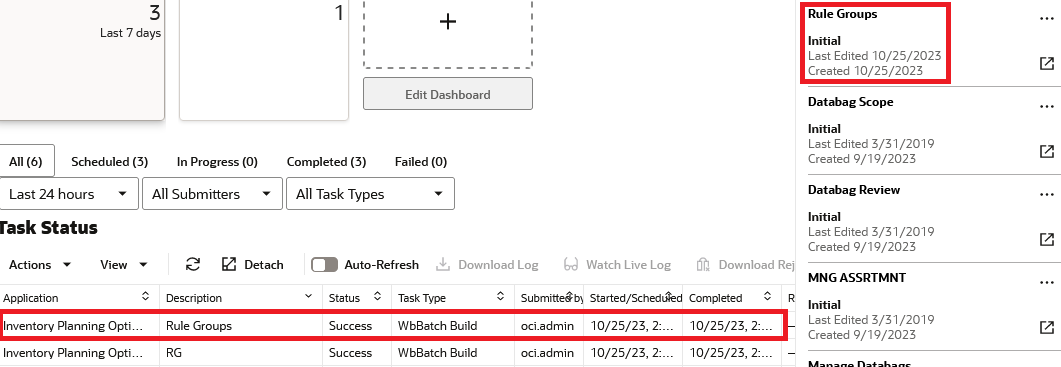
Manage Rule Groups Workspace
To build the Manage Rule Groups workspace, perform these steps:
-
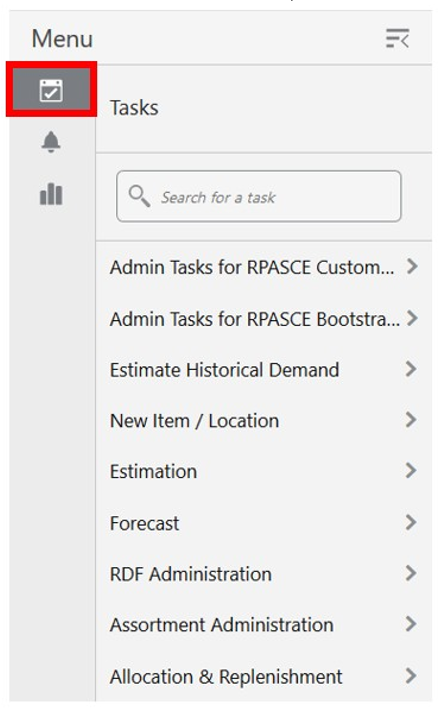
From the left sidebar menu, click Task Module to view the available tasks.
Figure 7-1 Task Module: Manage Rule Groups
-
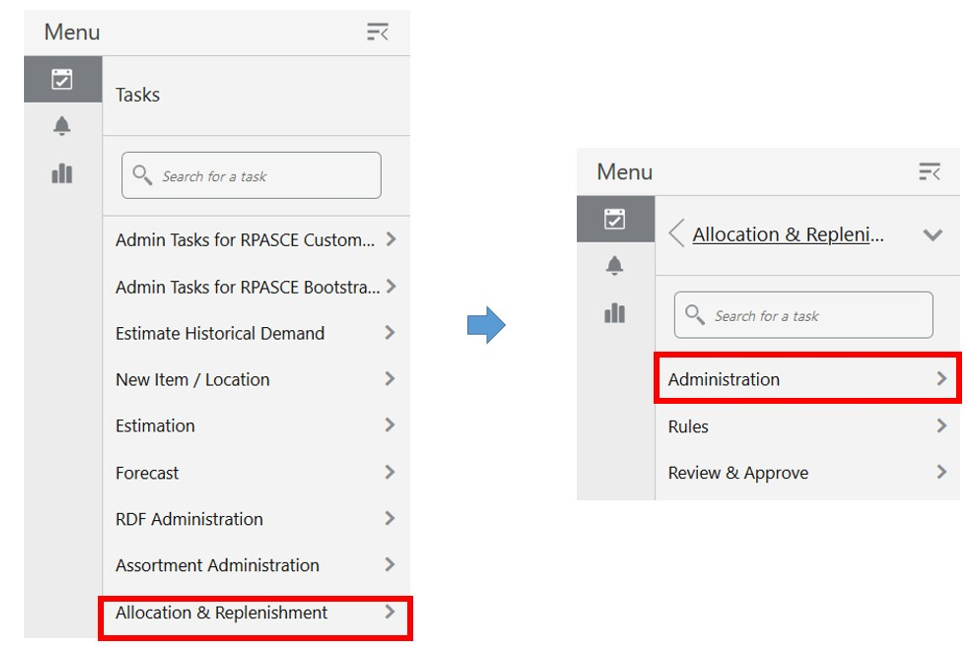
Click the Allocation & Replenishment activity and then click Administration to access the available workspaces.
Figure 7-2 Allocation & Replenishment Activity > Administration Menu
-
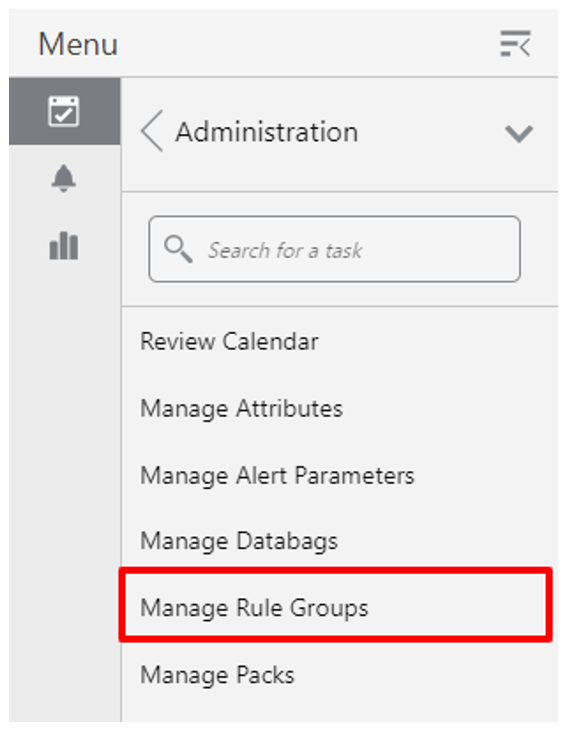
Click Manage Rule Groups. The Manage Rule Groups wizard opens.
Figure 7-3 Manage Rule Groups Wizard
-
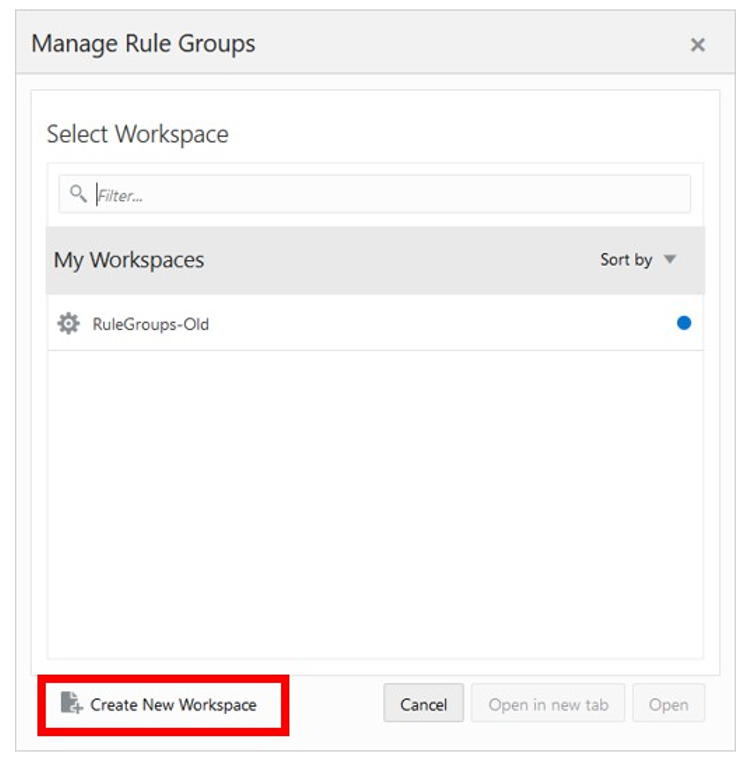
You can open an existing workspace, but to create a new workspace, click Create New Workspace.
Figure 7-4 Create New Workspace
-
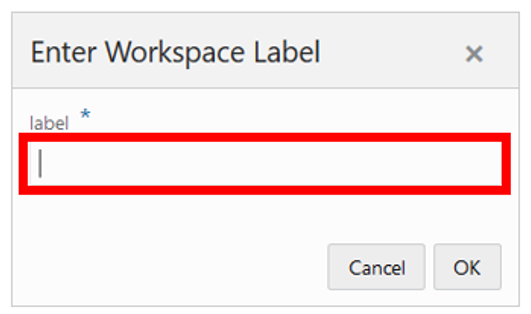
Enter a name for your new workspace in the label text box and click OK.
-
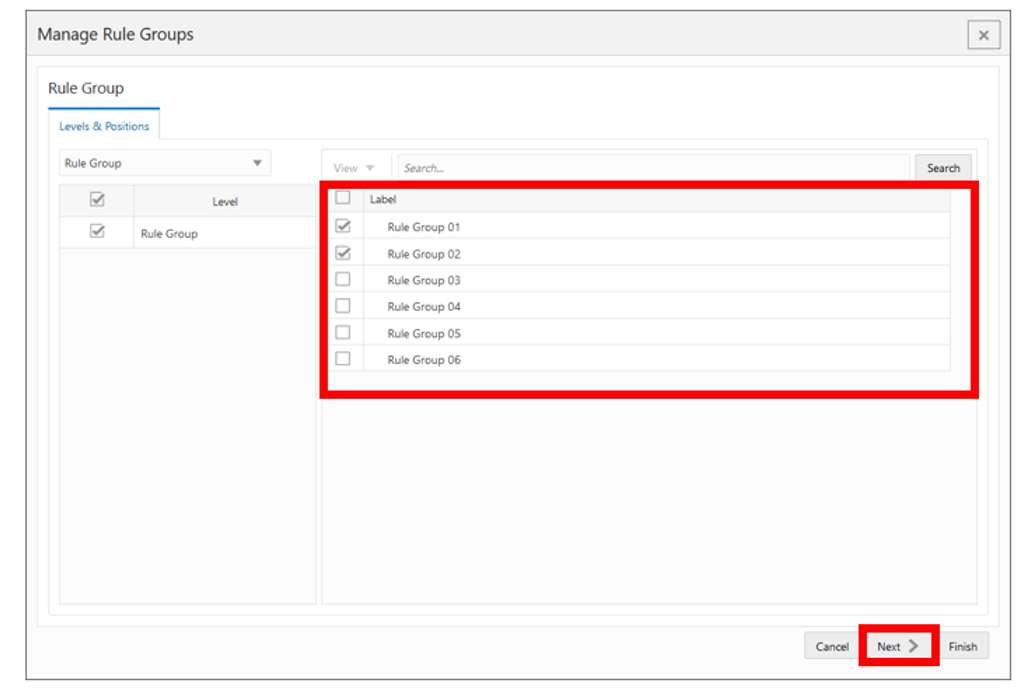
The Workspace wizard opens. Select the rule groups you want to work with and click Next.
Figure 7-5 Workspace Wizard: Select Rule Groups
-
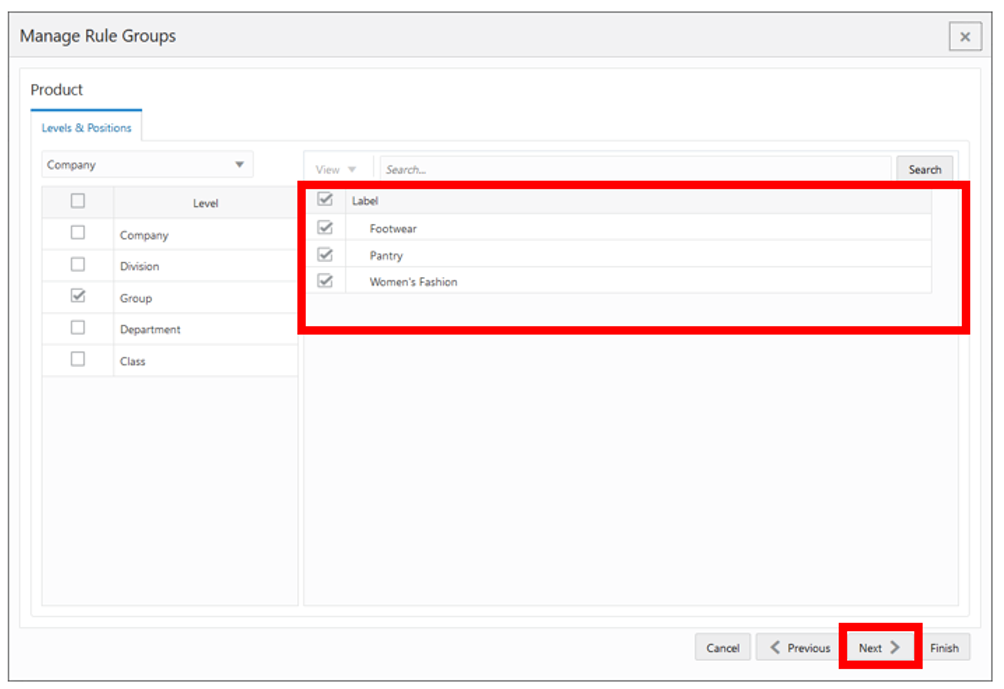
The Workspace wizard opens. Select the products you want to work with and click Next.
Figure 7-6 Workspace Wizard: Select Product
-
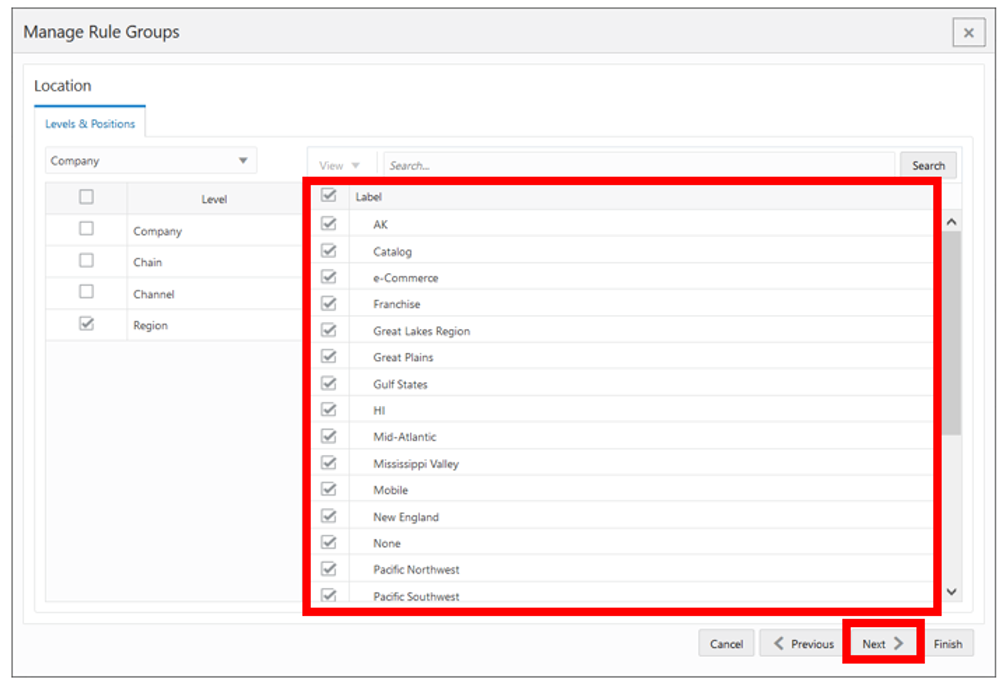
Select the locations you want to work with and click Next.
Figure 7-7 Workspace Wizard: Select Location
-
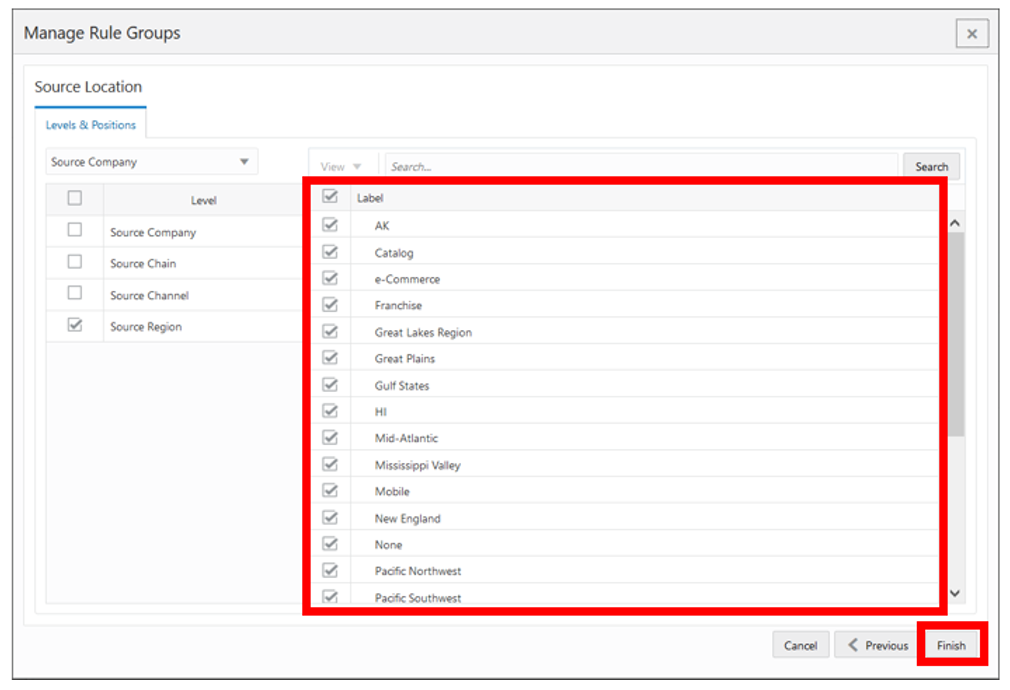
Select the source locations you want to work with and click Finish.
Figure 7-8 Workspace Wizard: Select Source Location
-
The wizard notifies you that your workspace is being prepared. Successful workspaces are available from the Dashboard.
Figure 7-9 Successful Workspace Build: Manage Rule Groups
