F Appendix: PO Allocation Setup and Validation
This appendix provides details to setup and validate PO Allocation.
Perform the following steps to validate PO allocation.
-
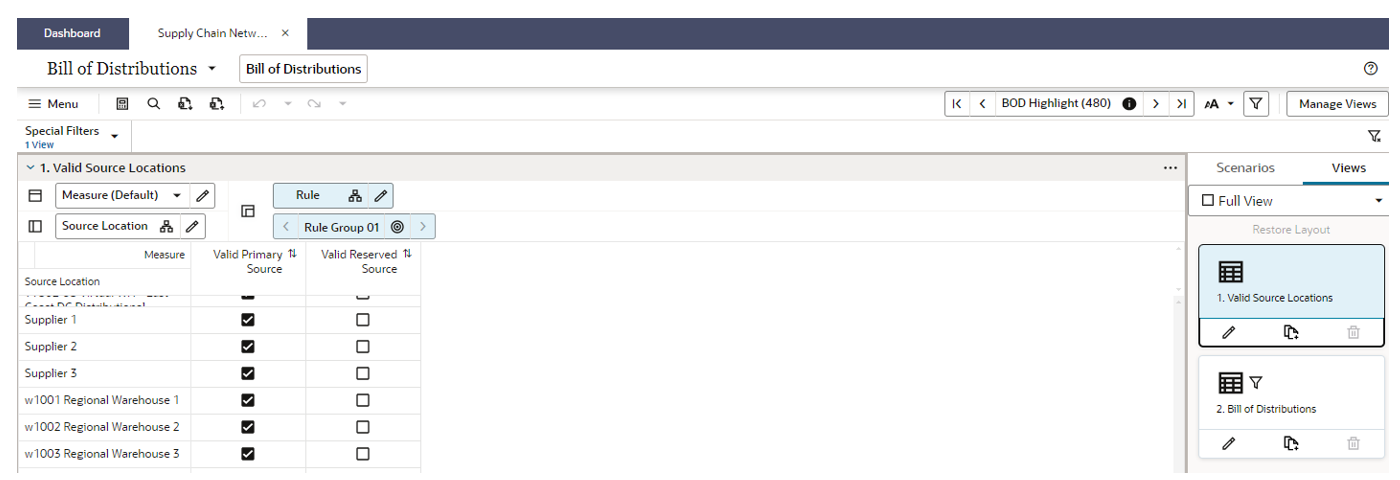
Make sure the warehouse or distribution center is selected as a Valid Primary Source in the Supply Chain Network workspace.
Figure F-1 Select Valid Primary Sources

-
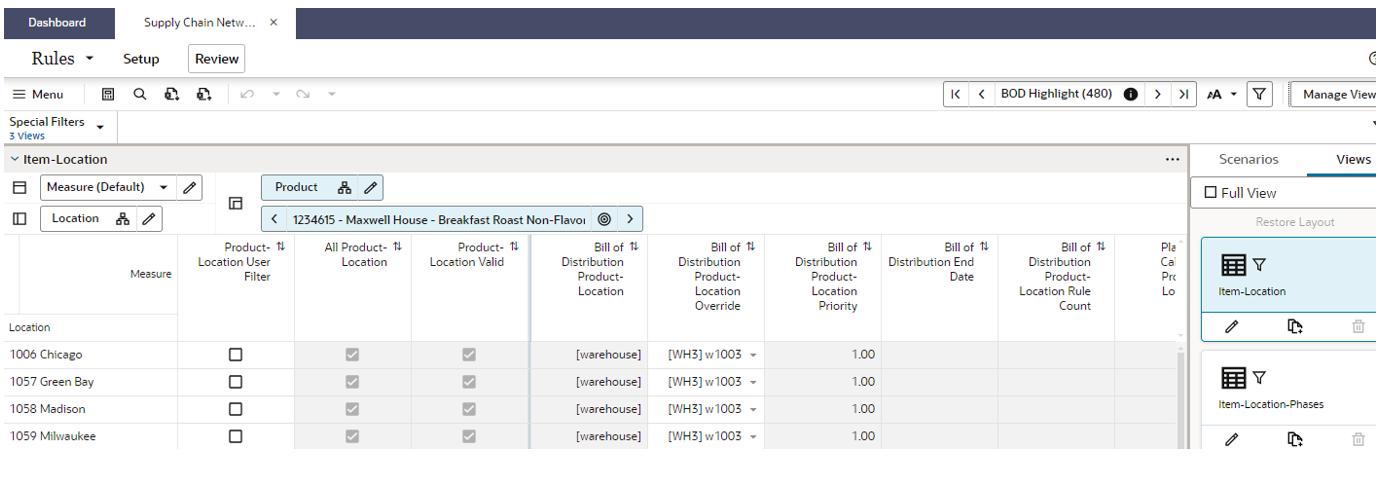
Define the Bill of Distribution by setting the BOD Primary Source and BOD Lead Time.
Figure F-2 Define the Bill of Distribution

-
Define the Planning Calendar and Lifecycle Calendar.
-
Define the Supply Chain Network rules.
Figure F-3 Define the Supply Chain Network Rules

-
You can override the rules setup in the previous step at the item/store.
Figure F-4 Override the Rules Setup

-
Setup Replenishment Parameters in the Replenishment Parameters workspace.
Figure F-5 Setup Replenishment Parameters

-
Setup the Inventory Plan Parameters. This only needed for Inventory Plan and Warehouse replenishment.
Figure F-6 Setup Inventory Plan Parameters

-
Setup the Constraint Parameters. For PO Allocation make sure that the Source Available includes On-Order (OO). By default, On-hand (OH) is consumed first and then followed by On-Order. You can use the Allocation Order measure to change the default behavior; whether OH is followed by OO (default) or OO is followed by OH. Make sure to specify the Source Duration days at the Warehouse. This measure indicates the On-Orders that will be considered for allocation that are arriving at the Warehouse within this duration.
Figure F-7 Setup the Constraint Parameters

-
Setup the Replenishment Parameter rules.
Figure F-8 Setup the Replenishment Parameter Rules

-
Make sure the item/stores have forecast because this will generate the need at the destination store.
-
Run the LAR batch.
-
Based on the need at the destination store, the PO’s will be allocated.
-
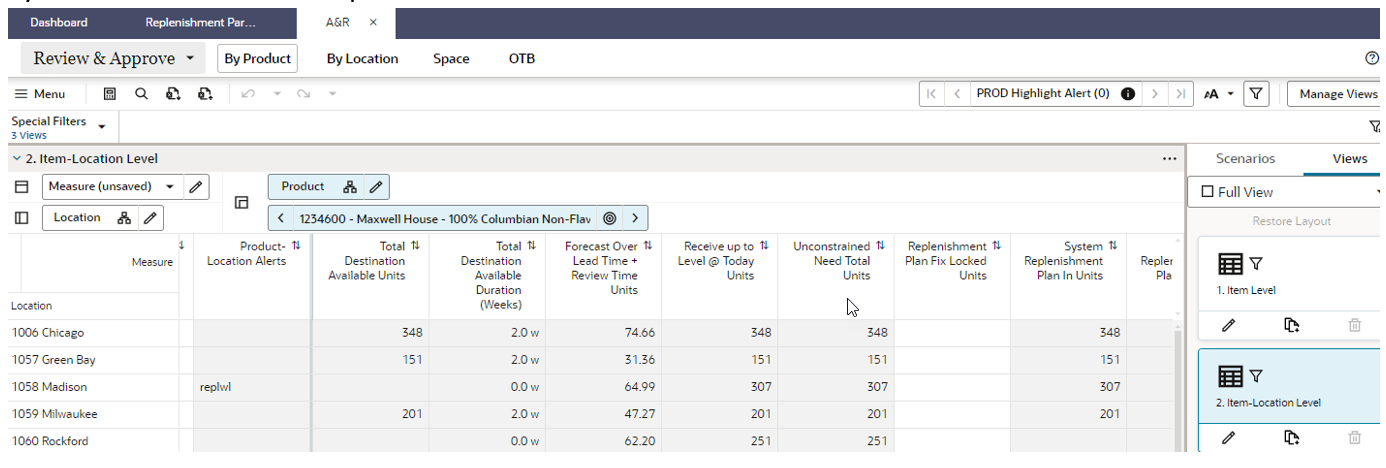
Set the System Plan in the A and R workspace.
Figure F-9 Set the System Plan

-
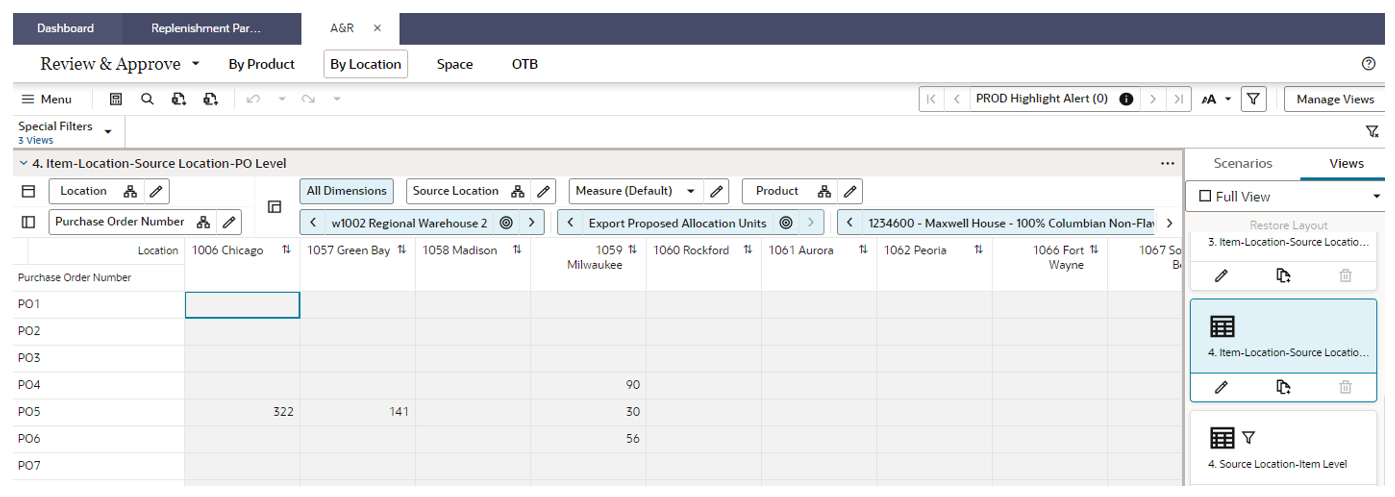
View the Exported PO allocation.
Figure F-10 Exported PO Allocation
