Quick Start
Step 1: Consider Before You Start
Review the basics. If you are new to REST APIs, make sure you understand the basics of REST and JSON. Review Roles and Privileges. You must have the necessary security roles and privileges to use the GET, POST, PUT, and DELETE methods on your resources. Choose a REST client. REST APIs connect software programs over the HTTP protocol. You need a software client to send the HTTP requests. In our examples, we use cURL. But, cURL is not the only tool you can use. To help you choose one, see Work with your REST Client.
Step 2: Get Your Oracle Retail Merchandising Cloud Account Info
-
REST Server URL. Typically, the URL of your Oracle Cloud service. For example, https://cust-env-mfcs-mcs.oracleindustry.com
-
IDCS or OCI IAM OAuth Client ID and secret, Access Token URL and scope to obtain Oauth 2.0 Access Token
- Client Credentials based
- Password Credentials based
OR
-
(Optionally, in case Basic authorization mode is to be used) User name and password. An Oracle Cloud service user with permissions to access the resources you are using.
Step 3: Configure Your Client
With the information gathered so far, you're ready to configure your client to send a REST HTTP request.
-
Construct the request URL. The URL consists of the server name and the resource path:
https://<server>/<resource-path>The <server> is the REST Server URL from Step 2, as in: https://cust-env-mfcs-mcs.oracleindustry.com
The <resource-path> is the relative path or endpoint to the resource you are working with. You can pick any endpoint in All REST Endpoints. For example, we are interested in the a supplier detail resource: /ReimRestService/services/private/Reim/supplier?supplierId=173810456 Combine the REST Server URL and, in this example, the supplier detail resource path and your request URL is complete. https://<server>/<resource-path>/ReimRestService/services/private/Reim/supplier?supplierId=173810456
-
Choose the Authorization method
-
Obtain Oauth Access Token using details obtained in Step 2. This is preferred way of authorization.
This will return a json payload containing access token like belowcurl -u <client id>:<client secret> -H 'Content-Type: application/x-www-form-urlencoded;charset=UTF-8' --request POST https://<IDCS_BASE_URL>/oauth2/v1/token -d 'grant_type=client_credentials&scope=rgbu:merch:system'{"access_token":"<access token>","token_type":"Bearer","expires_in":3600}Include this access token in the 'Authorization' header of the request. If you are using curl, use
--headeror-Has follows:{--header 'Authorization: Bearer <access token>'}ORNote:
This token is valid for one hour. After it expires repeat this step to obtain fresh access token.
-
Provide your account information. Include your user name and password (from Step 2) in the client. For example, if you are using cURL, you can specify your account information using the
-u cURLcommand as follows:-u <username:password> -
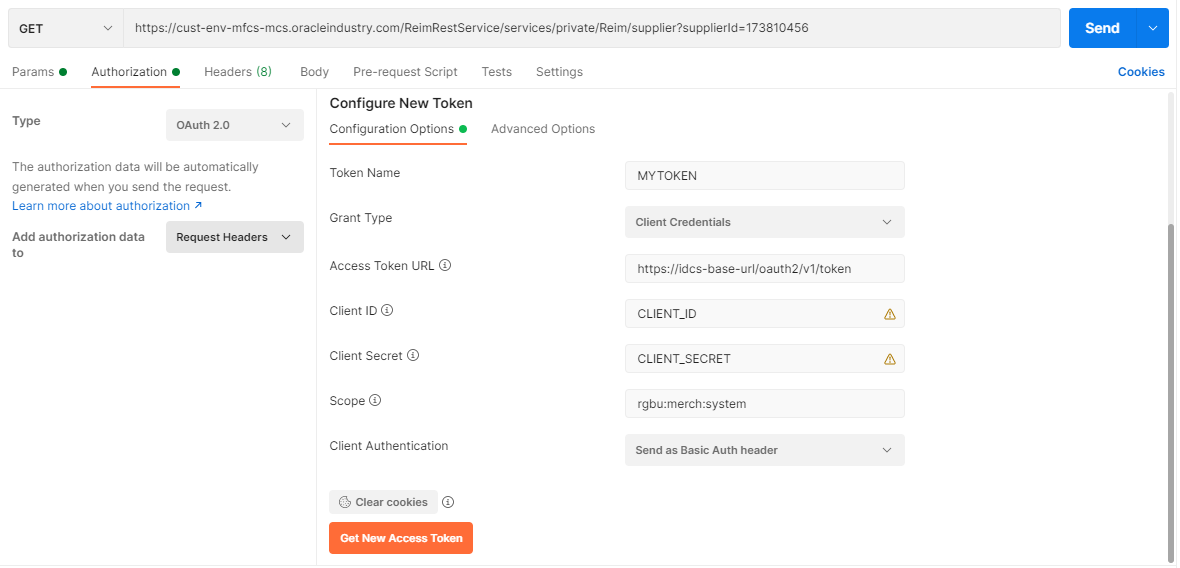
In Clients like Postman both Basic Auth and Oauth token based authorization are simplified. For getting Oauth token, goto Authorization tab and select Oauth 2.0 from drop down. Fill up the URL, Client Id, secret and scope and click on Get New Access Token. Subsequently click on Proceed and Use Token in the next dialog.

For Basic Auth, go to the Authorization tab and select Basic from the drop down menu. Fill in your username and password.

-
Note:
When using basic authorization, users should belong to groups that are authorized to access the service end points. For OAuth, oauth client needs to be created with the allowed scope. This needs to be done one time during provisioning the environment.
-
-
Set other headers like Content-Type, Accept, Accept-Language to override default. In curl use
--header 'Key: Value' (or -H 'Key:Value')to set these. For example:--header 'Content-Type: application/json' --header 'Accept-Language: en-US'.Below are the acceptable values of commonly used headers:
-
Accept - application/json or application/xml
-
Content-Type - application/json or application/xml
-
Accept-Language - ISO code of one of the supported languages.
-
Step 4: Send an HTTP Request
You are almost done. Now that your authentication and authorization are set, you are ready to send a test HTTP request. Continuing with our example, you want to get all the information about the structure of the items details object in REST. You can do this using the describe action in cURL:
curl --request GET 'https://cust-env-mfcs-mcs.oracleindustry.com/ReimRestService/services/private/Reim/supplier?supplierId=173810456' \
--header 'Accept: application/json' \
--header 'Accept-Language: en-US' \
--header 'Authorization: Bearer <access token>
or
curl --request GET 'https://cust-env-mfcs-mcs.oracleindustry.com/ReimRestService/services/private/Reim/supplier?supplierId=173810456' \
--header 'Accept: application/json' \
--header 'Accept-Language: en-US' \
-u username:password
This is how the request looks in Postman:

If the request is successful, then you should receive a 200 response with a body such as the following:
[
{
  "supplierName": "",
  "supplierId": "",
  "supplierScorecard": 0.0,
  "supplierScorecardMax": null,
  "invoicesCount": [
    {
      "description": "Past Due",
      "daysOut": -1,
      "invoiceCount": 0
    },
    {
      "description": "Today",
      "daysOut": 0,
      "invoiceCount": 0
    },
    {
      "description": "Tomorrow",
      "daysOut": 1,
      "invoiceCount": 0
    }
  ],
  "costDiscrepancyTotal": 0,
  "costDiscrepancyPercentage": 0.0,
  "quantityDiscrepancyTotal": 0,
  "quantityDiscrepancyPercentage": 0.0,
  "performanceDetail": {
    "assignedTo": null,
    "numberOfInvoices": null,
    "totalAmount": null,
    "automatchTotal": null,
    "currencyCode": "",
    "automatchRate": 0
  },
  "links": [],
  "hyperMediaContent": {
    "linkRDO": []
  }
}
]
Congratulations! Now you are ready to do more with your REST API.