Configure Templates
All spreadsheet downloads and uploads leverage templates, which determine the specific format that Merchandising expects when downloading and uploading data. For many of the foundation data entities these formats are fixed. However, for certain entities where the number of attributes being managed is larger, template configuration is available. This configuration is also available for three entities for Pricing. The entities supported are:
-
Items
-
Cost Changes
-
Purchase Orders
-
Replenishment Attributes
-
Price Changes
-
Clearances
-
Promotions
Template configuration can be used to update the worksheet tab titles and column headers, hide worksheets or columns that are not used, and define default values for attributes. For example, if you may want to create one template for new items and another that is used for updating specific item attributes, like adding user defined attributes (UDAs). Or you could create one template that is used for managing replenishment attributes for items that use Min/Max replenishment and one for items that use Dynamic replenishment.

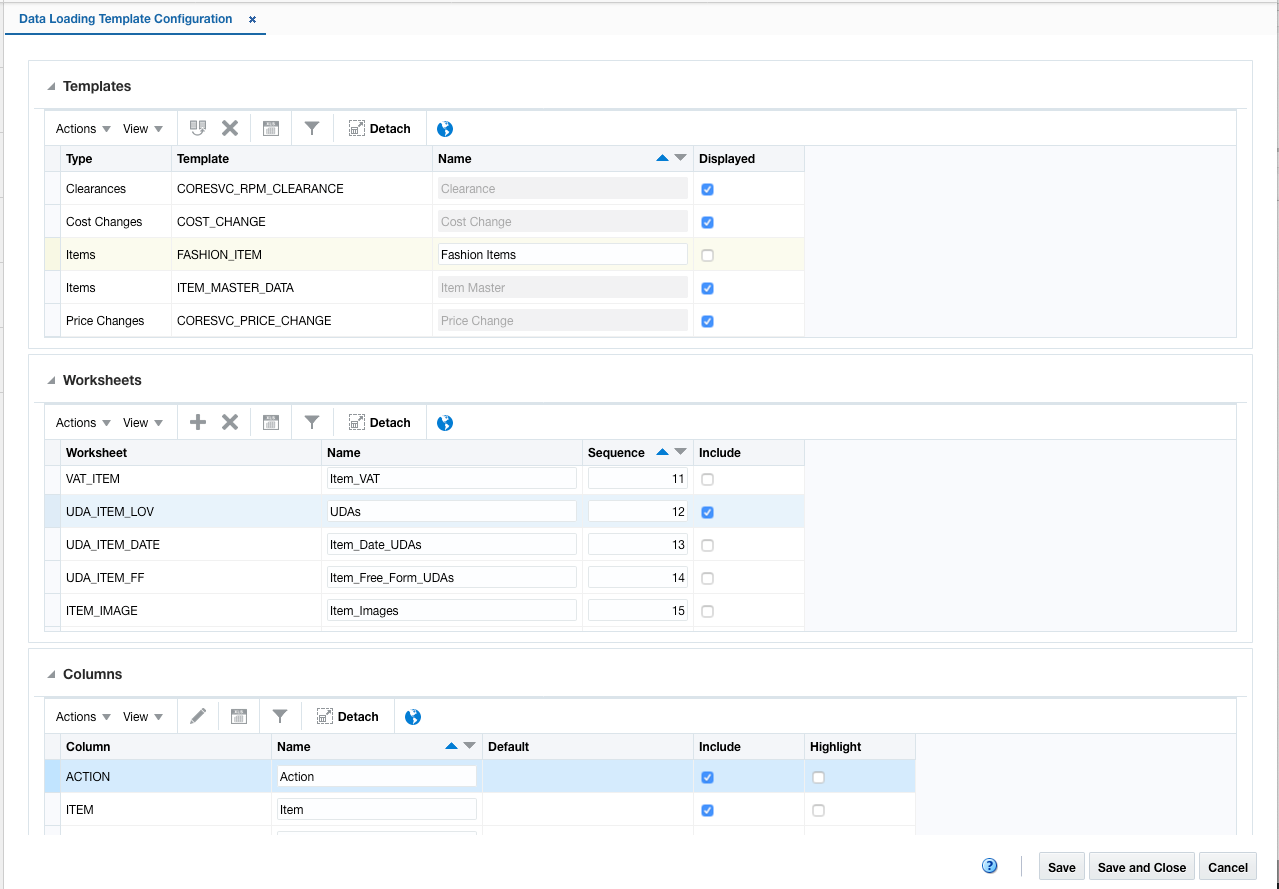
To access the template configuration, select the Data Loading Template Configuration option under Application Administration in the task list. Initially you should see the base template for each of the entities listed above. It is recommended that you do not modify the base templates, but instead start with selecting the base template for the entity you are configuring and the select the Create from Existing option in the Actions menu of the Template table. This will preserve your configurations when the application is patched. From here you can update the template name, which is what users will select when uploading or downloading this entity and choosing whether or not it should be displayed. If it is not set to display, then this template will not be visible to users outside this configuration screen.
Next, select which worksheet you want to include in your template, and in which order you want them displayed. For example, if you are creating a template for updating UDAs for an item, you may only want the Item and UDA LOV tabs included. You can also update the name of the worksheet; however, it should be noted that if you plan to use Microsoft Excel for spreadsheet maintenance, there should not be any spaces between words in your worksheet names.
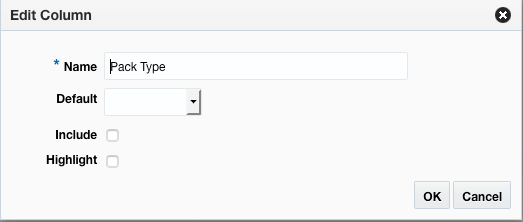
Lastly, for each column in the included worksheets, you can choose whether or not to include it in the template, update its display name, and choose whether or not to highlight the column in the spreadsheet. The highlight may be useful if you are trying to direct users to update or validate a particular set of attributes in the spreadsheet. Additionally, for each attribute whether it is included or not, you can define a default value. Where applicable, a list of values will also be available to select valid values for the defaults.

After all your updates are applied to the template configuration, save your changes and then access the Download Blank Template option under Data Loading in the task list to test your template configuration.