4 Manage Bank/Store Relationships
The Bank Stores window is used to enter and maintain the store/bank relationships and bank attributes. The bank attributes are exported to external ACH (Automated Clearing House) and UAR (Universal Account Reconciliation) systems.
Create a Bank/Store Relationship
To create a bank/store relationship:
-
From the Tasks menu, select Foundation Data > Bank Store. The Bank Stores window appears.
-
Select the bank from the Bank field.
-
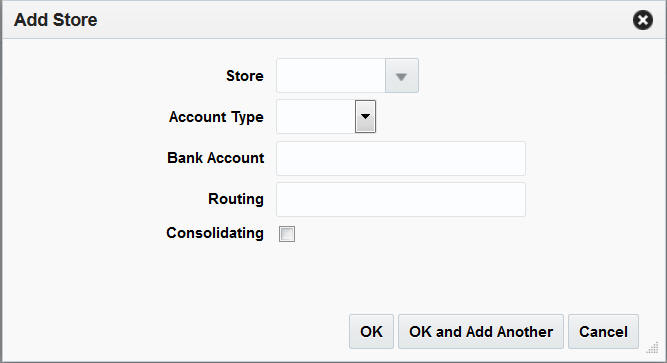
In the Bank Stores table, select Actions > Add. The Add Store window appears.
Figure 4-1 Add Store Window

-
In the Store field, enter a store ID number, select or search for the store.
-
In the Account Type field, select the account type the bank has for the store. The options are: Checking, Savings.
-
In the Bank Account field, enter a bank account number.
-
In the Routing field, enter the routing number for the bank.
-
To indicate that the account is a consolidating account, select Consolidating.
-
Click OK to add a store. You can add more stores by clicking OK and Add Another.
-
Click Cancel to return to the Bank Stores window.
Delete a Bank/Store Relationship
To delete a bank/store relationship:
-
From the Tasks menu, select Foundation Data > Bank Store. The Bank Stores window appears.
-
Select the bank stores you want to delete.
-
Select Actions > Delete.
-
Click Yes to confirm deletion.
-
Click Save and Close to save the changes and close the window.