2 Provisioning
Once your environments are ready for you, the person designated as your service administrator will receive a welcome e-mail: one for each environment type (stage, production, and so on).
This e-mail has several key pieces of information:
-
Username
-
This user is referred to as the Service Administrator user in this document. A temporary password will be sent in a separate e-mail.
-
-
Link to the OCI IAM Domains UI.
-
Links to your cloud services through the Oracle Retail Home link.
-
Customer Support (CSI) Number.
It is recommended that you save this e-mail for future reference, because at this point the service administrator is the only person with access.
Access OCI IAM
Once you receive your welcome e-mail, it is recommended that you, as the system administrator, log into the OCI IAM console to verify your access and set a new password. You will also be assigned the application administrator group for both your production and pre-production environments. Note that the group for pre-production will have an added extension (_PREPROD) in order to differentiate between the two. These should not be deleted.
You will need to find your application in OCI IAM. Select Oracle Cloud Services on left to display your environments, which will have the environment type, such as PROD, indicated in the name.
You should have the OMCS_Admin and OMCS_User roles automatically created in OCI IAM. You must assign yourself to the OMCS_Admin role. This assignment provides access to all companies and sets your authority to ALLOW.
Note:
As the first user to log into Order Administration, if you do not have the OMCS_Admin authority, you will not be able to log in.It is also recommended that you add additional administrators in order to have a backup administrator and share in user management administration, as at this point no one else in your organization will have access to Order Administration. For assistance in creating additional users or adding them to roles, see User Configuration.
If the user record in IDCS or OCI IAM is assigned the OMCS_Admin role, the user record will be created in Order Administration with full administrative authority. The user’s default authority will be set to ALLOW, the rank will be set to 1, and the user will have authority to all jobs and companies, as well as being able to see order volume totals at the About screen.
Validate Cloud Service Access
Next, you should validate that you can successfully log into each of the cloud services for which you have been provisioned using the URLs provided in the Retail Home Application Navigator.
Register Customer Support Identifier
The welcome e-mail will also include your Customer Support Identifier (CSI). This should be registered with My Oracle Support (MOS), which you will use to log questions or issues about these services. Follow link in the e-mail or access support.oracle.com to create a new account. If you already have a MOS account, remember to add your new CSI to your existing MOS account.
The first person to request access to a CSI will be checked by Oracle to ensure the domain of their e-mail address matches the domain associated with the CSI. Once approved, they will be made the Customer User Administrator of that CSI, and can approve others to use it. If someone else has already been made the administrator of that CSI, then the request will be e-mailed to him or her for approval. For more information on the Customer User Administrator, see MOS ID 1544004.2.
Note:
You will not be able to register your CSI number until your production environment has been provisioned.Setting up BI Publisher Users in IDCS
To set up BI Publisher reports using DIS/OAS requires each environment to be set up withReST Services credentials using a user ID and password. These credentials are owned and managed by the environment owner (retailer). The owner is responsible for creating and maintaining these credentials including rotating the password in IDCS and updating OACS Properties (CPRP).
The following procedures show how to create the credentials in IDCS and update OACS Properties.. The same screens should be used when rotating passwords.
-
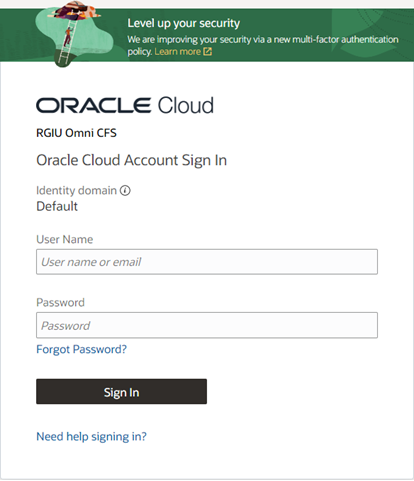
Login to OACS.
-
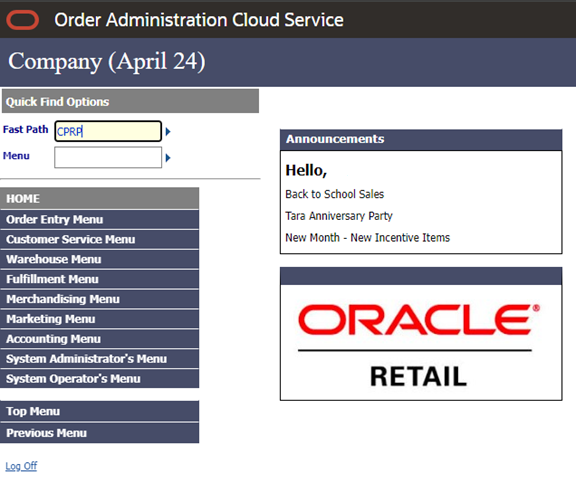
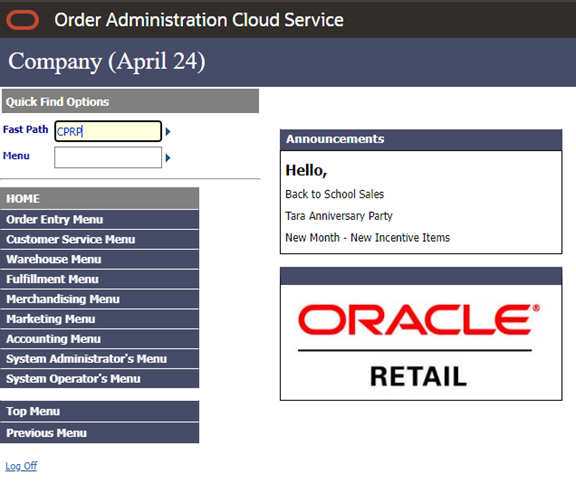
In the Fast Path field, enter CPRP.
-
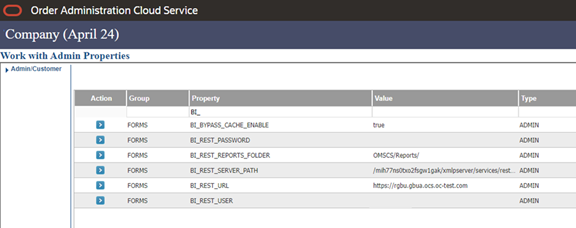
In the Property column, filter for “BI_”.
In the BI_REST_SERVER_PATH value copy the first section between the forward slashes, this is the BI Publisher Tenant ID. Temporarily save this value in notepad. This value will be used to look up the tenant ID later.
Tenant ID example:
mih77ns0txo2fsgw1gak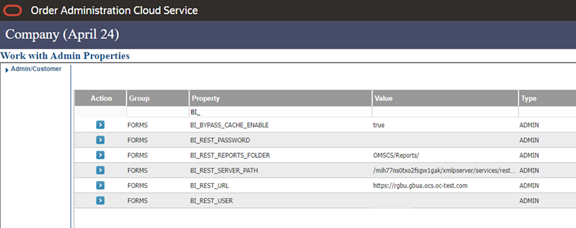
-
Log into your IDCS Administrator Console.
The URL is only available to the person who set up IDCS and looks similar to the following URL:
https://idcs-abcdefg12345xyz.identity.pint.abxyz.com/ui/v1/adminconsole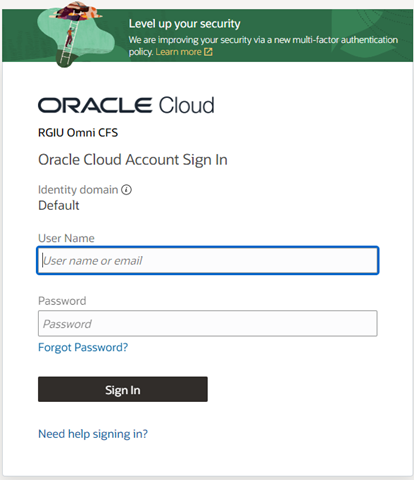
-
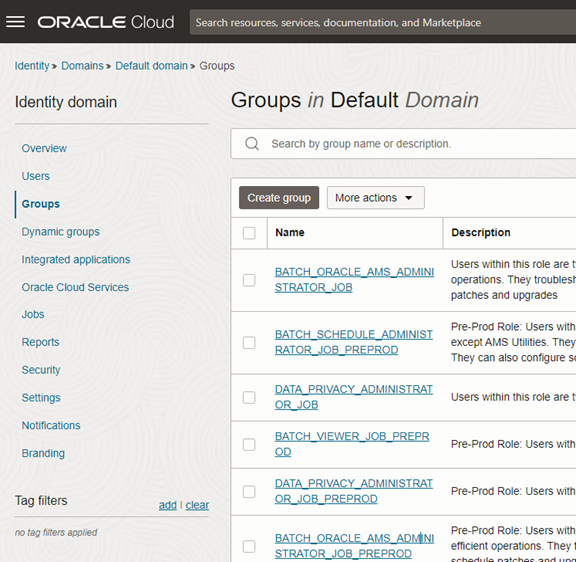
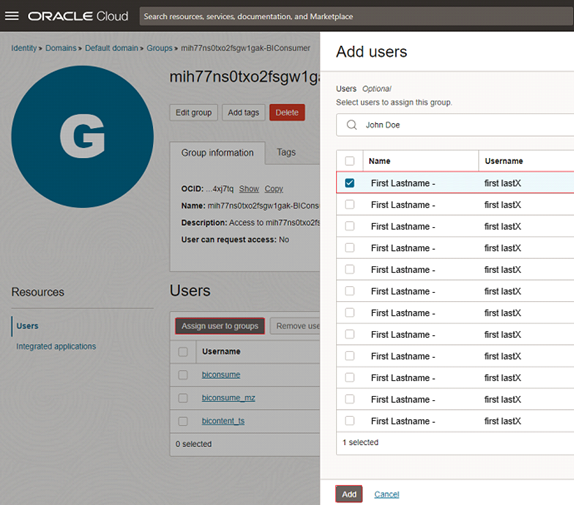
From the Identity domain menu, select Groups. A list of groups in the default domain is displayed.
-
Using the Tenant ID found in the OACS CPRP screen earlier, search for that tenant by appending “-BIConsumer” to the end.
Click the line with your Tenant ID listed. For example:
mih77ns0txo2fsgw1gak-BIConsumer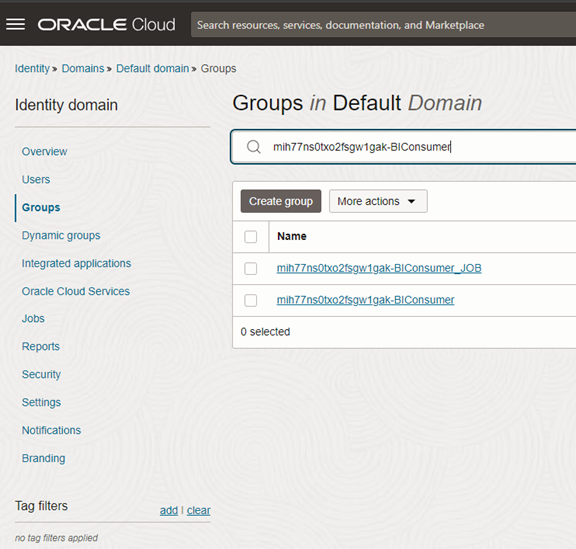
-
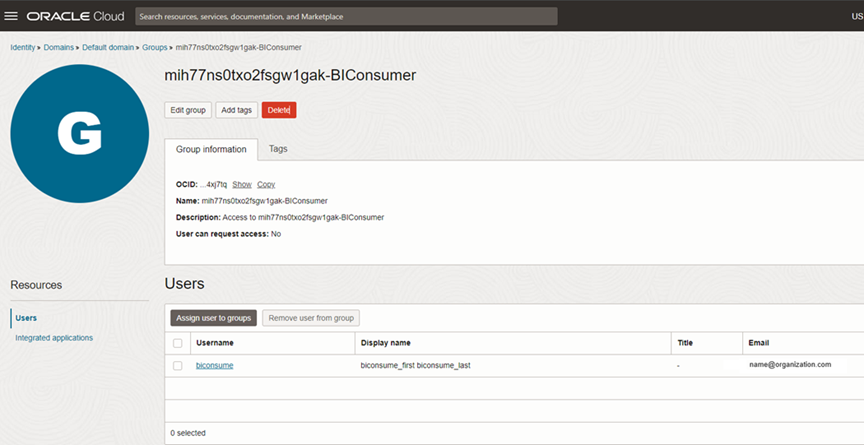
Check the box in the row for the “biconsume” username.
Click the Assign user to Groups button to add users to the biconsume group.
Add your IDCS user for OACS BI Publisher integration.
-
Select the user or users to add to the selected group and click Add.
Return to OACS to set up the BI_REST_USER account in the OACS Properties (CPRP).
-
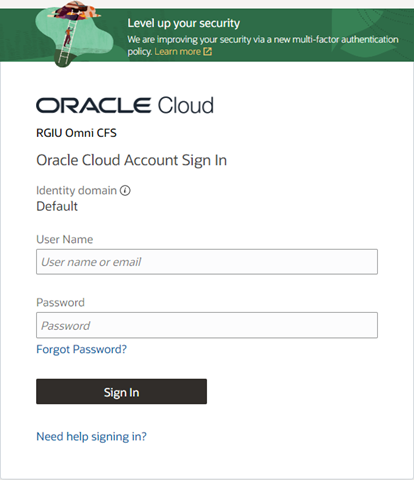
Login to OACS.
-
In the Fast Path field, enter CPRP.
-
In the Property column, filter for “BI_”.
-
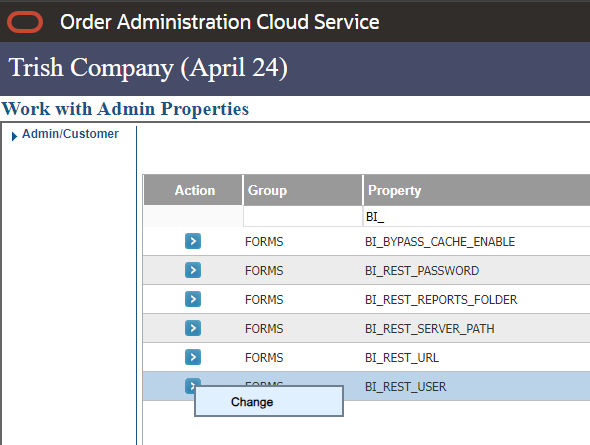
Click the row for BI_REST_USER.
Click the blue arrow and select Change from the menu.
-
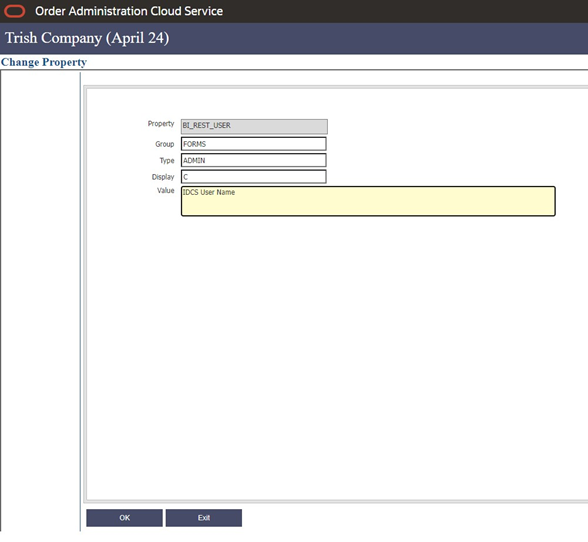
In the Value field, enter the username that you added to the bi_consume group in IDCS.
Click OK and then Exit.
-
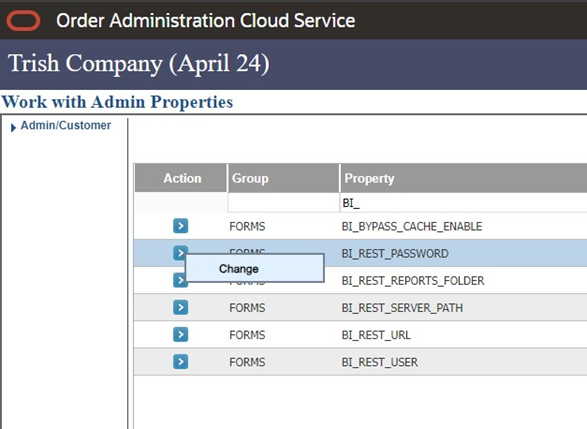
Click the row for BI_REST_PASSWORD.
Click the blue arrow and select Change from the menu.
-
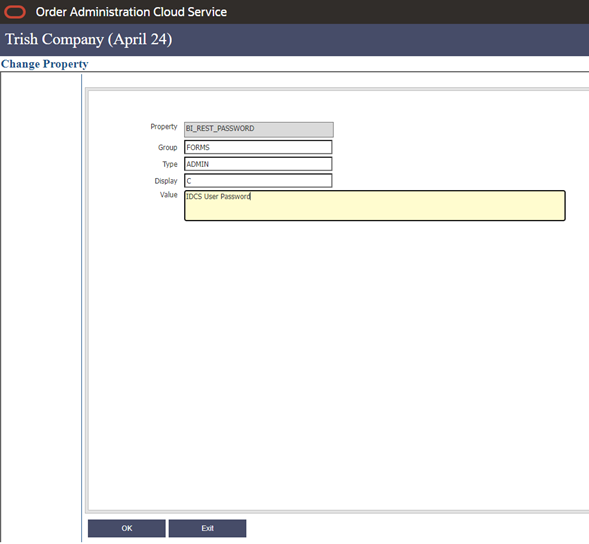
In the Value field, enter the password for the user that you added to the bi_consume group in IDCS.
Click OK and then Exit.
Click Exit from the Work with Admin Properties screen to return to the main menu in Classic View
-
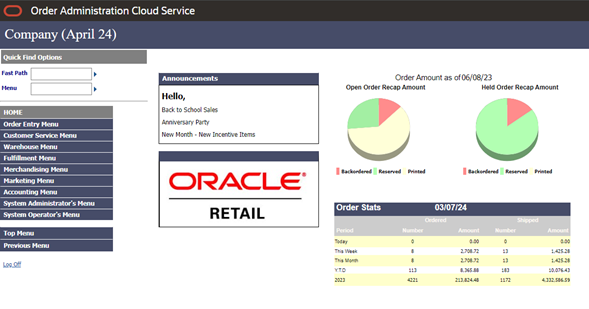
Review the pie and tabular charts on the main screen. Other reports are also available.
