Install ETL Component
This page will guide you in installing the Oracle Data Integrator-based ETL Component on the Oracle Utilities Analytics Warehouse (OUAW) application server.
Note: All the tasks below need to be followed in sequential order.
On this page:
Prerequisites
Before installing the OUAW ETL component, verify the following:
-
Use the same operating system user used to install the required software.
-
Ensure Oracle GoldenGate is installed on the target database server.
-
Ensure Oracle GoldenGate Monitor Agent is installed on the target database server.
-
Ensure that Oracle GoldenGate Monitor Agent instance configure template, Created and set Wallet on the Target Database server
-
Ensure that the ODI Repository schema is created on the target database server.
-
Ensure Java is installed on the application server.
-
Ensure Oracle Fusion Middleware Infrastructure is installed on the target application server.
-
Ensure Oracle Data Integrator (ODI) is installed on the target application server.
See Perform Pre-Installation Steps for OUAW for more information.
Set Up Oracle GoldenGate on Target Database Server
-
Connect to the target database as a sys user and run the command below:
Copyalter system set enable_goldengate_replication=TRUE scope=both; -
In the Command window, navigate to the Oracle GoldenGate Home directory.
-
Edit the GLOBALS file in the directory and add the following command:
CopyEnableMonitoring -
Save the file.
-
Navigate to GoldenGate home and check for directories (dirprm,dirdat,dirrpt,...,). If these directories do not exist, connect to ggsci prompt and execute the statement below. This will create all required directories for the GoldenGate configuration.
Copyexport ORACLE_HOME=<ORACLE HOME>export PATH=$ORACLE_HOME/bin:$PATH./ggsciCREATE SUBDIRS
Configure and Start GoldenGate JAgent Instance for OUAW
-
Start the rmiregistry services using the commands below.
Note: Keep track of the port on which the RMI server started. The port number specified in the example is 5559. If it is not specified, the default port 1099 will be used.
Copyexport JAVA_HOME=<JAVA_HOME>
export PATH=$JAVA_HOME/bin:$PATH
rmiregistry <port number> &Example:
rmiregistry 5559 & -
Navigate to <GoldenGate Home>/dirprm and edit the jagent.prm file. Replace COMMAND java with COMMAND <JAVA_HOME>/bin/java.
-
Navigate to <GoldenGate Home> and run the command below.
Copyexport ORACLE_HOME=<ORACLE_HOME>
export PATH=$ORACLE_HOME/bin:$PATH
./ggsci
START JAGENT
The logs for JAgent are created at the following example location: <Oracle GoldenGate Monitor home agent instance>/logs.Example: <Oracle GoldenGate Monitor home agent instance>/logs/ogg_agent.log.
Install the ETL Component
-
Log in to application server.
-
Navigate to the temporary directory where OUAW installer is downloaded. Example: <TEMPDIR/application>.
-
Set the JAVA HOME and add PATH.
Copyexport JAVA_HOME=<JAVA HOME>
export PATH=$JAVA_HOME/bin:$PATH -
Launch the OUAW installer by running the command below. The OUAW installer Welcome page appears.
Copyjava -jar OUA_2.8.0.0.0_generic.jar -logLevel finest -
Review the information before you begin the installation. Click Next to continue.
Note: If you are installing Oracle software on the server for the first time, provide central inventory details such as the inventory directory location and operating system group.
-
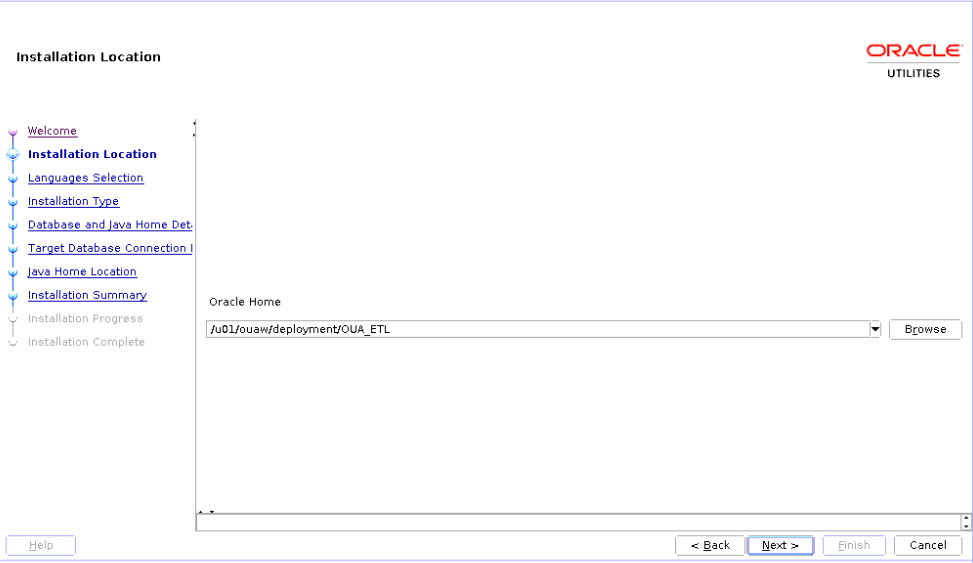
On the Installation Location page, define the installation location in the Oracle Home field and click Next. Note: The specified Oracle home directory must be an empty directory.
Field Name and Description
Value
Oracle Home: The directory where the Oracle Utilities Analytics Warehouse ETL is going to be installed.
Note: This directory location is called the ETL Home. Keep track of it as it will be used during some deployment steps.
Example: <ETL Home>
</u01/ouaw/deployment/OUA_ETL>
-
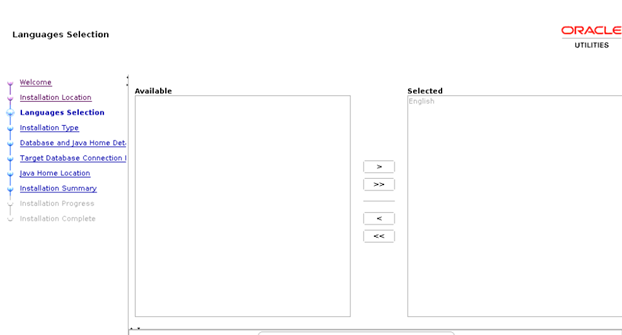
On the Languages Selection page, select English and click Next.
Field Name and Description
Value
Language Selection: The language for the installation process.
English
-
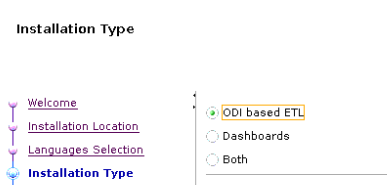
On the Installation Type page, select ODI based ETL and click Next. Note: Based on the selected installation type, the options on the left navigation panel change.
Field Name and Description
Value
Installation Type: Select ODI based ETL.
ODI based ETL
-
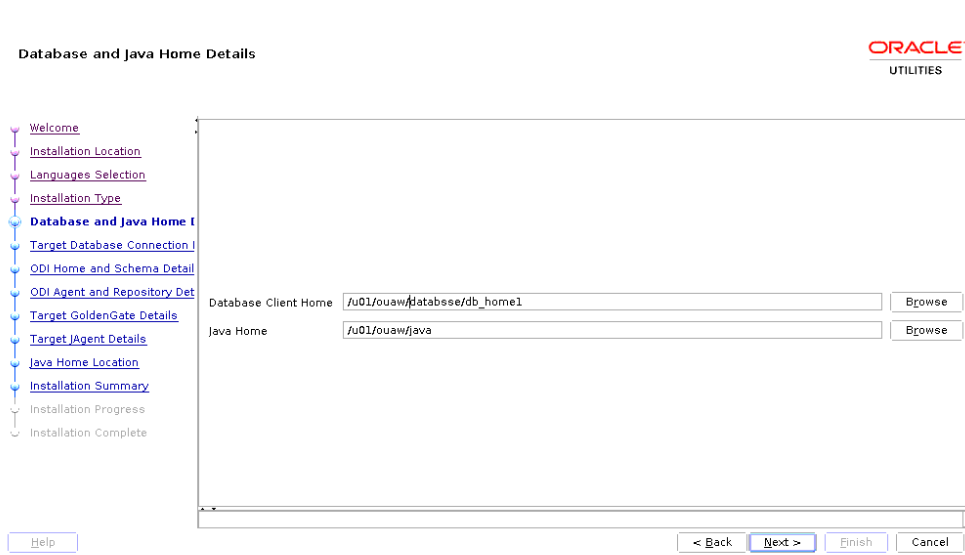
On the Database and Java Home Details page, enter the following and click Next.
Field Name and Description
Value
Database Client Home: Enter the Oracle Database Client installed location or Database Home location in the case where the same server is being used for both the application and database server.
Example: <Database Client> or <ORACLE_HOME>
</u01/ouaw/dbclient> or </u01/ouaw/database>
Java Home: Enter the Java installed location.
Example: <JAVA HOME>
</u01/ouaw/java>
-
On the Target Database Connection Details page, enter the following and click Next.
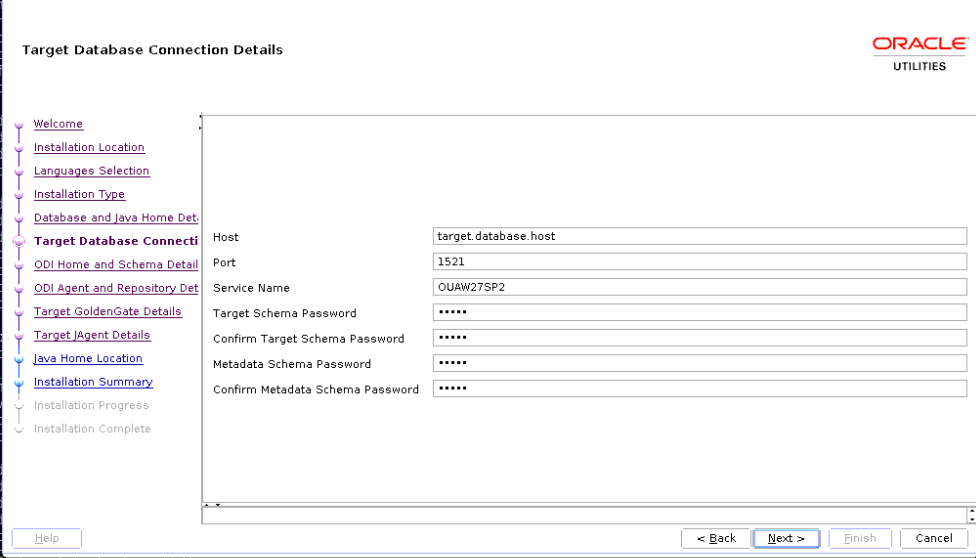
Field Name and Description
Value
Host: The target database server where database resides.
Target Database server host name.
<dbserver.hostname>
Port: The target database server port number.
Target Database port.
Example: <1521>
Service Name: The target database service name.
<Database service name>
Target Schema Password: Password for the target schema (DWADM).
<DWADM user password>
Confirm Target Schema Password: Confirm password for the target schema (DWADM).
<DWADM user password>
Target Schema Password: Password for the metadata schema (MDADM).
<MDADM user password>
Confirm Target Schema Password: Confirm password for the metadata (MDADM) schema.
<MDADM user password>
-
On the ODI Home and Schema Details page, enter the following and click Next.

Field Name and Description
Value
ODI Home: The directory where Oracle Data Integrator (ODI) is installed.
Location of FMW Home
Example: </u01/ouaw/middleware>
Supervisor User: Name of the Oracle Data Integrator Supervisor.
SUPERVISOR
Supervisor Password: Enter the Supervisor Password and store it for future reference.
<Supervisor user password >
Confirm Supervisor Password: Enter same as Supervisor Password.
<Supervisor user password >
Master Repository Schema Name: Oracle Data Integrator master repository schema name.
OUA_MASTER
Master Repository Schema Password: Master Repository schema password.
<OUA_MASTER user password>
Confirm Master Repository Schema Password: Confirm password of the Oracle Data Integrator master repository schema.
<OUA_MASTER user password>
Work Repository Schema Name: Oracle Data Integrator work repository schema name.
OUA_WORK
Work Repository Schema Password: Work Repository schema password.
<OUA_WORK user password>
Confirm Work Repository Schema Password: Confirm password of Oracle Data Integrator work repository schema.
<OUA_WORK user password>
-
On the Oracle Data Integrator Agent and Repository Details page, enter the following and click Next.
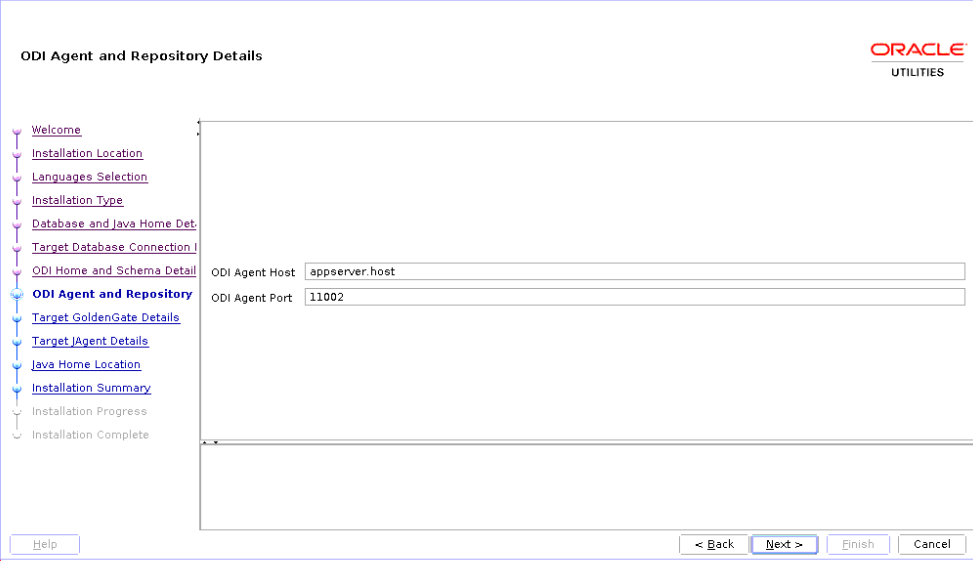
Field Name and Description
Value
ODI Agent Host: The application server hostname where the ODI application server is installed.
Example:
<appserver.hostname>
ODI Agent Port: Enter the port which is the Oracle Data Integrator WebLogic Managed Server port. Make sure that you use the same port while creating Oracle Data Integrator managed server.
Example: <11002>
-
On the Target GoldenGate Details page, enter the following and click Next.
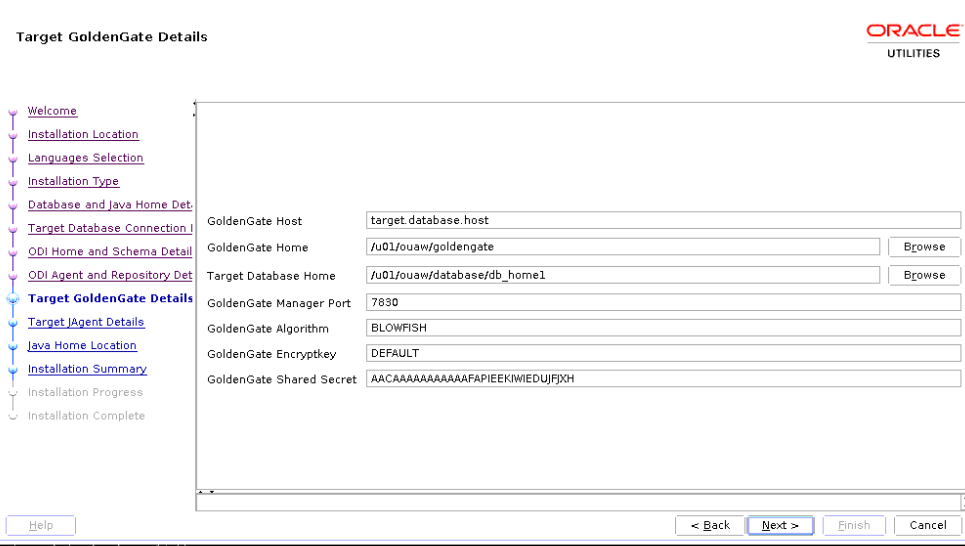
Field Name and Description
Value
GoldenGate Host: Enter the Target database hostname where GoldenGate is installed.
Target database server host name
Example: <dbserver.hostname>
GoldenGate Home: Enter the GoldenGate installed location.
Example: <GoldenGate Home.>
Target Database Home: Enter the target database installed location.
Example: <ORACLE HOME>
GoldenGate Manager Port: The Oracle GoldenGate Manager port which is running on the database server host.
<The default value is 7830>
GoldenGate Algorithm: The algorithm configured in Oracle GoldenGate on the target database server
The default value is "BLOWFISH".
GoldenGate Encryptkey: The Encrypt Key configured in Oracle GoldenGate on the target database server.
The default value is “DEFAULT”
GoldenGate Shared Secret: Shared secret key configured in Oracle GoldenGate on the target database server.
Go to the Oracle GoldenGate prompt and run the command:
encrypt password <password of MDADM user>, encryptkey DEFAULT
Provide the result of the above command as the value.
-
On the Target JAgent Details page, enter the following and click Next.
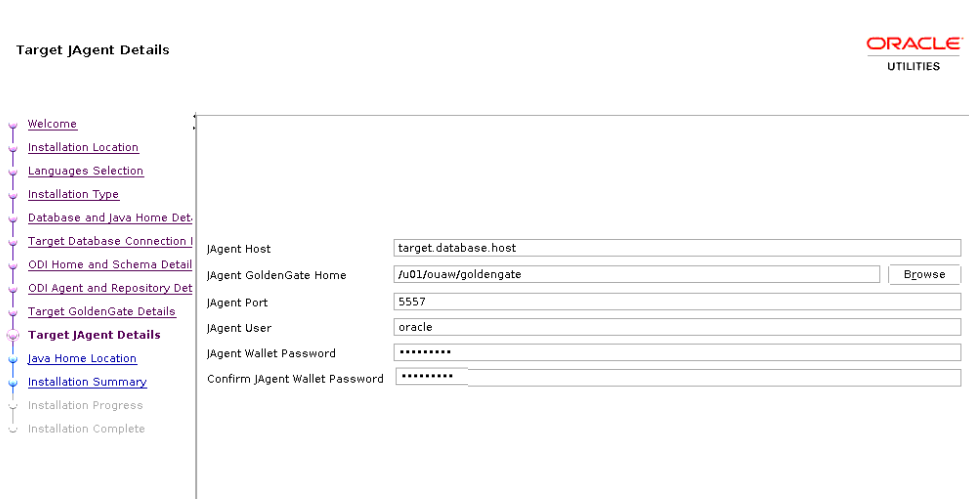
Field Name and Description
Value
JAgent Host: Enter the Target database hostname where GoldenGate JAgent is configured.
The target database server host name
Example: <dbserver.hostname>
JAgent GoldenGate Home: Enter the target database server GoldenGate Home installed location.
Example: <GoldenGate Home>
JAgent Port: Use the JAgent RMI port defined in the config properties file.
Example: <5557>
JAgent User: Enter the OS user that installed the JAgent.
Example: <oracle>
JAgent Wallet Password: Enter the JAgent Wallet password which was generated in the above steps.
<JAGENT Wallet password>
Confirm JAgent Wallet Password: Enter the same password as above.
<JAGENT Wallet password>
-
On the Java Home Location page, enter the following and click Next.
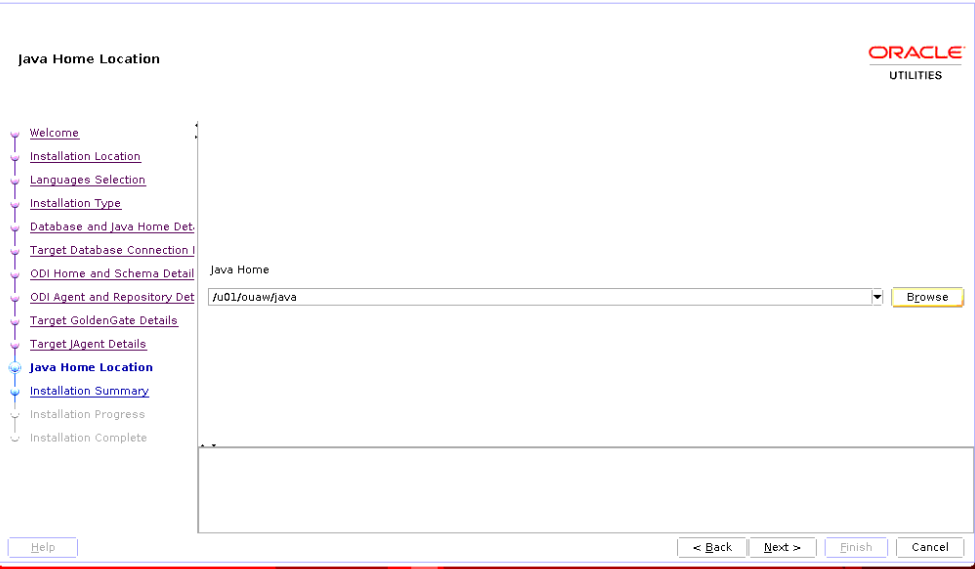
Field Name and Description
Value
Java Home: Enter the Java installed location (on the Application server).
Example: </u01/ouaw/java>
-
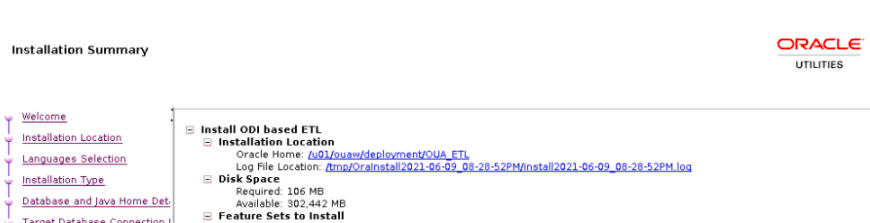
On the Installation Summary page, a summary is displayed. Click the Install button to proceed.
An Installation Progress page displays to track the installation.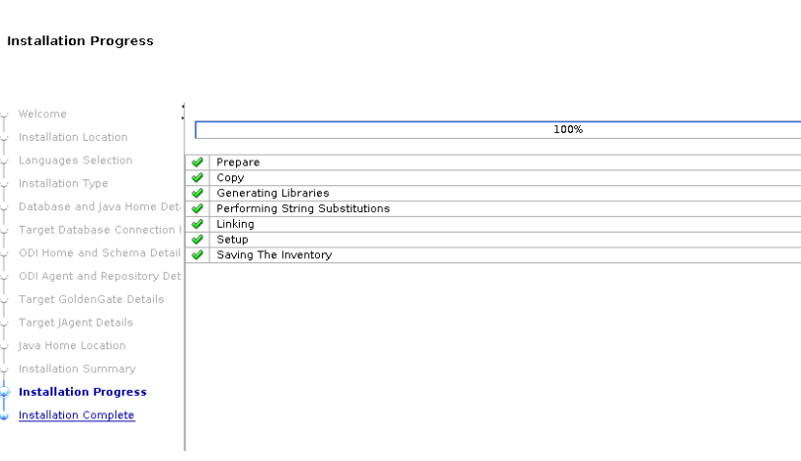
-
On the Installation Complete page, note the displayed details and click Finish to close the installer wizard. The ETL is now installed.
Verify the OUAW ETL Installation
Review the contents of the installation log files to make sure that the installer did not encounter any problems. The OUAW installer logs location will be shown in the launched terminal. To see the directory structure, navigate to <ETL Home> and enter the following command:
cd <ETL HOME>;
tree -d <OUA_ETL> -L 1
This will confirm that the ETL component installation was successful.
Create a Database Directory
Create a database directory B1_DATA_DUMP_DIR on the target database. This directory is used for logging the export/import task used during the initial ETL load. The following is a sample SQL that creates the database directory pointing to the file system path. Example: </u01/file_data>.
CREATE DIRECTORY B1_DATA_DUMP_DIR AS '</u01/file_data'>;Create the WebLogic Domain for Oracle Data Integrator Agent
Create the WebLogic Domain to bring up the WebLogic Agent (ODI Agent) to complete the steps in this section. The ODI Domain creation utility is an automated script that lets you create a non-clustered domain or a clustered domain. Choose which type of domain you want to create and follow the steps below. There are also steps for adding another ODI managed server and editing .sh files for ODI agent connectivity.
-
Create a Non-Clustered ODI Domain
-
Create a Clustered ODI Domain
-
Add Another ODI Managed server
-
Edit setDomain.sh and startWeblogic.sh files for ODI Agent Connectivity
1. Create a Non-Clustered ODI Domain
Note: The password fields values (RCUSCHEMAPWD,WEBLOGIC_PASSWORD) will be cleared from ODI_CONFIG.properties after executing createDomain.sh or createMachine.sh. Ensure these fields are updated for each invocation of createDomain.sh or createMachine.sh.
-
Navigate to the <ETL Home>/etc directory and provide the following properties in the ODI_CONFIG.properties file.
Property
Description
DOMAIN_PATH
The directory where odi_domain will be created.
Example : </u01/ouaw/domains/odi_domain>
RCUPREFIX
Repository prefix created in the Perform Pre-Installation Steps for OUAW - Prerequisites for Application Server - Configure Repository . Example: ODI
RCUSCHEMAPWD
Enter the RCU SCHEMA PASSWORD.
WEBLOGIC_USERNAME
WebLogic user name for <odi_domain>.
WEBLOGIC_PASSWORD
WebLogic password for <odi_domain>.
CLUSTER_NAME(OPTIONAL)
--
ODI_DBSERVER
ODI database server name (target.databaseserver).
ODI_DBPORT
ODI database port (target database port). Example: 1521
ODI_DBNAME
ODI database service name (target database service name).
ADMIN_PORT
ODI WebLogic domain AdminServer port. Example: 11000
MANAGED_SERVER_PORT
ODI WebLogic domain ManagedServer port. Example: 1001
If not specified, default port 15101 will be assigned.
NONSSL_PORT
ODI WebLogic NONSSL_PORT. Example: 11000
If not specified, default port 7001 will be assigned.
ODI_DOMAIN_HOSTNAME
Host name(application server) on which the odi_domain is to be created.
MACHINE_NAME (OPTIONAL)
--
MACHINE_PORT (OPTIONAL)
--
MANAGED_SERVER_NAME
Example: <ODI_Server1>
-
Navigate to the <ETL Home>/bin directory and invoke the createDomain.sh script. After creating the ODI Domain, see Start the ODI Domain below to start the admin server and managed server.
2. Create a Clustered ODI Domain
Note: The scope of the domain creation scripts for clustered domain is limited to creation of a 2 node cluster with managed servers running on the same machine but on different ports. In case your cluster needs more than two managed servers or if the managed servers will be running on different machines, the clustered domain should be created manually using ODI documentation as reference.
Note: The password fields values (RCUSCHEMAPWD,WEBLOGIC_PASSWORD) will be cleared from ODI_CONFIG.properties after executing createDomain.sh or createMachine.sh. Ensure these fields are updated for each invocation of createDomain.sh or createMachine.sh.
-
Navigate to the <ETL Home>/etc directory and provide the following properties in the ODI_CONFIG.properties file.
Property
Description
DOMAIN_PATH
The directory where <odi_domain> will be created.
Example : </u01/ouaw/domains/odi_domain>
RCUPREFIX
Repository prefix created in the LINK TO ODI RCU. Example: ODI
RCUSCHEMAPWD
Enter the RCU SCHEMA PASSWORD.
WEBLOGIC_USERNAME
WebLogic user name for <odi_domain>.
WEBLOGIC_PASSWORD
WebLogic password for <odi_domain>.
CLUSTER_NAME
Additional mandatory property ODI Cluster name <odi_cluster>.
ODI_DBSERVER
ODI database server name (target database server).
ODI_DBPORT
ODI database port (target database port). Example: <1521>
ODI_DBNAME
ODI database name (target database name).
ADMIN_PORT
ODI WebLogic domain AdminServer port. Example: <11000>
MANAGED_SERVER_NAME
The managed server name can be used as <ODI_Server1> and can be added to CLUSTER_NAME.
MANAGED_SERVER_PORT
ODI WebLogic domain Managed Server port. Example: <11001>
If not specified, default port 15101 will be assigned.
NONSSL_PORT
ODI WebLogic NONSSL_PORT. Example: 11000
If not specified, default port 7001 will be assigned.
ODI_DOMAIN_HOSTNAME
Host name(application server) on which the <odi_domain> is to be created.
-
Navigate to the <ETL Home>/bin directory and invoke the createDomain.sh script. This creates an ODI domain with an admin server and a managed server (called <ODI_server1>) assigned to the cluster.
3. Add Another ODI Managed Server
Follow the steps below to create another managed server and add it to the cluster.
-
Navigate to the <ETL Home>/etc directory and provide the following mandatory properties in the ODI_CONFIG.properties file:
• MANAGED_SERVER_NAME
• MANAGED_SERVER_PORT -
Provide the following optional properties in the ODI_CONFIG.properties file:
• MACHINE_NAME
• MACHINE_PORT -
Navigate to <ETL Home>/bin and invoke createMachine.sh. A new managed server is created with the specified name and assigned to the cluster.
4. Edit setDomain and startWeblogic files for ODI Agent Connectivity
To modify the setDomainEnv.sh script for ODI agent connectivity:
-
In the command shell, change the directory to ODI Domain Home. Example: cd <odi_domain>/bin
-
Add the -Dweblogic.oif.serialFilterScope=weblogic argument to setDomainEnv.sh immediately below an existing JAVA_OPTIONS command. Example:
JAVA_OPTIONS="${JAVA_OPTIONS} -Dweblogic.oif.serialFilterScope=weblogic"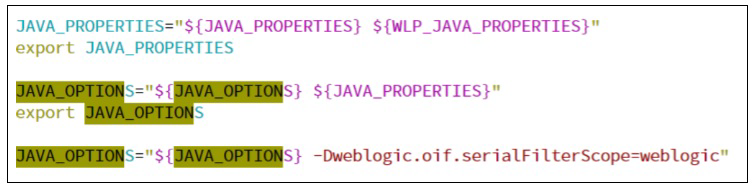
To modify the startweblogic.sh script for ODI agent connectivity:
-
Create a backup of the startweblogic.sh script.
-
Edit the startweblogic.sh script in the editor.
-
Add the following code after the pattern # START WEBLOGIC.
Copyexport CONFIG_JVM_ARGS="-Djava.security.egd=file:/dev/./urandom -Dweblogic.security.SSL.enableJSSE=true -Dweblogic.security.SSL.ignoreHostnameVerification=true -Dweblogic.security.TrustKeyStore=DemoTrust -Dweblogic.security.CustomTrustKeyStoreType=JKS" -
Insert the following code after the pattern Djava.security.policy=${WLS_POLICY_FILE }:
Copy-Djava.security.egd=file:/dev/./urandom -Dweblogic.security.SSL.enableJSSE=true -Dweblogic.security.SSL.ignoreHostnameVerification=true -Dweblogic.security.TrustKeyStore=DemoTrust -Dweblogic.security.CustomTrustKeyStoreType=JKS
Note: Insert the code in all three places where the pattern occurs. As an example, here is how the code looks before inserting the new code lines above.Copy${JAVA_HOME}/bin/java ${JAVA_VM} ${MEM_ARGS} ${LAUNCH_ARGS} -Dweblogic.Name=${SERVER_NAME} -Djava.security.policy=${WLS_POLICY_FILE} ${JAVA_OPTIONS} ${PROXY_SETTINGS} ${SERVER_CLASS}
Here is how the code looks after inserting the new code lines above.Copy${JAVA_HOME}/bin/java ${JAVA_VM} ${MEM_ARGS} ${LAUNCH_ARGS} -Dweblogic.Name=${SERVER_NAME} -Djava.security.policy=${WLS_POLICY_FILE} -Djava.security.egd=file:/dev/./urandom -Dweblogic.security.SSL.enableJSSE=true -Dweblogic.security.SSL.ignoreHostnameVerification=true -Dweblogic.security.TrustKeyStore=DemoTrust -Dweblogic.security.CustomTrustKeyStoreType=JKS ${JAVA_OPTIONS} ${PROXY_SETTINGS} ${SERVER_CLASS}
Start the ODI Domain
Starting the ODI Domain involves two steps: starting the AdminServer and starting the ODI_server1 managed server.
Start the AdminServer
-
In the command shell, change the directory to <ODI DOMAIN>/servers/AdminServer/security.
-
Create a boot.properties file with <username and password>. Example:
-
username=<weblogic username>
-
password=<weblogic password>
-
-
Change the directory to <ODI DOMAIN>/bin and execute the following command:
Copynohup ./startWebLogic.sh > startWebLogic.log 2>&1 &
Start the Managed Server <ODI_server1>
-
In the command shell, change directory to <ODI DOMAIN>/servers/<Managed server name>/security .
Example: </u01/ouaw/domains/odi_domain>/servers/<ODI_server1>/security/
If the ODI_server1/security directory does not exist under <ODI DOMAIN>/servers, then create it manually using the following command:Copymkdir -p ODI_server1/security -
Create a boot.properties file with <username and password>. Example:
-
username=<weblogic username>
-
password=<weblogic password>
-
-
Change the directory to <ODI DOMAIN>/bin and execute the following command:
Copynohup ./startManagedWebLogic.sh <ODI_server1> > StartManagedWeblogic.log 2>&1 &
Perform the Initial Setup for Star Schema
Follow the steps below to execute the B1_INITIAL_SETUP_PKG from the ODI console.
-
Change the directory to <FMW HOME>/odi/studio/bin.
-
Set the JAVA HOME.
Copyexport JAVA_HOME=<JAVA_HOME>
export PATH=$JAVA_HOME/bin:$PATH -
Run the ODI executable file: ./odi. This opens Oracle Data Integrator Studio.
Note: Oracle Data Integrator (ODI) Studio 12.2.1.4 is not supported in AIX and Solaris operating systems. Install ODI in either Linux or Windows machines to connect to the target database.
-
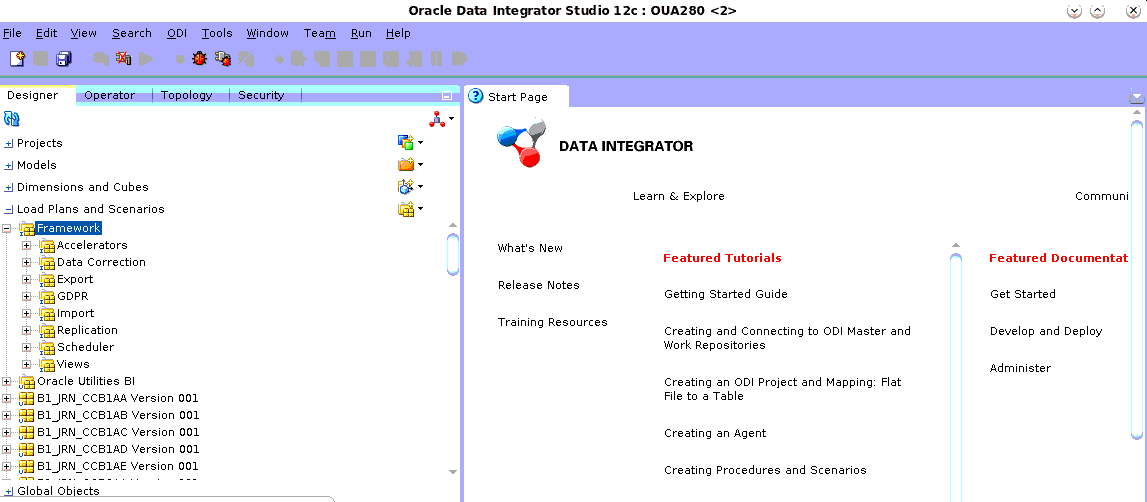
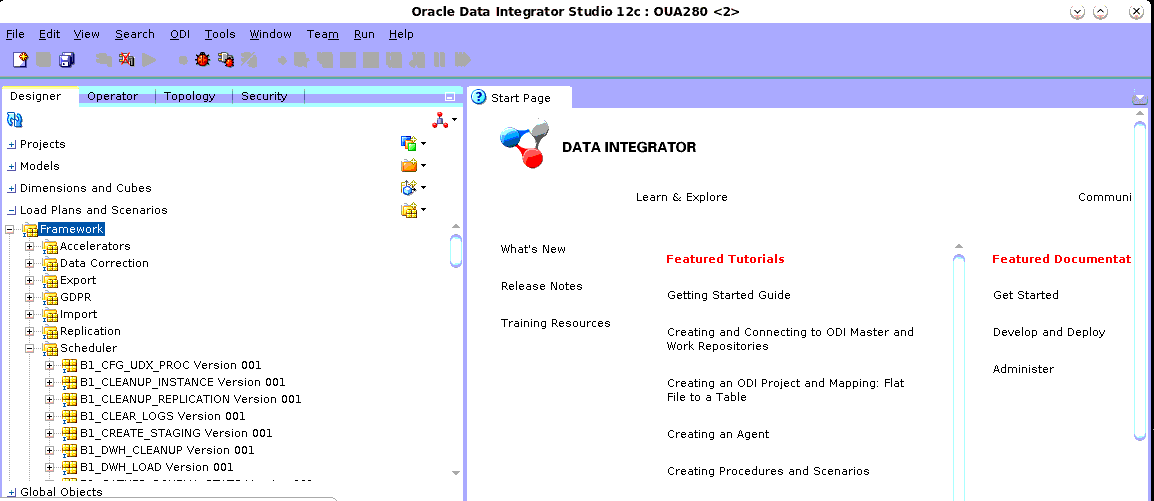
Log in to Oracle Data Integrator Studio and navigate to Designer > Load Plans and Scenarios > Framework > scheduler.
-
Navigate to the Load Plans and Scenario folder in the Designer tab.
-
Expand the Framework folder.
-
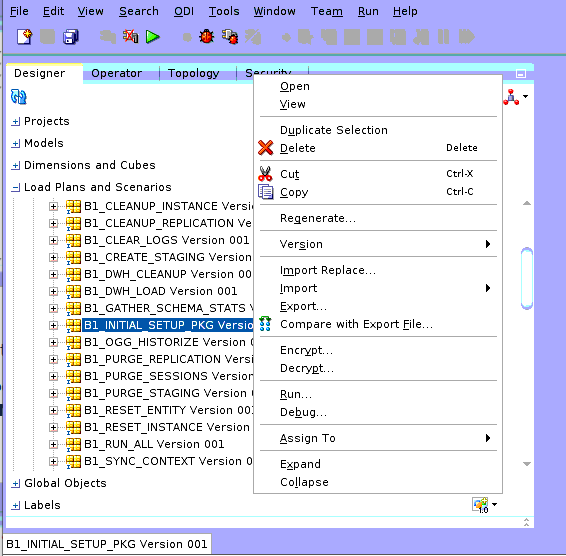
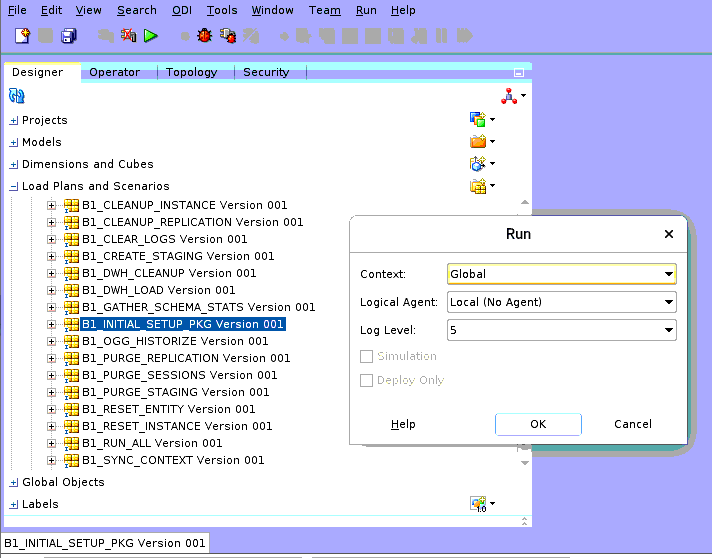
Right-click on B1_INITIAL_SETUP_PKG Version 001 and click Run. A popup windows opens.
-
In the Context field, select GLOBAL. In the Logical Agent field, select Local (No Agent). Click OK.
Enable ODI scheduler
-
In Oracle Data Integrator Studio, navigate to Designer > Load Plans and Scenarios > Framework > B1_RUN_ALL Version 001 > Scheduling.
-
Right-click scheduling and select the New Scheduling option.
-
Select the source context as global, agent as WLS_AGENT, and the log level as 1.
-
To specify how often the scheduler should run, navigate to the Execution Cycle tab of the Scheduler and select the Many Times option. Set the interval between repetitions.
-
Navigate to Topology > Agents > OracleDIAgent.
-
Right-click on OracleDIAgent and click Update Schedule.