Load the Data Warehouse
The primary objective of a data warehouse is to extract data from one or more source systems, transform that data according to the business logic, and then load the data into the data warehouse so that business users can make informed decisions. After successfully installing Oracle Utilities Analytics Warehouse (OUAW) and integrating any source applications, the data warehouse needs to be loaded.
On this page:
Overview Diagram
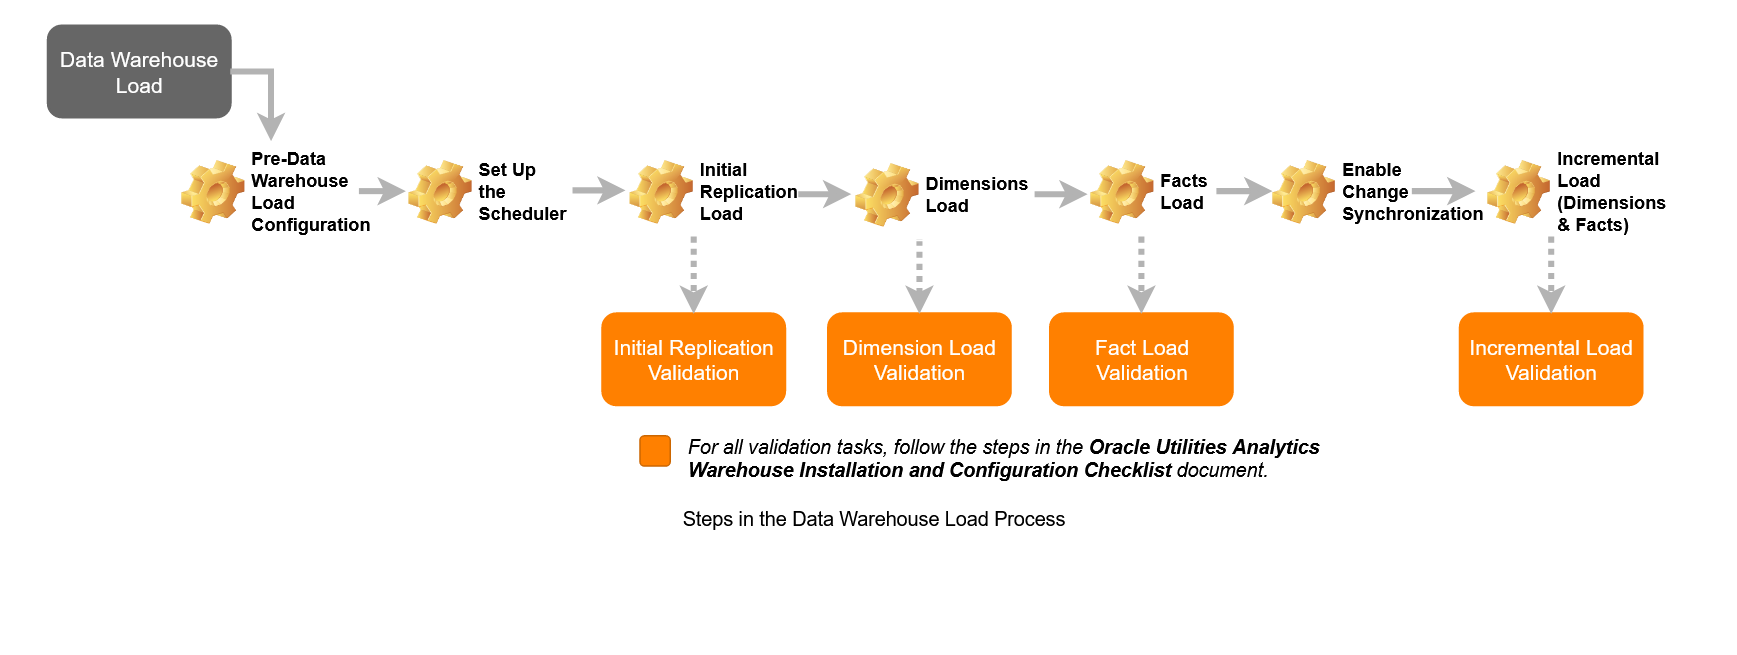
The diagram below illustrates the steps involved in loading data into the target data warehouse.
Note: One part of the diagram refers to the Oracle Utilities Analytics Warehouse Installation and Configuration Checklist, which is for version 2.7.0.2 of the product. The checklist can be used for version 2.8.0.0.
Pre-Data Warehouse Load Configuration
Oracle Utilities Analytics Warehouse ETL architecture is a metadata driven framework that allows you to configure out-of-the-box ETL jobs. The out-of-the-box ETL jobs are set up during the integration of the source system with the Oracle Utilities Analytics Warehouse. However, some additional configuration is required before starting the loading of data into the target data warehouse. This section contains only required metadata configurations before the data warehouse load, and these configurations augment those default configurations at the time of integration of the source system with the Oracle Utilities Analytics Warehouse.
Review Default Metadata Configuration
Some default metadata configurations can also be modified using the Oracle Utilities Analytics Warehouse Administration Tool. It is also mandatory to modify some default metadata configuration for the user customization. To know about default metadata configuration and how to modify them, follow the usage of Oracle Utilities Analytics Warehouse Administration Tool in the Administration topic.
Configure ETL Jobs
OUAW contains pre-built analytics for Oracle Utilities Analytics Framework (OUAF) and non-OUAF source applications. These source applications are listed below.
OUAF Source
- Oracle Utilities Analytics Customer Care and Billing
- Oracle Utilities Analytics Customer to Meter
- Oracle Utilities Analytics Meter Data Management
- Oracle Utilities Analytics Work and Asset Management
- Oracle Utilities Analytics Mobile Workforce Management
Non-OUAF Source
- Oracle Utilities Network Management System
If you have integrated one of these source system with OUAW, then perform the tasks below before the initial load of data into the data warehouse from each respective source.
Configure ETL Jobs
Oracle Data Integrator ETL jobs are configured at the time of integrating the source application with OUAW. These jobs are used to transform and load target dimensions, facts, and materialized views data from the replication layer into the target layer. Some ETL jobs are dependent on others. The dependency structure of target entities, and the order in which target entities should be loaded, are explained below.
- Make sure that all required ETL parameters and buckets are configured.
- For an OUAF source application, the respective parameters and buckets must be configured in source application before the integration of source application. If not configured, then configure all required ETL parameters and buckets, and regenerate all replication views.
- For a non-OUAF source application (specifically Oracle Utilities Network Management System), the respective parameters and buckets must be configured using the Oracle Utilities Analytics Warehouse Administration Tool after the integration of the source application. If not configured, then configure all required ETL parameters and buckets, and regenerate all replication views.
- All dimensions are independent. Therefore, all dimensions can be loaded simultaneously
- Facts are dependent on dimensions. Therefore, facts should be loaded only after their dependent dimensions are loaded completely at the time of initial loading. Dependency is managed by the ETL framework. During incremental load, all facts will be loaded until the time their dependent dimensions are loaded.
- Accumulating fact contains only the latest version of a transaction or event. These types of facts are usually small and should be loaded fully, from the extract start date provided at the time of integration of the source application. The default slice duration is Yearly, but depending on the volume of data, the slice duration type can be modified from Yearly to Quarterly or Monthly, and so on.
- Periodic snapshot facts contain the latest version of a transaction or event within a snapshot period. If there are no modifications for a transaction or event after it is loaded into the target fact, then the same record will be loaded for all subsequent snapshot periods. The default slice duration type for most of the periodic snapshot facts are Monthly, but this can be modified to Quarterly or Weekly and so on, depending on the business need.
- Periodic snapshot fact used to report trends. If business users are only interested in analyzing trends for the last two years, then this fact should be loaded from the last two years. This will take less time to complete the loading, and it also reduces the storage cost. In this case, the slice start date should be modified to load data from the last two years.
- The slice duration type and slice start date can be modified using the Administration Tool. How to modify these metadata configurations is explain in the Administration topic.
Set Up the Scheduler
- Open Oracle Data Integrator Studio.
- Navigate to Designer > Load Plans and Scenarios > Framework > Scheduler > B1_RUN_ALL Version 001 > Scheduling.
- Right-click scheduling and select New Scheduling.
- Select the source context as global, the agent as WLS_AGENT, and the log level as 5.
- To specify how often the scheduler should run, navigate to the Execution Cycle tab and select Many Times.
- Set the interval between repetitions. For example, to set up the scheduler to run every five minutes, follow the screenshot below:

- Click Save.
- Navigate to Topology > Agents > OracleDIAgent.
- Right-click OracleDIAgentand clickUpdate Schedule.
Run B1_INITIAL_SETUP_PKG Scenario
This scenario is used to populate the date and time dimension. This will insert two records into every dimension in the target schema. These two default records are necessary to handle missing and unassigned or unavailable dimension references in the fact.
- Open Oracle Data Integrator Studio.
- Navigate to Designer > Load Plans and Scenarios > Framework > Scheduler.
- Right-click B1_INITIAL_SETUP_PKG Version 001, and select Run.
- Select global as context, WLS_AGENT as logical agent, and then click OK.
- Provide the minimum date range to populate the CD_DATE dimension in YYYYMMDD format. Uncheck the option and provide the values in the option. Make sure that no transaction should be present before this date.
- Provide the maximum date range to populate the CD_DATE dimension in YYYYMMDD format. Uncheck the option and provide the values in the option. Make sure that you should populate the date dimension with advance entries for future dates. By default, this scenario will add date entries till December 31, 2050.
- Navigate to the Operatortab and make sure that this scenario is executed successfully.
Initial Replication Load
For initial load from source to replication, the Oracle Data Integrator scenario B1_SYNC_CONTEXT should be executed. This job identifies all source application tables configured to be replicated and then synchronizes historical data from source into the replication schema for all those tables if not synchronized before. B1_SYNC_CONTEXT uses the database data pump functionality to synchronize historical data from the source database into the replication schema. The data can be copied to the replication layer using three methods:
- Export and Import
- Export and Import Using Shared Network Storage
- Database Link
Export and Import
Follow below steps to synchronize initial historical source data into the Oracle Utilities Analytics Warehouse replication layer.
- Log in to the Oracle Utilities Analytics Warehouse Administration Tool.
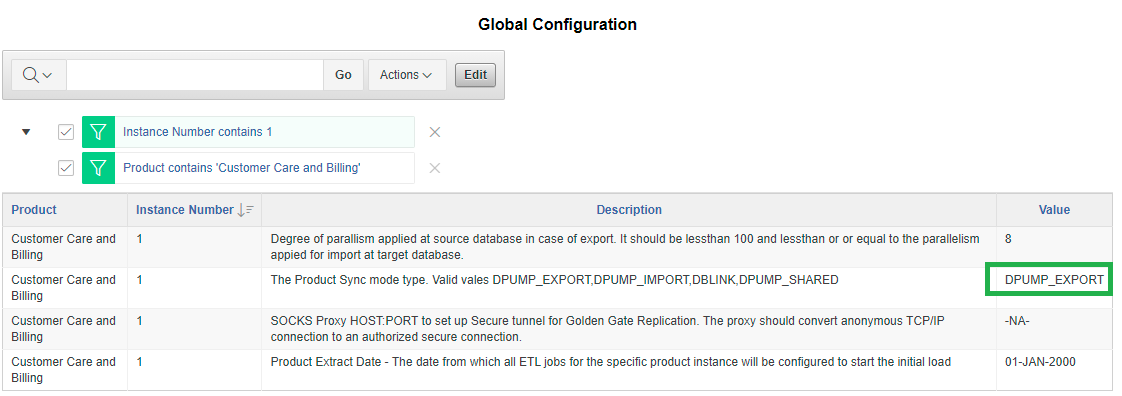
- Click Global Configuration in the left panel under ETL Configuration.
- Click Edit.
- Replace DBLINK with DPUMP_EXPORT for the appropriate Product and Instance (that is, the source product and instance for which you want to perform initial replication load) and click Save.
- Open Oracle Data Integrator.
- Navigate to the Load Plans and Scenario folder in the Designer tab.
- Expand the Framework > Scheduler folder.
- Right click B1_SYNC_CONTEXT Version 001 and click Run to start exporting data from the source. A popup windows opens to enter the Context and Logical Agent. In the example provided, choose the appropriate context code and Logical agent as WLS Agent.
- Make sure that B1_SYNC_CONTEXT job is completed without any error.
- Move the dump files from source B1_DATA_DUMP_DIR to target B1_DATA_DUMP_DIR location manually.
- Follow above step 1 - 4 to modify the global configuration from DPUMP_EXPORT to DPUMP_IMPORT.

- Run B1_SYNC_CONTEXT Version 001 again to import data into the replication schema.
- Make sure that the job is completed successfully. This can be verified in the Oracle Data Integrator operator log.
Export and Import Using Shared Network Storage
In this method, no movement of files is required. Follow the steps below to load initial data into the replication schema.
- Follow step 1-4 mentioned under the Export and Import method above, and set the value to DPUMP_SHARED in the Global Configuration section for the appropriate product and instance.

- Follow step 6-12 mentioned under Export and Import method above to run B1_SYNC_CONTEXT job.
- Make sure that the job is completed successfully. This can be verified in the Oracle Data Integrator operator log.
Database Link
This is the default method to replicate initial data from source into their respective replication schema. Make sure that for your respective source product and instance, the value is set to DBLINK. If the global configuration is not set as DBLINK, then set to DBLINK as mentioned below. Follow step 6-12 mentioned under the Export and Import method above to run B1_SYNC_CONTEXT job. Make sure that this job executes successfully without any error.

Initial Star Schema Load
After existing historical data is replicated from the source into the Oracle Utilities Analytics Warehouse Analytics replication layer, Dimensions, Facts and Materialized views for the respective source should be loaded. Follow below steps for loading data into star schemas:
Dimensions Load
Dimensions are completely independent objects. Dimensions can be loaded until the time data is synchronized into the replication schema. Follow the steps below to enable all dimensions.
- Log in to the Oracle Utilities Analytics Warehouse Administration Tool.
- Click Job Configuration in the left panel under ETL Configuration.
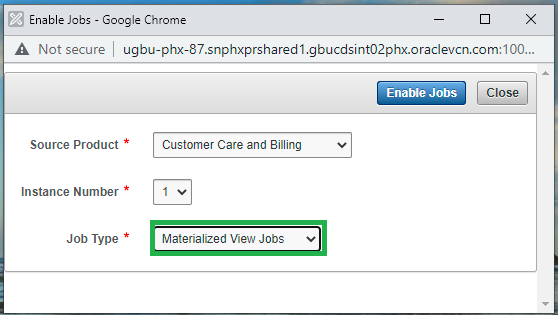
- In the Job Configuration page, click Enable Jobs.
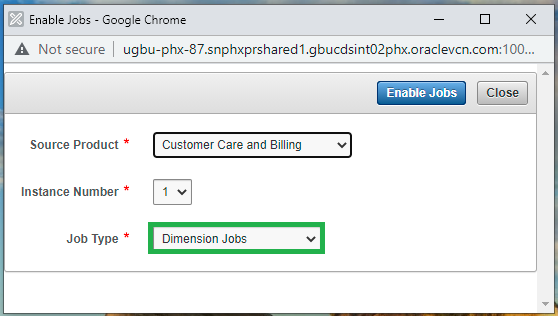
- Select the appropriate Source Product and Instance Number.
- In the Job Type field, select Dimension Jobs, and then click Enable Jobs.
Now all dimension jobs for the selected context are enabled. The scheduler agent B1_RUN_ALL is also configured. Therefore, dimension jobs will be triggered by the scheduler agent automatically.
Navigate to the Operator tab and monitor the execution status. You can also monitor the execution of jobs in B1_JOBS_VW in the metadata schema. Wait for all dimensions to load completely. Except for static one-time load dimensions, all other dimensions should be loaded until the time data synced into the replication schema. Use the Oracle Utilities Analytics Warehouse Installation and Configuration Checklist to validate the loading of dimensions into the target data warehouse.
Note: Although the latest Analytics Warehouse Installation and Configuration Checklist is for version 2.7.0.2 of the product, the steps still apply to version 2.8.0.0.
Facts Load
After all dimensions are loaded successfully, enable all fact ETL jobs by following these steps:
- Log in to the Oracle Utilities Analytics Warehouse Administration Tool.
- Click Job Configuration in the left panel under ETL Configuration.
- In the Job Configuration page, click Enable Jobs.
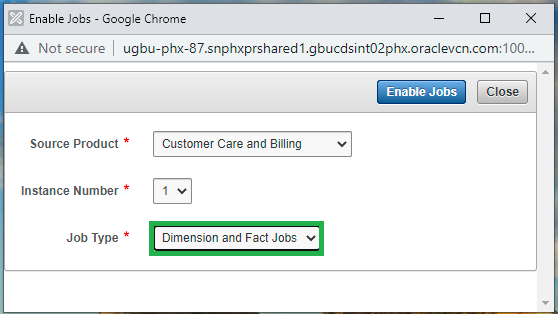
- Select the appropriate Source Product and Instance Number.
- In the Job Type field, select Dimension and Facts Jobs, and then click Enable Jobs.
Now all fact ETL jobs are enabled. Scheduling the B1_RUN_ALL job will trigger these fact ETL jobs automation to load their respective target fact table. Navigate to the Oracle Data Integrator→ Operator tab and monitor the execution status. You can also monitor the execution of jobs in B1_JOBS_VW in the metadata schema. Wait for all facts to load completely.
Materialized Views (MV) Load
Follow the same steps in Facts Load above to enable materialized views for the configured source product, and make sure that all required materialized views are created. Except for Oracle Utilities Network Management System, all other source products contain materialized views.
Configure the Security
After all star schemas are loaded successfully and their respective materialized views are created (that is, materialized views exist for the source product), the next step is for security scripts to be executed for the given source product instance. For configuring the security, perform the following steps in Linux environment:
- Add Java 8 to path variable, as shown in example below:
export PATH=/scratch/softwares/jdk1.8.0_121/bin:$PATH- Set classpath pointing to OraDBI.jar and all dependency jars.
export CLASSPATH=<Path to BI270>/BI270/DWADM/Jarfiles/*- Run OraGenSec as shown below:
java com.oracle.ouaf.oem.install.OraGenSec -l oragensec.log -d DWADM,DWADM,jdbc:oracle:thin:@<DATABASE SERVER>:<DATABASE PORT>/<ORACLE SERVICE NAME> -a A -r DW_READ,DW_USER -u DWREAD,DWUSEREnable Change Data Synchronization
The change synchronization process needs to be enabled to bring incremental data from the source application after the initial source data is replicated completely. Follow the steps below to enable the change data synchronization process:
- Log in to the Oracle GoldenGate Command Line Interface (GGSCI) in the target.
- Execute the script below to get the status of the GoldenGate process. Make sure that the GoldenGate manager process is in a running state, and that GoldenGate replicat processes are in a stopped state.
- Start the GoldenGate replicat processes for the respective context. Ensure that GoldenGate replicat processes for the configured context are in a running state.
GGSCI> info all
GGSCI> start replicat <Context Code>*
GGSCI> info allIncremental Star Schema Load
Once GoldenGate change synchronization processes are enabled, incremental data from the source application will automatically start flowing into the replication schema for all configured tables. As ETL jobs and the scheduler are enabled, target star schema objects (for example, Dimensions, Facts, etc.) will also be loaded automatically. No manual activity is required to load the incremental data into the target schema. At this point, both ETL and Analytics need to be monitored at a regular interval of time for the smooth function of this product and can be open for the business users to access.