Using Custom User-Defined Dimensions (UDD)
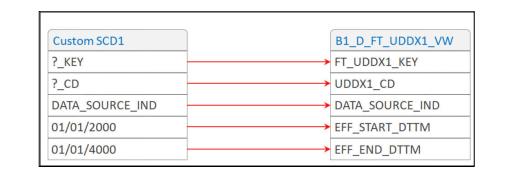
For a custom dimension lookup, customize the UDDX views first to refer to a custom dimension as illustrated below.
SCD1
If a custom dimension lookup is required, the UDDX views have to be customized to refer to a custom dimension.
Assuming that the custom dimension is of type 1, create the mapping as shown below to override the UDDX view. In the given example, the custom SCD1 dimension is used to link to the CF_FT fact’s UDD1_KEY column.

SCD2
Assuming that the custom dimension is of type 2, create the mapping as shown below to override the UDDX view. In the given example, the custom SCD2 dimension is used to link to CF_FT fact’s UDD1_KEY column .
.
 .
.The lookup functions as designed and the out-of-the-box fact refers to a custom dimension. Then, create an Oracle Data Integrator package with the ODI CM mapping. The CM mapping updates the user-defined field columns based on the input parameters and natural key of the UDX table.
Note: The dimensions consist of a minimum of ten UDF columns. These columns are used to store additional information from the source systems. For example: UDF1_CD, UDF2_CD, UDF1_DESCR, UDF2_DESCR, etc.
After writing the CM package, configure it and enable the jobs (Refer to the UDX Processing section in Chapter 4: Extending Star Schema). If data has already been loaded, user-defined fields are populated for incremental changes. To load the data for all rows, reset the fact using the reset scenario.