Specifying the Visible Nodes in the Configuration Manager
Let’s say you want to monitor a specific node in the Oracle Utilities Live Energy Connect (LEC) Server configuration. By default, the node you are interested in may not show up in the Node Table or Node Monitor because the Configuration Manager limits the number of nodes displayed to keep the screen from getting cluttered. The Configuration Manager also limits the number of connections displayed in the Connections panel to keep the graph of connections that it displays readable. You can change what nodes and connections are visible with the Filter Nodes tool.
To create a new filter rule with the Filter Nodes tool:
- Navigate to the Filter menu and select Filter Nodes.
- Add a rule and change the drop-down options on the Container row to name and contains, respectively.
- In the Condition text box type the whole node label of the node that you’re interested in, or just a part of it and select Append. Now, nodes that contain that string in the node label is visible in the Node Table and Node Monitor.
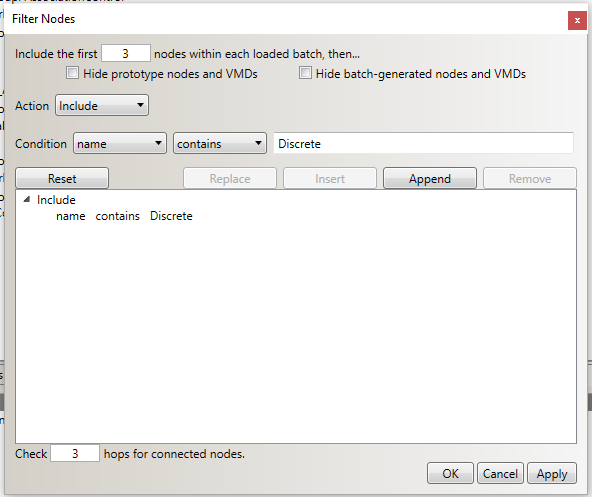
The following image shows Filter Nodes tool containing a filter rule that makes nodes whose node labels contain the string Discrete visible in the Node Table and Node Monitor. Notice the number of hops (connections) from a selected node in the Connections panel is set to 3, which is the default.
Note: VMD names and node labels are case-sensitive and so any strings specified in the Filter Nodes Tool are also case-sensitive.
To Adjust the connection hops displayed in the Connections panel:
- Navigate to the Filter menu and adjust the value of the Check hops for connected nodes field.
- Select Append. Now, the graphic in the Connections panel shows nodes within the desired number of connections from the selected node.