Configure Oracle Autonomous Recovery Service in OCI
Introduction
This tutorial shows you the step by step process to configure Oracle Database Autonomous Recovery Service in OCI. It also shows how to set up real-time data protection, monitor automated backups, and perform restore/recovery of the database using existing backups with different recovery points.
Recovery Service is a fully-managed service based on the on-premises Oracle Zero Data Loss Recovery Appliance technology which offers modern cyber-security protection for Oracle Databases of any size.
The Recovery Service provides the following unique advantages over Object Storage backups while keeping costs the same:
- Achieve faster backups with less database overhead
- Be confident in reliable recovery
- Get deeper insights into your database protection
- Zero data loss for all database backups
Objectives
- Set up prerequisites for using Oracle Database Zero Data Loss Autonomous Recovery Service
- Configure Recovery Service as a backup destination for an Oracle database
- Monitor automated backups using Recovery Service
- Perform restore/recovery of the database
Prerequisites
- Ensure the Recovery Service is supported for your database release (Oracle Database 19.16 or later)
- Ensure your tenancy’s resource limits are adequate
Considerations
- Recovery Service is supported on the following platforms:
- OCI
- Oracle Database@Azure
- Oracle Database@Google Cloud
- Oracle Database@AWS (with the Recovery Appliance deployed in OCI)
Configuration Steps
Task 1: Create Users, Groups, and Assign Recovery Service Permissions
As a tenancy administrator, create the Oracle Cloud Infrastructure IAM users and groups to manage Recovery Service related tasks.
-
As a tenancy administrator, create a OCI IAM user which will be used to manage Recovery Service.
- Create a IAM group to add the user, to be used to manage Recovery Service.
- Add these policies for the group to provide permissions to manage Recovery Service:
     Allow group {group name} to manage recovery-service-policy in compartment {location}

     Allow Group {group name} to manage recovery-service-subnet in compartment {location}
- Add the user created in step 1 to the group.
Task 2: Configure Private Backup Subnet
The Recovery Service requires a private subnet in the same virtual cloud network (VCN) where your database resides. The private subnet must include security rules to control the backup network between your database and Recovery Service.
Recommendations for Recovery Service Subnets in the Database VCN
- The database VCN must have a single private subnet for backups to Recovery Service.
- The private subnet must be an IPv4-only subnet for Recovery Service in your database VCN. Do not select an IPv6-enabled subnet as Recovery Service does not support using an IPv6-enabled subnet.
- The recommended subnet size is /24 which can support 256 IP addresses.
- To implement network isolation, we recommend USE NSG for the database VNIC with egress rules to allow ports 2484 and 8005.
-
Add a private subnet in the database VCN to be used for Recovery Service.
-
Add the ingress rules to allow destination ports 8005 and 2484.
-
Add an NSG with egress rules to allow ports 2484 and 8005.
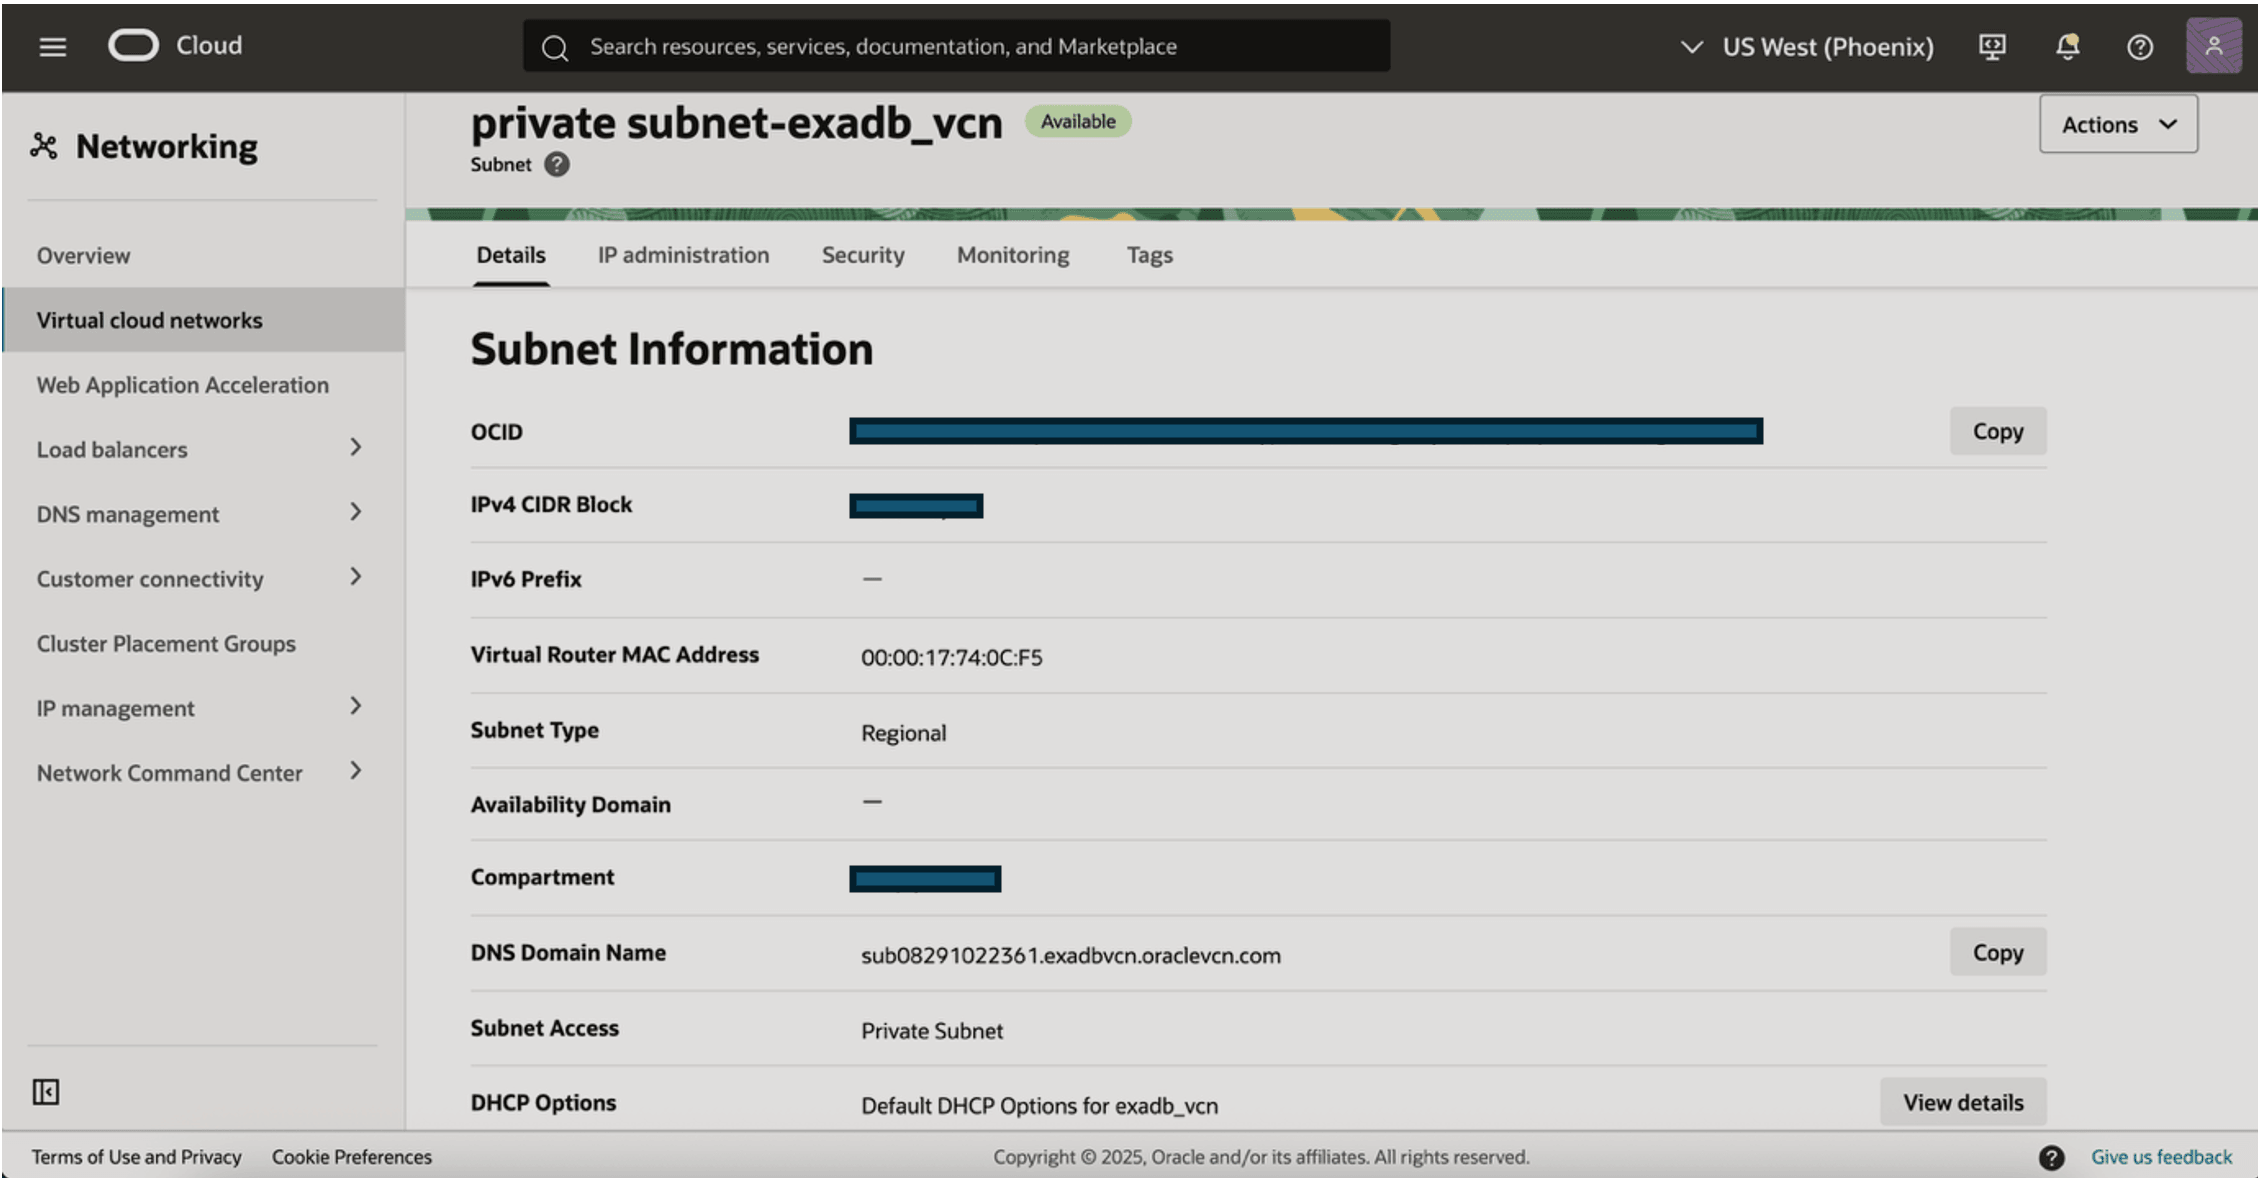
Task 3: Register Recovery Service Subnet
After creating a private subnet in the database VCN, you need to register that subnet as the “Recovery Service Subnet” which will be used for the transfer of backups from the database subnet to the Recovery Service appliance.
- Multiple protected databases can use the same Recovery Service subnet.
- Multiple subnets can be assigned to the recovery subnet that is used by more than one protected database.
-
By adding multiple subnets to Recovery Service, you ensure that the required number of IP addresses are available to support the Recovery Service private endpoints.
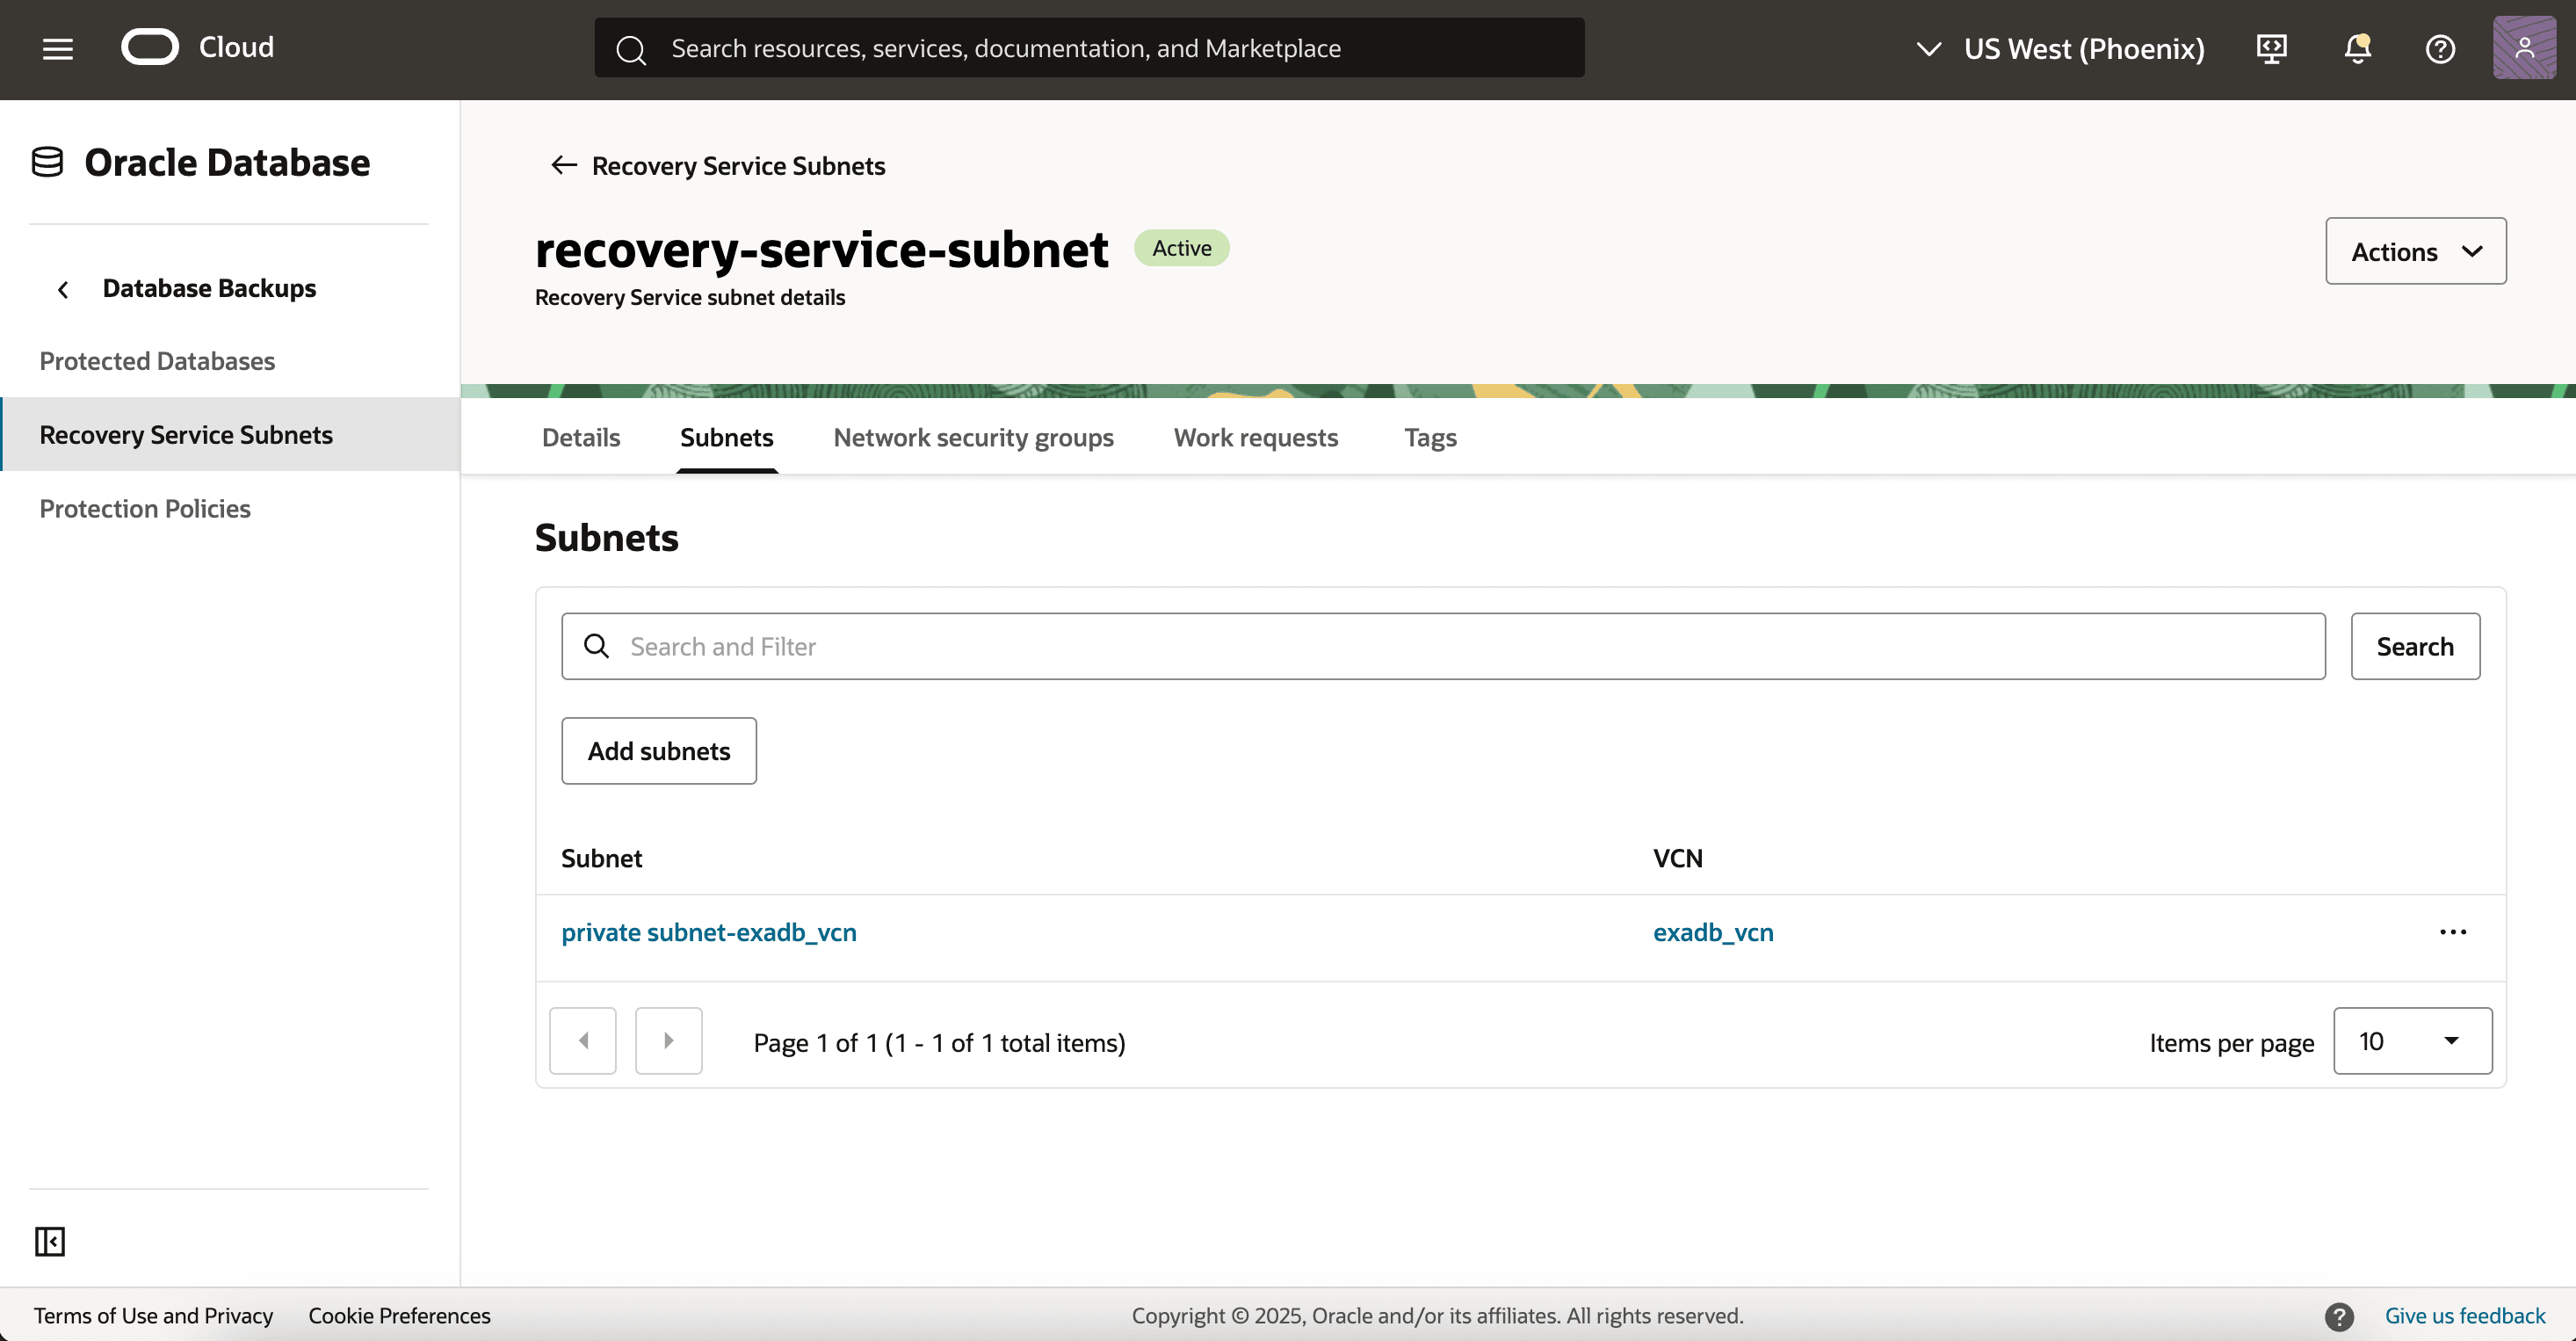
Task 4: Review Protection Policy
- Recovery Service provides predefined protection policies to suit common use cases for backup retention.
- Below are pre-defined Oracle protection policies with different retention windows:
- Platinum: 95 days
- Gold: 65 days
- Silver: 35 days
- Bronze: 14 days
-
You can also create custom protection policies to suit your custom data retention requirements.
The following image shows several active policies in place, including a custom policy for a 40-day retention period.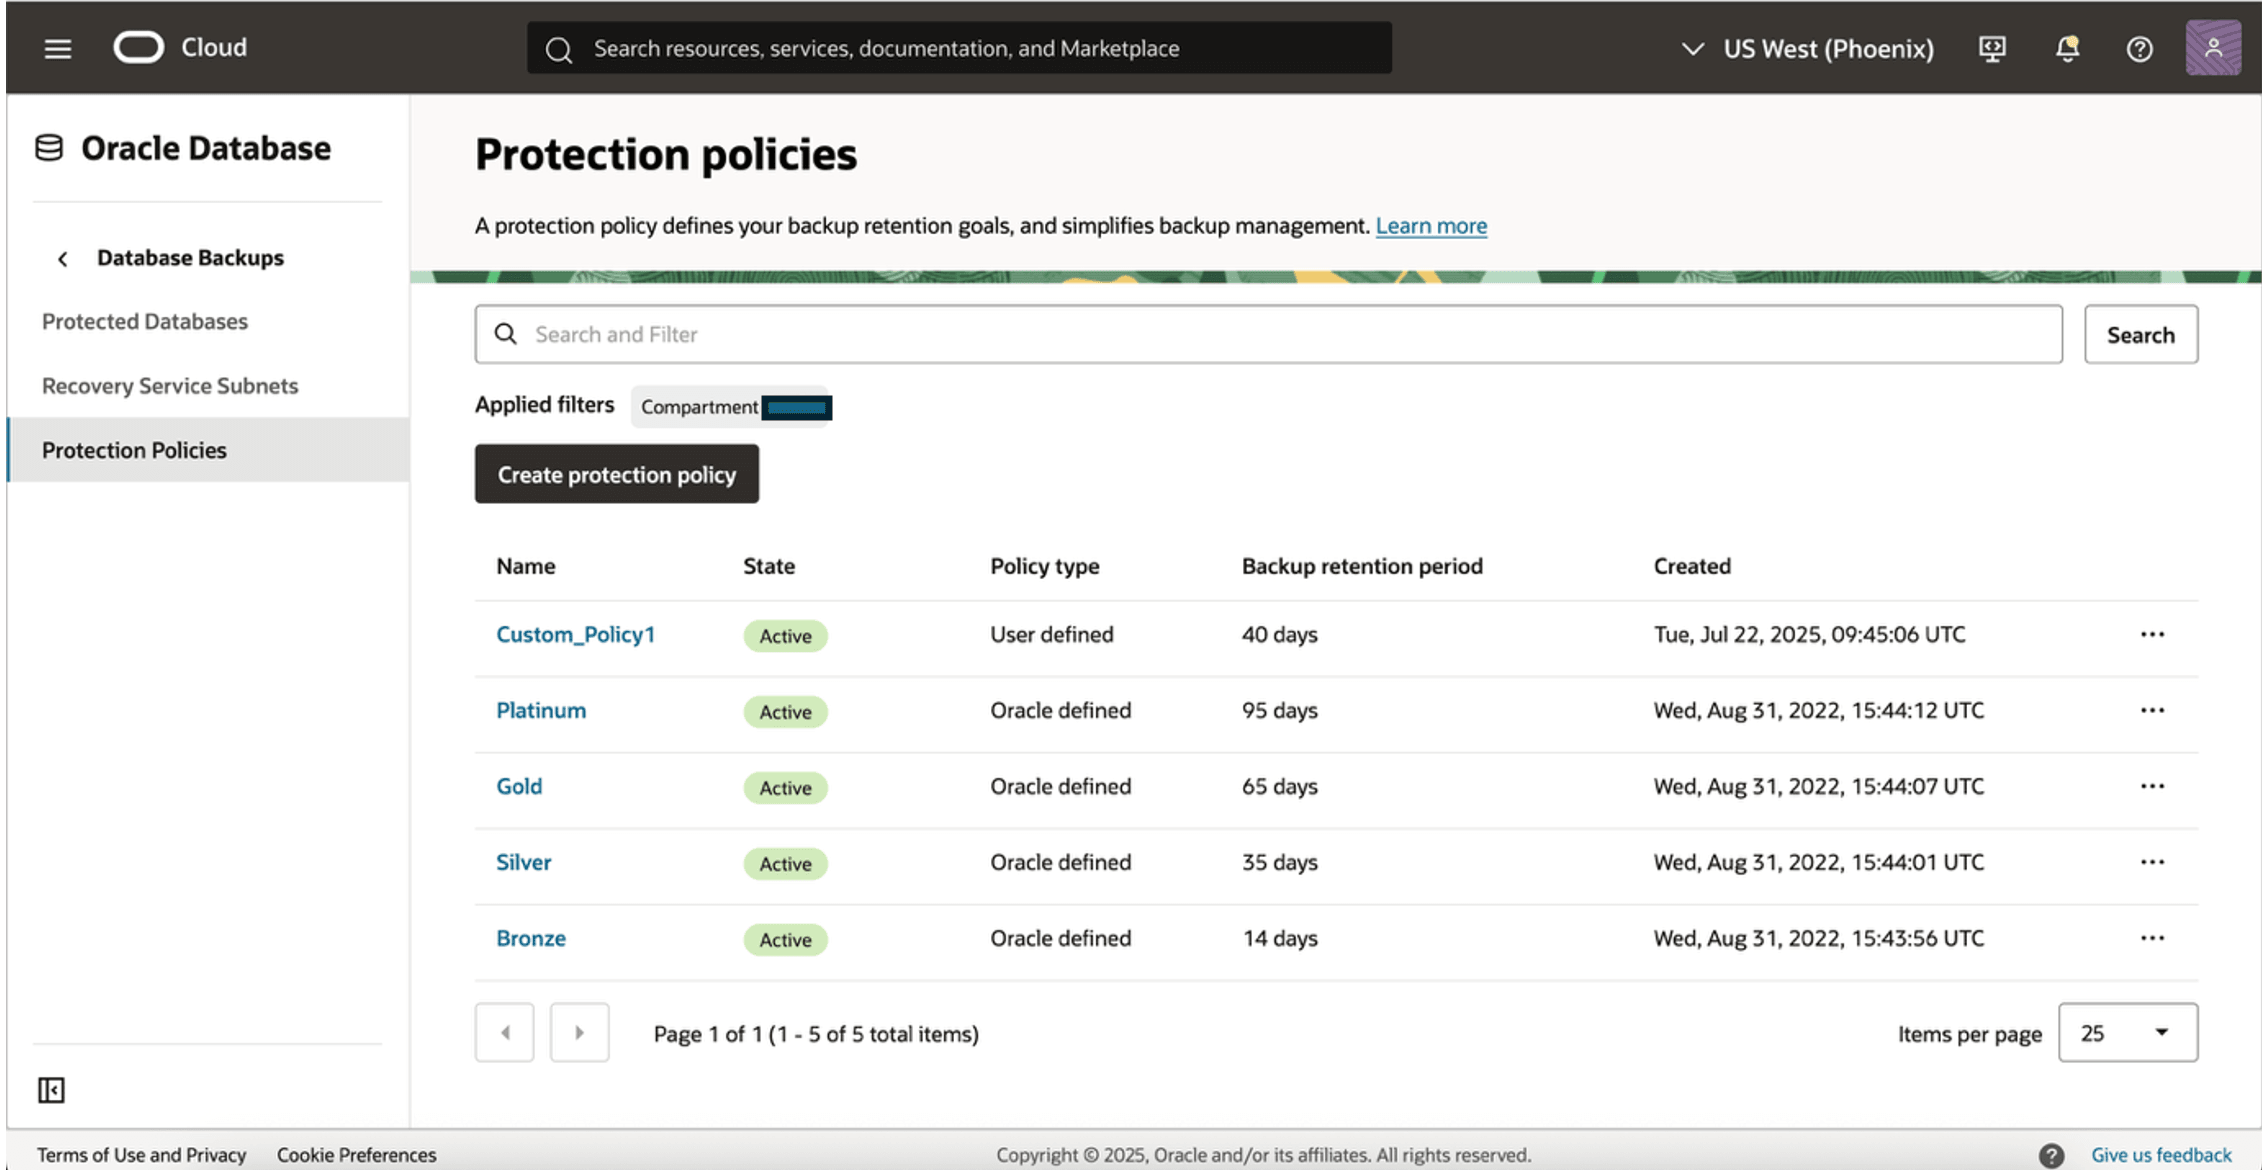
Task 5: Enable Automatic Backups to Recovery Service
You can enable automatic database backups while provisioning a new database, and select the backup destination as Autonomous Recovery Service.
You can also enable these parameters while enabling automatic backups:
- Protection Policy: For database backup retention window.
- Retention Lock: If the retention lock is Enabled, then Recovery Service prohibits the modification or deletion of backups until the retention period expires.
-
Real-Time Data Protection: Real-time data protection enhances database protection, minimizes data loss, and supports a recovery point up to the last sub-second.
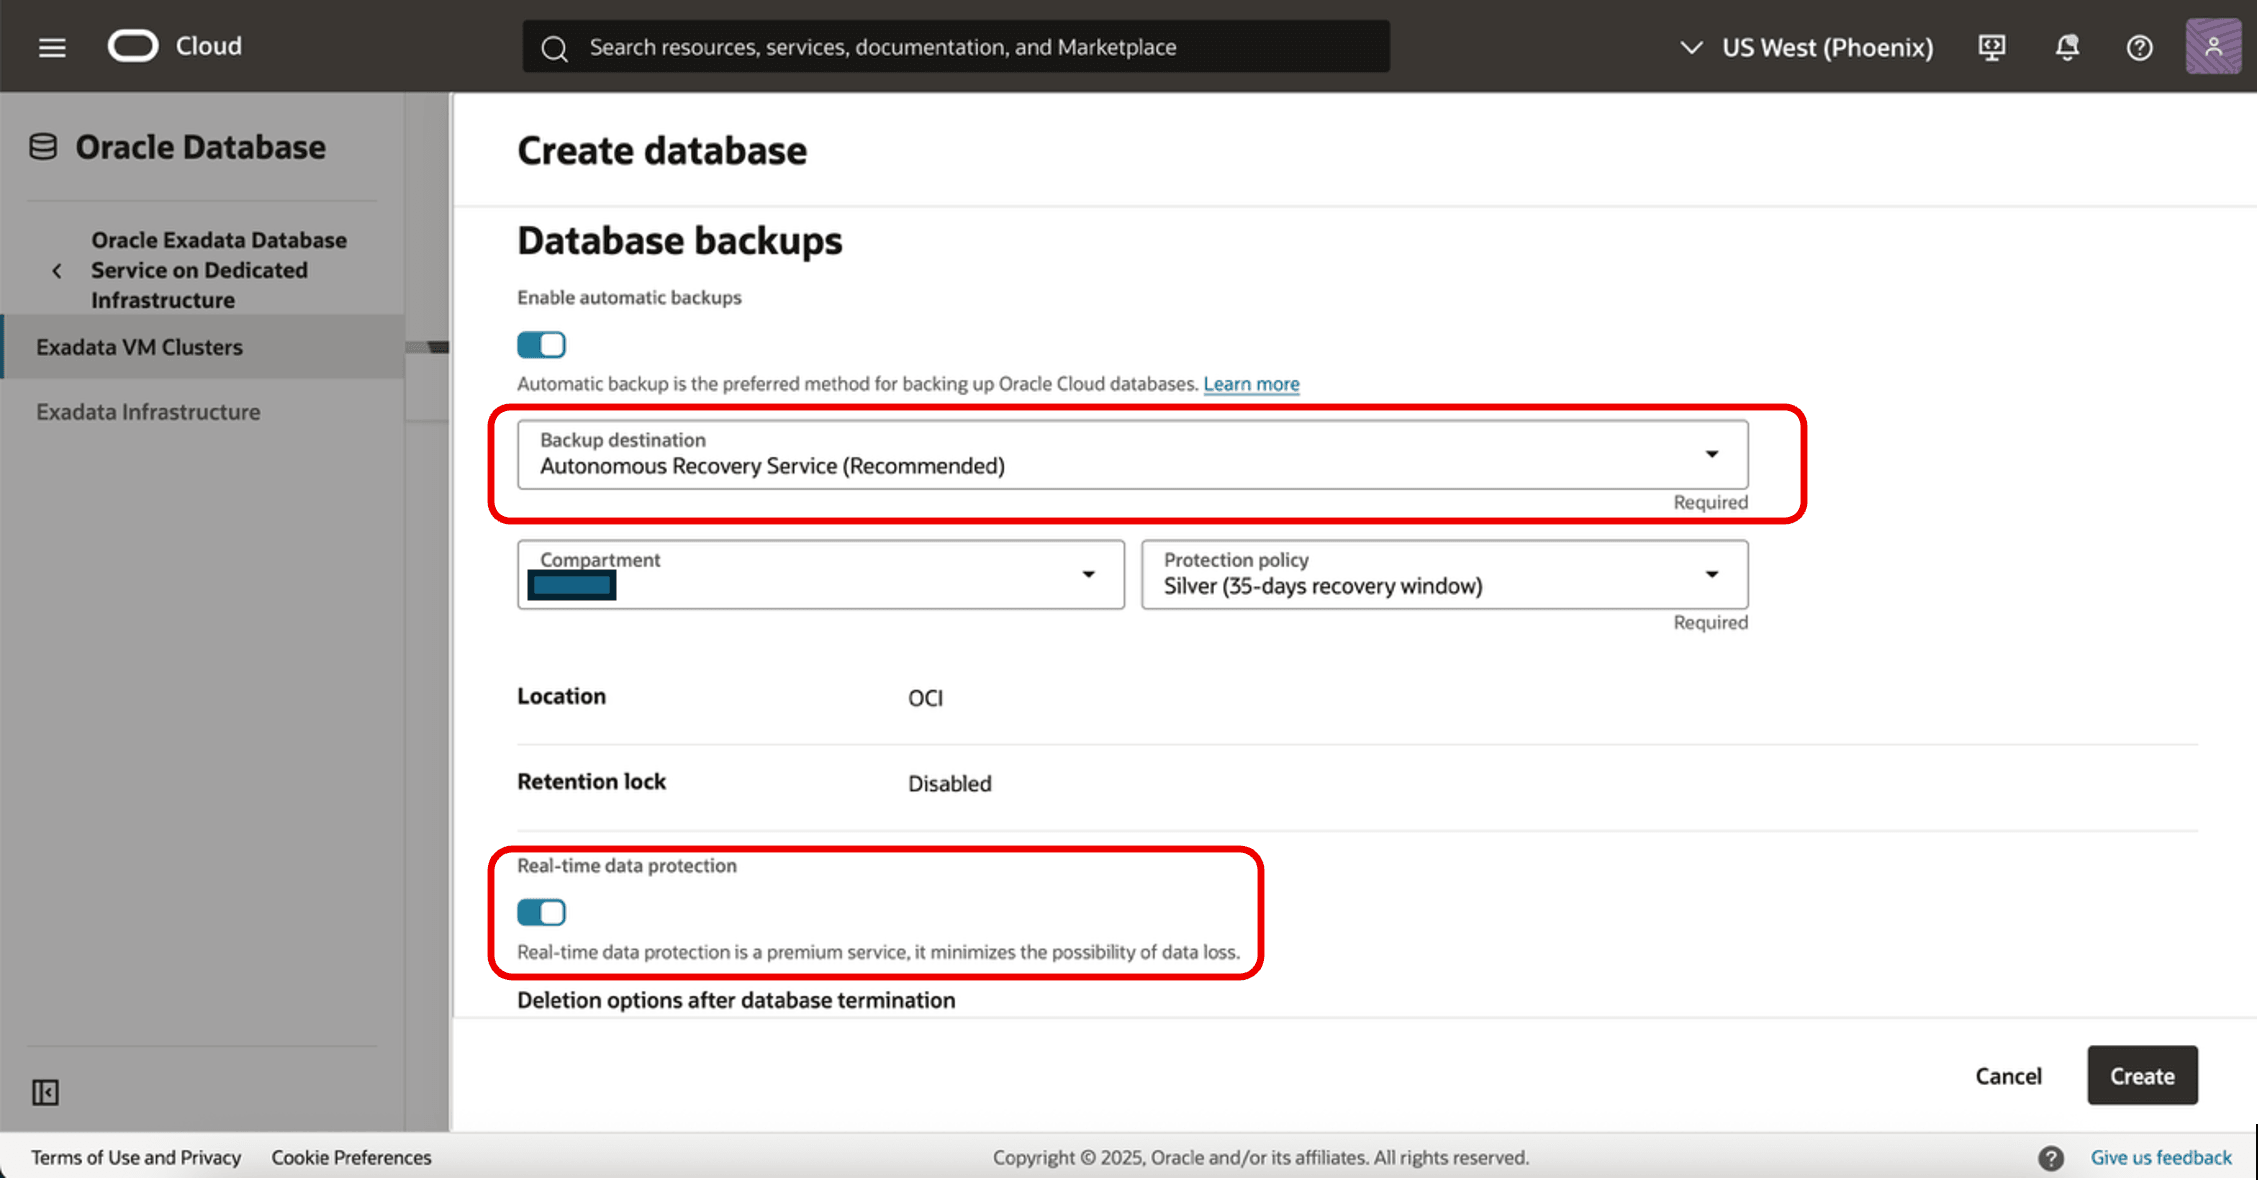
Task 6: Monitor Automatic Backups
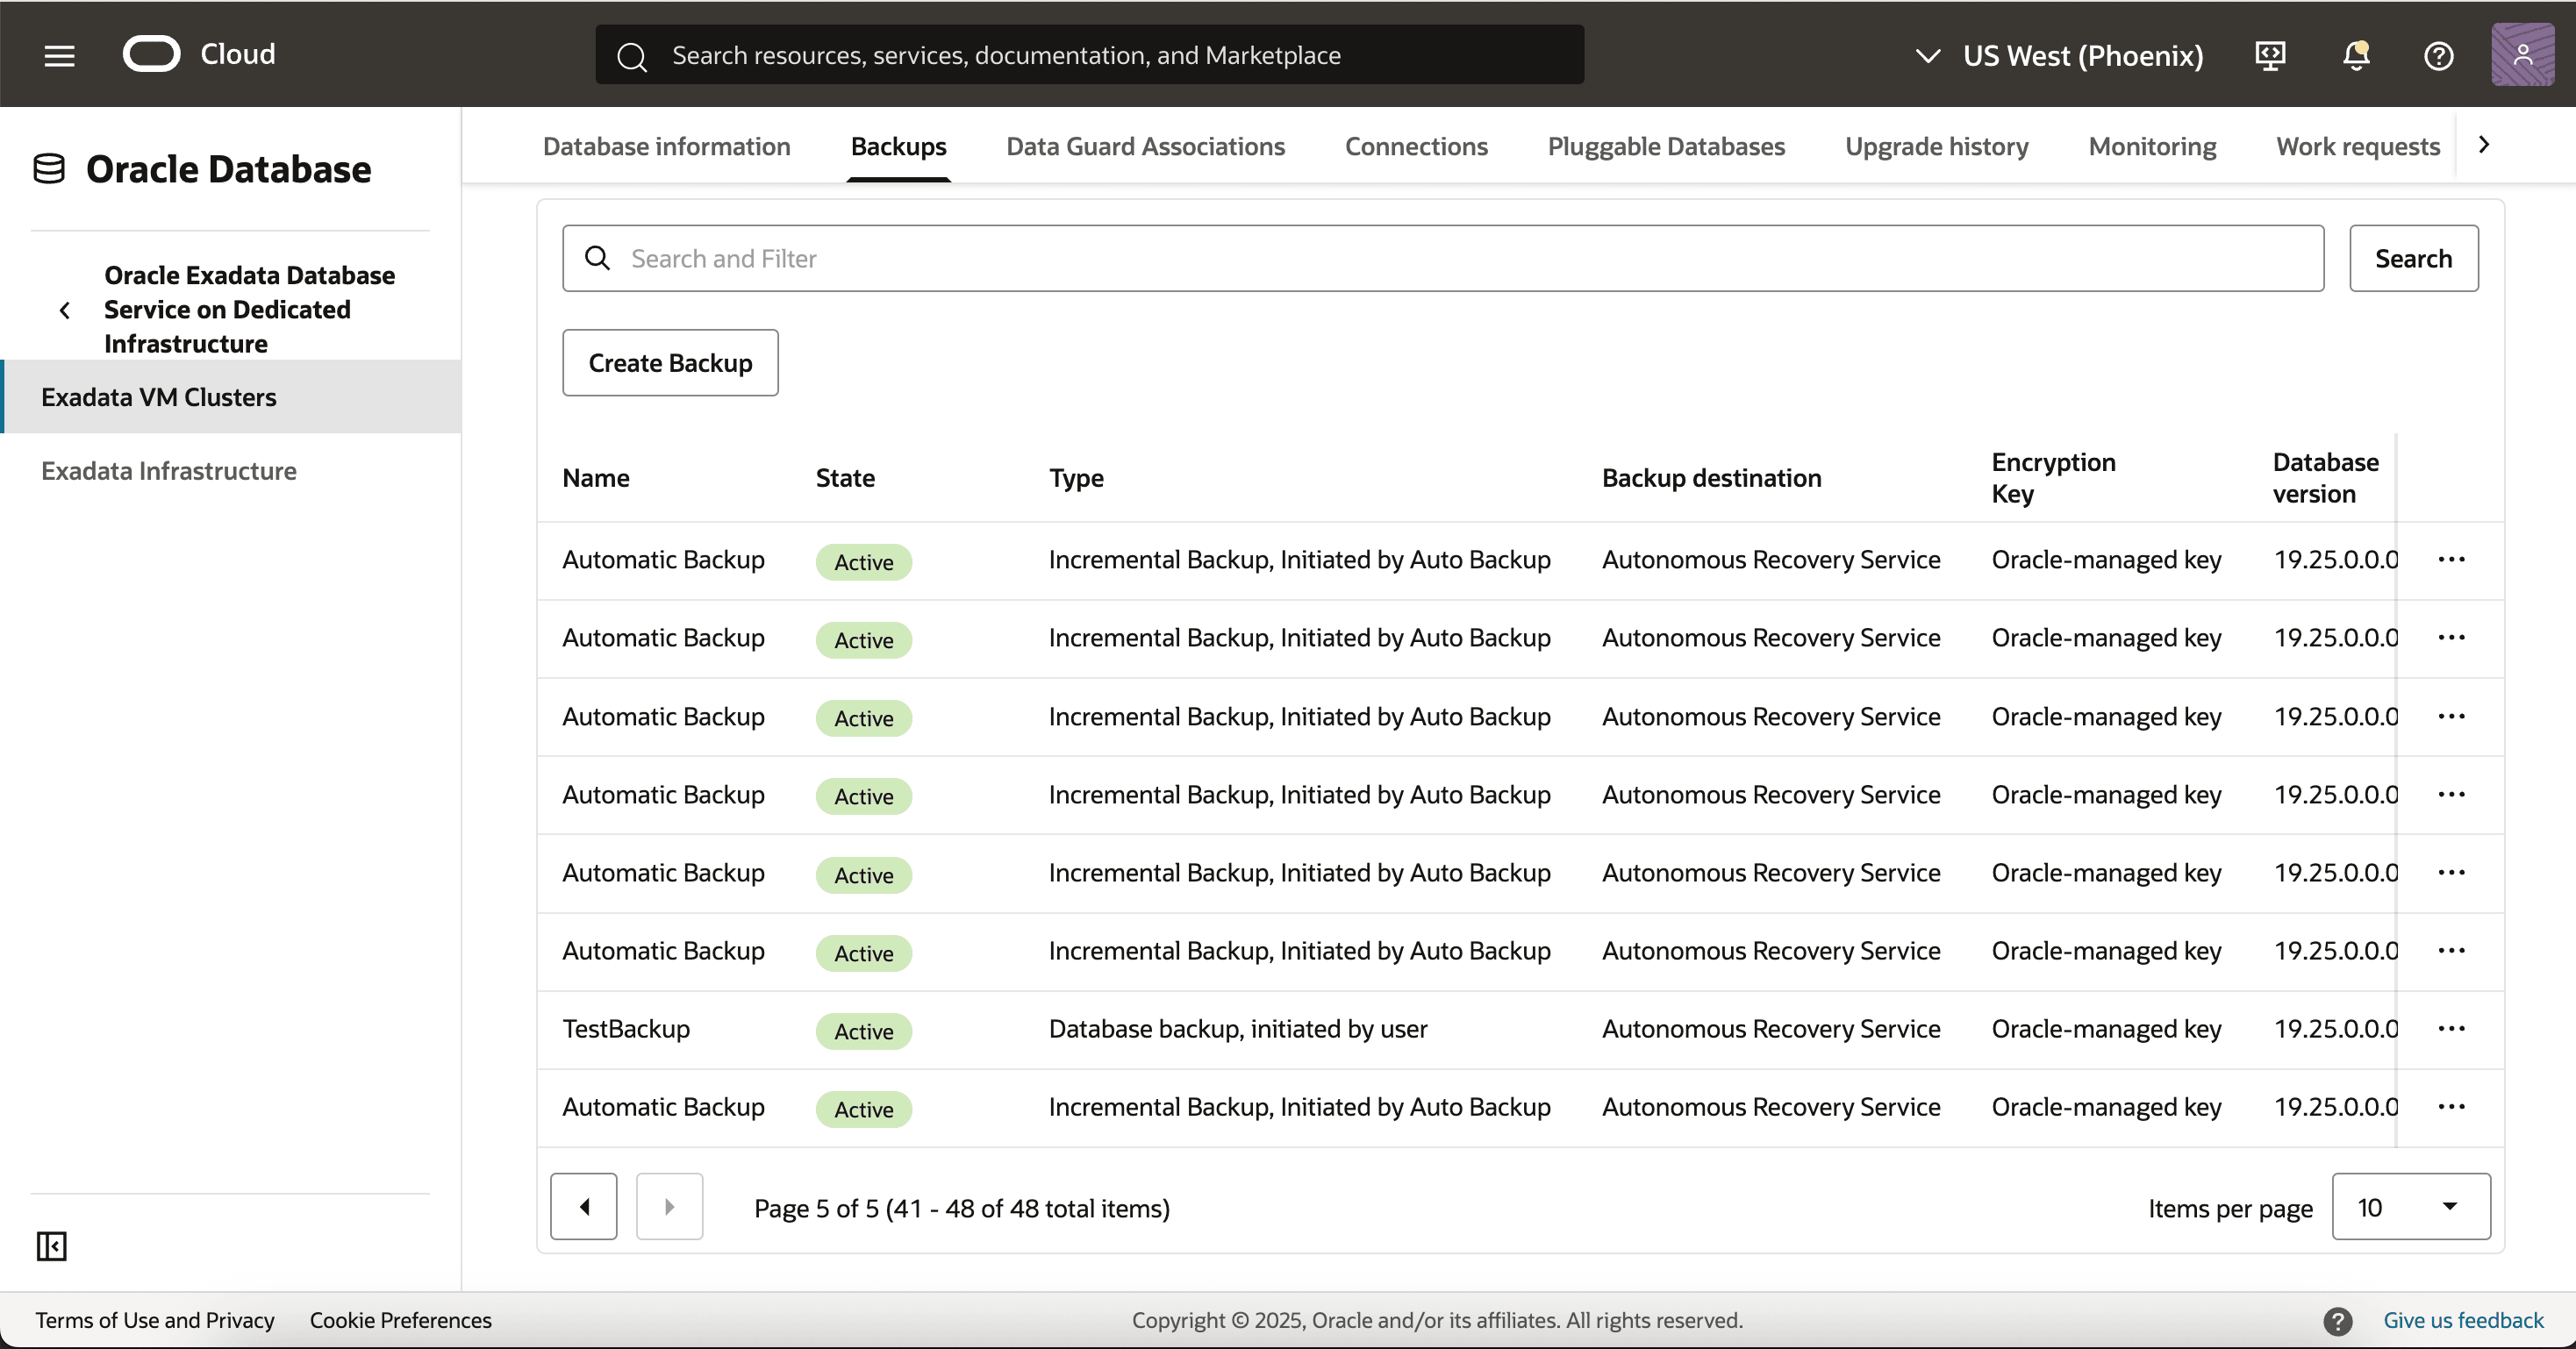
You can view protected database backups from the OCI console as shown below:
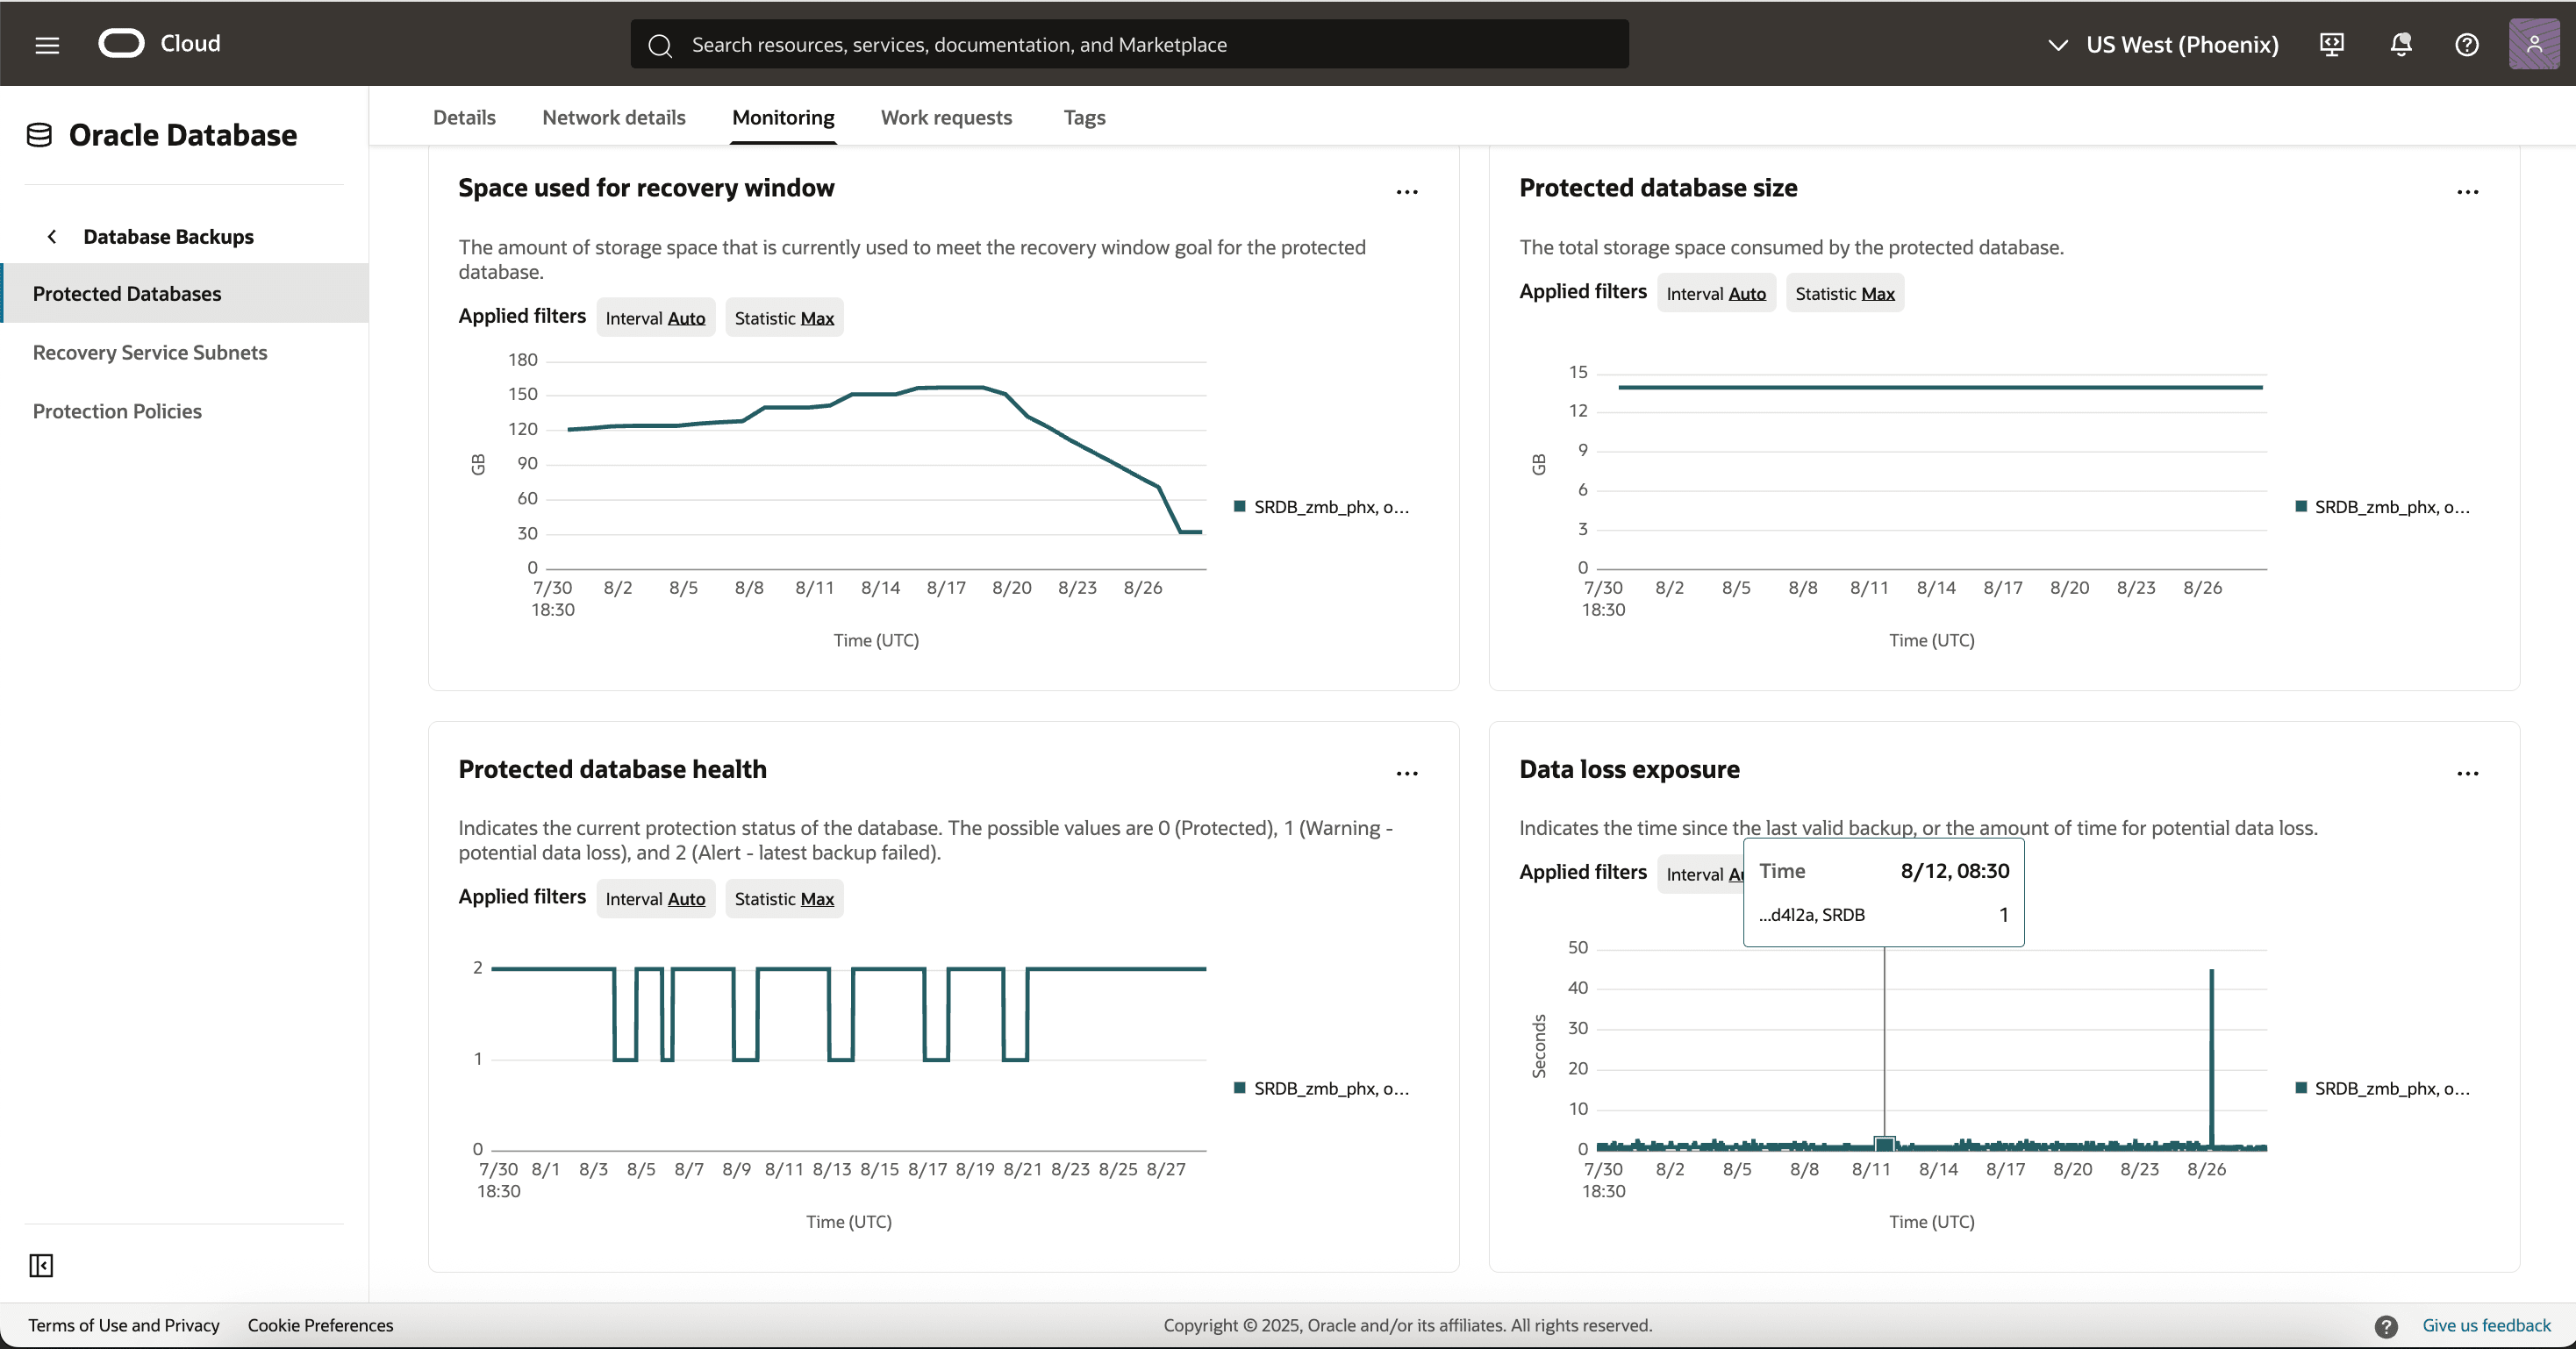
You can also monitor database backup health using the console:
Task 7: Perform Restore or Recovery of the Database
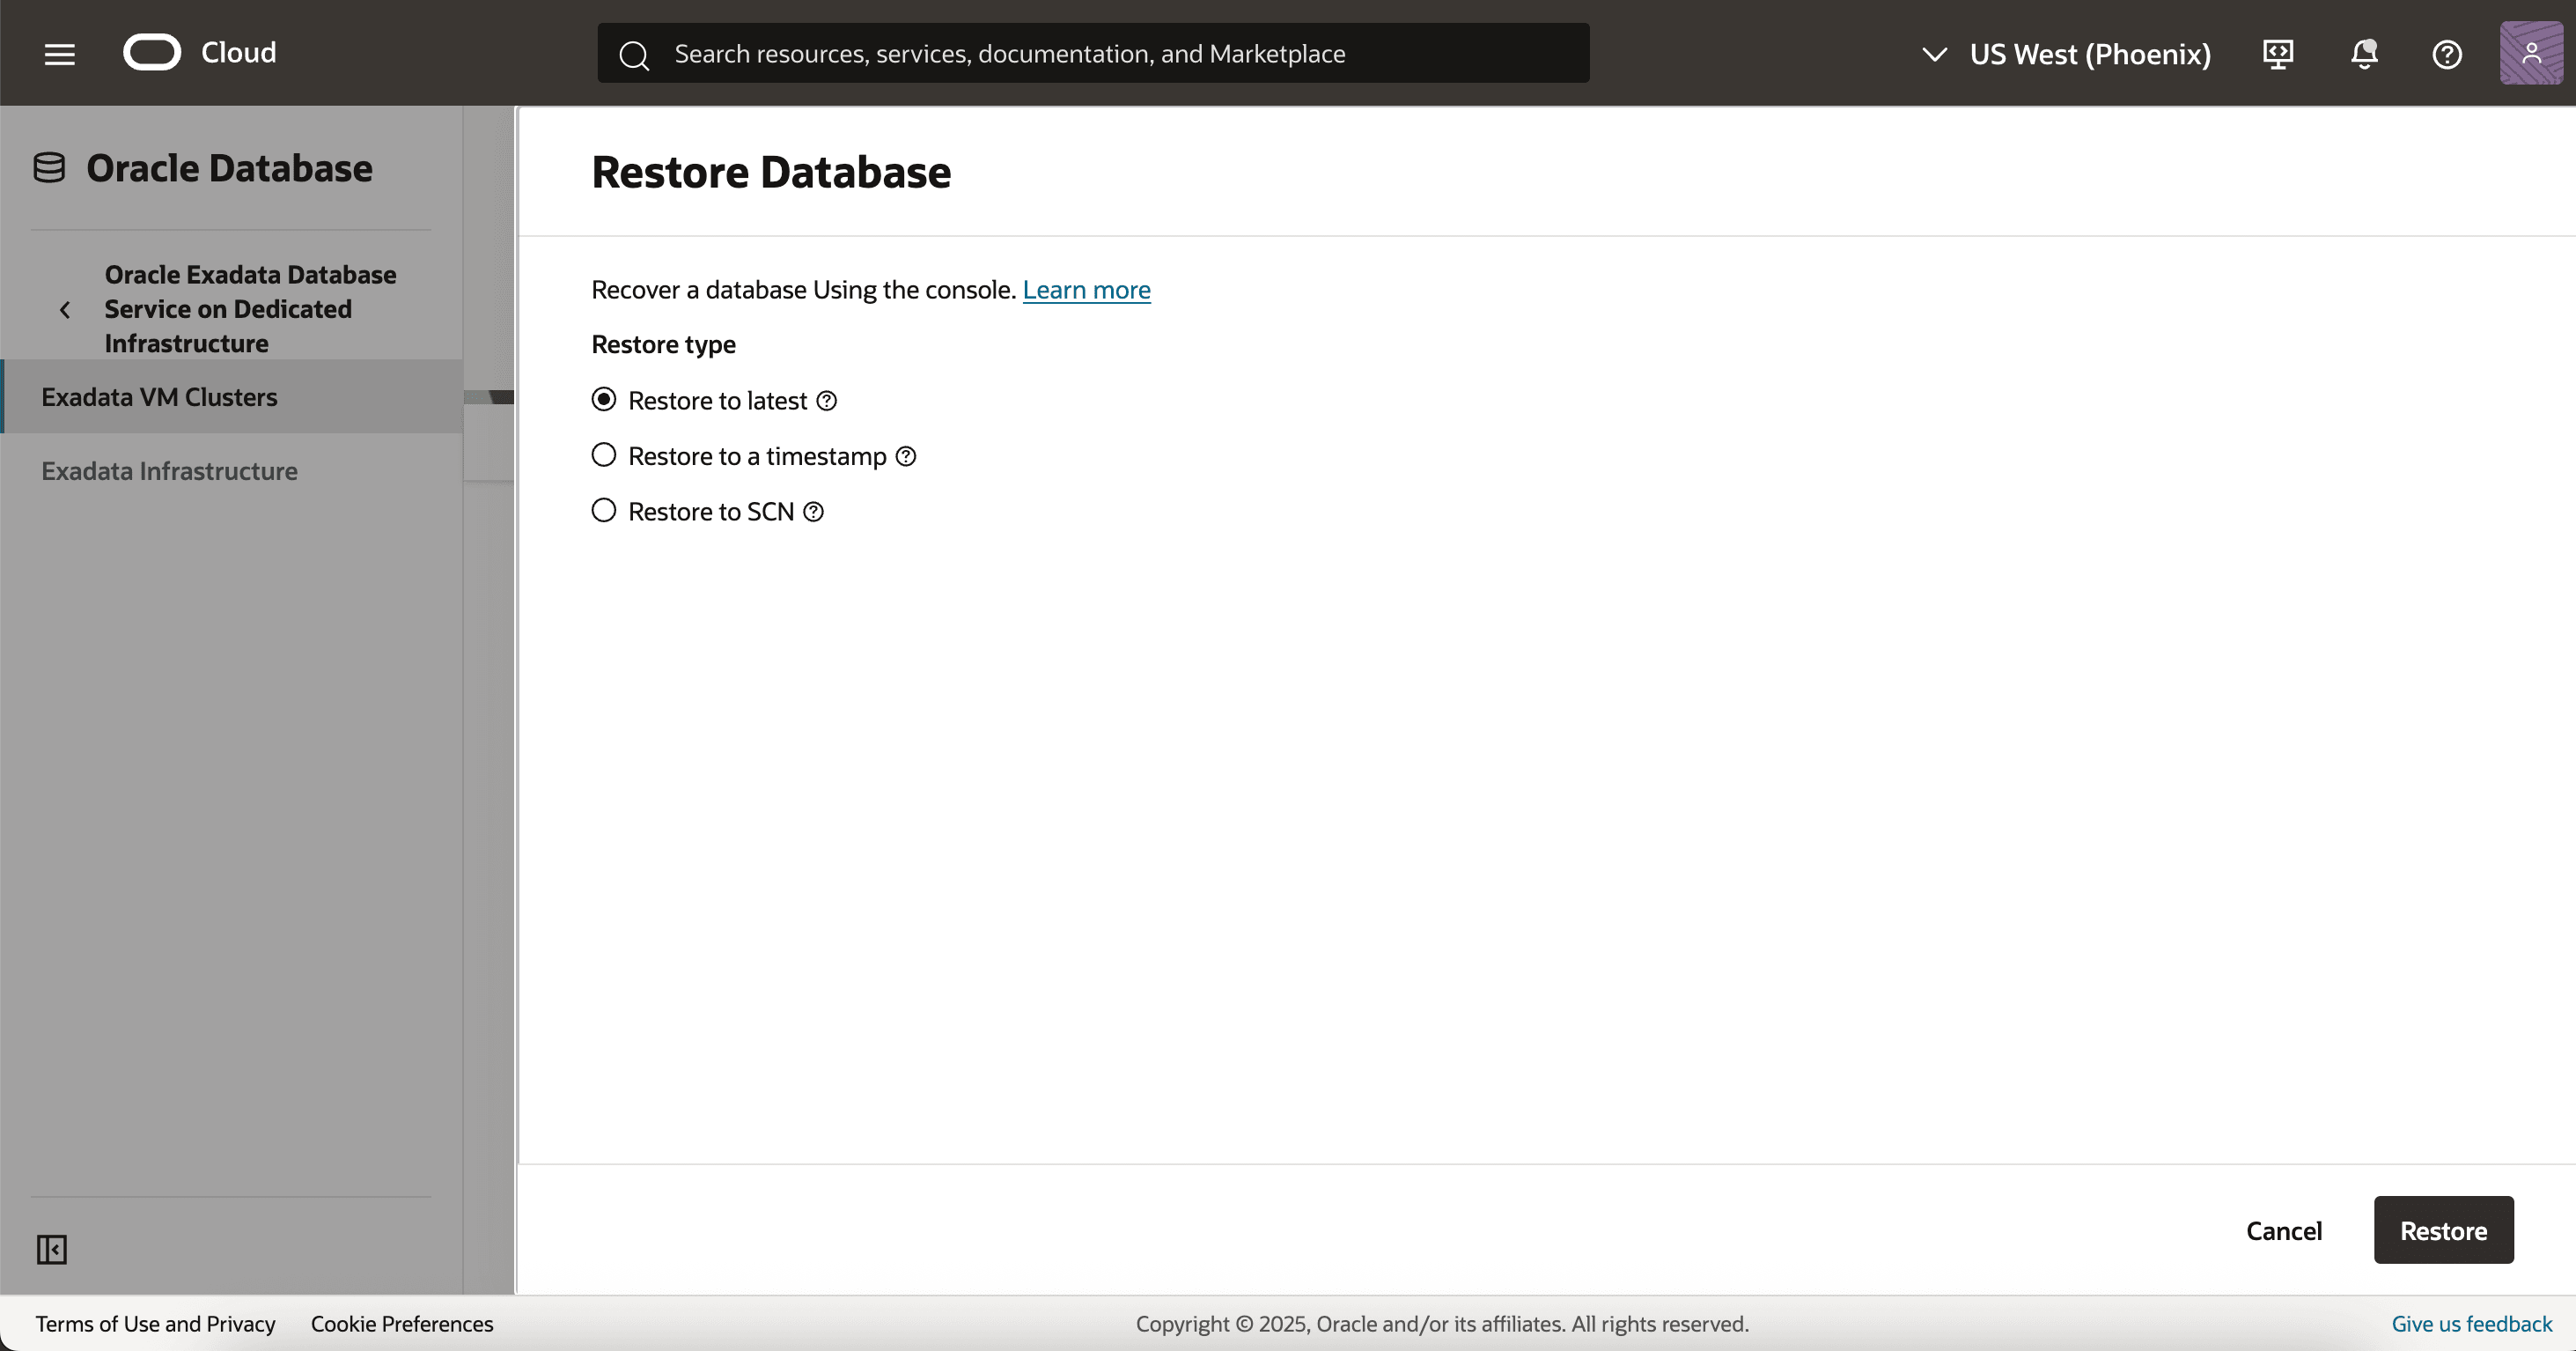
The database can be recovered by using automatic backups taken by Recovery Service. It offers three restore points while recovering the database:
- Restore to latest
- Restores the database to the last known good state with the least possible data loss.
- Restore to a timestamp
- Restores the database to the timestamp specified.
- Restore to SCN
- Restores the database using the System Change Number (SCN) specified.
Acknowledgments
- Author - Sanjay Rahane, Principal Cloud Architect, North America Cloud Infrastructure
More Learning Resources
Explore other labs on docs.oracle.com/learn or access more free learning content on the Oracle Learning YouTube channel. Additionally, visit education.oracle.com/learning-explorer to become an Oracle Learning Explorer.
For product documentation, visit Oracle Help Center.
Configure Oracle Autonomous Recovery Service in OCI
G42588-01