Use OCI Session Token-Based Authentication from GitHub Action to Run Terraform
Introduction
In this tutorial, we will demonstrate how to configure a GitHub Actions workflow to authenticate with Oracle Cloud Infrastructure (OCI) using a user-generated session token instead of a long-lived API key. To enhance security and streamline automation, this GitHub Action workflow replaces traditional OCI user API keys with a temporary session token to authenticate to Oracle Cloud Infrastructure (OCI) when running Terraform.
OCI session tokens are short-lived, temporary credentials that can be generated through the Oracle Cloud Infrastructure Command Line Interface (OCI CLI) and used in place of an API key. This eliminates the need to store long-lived credentials like API keys in your CI/CD pipeline.
Session tokens are temporary and expire automatically, reducing the risk of long-term credential exposure. Tokens automatically expire and cannot be reused, significantly reducing the risk of credential leaks.
This is an alternative when you do not want to store user API keys in GitHub.
Note: The token expires after an amount of time defined in
exp_time. If you need to run the action again you must refresh the token. For more information about token based authentication, see Token-based Authentication for the CLI.
Objectives
-
Configure a GitHub Actions workflow to authenticate to OCI with session tokens.
-
Generate a session token using OCI CLI.
-
Use the native OCI terraform backend to store state files in OCI Object Storage.
Prerequisites
-
An OCI account with the necessary permissions to create and manage resources like VCN, OCI Object Storage and so on.
-
A GitHub account with a repository where you can create a GitHub Actions workflow. You will need to setup an access token in GitHub.
-
OCI CLI installed and configured.
-
(Optional) A Linux/Unix environment from where to run some shell/bash script.
-
(Optional) GitHub CLI installed and configured.
-
(Optional) Python installed.
-
Familiar with GitHub for example, how to create a repository, how to run Actions and so on.
Task 1: (Optional) Install and Configure GitHub CLI
This is not in the scope of this tutorial. You may skip this task but later you will have to update some GitHub secrets and variables manually.
-
Install the GitHub CLI. For more information, see Take GitHub to the command line.
-
Run the following command and follow the prompts to authenticate your GitHub account.
gh auth login -
Run the following command to check if the authentication works.
gh auth status
Task 2: Create the GitHub Repository
-
Download the zip file from here: github_auth_session_token.zip
-
Create a repository in your GitHub account.
-
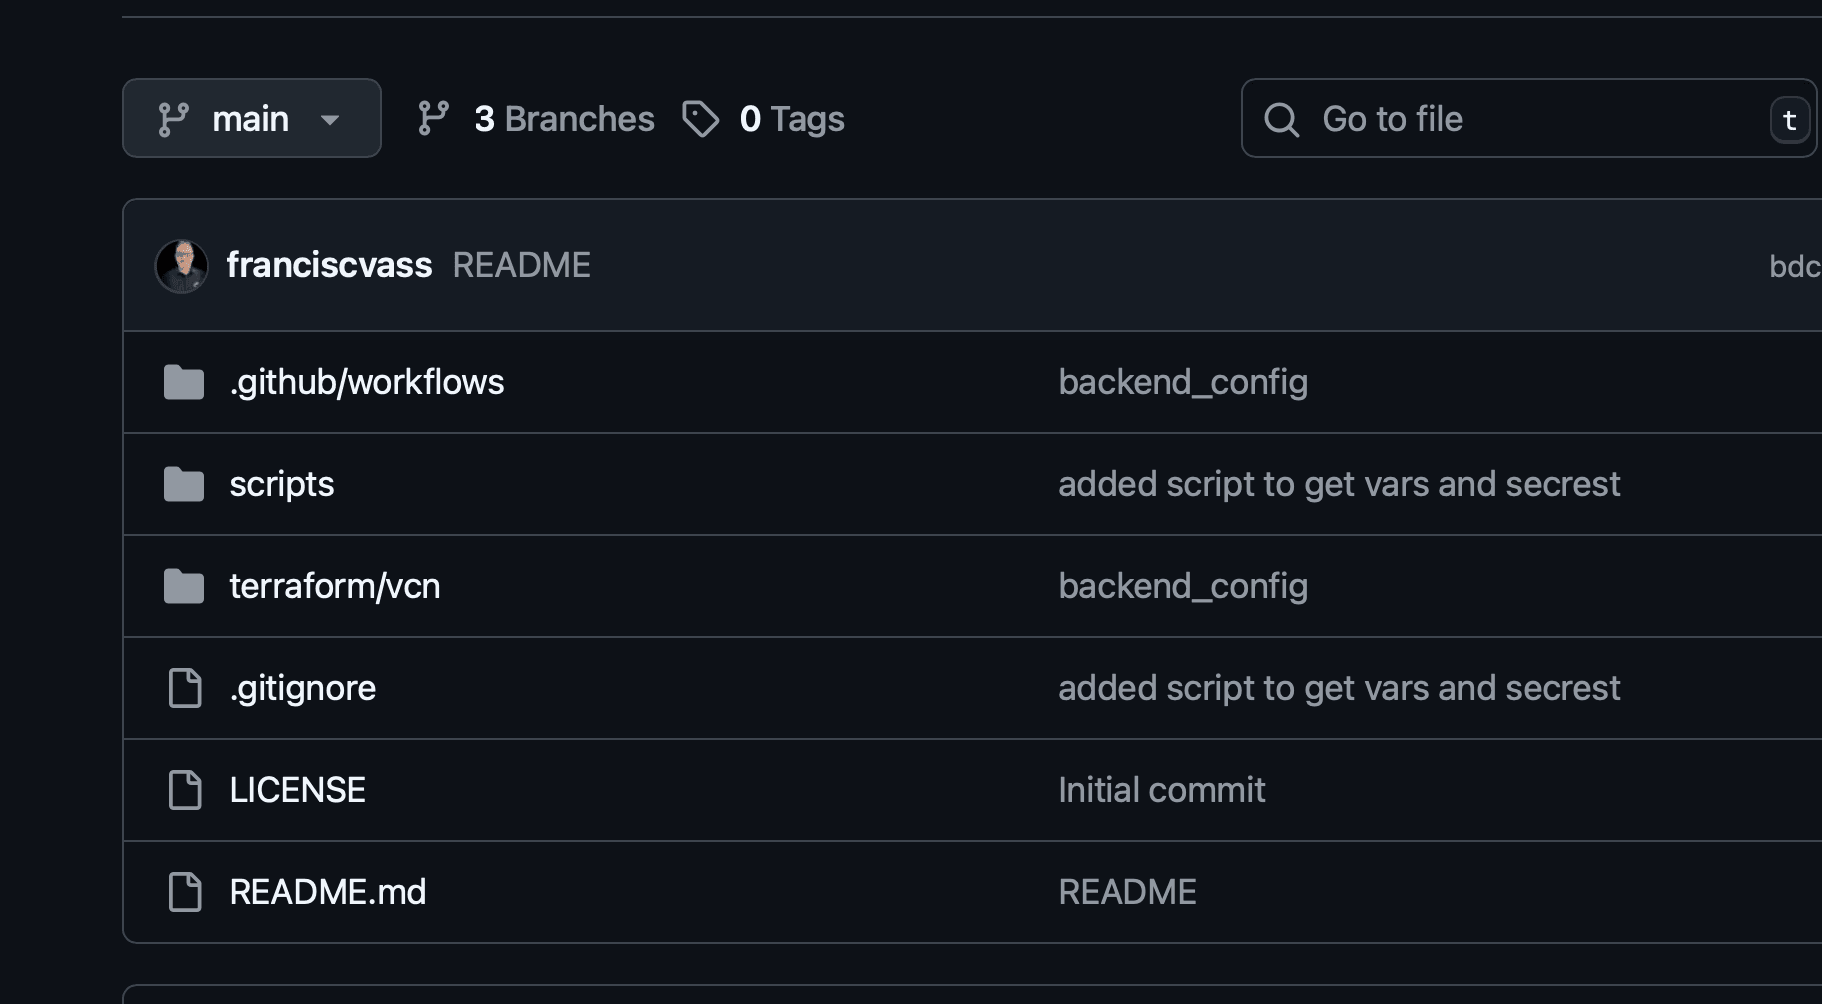
Upload the files within the zip file to your repository. You should have a repository that looks like:

-
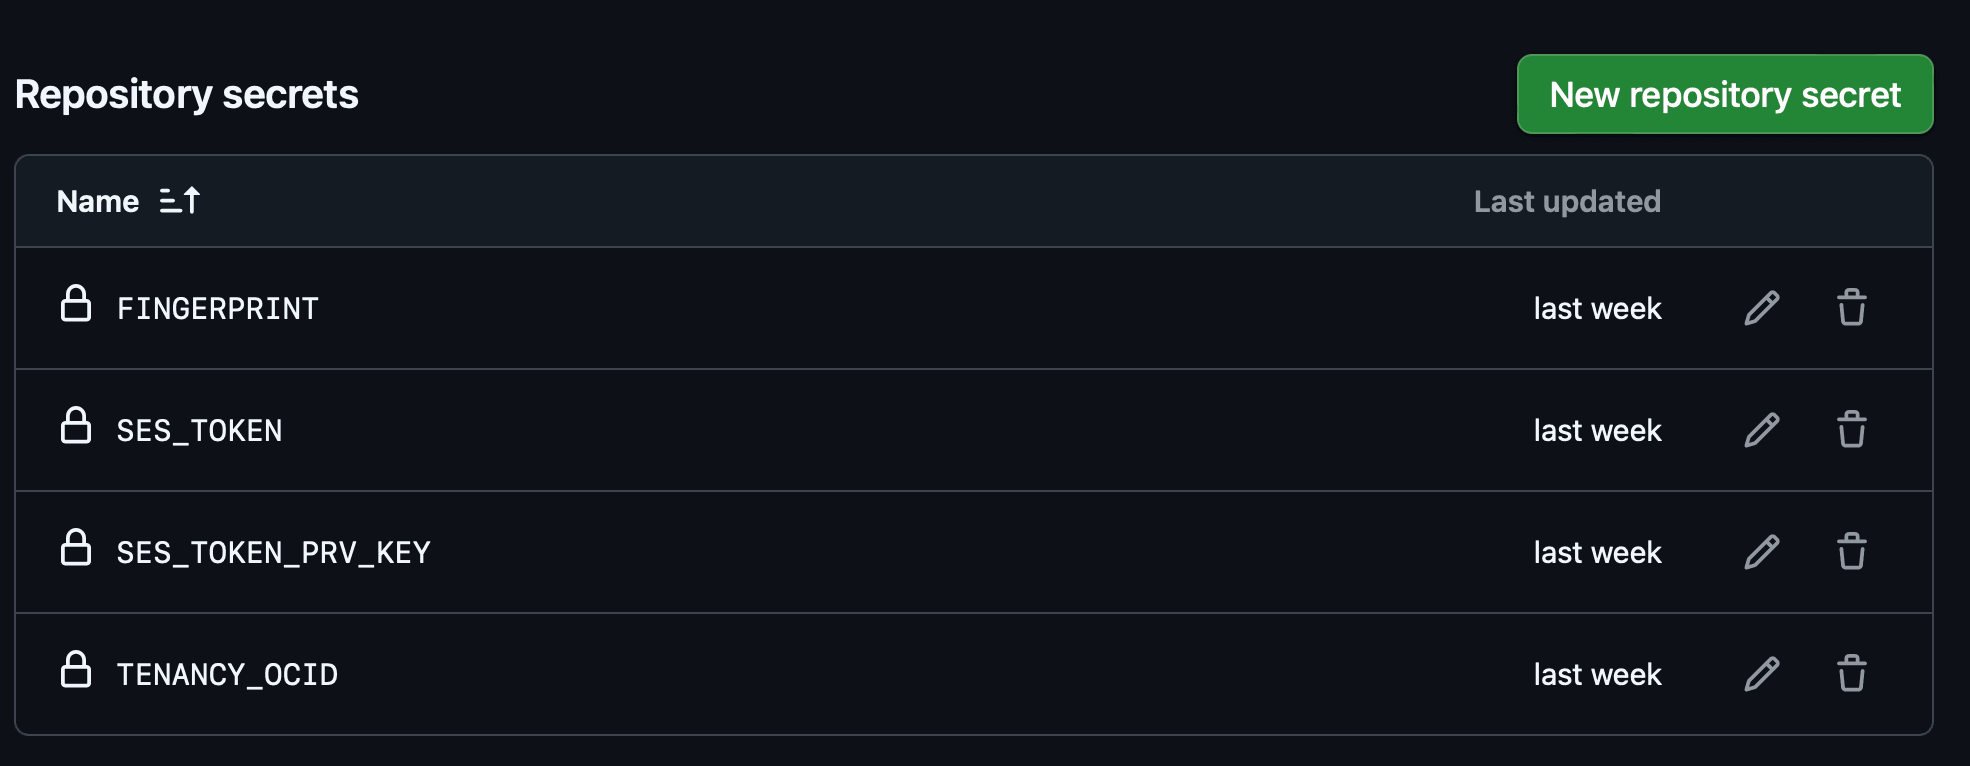
Create the Secrets and Variables in your GitHub repository.
Navigate to Settings, Secrets and variables, Actions and click Create the Secrets. For now you just create them, no need to add values to them. We will add them later.

-
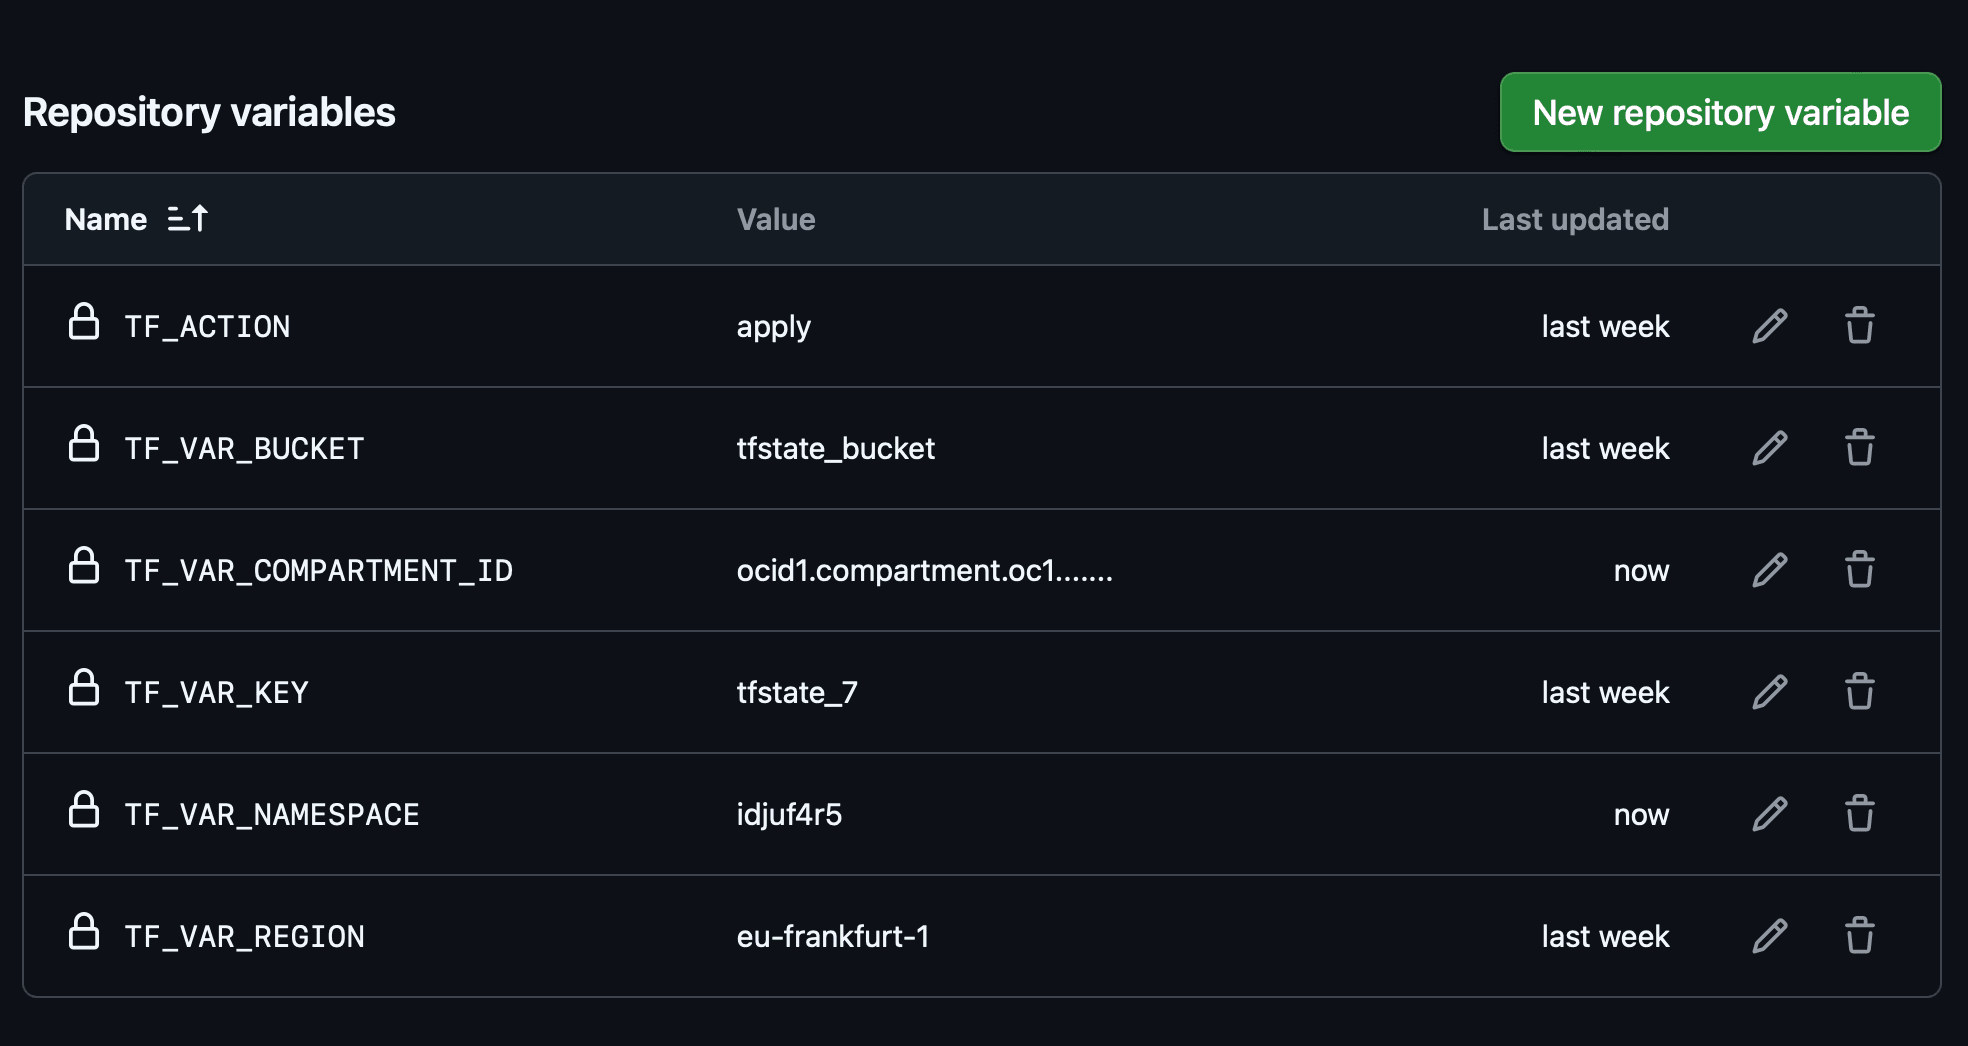
Create the Variables in your GitHub repository.

Here are the descriptions of the variables:
-
tf_action: Usually this is apply. It is used for demo purpose here. -
tf_var_bucket: The name of an existing bucket where we will store the state file. -
tf_var_compartment_id: The OCID of the compartment where will create the resources. -
tf_var_key: The name of the terraform state file. -
tf_var_namespace: The Namespace of your tenant. -
tf_var_region: The region where we will create the resources.
-
Task 3: Generate the Session Token and Set the GitHub Secrets and Variables
Option 1: Generate Automatically
Note: This will work if the GitHub CLI is installed and configured. If not installed go to Option 2.
-
Unzip the file and go to the scripts folder inside the extracted directory.
-
Run the
github_set_var_secrets.shscript with the following parameters.-
exp_time: How much time in minutes the token will be valid. -
profile: The profile that will be added to your OCI config file. -
tf_action: Usually this is apply. -
tf_var_bucket: The name of an existing bucket where will store the state file. -
tf_var_compartment_id: The OCID of the compartment where we will create the resources. -
tf_var_key: The name of the terraform state file. -
tf_var_namespace: The namespace of your tenant.
Running the following script ideally will open a web browser window to log in to your OCI tenancy.
-
-
Enter the credentials to log in and wait for the browser to finish and return to the terminal. This action will generate a session token and will add a new profile to your OCI config file.
These will be uploaded into your GitHub repository as secrets and variables. If all works well you should see something that looks like:
(base) github_auth_session_token/scripts> ./github_set_var_secrets.sh --region eu-frankfurt-1 \
> --exp_time 120 \
> --profile tf_ion5 \
> --githubrepo franciscvass/deploy_vcn_in_oci \
> --tf_action apply \
> --tf_var_bucket tfstate_bucket \
> --tf_var_compartment_id ocid1.compartment.oc1...... \
> --tf_var_key tfstate_5 \
> --tf_var_namespace idjuatm1d4mrtuuytyu
   Please switch to newly opened browser window to log in!
   You can also open the following URL in a web browser window to continue:
https://login.eu-frankfurt-1.oraclecloud.com/v1/oauth2/........
   Completed browser authentication process!
Config written to: /Users/.../.oci/config

   Try out your newly created session credentials with the following example command:

   oci iam region list --config-file /Users/.../.oci/config --profile tf_ion5 --auth security_token

export VARS
TF_VAR_COMPARTMENT_ID=ocid1.compartment.oc1..aa......
TF_VAR_KEY=tfstate_5
TF_VAR_BUCKET=tfstate_bucket
TF_ACTION=apply
TF_VAR_NAMESPACE=idjuatm1duytyu4mr
call get_token.py
run set_token.sh
Set GH secrets
✓ Set Actions secret SES_TOKEN_PRV_KEY for franciscvass/deploy_vcn_in_oci
✓ Set Actions secret SES_TOKEN for franciscvass/deploy_vcn_in_oci
✓ Set Actions secret FINGERPRINT for franciscvass/deploy_vcn_in_oci
✓ Set Actions secret TENANCY_OCID for franciscvass/deploy_vcn_in_oci
set GH VARS
✓ Updated variable TF_VAR_KEY for franciscvass/deploy_vcn_in_oci
✓ Updated variable TF_VAR_BUCKET for franciscvass/deploy_vcn_in_oci
✓ Updated variable TF_VAR_COMPARTMENT_ID for franciscvass/deploy_vcn_in_oci
✓ Updated variable TF_VAR_NAMESPACE for franciscvass/deploy_vcn_in_oci
✓ Updated variable TF_VAR_REGION for franciscvass/deploy_vcn_in_oci
✓ Updated variable TF_ACTION for franciscvass/deploy_vcn_in_oci
NAME                   VALUE                                                                                UPDATED
TF_ACTION              apply                                                                                less than a minute ago
TF_VAR_BUCKET          tfstate_bucket                                                                       less than a minute ago
TF_VAR_COMPARTMENT_ID  ocid1.compartment.......................                                             less than a minute ago
TF_VAR_KEY             tfstate_5                                                                            less than a minute ago
TF_VAR_NAMESPACE       idjuatm1d4mr                                                                         less than a minute ago
TF_VAR_REGION          eu-frankfurt-1                                                                       less than a minute ago
/github_auth_session_token/scripts>
Option 2: Generate Manually
-
Go to the
scriptsfolder. -
Run the
github_set_var_secrets.shscript with the same arguments as explained in Option 1.(base) github_auth_session_token/scripts> ./github_get_var_secrets.sh --region eu-frankfurt-1 \ > --exp_time 120 \ > --profile tf_ion5 \ > --githubrepo franciscvass/deploy_vcn_in_oci \ > --tf_action apply \ > --tf_var_bucket tfstate_bucket \ > --tf_var_compartment_id ocid1.compartment.oc1...... \ > --tf_var_key tfstate_5 \ > --tf_var_namespace idjuatm1d4mrtuuytyu -
The following script will generate a file
info_for_github.txtwith the values of variables and secrets.Note: Do not share this file. You may delete it after you have updated the secrets and variables.
-
Open the generated file and update the GitHub repository secrets and variables with values from this file.
Note: Do not add any extra characters to values you copied from the file.
Task 4: Run the GitHub Action
Before running the GitHub Action, the code will deploy a simple VCN in your compartment.
Note: Make sure this is possible from business and security perspective.
-
In your GitHub repository, navigate to Actions.
-
Select the Terraform - deploy VCN workflow.
-
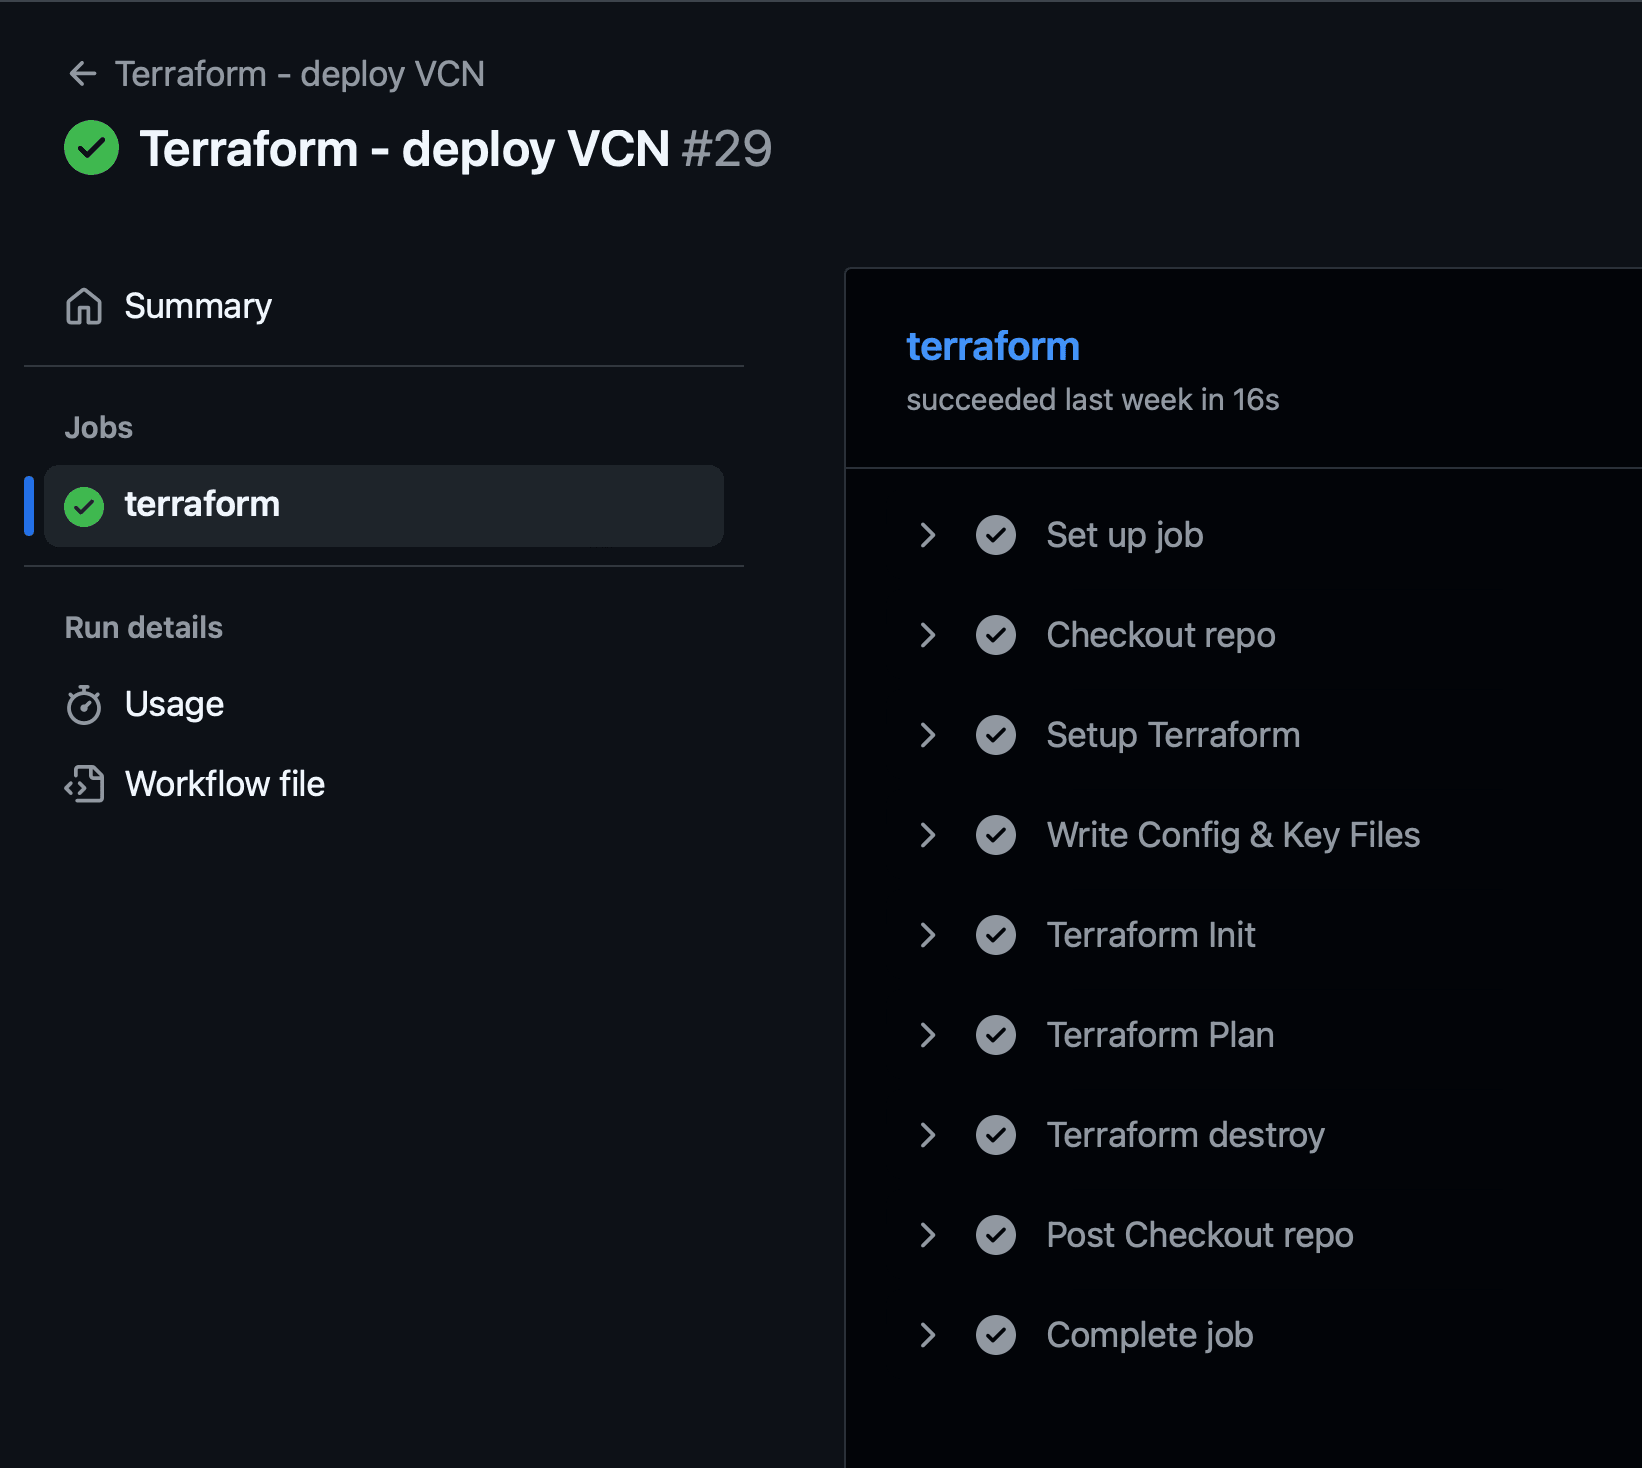
Click Run workflow. When it finishes you should see something like this:

-
Check your compartment VCN to see the new VCN.
-
Check the bucket you used (
tf_var_bucket) to store the terraform state file.
Task 5: Destroy the Resource
The bucket and the state file generated will not be destroyed. You may delete them manually.
In the GitHub repository, update the TF_ACTION variable to destroy and run the action again.
Related Links
Acknowledgments
- Author - Francisc Vass (Principal Cloud Architect)
More Learning Resources
Explore other labs on docs.oracle.com/learn or access more free learning content on the Oracle Learning YouTube channel. Additionally, visit education.oracle.com/learning-explorer to become an Oracle Learning Explorer.
For product documentation, visit Oracle Help Center.
Use OCI Session Token-Based Authentication from GitHub Action to Run Terraform
G40740-01