Verify the Accessibility of Oracle JET Components Table and Message
Introduction
In the Perform Screen-Reader Validation on an Oracle JET App tutorial, we addressed several accessibility issues in the Employees page. There are several issues that remain that we will address in this tutorial.
Objectives
In this tutorial, you will learn how to identify and fix the remaining accessibility issues in the Employees page of the ACCLearningPath app.
Prerequisites
- A development environment set up to create Oracle JET web apps that includes an installation of Node.js
- Access to the Oracle JET Cookbook
- Access to the Oracle JET Keyboard and Gesture Guide
- Completion of the previous tutorial in this learning path, Validate the Accessibility of Master Detail Views in an Oracle JET App
Task 1: Verify Page Structure
The first step in the review is to ensure that all necessary HTML headings are present on the page.
-
Navigate to the
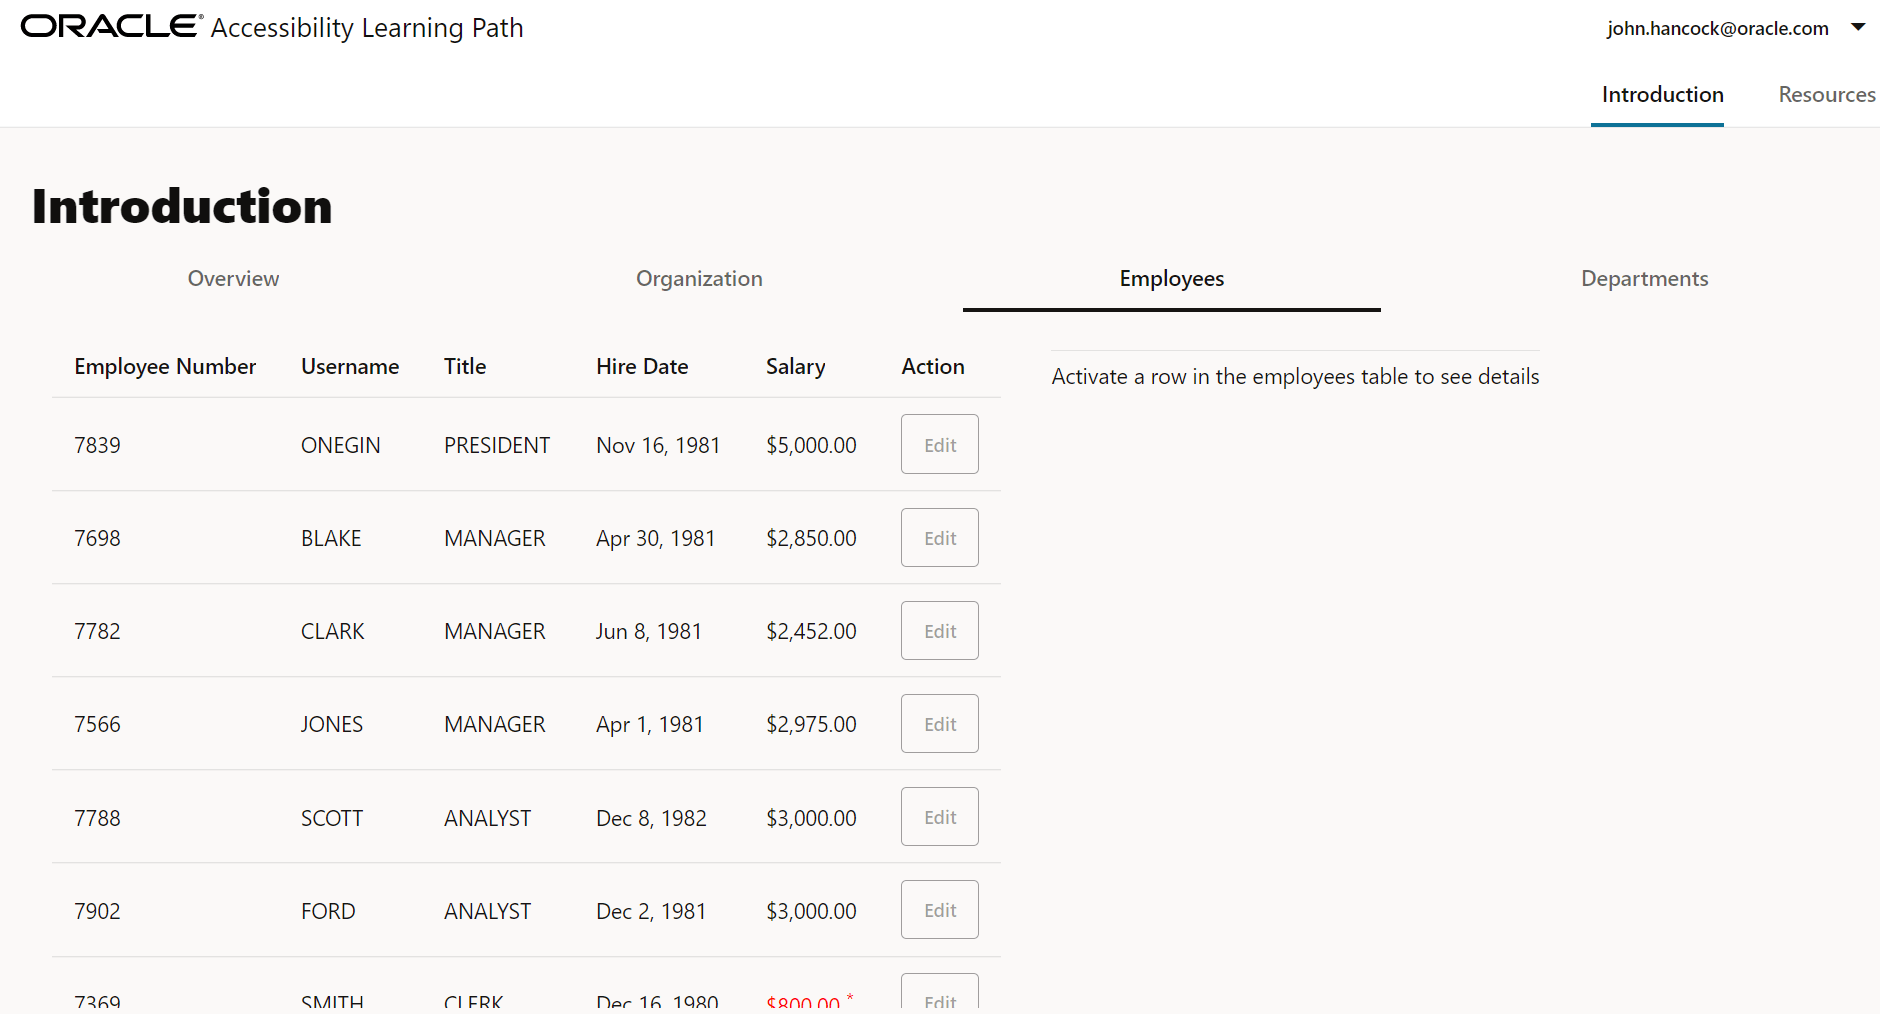
ACCLearningPathdirectory in the terminal and run the app.npx ojet serveYour browser will open to the app’s Introduction page with the Overview tab loaded. Click on the Employees tab in the tab bar and and inspect the Employees page.

The Employees page consists of two panels. The HTML headings are missing from the page itself and from each panel.
-
Navigate to the
ACCLearningPath/src/js/viewsdirectory and open theemployees.htmlfile in an editor. -
Locate the first opening
<div>tag in the file.<div class="oj-hybrid-padding"> <oj-messages id="messagesId" messages="[[messagesDataprovider]]" display="notification" position="[[positionObject]]"> </oj-messages> -
Immediately after the opening
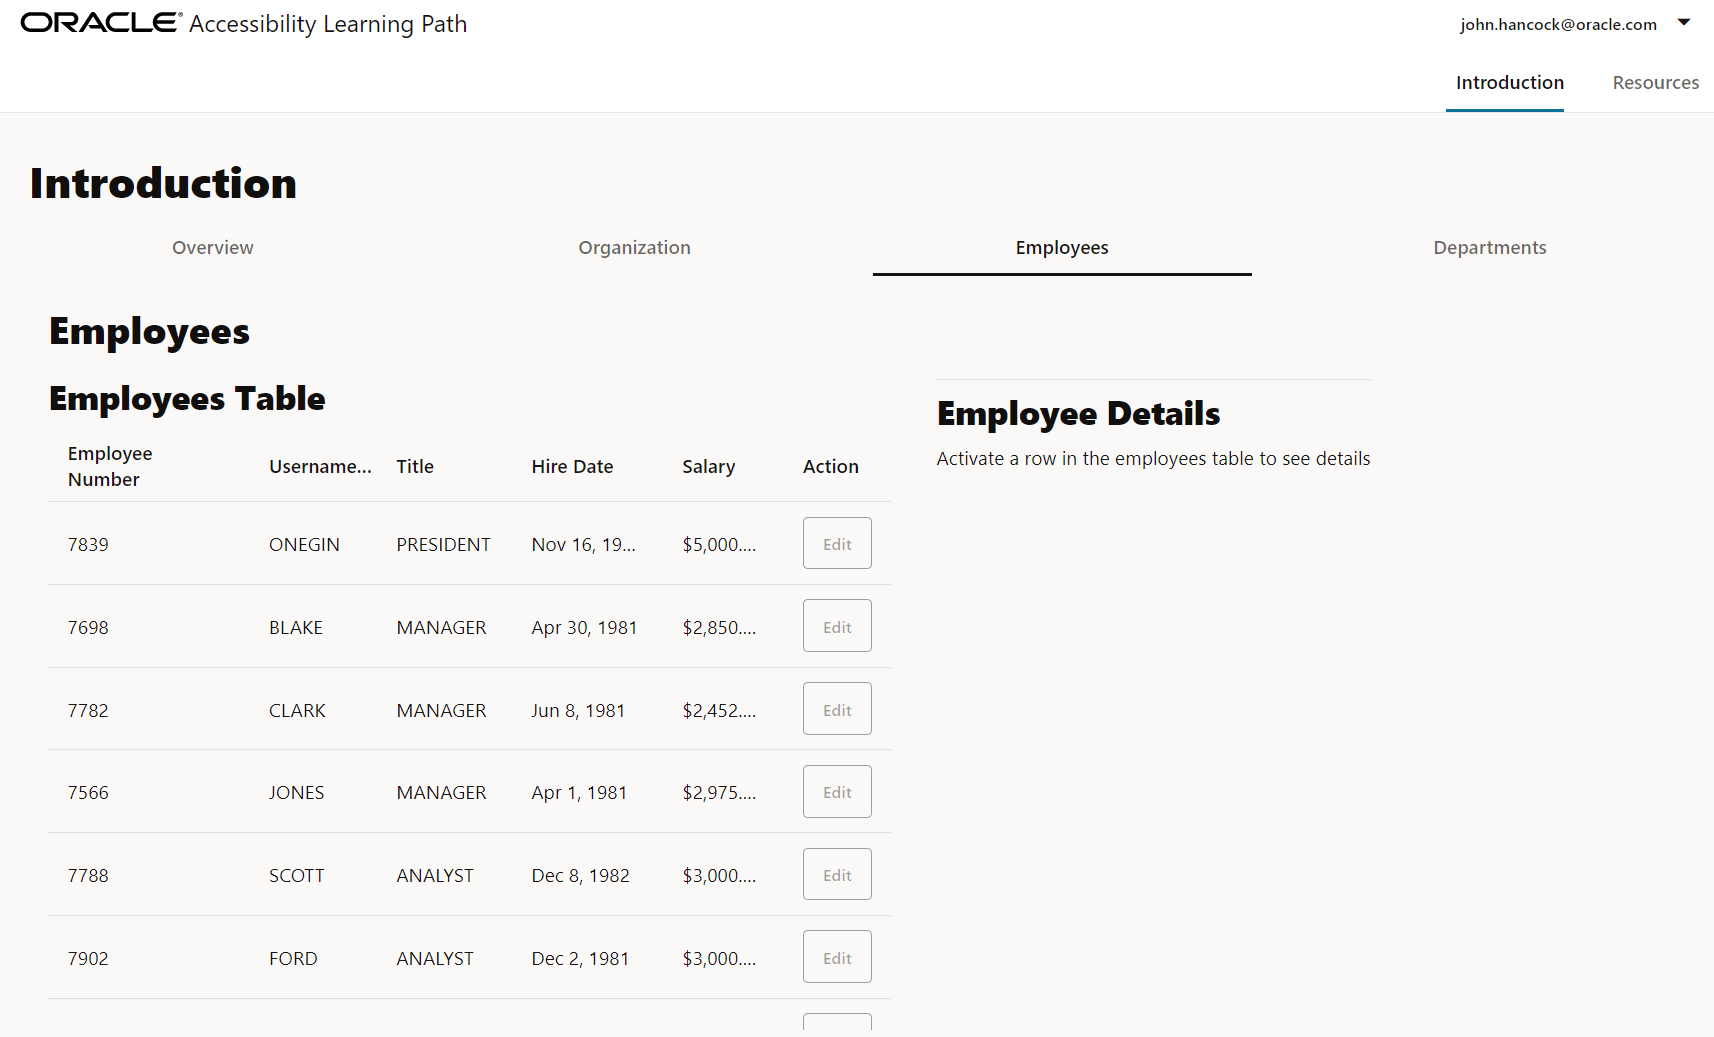
<div>tag, insert anh3heading to identify the Employees page.<div class="oj-hybrid-padding"> <h3>Employees</h3> <oj-messages id="messagesId" messages="[[messagesDataprovider]]" display="notification" position="[[positionObject]]"> </oj-messages> -
Locate the opening
<div>tag that forms the left panel that contains a table.<div class="oj-flex-item"> <oj-table id='table' class="table-size" first-selected-row="{{selectedRow}}" aria-label="Employees Table" . . . > -
Between the opening
<div>and<oj-table>tags, insert anh4heading to properly label this panel.<div class="oj-flex-item"> <h4>Employees Table</h4> <oj-table id='table' class="table-size" first-selected-row="{{selectedRow}}" aria-label="Employees Table" . . . > -
Edit the
aria-labelattribute of the<oj-table>element to include both the heading text and the instructional text displayed in the second panel.<div class="oj-flex-item"> <h4>Employees Table</h4> <oj-table id='table' class="table-size" first-selected-row="{{selectedRow}}" aria-label="Employees Table - Activate a row to see employee details" . . . >The table now adheres to both WCAG Success Criterion 2.5.3 Label in Name and WCAG Success Criterion 1.3.1 Info and Relationships. To meet these criteria, both the visual label and the instructional text from the right panel must be included in the spoken label of a control.
-
Locate the opening
<div>tag that defines the right panel of the Employees page that will hold the employee details.<div id="detailContainer" class="oj-flex-item" style="margin-left: 30px; min-width: 200px"> <hr style="margin-top:12px;"> <oj-bind-if test="[[!activeRow()]]"> -
Between the
<div>and<oj-bind-if>tags, insert anh4heading underneath the horizontal rule that will identify this panel.<div id="detailContainer" class="oj-flex-item" style="margin-left: 30px; min-width: 200px"> <hr style="margin-top:12px;"> <h4>Employee Details</h4> <oj-bind-if test="[[!activeRow()]]"> -
Save the file. Your file should look similar to employees-page-html.txt.
-
Verify your applied changes in the running app.

Task 2: Perform a Keyboard-Only Test
This section and the following Perform a Screen-Reader Test portion of this tutorial need to be done without the use of a mouse. During this test, ensure that the focus point is always clearly identified and that the tab order is predictable.
-
In the Employees Page, press
<Ctrl+L>to set focus to the address bar. -
Press
<Tab>. Focus moves to the skip nav link. -
Press
<Tab>. Focus moves to john.hancock@oracle.com in the user menu at the top-right of the page. -
Press
<Tab>. Focus moves to Introduction in the main navigation menu immediately below the user menu. -
Press
<Tab>. Focus moves to Overview in the tab bar. -
Press
<Tab>. Focus moves to the first column header, Employee Number, in the Employees Table. -
Press
<down arrow>to place focus on the first data row of the table.The Employee Details form should appear in the panel on the right side of the page.
-
Press
<Space>to select the row, and then press<F2>to move focus to the first tabbable element, the Edit button. -
Press
<Space>to activate the Edit button. An Edit Employee dialog opens, and focus moves to the Employee Id field. -
Press
<Tab>. Focus moves to the Employee Name field. -
Press
<Tab>. Focus moves to the Job Title field. -
Press
<Tab>. Focus moves to the Hire Date field. -
Press
<Tab>. Focus moves to the Salary field. -
Press
<Tab>. Focus moves to the Save button. -
Press
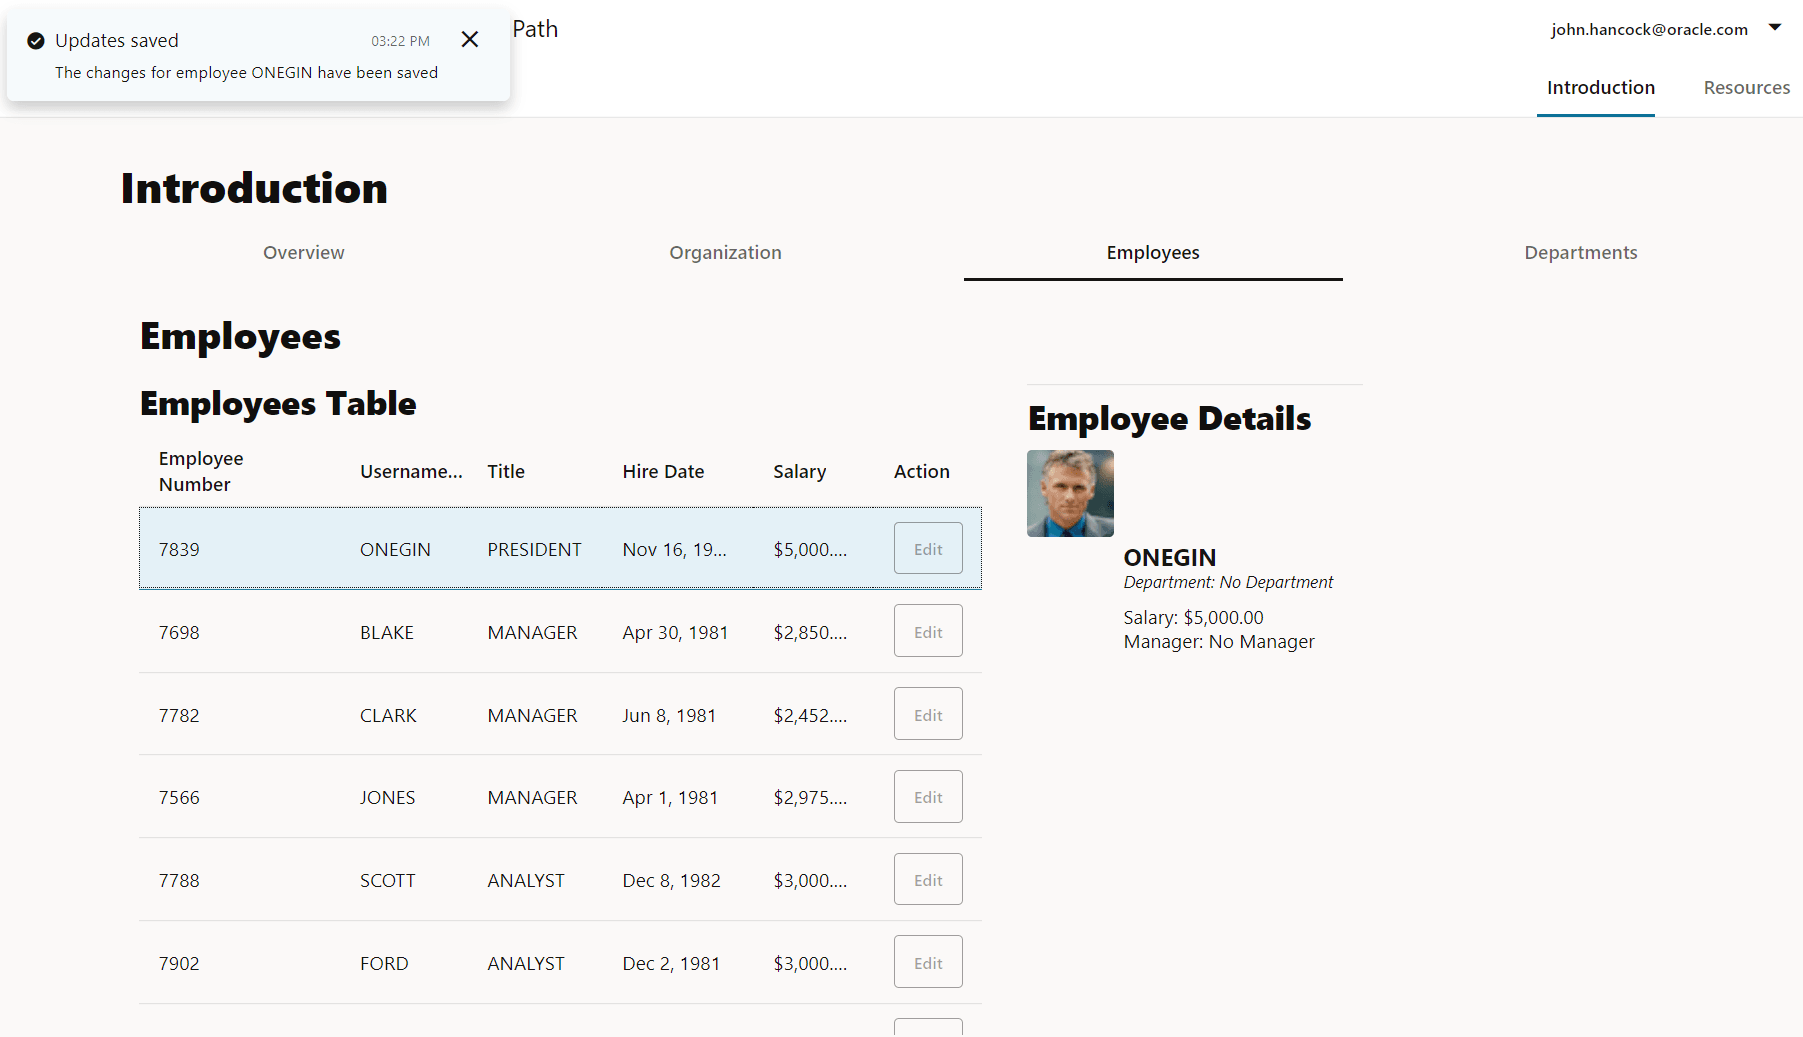
<Space>to activate the Save button and close the dialog. Focus moves back to the selected first data row of the Employees Table.Notice the message box in the top-left corner of the page. The message box provides confirmation that the updates were saved.

Screen-magnification software places focus on the Employees Table, and so the confirmation message may sit outside of the viewport of the magnifier.
-
Navigate to the
ACCLearningPath/src/js/viewModelsdirectory and editemployees.js. -
Locate the definition of
this.positionObject.this.positionObject = { my: { vertical: "top", horizontal: "start" }, at: { vertical: "top", horizontal: "start" }, of: "window", }; -
Modify the
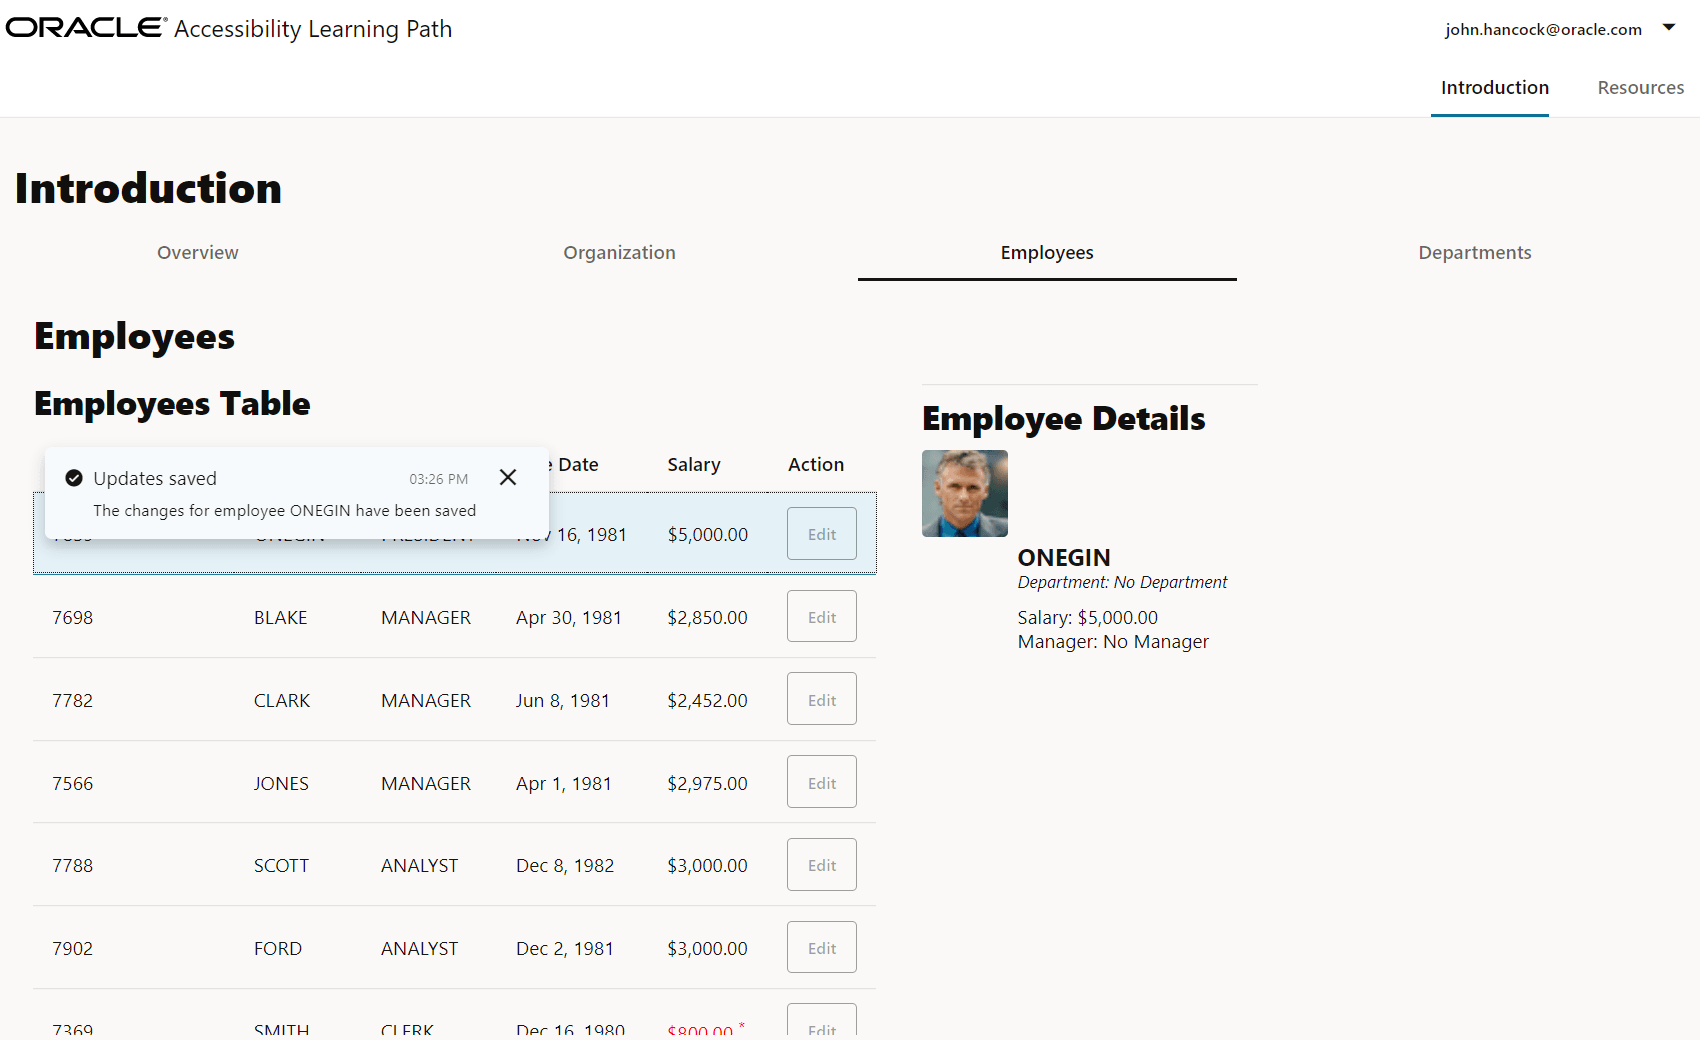
positionObjectdefinition so that the object’s location is based on the table rather than the window.this.positionObject = { my: { vertical: "top", horizontal: "start" }, at: { vertical: "top", horizontal: "start" }, of: "#table", };Save the file. Then repeat steps 1 through 15 of the keyboard-only test to verify the confirmation message’s location has moved to the table.

Task 3: Perform a Screen-Reader Test
The final piece of the accessibility review is the screen-reader validation. The following validation steps are based on using the JAWS screen reader, but the results will be similar if you are using the NVDA screen reader.
-
In the terminal window, exit the running app by pressing
<Ctrl+C>, and, if prompted, entery. -
Start your screen reader and then restart your web app.
npx ojet serveYour app will open in your browser automatically; the screen reader will start reading once the page is fully loaded.
-
Click on the Employees tab in the tab bar. Do not use the mouse after this point.
-
Press
<Ctrl+L>to set focus to the address bar. -
Press
<Tab>. JAWS reads, “Skip to main content. Same page link.” -
Press
<Tab>. JAWS says, “Banner region. Toolbar. john.hancock@oracle.com button menu. Press space to activate the menu, then navigate with arrow keys.” -
Press
<Tab>. JAWS says, “Navigation region tab. Introduction tab selected. 1 of 2.” -
Press
<Tab>. JAWS says, “Main region tab. Employees tab selected. 3 of 4.” -
Press
<Tab>. JAWS says, “Table with 6 columns and more than 13 rows. Employees table - Activate a row to see employee details. Column header 1, Employee Number.” Focus moves to the first cell in the row of table column headers. -
Press
<down arrow>. JAWS says, “Row 1: 7839. Unselected. Column 1, Employee Number: 7839.” Focus is in the first data row of the table. -
Press
<right arrow>. JAWS says the column number and employee username. -
Press
<Space>. The row is selected, and JAWS says, “Space. Selected.” -
Press
<F2>to move to the first tabbable element. JAWS says, “Edit button. To activate, press Enter.” -
Press
<Enter>. JAWS says, “Edit employee. Edit employee. Employee Id 7,839…” The screen reader opens the Edit Employee dialog and will continue reading until a key is pressed. -
Press
<Tab>five times to move over the editable and readonly fields to the Save button. JAWS says, “Save button. To activate, press Enter.” -
Press
<Enter>. JAWS says, “Message category: confirmation. Updates saved. The changes for employee Onegin have been saved.” The employee username in your app may differ here, because of edits made in an earlier tutorial. -
Press
<F6>to read the message box contents. JAWS says, “Messages complementary region. Updates saved. Entering messages region. Press F6 to navigate back to prior focused element.” -
Press
<Tab>. JAWS says, “Close button. To activate, press Enter.” -
Press
<Enter>to close the message box. Focus returns to the table and the prior selected cell. -
Stop your screen reader.
-
In your terminal window, exit the app by pressing
<Ctrl+C>, and, if prompted, entery.
This completes the third set of accessibility fixes.
Next Step
Proceed to the next tutorial in this module.
This tutorial is part of the module Validate and Fix Application Accessibility.
- Customize the Connected Lifecycle Events
- Validate the Accessibility of Master Detail Views in an Oracle JET Application
- Verify the Accessibility of Oracle JET Components Table and Message
- Test Keyboard Navigation in Complex Oracle JET Components
You can return to the accessibility learning path’s main page to access all the modules on accessibility.
More Learning Resources
Explore other labs on docs.oracle.com/learn or access more free learning content on the Oracle Learning YouTube channel. Additionally, visit education.oracle.com/learning-explorer to become an Oracle Learning Explorer.
For product documentation, visit Oracle Help Center.
Verify the accessibility of Oracle JET components table and message
F34164-04