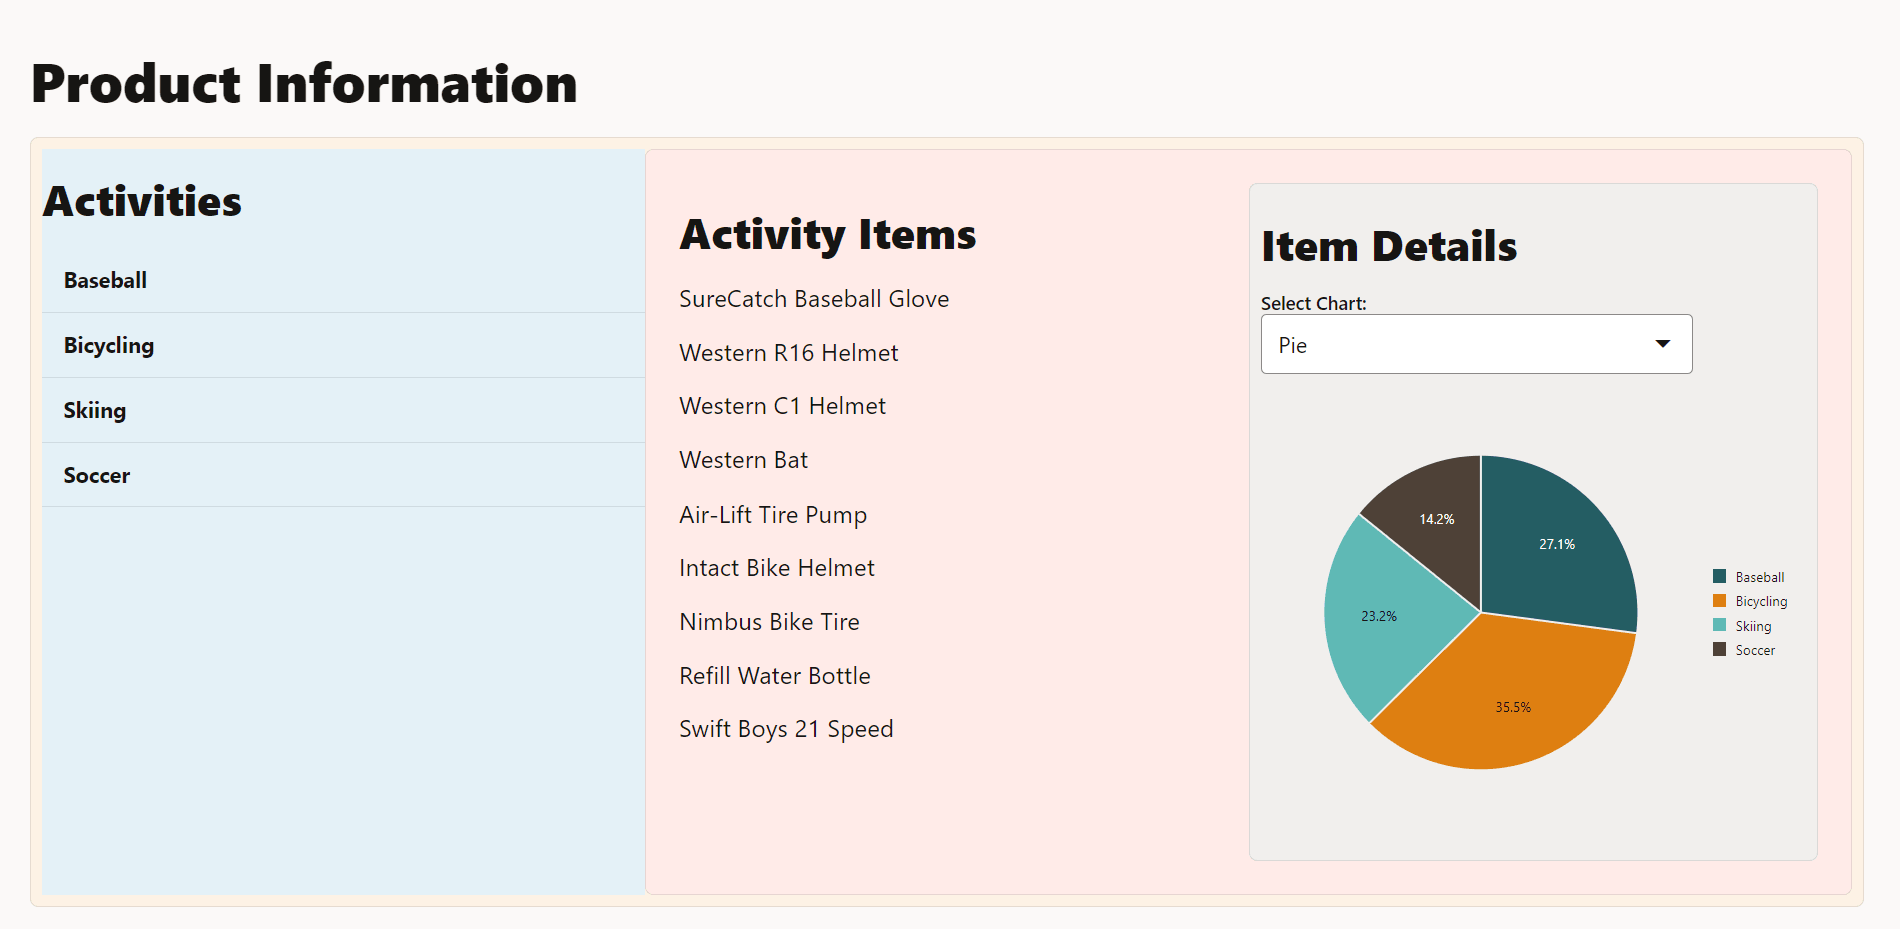
Show or hide content in the Oracle JET web app
Introduction
The Oracle JET oj-module component and JavaScript responsive utility classes can load different views based on the screen size. You can use the oj-module component to replace content within a region of a page by binding a view and the corresponding viewModel to an element.
Objectives
In this tutorial, you will customize an Oracle JET web app to bind a view and the corresponding viewModel by using an Oracle JET oj-module component and responsive TypeScript code.
Prerequisites
- A development environment set up to create Oracle JET web apps that includes an installation of Node.js
- Access to the Oracle JET Developer Cookbook
- Completion of the previous tutorial in this learning path, Format the Containers for the Oracle JET Web Application
- The completed app jet_web_application_responsive_design_final.zip optionally downloaded
Task 1: Add the Module Component to the View
Define the view and the corresponding viewModel under the Oracle JET oj-module component by using the configuration object.
-
Navigate to the
JET_Web_Application/src/ts/viewsdirectory and open thedashboard.htmlfile in an editor. -
Find the
divelement withid="activityItemsContainer". Within the emptydiv, add adivcontainer that surrounds anoj-modulecustom HTML element with theconfigattribute that defines the navigation region.<div id="activityItemsContainer" class="oj-flex-item oj-md-6 oj-sm-12"> <div id="container"> <oj-module config="[[moduleConfig]]"></oj-module> </div> </div> -
Save the
dashboard.htmlfile.Your code should look similar to the final-dashboard-html.txt.
Task 2: Update the Imported Modules List in the ViewModel
At the top of the dashboard.ts file, import modules that support the Oracle JET components.
-
Navigate to the
JET_Web_Application/src/ts/viewModelsdirectory and open thedashboard.tsfile in an editor. -
After the
ojlistviewmodule, add the three JET responsive HTML utilities modules and theojmodule-elementmodule.import * as AccUtils from "../accUtils"; import * as ko from "knockout"; import MutableArrayDataProvider = require("ojs/ojmutablearraydataprovider"); import "ojs/ojselectsingle"; import "ojs/ojlabel"; import "ojs/ojchart"; import * as storeData from "text!../store_data.json"; import "ojs/ojlistview"; import * as ResponsiveUtils from "ojs/ojresponsiveutils"; import * as ResponsiveKnockoutUtils from "ojs/ojresponsiveknockoututils"; import * as HtmlUtils from "ojs/ojhtmlutils"; import "ojs/ojmodule-element"; -
Save the
dashboard.tsfile.Your import block should look similar to import-block-ts.txt.
Task 3: Add the Code for Responsive Loading in the ViewModel
In a responsive layout, you want to load different content for different screen sizes. You can use oj-module to load different views by using an observable, a media query, or a custom media query observable.
-
Open the Oracle JET Cookbook and navigate to the Cookbook home page. Click Framework in the menu bar, then click Responsive Behaviors, and then click Responsive Loading.
-
There you can access the API documentation for the
ResponsiveUtilsnamespace. Then scroll to the Methods section and read about thegetFrameworkQuery()method. -
In the
dashboard.tsfile, below thechartDataProviderdeclaration, add an inline template code block to pass to theoj-modulecustom HTML element.this.chartDataProvider = new MutableArrayDataProvider(this.chartData, { keyAttributes: "id", }); // Define the oj-module inline template for Activity Items list const lg_xl_view = '<h3 id="activityItemsHeader">Activity Items</h3>' + '<oj-list-view style="font-size: 18px" aria-labelledby="activityItemsHeader">' + "<ul>" + "<li>" + '<div class="oj-flex-item">' + "<p>SureCatch Baseball Glove</p>" + "<p>Western R16 Helmet</p>" + "<p>Western C1 Helmet</p>" + "<p>Western Bat</p>" + "</div>" + "</li>" + "<li>" + '<div class="oj-flex-item">' + "<p>Air-Lift Tire Pump</p>" + "<p>Intact Bike Helmet</p>" + "<p>Nimbus Bike Tire</p>" + "<p>Refill Water Bottle</p>" + "<p>Swift Boys 21 Speed</p>" + "</div>" + "</li>" + "</ul>" + "</oj-list-view>";The inline data node for large screen and extra-large screens is passed through the
lg_xl_viewvariable. -
Below the definition of the
lg_xl_viewvariable, define the code to pass the inline data node for small and medium screens through thesm_md_viewvariable.// Display this content for small and medium screen sizes const sm_md_view = '<div id="sm_md" style="background-color:lightcyan; padding: 10px; font-size: 10px">' + '<h3 id="activityDetailsHeader">Activity Details</h3>' + '<oj-list-view style="font-size: 18px" aria-labelledby="activityDetailsHeader">' + "<ul>" + "<li>" + '<div class="oj-flex-item">' + "<p>SureCatch Baseball Glove</p>" + "<p>Western R16 Helmet</p>" + "<p>Western C1 Helmet</p>" + "<p>Western Bat</p>" + "</div>" + "</li>" + "</ul>" + "</oj-list-view>" + "</div>"; -
Below the definition of the
sm_md_viewvariable, define the code to load the view for different screen sizes by using athis.largemedia query observable.// Identify the screen size and display the content for that screen size const lgQuery = ResponsiveUtils.getFrameworkQuery( ResponsiveUtils.FRAMEWORK_QUERY_KEY.LG_UP ); this.large = ResponsiveKnockoutUtils.createMediaQueryObservable(lgQuery!); this.moduleConfig = ko.pureComputed(() => { let viewNodes = HtmlUtils.stringToNodeArray( this.large() ? lg_xl_view : sm_md_view ); return { view: viewNodes }; }); /** * End of oj-module code */By using the HTML utility function, you can get the framework media query string in the
this.largevariable. The HTML code in thelg_xl_viewvariable is loaded if the media query string value inthis.large()is equal toLG_UP, large or above. The HTML code in thesm_md_viewvariable is loaded if the media query string value in thethis.large()is not equal toLG_UP. -
Add type declarations for
largeandmoduleConfigto the class.class DashboardViewModel { chartTypes: Array<Object>; chartTypesDP: MutableArrayDataProvider<ChartType["value"], ChartType>; chartData: Array<Object>; chartDataProvider: MutableArrayDataProvider<string, {}>; activityDataProvider: MutableArrayDataProvider<Activity["id"], Activity>; val: ko.Observable<string>; large: ko.Observable<boolean>; moduleConfig: ko.PureComputed<any>; -
Save the
dashboard.tsfile.Your file should look similar to final-dashboard-ts.txt.
Task 4: Run the Web App
-
In the terminal window, change to the
JET_Web_Applicationdirectory and run the app.npx ojet serveOracle JET tooling runs your web app in a local web browser where you can view the dashboard contents.

To display the contents in the
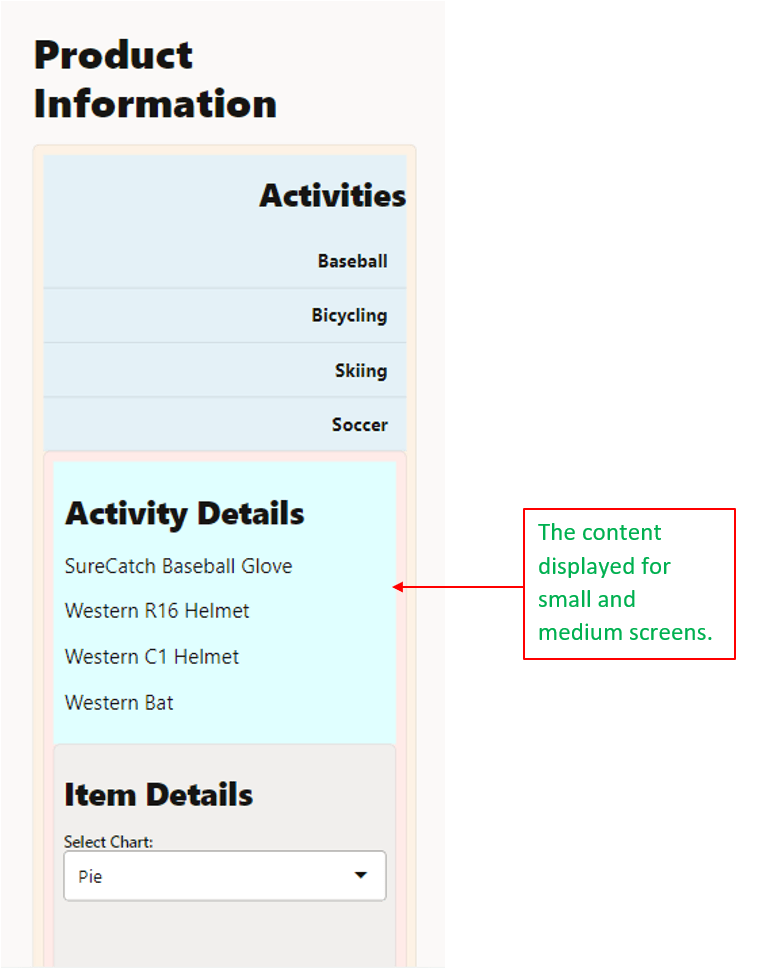
sm_md_viewvariable, adjust the screen to a small or medium size. Note the shortened list of items under the Activity Details heading, which is highlighted light cyan.
To display the contents in the
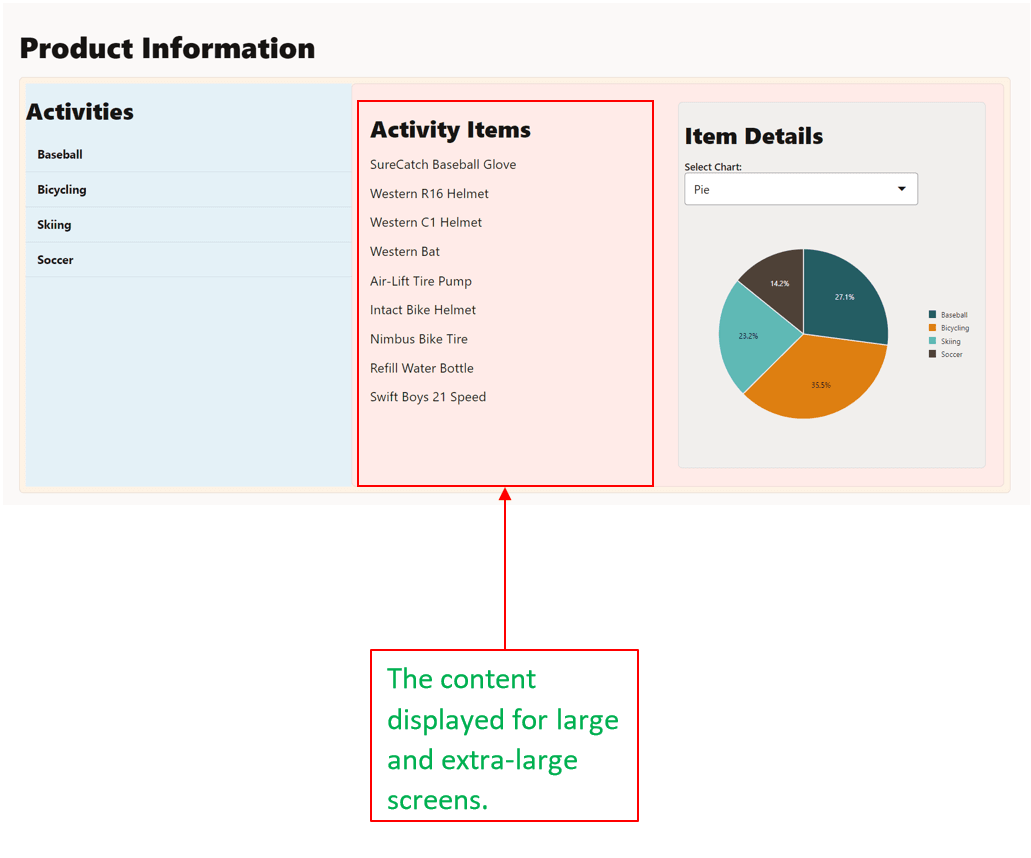
lg_xl_viewvariable, change the screen size to large or extra-large.
-
In the terminal window, press Ctrl+C, and if prompted, enter
yto exit the Oracle JET tooling batch job. -
Close the browser window or tab.
-
Your completed app with responsive design functionality should look similar to jet_web_application_responsive_design_final.zip.
Task 5: (Optional) Run a Web App from a Restored App
If you want to run the completed Oracle JET web app from the supplied code, you can restore the app from the downloaded archive file. To work with a stripped and zipped Oracle JET web app, you must restore project dependencies, including Oracle JET tooling and the required libraries and modules, within the extracted app.
-
Download the
jet_web_application_responsive_design_final.zipfile and extract the contents of the completed app to thejet_web_application_responsive_design_finalfolder. -
In the terminal window, navigate to the
jet_web_application_responsive_design_finalfolder and restore the Oracle JET web app by installing the NPM packages that it requires.npm install -
Wait for a confirmation message similar to the following.
$ added 284 packages in 59sThe app is ready to run.
-
Run the web app and test in the browser.
npx ojet serve -
Close the browser window or tab that displays your running web app.
-
In the terminal window, press Ctrl+C, and if prompted, enter
yto exit the Oracle JET tooling batch job.
Next Step
Proceed to the next tutorial in this module.
This tutorial is part of the module Responsive Design.
- Add Containers to the Oracle JET Web Application.
- Format the Containers for Different Screen Sizes
- Show or Hide Content in the Oracle JET Web Application
- Test the Oracle JET Web Application on Different Screen Sizes
You can return to the learning path’s main page to access all the modules on building web apps.
More Learning Resources
Explore other labs on docs.oracle.com/learn or access more free learning content on the Oracle Learning YouTube channel. Additionally, visit education.oracle.com/learning-explorer to become an Oracle Learning Explorer.
For product documentation, visit Oracle Help Center.
Show or hide content in the Oracle JET web application
F11844-11