Use the web component in an Oracle JET web app
Introduction
A web component is a reusable piece of user interface that you can embed as a custom HTML element in your web app. Web components can contain Oracle JavaScript Extension Toolkit (Oracle JET) components, other web components, HTML, JavaScript, and Cascading Style Sheets (CSS). You use the Oracle JET tooling to create the web component, and you can use an Oracle JET starter template to generate the HTML and TypeScript or JavaScript files that you modify to add the web component.
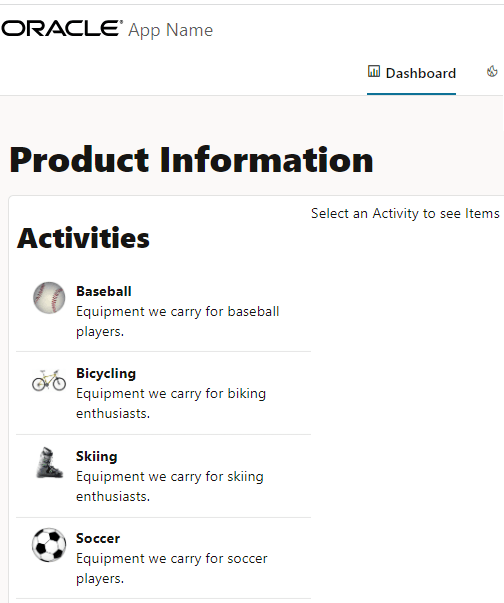
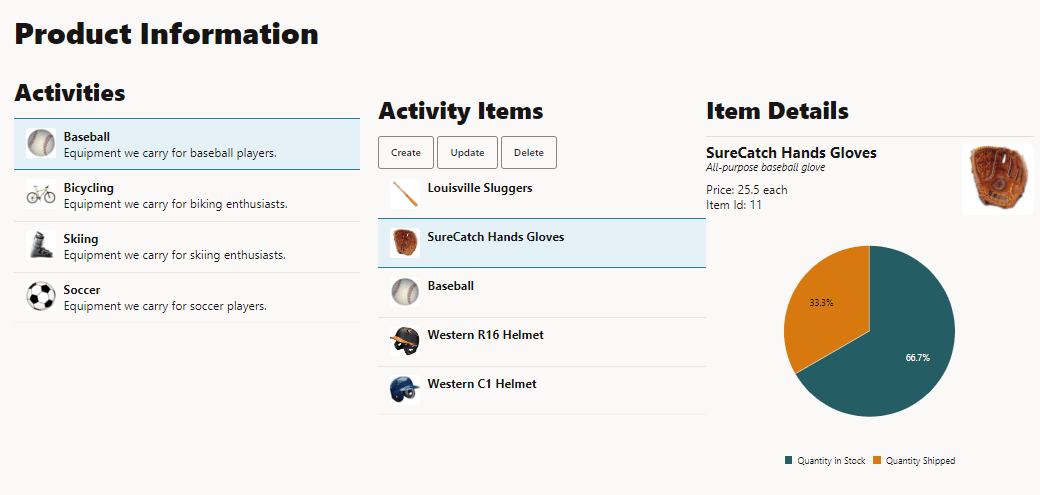
The Oracle JET web app (web component consuming app) starter template you use in this tutorial displays the Product Information panel with the Activities and Activity Items section. The Activity Items section displays the Create, Update, and Delete buttons. The Update button displays the Update Item Details dialog with a form that consists of four input text fields. The web component that you add to this starter template replaces the Update Item Details dialog content.
Objectives
In this tutorial, you will use a web component in an Oracle JET web app. You also learn how to define attributes in the HTML file of your web app to use data from a REST endpoint.
Prerequisites
-
A development environment set up to create Oracle JET web apps that includes an installation of Node.js
- (Option 1) Completion of the final tutorial in the previous learning path in this series: Delete Data Records in an Oracle JET Web App
- (Option 2) If you haven’t completed the previous learning path in this series: The jet_web_application_temp.zip downloaded
- Completion of the previous tutorials in this learning path, so that you have created a demo-update-item.zip file of your web component
- The completed web app jet_web_component_application_final.zip optionally downloaded
Task 1: Download the Starter App
Skip this task if you’re continuing to work in a web app that you created in the previous learning path.
-
Rename
jet_web_application_temp.zipasJET_Web_Application.zip. Extract the contents to theJET_Web_Applicationfolder. -
Navigate to the
JET_Web_Applicationfolder, and restore the Oracle JET web app.npm installYour web app is ready to use.
-
In the terminal window, run the app.
npx ojet serveThe browser displays your web app that shows the Product Information panel with the list of activities in the Activities section.

-
In the browser that displays your web app, click one of the activities and then select one of the items in the Activity Items section.

The Activity Items section displays the Create, Update, and Delete buttons.
-
Click Update to view the content of the Update Item Details dialog.
-
In the terminal window, press Ctrl+C, and if prompted, enter
yto exit the Oracle JET tooling batch job. -
Close the browser window or tab.
Task 2: Add the Web Component Folder
- Navigate to the
JET_Web_Application/src/tsdirectory and create a new folder namedjet-composites. -
Extract the
demo-update-item.zipfile into thejet-compositesfolder.The new folder has the path
JET_Web_Application/src/ts/jet-composites/demo-update-itemand contains the web component source files.
Task 3: Edit the Application ViewModel
To use the web component in your web app, add the web component loader module to the viewModel file of your web app.
-
Navigate to the
JET_Web_Application/src/ts/viewModelsdirectory and open thedashboard.tsfile in an editor. -
At the top of the
dashboard.tsfile, import the web component loader module.import * as AccUtils from "../accUtils"; . . . import "demo-update-item/loader"; -
Save the
dashboard.tsfile.
Task 4: Edit the Application View
To use the web component in your web app, you must also add the web component element with the defined attributes to the HTML file of your web app.
-
Navigate to the
JET_Web_Application/src/ts/viewsdirectory and open thedashboard.htmlfile in an editor. -
Locate the
oj-dialogcustom HTML element withid="editDialog", and comment out theoj-label-valueandoj-input-textcustom HTML element references for the input text fields in thediv slot="body"element.<oj-dialog id="editDialog" class="no-display" dialog-title="Update Item Details" cancel-behavior="icon" > <div slot="body"> <!-- <oj-label-value label-edge="inside"> <oj-label for="chatWindow" slot="label">Item ID</oj-label> <div slot="value" class="slot-line"> <oj-bind-text id="chatWindow" value="[[inputItemID]]" class="text-width"></oj-bind-text> </div> </oj-label-value> <oj-label class="oj-label oj-label-value" for="createNewName">Name</oj-label> <oj-input-text id="createNewName" value='{{inputItemName}}'></oj-input-text> <oj-label class="oj-label oj-label-value" for="createNewPrice">Price</oj-label> <oj-input-text id="createNewPrice" value="{{inputPrice}}"></oj-input-text> <oj-label class="oj-label oj-label-value" for="createNewDesc">Description</oj-label> <oj-input-text id="createNewDesc" value="{{inputShortDesc}}"></oj-input-text> --> </div> . . . </oj-dialog> -
In the
div slot="body"element of theeditDialogbutton, below the commented-out elements, add thedemo-update-itemweb component element with the attribute values for each input text field.<oj-dialog id="editDialog" class="no-display" dialog-title="Update Item Details" cancel-behavior="icon" > <div slot="body"> . . . <demo-update-item item-id="34" item-name="John" item-price="3434.55" item-desc="This is an updated item" > </demo-update-item> </div> <div slot="footer"> <oj-button id="submitBtn" on-oj-action="[[updateItemSubmit]]">Submit</oj-button> </div> </oj-dialog> -
Save the
dashboard.htmlfile.
Task 5: Test Your App
The Update Item Details dialog displays static values in the input text fields. These values are not editable. You must bind the attribute values to the property references to edit the fields.
-
In the terminal window, change to the
JET_Web_Applicationdirectory and run the web app.npx ojet serveThe browser displays your web app with the Product Information panel.
-
In the browser that displays your web app, select an activity in the Activities section, choose an item in the Activity Items section, and then click Update.

In the next task of this tutorial, you replace the static data with data from a REST endpoint.
-
Leave the terminal window and the browser window or tab that displays your web app open.
The
npx ojet servecommand allows you to make changes to your web app code that are immediately reflected in the browser.
Task 6: Use REST Data in the Application View
The Oracle JET web app uses data from a REST endpoint. You must modify the attribute values of the demo-update-item web component element that is defined in the HTML file of your web app to display data from the REST endpoint.
-
Navigate to the
JET_Web_Application/src/ts/viewsdirectory and open thedashboard.htmlfile in an editor. -
Edit the attributes that are defined in the
demo-update-itemelement to use values from the REST endpoint of theJET_Web_Application.<oj-dialog id="editDialog" class="no-display" dialog-title="Update Item Details" cancel-behavior="icon" > <div slot="body"> <demo-update-item item-id="[[itemData().id]]" item-name="{{inputItemName}}"> </demo-update-item> </div> <div slot="footer"> <oj-button id="submitBtn" on-oj-action="[[updateItemSubmit]]">Submit</oj-button> </div> </oj-dialog>The property name references for the attribute values use
{{}}double braces for two-way data binding and[[]]double braces for one-way data binding. -
Save the
dashboard.htmlfile.Your
dashboard.htmlcode should look similar to final-use-wc-dashboard-html.txt. -
Return to the browser to view the changes in your web app.
-
In the browser that displays your web app, select an activity in the Activities section, choose an item in the Activity Items section, and then click Update.

The Update Item Details dialog displays the attribute values from the REST endpoint in the input text fields. You can now update the item details and click Submit.
-
Close the browser window or tab that displays your running web app.
-
In the terminal window, press Ctrl+C, and if prompted, enter
yto terminate the Oracle JET tooling batch job. Close the terminal window.
Task 7: (Optional) Run a Web App from a Restored App
If you want to run the completed Oracle JET web app from the supplied code, you can restore the web app from the downloaded archive file. To work with a “stripped and zipped” Oracle JET web app, you must restore project dependencies, including Oracle JET tooling and the required libraries and modules, within the extracted app.
-
Download the
jet_web_component_application_final.zipfile and extract the contents of the completed web app to thejet_web_component_application_finalfolder. -
In the terminal window, navigate to the
jet_web_component_application_finalfolder and restore the Oracle JET web app by installing the NPM packages that it requires.npm install -
Wait for a confirmation message similar to the following.
added 284 packages in 59sThe web app is ready to use.
-
Run the web app and test in the browser.
npx ojet serve -
Close the browser window or tab that displays your running web app.
-
In the terminal window, press Ctrl+C, and if prompted, enter
yto exit the Oracle JET tooling batch job.
Next Step
Proceed to the next tutorial in this module.
This tutorial is part of the module Reusable Web Components.
- Create an Oracle JET Web Component
- Enhance and Archive the Oracle JET Web Component
- Use the Web Component in an Oracle JET Web App
- Import the Oracle JET Web Component into Oracle Visual Builder
You can return to the learning path’s main page to access all the modules on building web apps.
More Learning Resources
Explore other labs on docs.oracle.com/learn or access more free learning content on the Oracle Learning YouTube channel. Additionally, visit education.oracle.com/learning-explorer to become an Oracle Learning Explorer.
For product documentation, visit Oracle Help Center.
Use the web component in an Oracle JET web app
F11867-13