Create the detail view in an Oracle JET virtual DOM app
Introduction
Oracle JavaScript Extension Toolkit (Oracle JET) components preserve the hierarchical relationship of master and detail data objects, as defined by the data source. In the previous tutorial, you created a data provider object using an instance of the MutableArrayDataProvider class. Using props, you passed the data provider object to the List View component in the ActivityContainer component and rendered the data items. Now, using the same JSON data store, you will create the detail view of your app by populating the ActivityItemContainer and ItemDetailContainer components, respectively, with the activity items of a given activity and the specific item details of an activity item by passing them data from a parent container using props.
Objectives
In this tutorial, you will read master-detail hierarchical data from a local JSON document and display the detail view in an Oracle JET virtual DOM app. You will data bind multiple items of the child data objects from a local JSON document and populate the rows of an Oracle JET List View component in the ActivityItemContainer component with that data, as well as Oracle JET Avatar and Chart components in the ItemDetailContainer component.
Prerequisites
- A development environment set up to create Oracle JET virtual DOM apps that includes an installation of Node.js
- Completion of the previous tutorial in this learning path, Create the Master View in an Oracle JET Virtual DOM App
Task 1: Create a Data Provider in Parent Container 2
-
Navigate to the
JET-Virtual-DOM-app/src/componentsdirectory and open theParentContainer2.tsxfile in an editor. -
At the top of the file, add
importstatements for theMutableArrayDataProviderclass and the JSON data in thestore_data.jsonfile.import MutableArrayDataProvider = require("ojs/ojmutablearraydataprovider"); import * as storeData from "text!./store_data.json"; -
Create
ItemandActivityItemtype aliases.type Item = { id: number; name: string; short_desc?: string; price?: number; quantity?: number; quantity_shipped?: number; quantity_instock?: number; activity_id?: number; image?: string; }; type ActivityItem = { id: number; name: string; items: Array<Item>; short_desc: string; image: string; }; -
Add an
activityItemDPinstance of aMutableArrayDataProvider, as well as two variables used to provide the data provider with the Baseball activity’s items from the JSON data source.const activityData = JSON.parse(storeData); let activityItemsArray = activityData[0].items // Create data provider instance for the array of activity items for the Baseball activity const activityItemDP = new MutableArrayDataProvider<ActivityItem["id"], ActivityItem>(activityItemsArray, { keyAttributes: "id", }); -
In the
ParentContainer2function, add adataattribute to theActivityItemContainerelement to pass the data provider object to theActivityItemContainercomponent usingprops.<ActivityItemContainer data={activityItemDP} />Save the file. Your code should look similar to
parent-container2-1-tsx.txt.
Task 2: Create the Activity Item Container’s List View Component
-
Navigate to the
JET-Virtual-DOM-app/src/components/ActivityItemdirectory and open theActivityItemContainer.tsxfile in an editor. -
At the top of the file, delete the
importstatements for theResponsiveUtilsmodule and theuseRef,useState, anduseEffecthooks. Also delete thesm_md_viewvariable. -
Inside the
ActivityItemContainerfunction, remove code that makes use of hooks and state and that enables the conditional display of content in thereturnstatement. Your function should look similar to the following code.const ActivityItemContainer = () => { return ( <div id="activityItemsContainer" class="oj-flex-item oj-bg-success-20 oj-sm-padding-4x-start oj-md-6 oj-sm-12"> <div id="container" class="item-display no-wrap"> <h3>Activity Items</h3> <ul> <li class="li-item">Louisville Slugger Bat</li> . . . </ul> </div> </div> ); }; -
Delete the
ulelement from thereturnstatement, and in thedivelement whereid="container", remove theclassattribute. TheActivityItemContainerfunction should look similar to the following code.const ActivityItemContainer = () => { return ( <div id="activityItemsContainer" class="oj-flex-item oj-bg-success-20 oj-sm-padding-4x-start oj-md-6 oj-sm-12"> <div id="container"> <h3>Activity Items</h3> </div> </div> ); }; -
Add the following
importstatements for the Oracle JET List View component andMutableArrayDataProviderclass to the top of the file.import "ojs/ojlistview"; import { ojListView } from "ojs/ojlistview"; import MutableArrayDataProvider = require("ojs/ojmutablearraydataprovider"); -
Add
Props,ActivityItem, andItemtype aliases below the block ofimportstatements.type Props = { data?: MutableArrayDataProvider<ActivityItem["id"], ActivityItem>; value?: string; }; type Item = { id: number; name: string; short_desc?: string; price?: number; quantity?: number; quantity_shipped?: number; quantity_instock?: number; activity_id?: number; image?: string; }; type ActivityItem = { id: number; name: string; items: Array<Item>; short_desc: string; image: string; }; -
Create the
listItemRendererfunction that renders each list item and includesspananddivelements to populate the List View component’s rows with a background image, name, and short description.const listItemRenderer = (item: ojListView.ItemTemplateContext) => { const image = item.data.image.replace("css", "styles"); return ( <div class="oj-flex no-wrap"> <span class="demo-thumbnail oj-flex-item" style={"background-image:url(" + image + ")"}></span> <div class="demo-content oj-flex-item"> <div> <strong>{item.data.name}</strong> </div> <span class="demo-metadata">{item.data.short_desc}</span> </div> </div> ); }; -
Underneath the
listItemRendererfunction, add aListViewPropstype alias and two variables to define the gridline and scroll properties for the List View component.type ListViewProps = ComponentProps<"oj-list-view">; const gridlinesItemVisible: ListViewProps["gridlines"] = { item: "visible" }; const scrollPolicyOpts: ListViewProps["scrollPolicyOptions"] = { fetchSize: 5 }; -
Add
propsto theActivityItemContainerfunction definition.const ActivityItemContainer = (props: Props) => { -
Inside the
ActivityItemContainerfunction’sreturnstatement, add an Oracle JET List View component, where the data provider object that is passed down fromParentContainer2is accessed viapropsin the List View’sdataattribute.return ( <div id="activityItemsContainer" class="oj-flex-item oj-bg-success-20 oj-sm-padding-4x-start oj-md-6 oj-sm-12"> <div id="container"> <h3>Activity Items</h3> <oj-list-view id="activitiesList" class="item-display" aria-labelledby="activitiesHeader" data={props.data} gridlines={gridlinesItemVisible} selectionMode="single" scrollPolicy="loadMoreOnScroll" scrollPolicyOptions={scrollPolicyOpts}> </oj-list-view> </div> </div> ); -
Within the List View component, add a
templateelement with aslotattribute to render each item in the list.. . . <template slot="itemTemplate" render={listItemRenderer}></template> </oj-list-view>Save the file. Your code should look similar to
activity-item-container-1-tsx.txt.
Task 3: Run the Virtual DOM App
-
In the terminal window, navigate to the
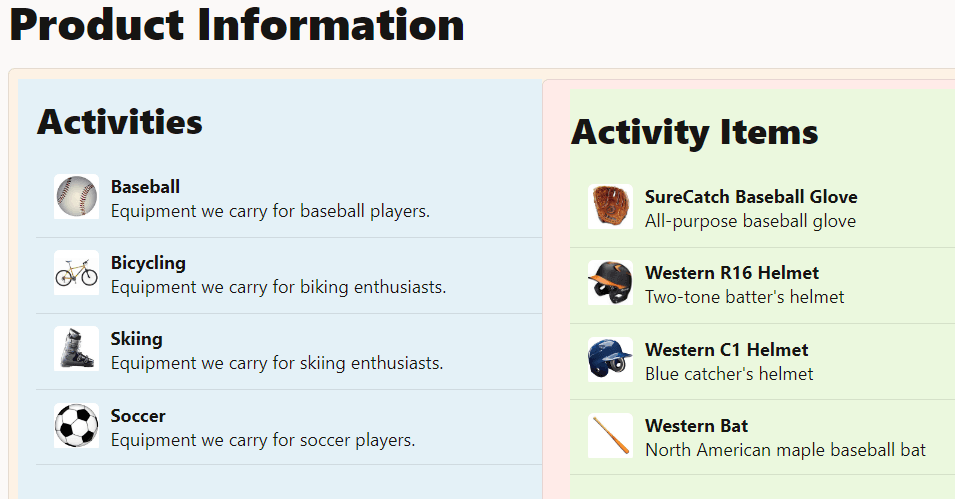
JET_Virtual_DOM_appdirectory and run the app.npx ojet serveThe app runs in the web browser, and the Activity Items list displays the Baseball activity items with their short descriptions and thumbnail images.

-
Leave the terminal window and the browser that displays your app open.
Task 4: Create the Item Detail Chart and Avatar Components
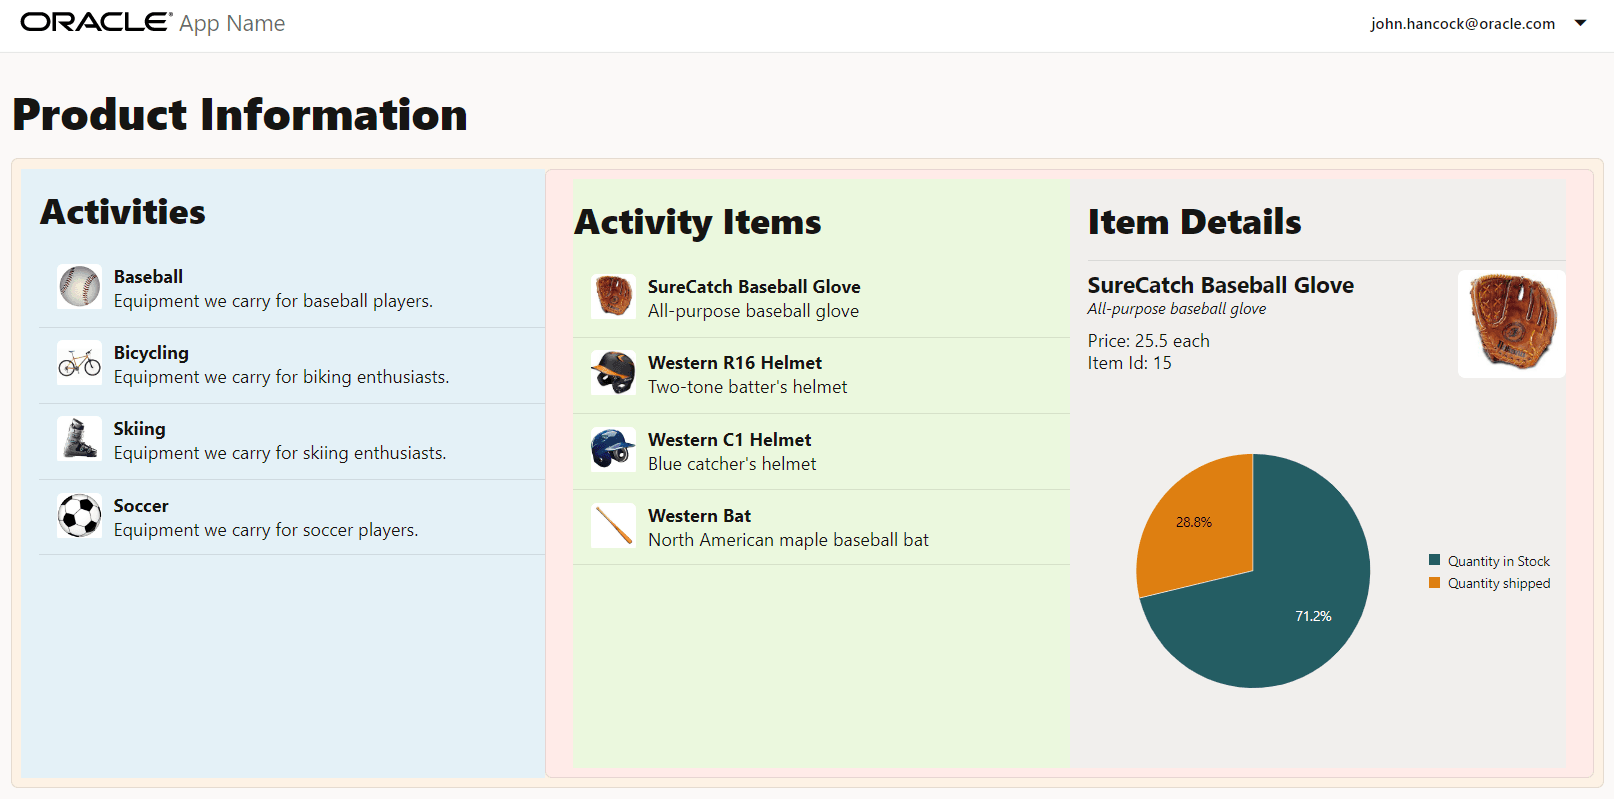
Pass the item details of the SureCatch Baseball Glove activity item from the ParentContainer2 component to the ItemDetailContainer component via props, binding the data to the Oracle JET Chart and Avatar components, as well as to multiple text fields.
-
Navigate to the
JET-Virtual-DOM-app/src/componentsdirectory and open theParentContainer2.tsxfile in an editor. -
Below the
activityItemDPinstance, add aspecificItemvariable to hold the item details data for the SureCatch Baseball Glove activity item.// Create an object variable holding the item details for the SureCatch Baseball Glove const specificItem: Item = activityData[0].items[0] -
Add an
itemattribute to theItemDetailContainerelement to pass down the item details to the child component viaprops.<ItemDetailContainer item={specificItem} />Save the file. Your code should look similar to
parent-container2-2-tsx.txt. -
Navigate to the
JET-Virtual-DOM-app/src/components/ItemDetailContainerdirectory and open theItemDetailContainer.tsxfile in an editor. -
Remove these
importstatements from the top of the file.import { useState, useCallback } from "preact/hooks"; import "ojs/ojlabel"; import "ojs/ojselectsingle"; import { ojSelectSingle } from "ojs/ojselectsingle"; import * as storeData from "text!../store_data.json"; import "ojs/ojlistview"; import { ojListView } from "ojs/ojlistview"; import "ojs/ojlistitemlayout"; -
Add an
importstatement for theojavatarmodule.import "ojs/ojavatar"; -
Remove the
ChartTypetype alias, thechartTypeDataandchartDatavariables, and thechartTypesDPandchartDataProviderdata provider instances. -
Add
PropsandItemtype aliases.type Props = { item?: Item; }; type Item = { id: number; name: string; short_desc?: string; price?: number; quantity?: number; quantity_shipped?: number; quantity_instock?: number; activity_id?: number; image?: string; }; -
Inside the
ItemDetailContainerfunction, delete the following lines of code.const [val, setVal] = useState("bar" as ChartProps['type']); const valChangeHandler = useCallback( (event: ojSelectSingle.valueChanged<ChartType['value'], ChartType>) => { setVal(event.detail.value as ChartProps['type']); }, [val, setVal] ); -
Replace the
chartItemtemplate variable.const chartItem = ( item: ojChart.ItemTemplateContext<ChartItem["id"], ChartItem> ) => { return ( <oj-chart-item value={item.data.value} groupId={[0]} seriesId={item.data.series} ></oj-chart-item> ); }; -
Add
propsto theItemDetailContainerfunction definitionconst ItemDetailContainer = (props: Props) => { -
Add a
pieDataProviderinstance of aMutableArrayDataProviderbefore thereturnstatement.const pieDataProvider: MutableArrayDataProvider<ChartItem["id"], ChartItem> = new MutableArrayDataProvider( [ { series: "Quantity in Stock", value: props.item.quantity_instock }, { series: "Quantity shipped", value: props.item.quantity_shipped }, ], { keyAttributes: "id" } ); -
Inside the
returnstatement, beneath theh3heading for Item Details, delete theoj-labelandoj-select-singleelements. Replace that code with a horizontal rule,oj-avatarelement, anddivelements to display databound item details.<hr class="hr-margin" /> <oj-avatar role="img" size="lg" aria-label={"product image for" + props.item.name} src={props.item?.image?.replace("css", "styles")} class="float-right"></oj-avatar> <div id="itemName" class="data-name">{props.item.name}</div> <div id="itemDesc" class="data-desc">{props.item.short_desc}</div> <div id="itemPrice">{"Price: " + props.item.price + " each"}</div> <div id="itemId">{"Item Id: " + props.item.id}</div> -
Replace the
id,typeanddataattributes in theoj-chartelement. Also add adivelement surrounding theoj-chartelement.<div> <oj-chart id="pieChart" type="pie" data={pieDataProvider} animationOnDisplay="auto" animationOnDataChange="auto" hoverBehavior="dim" class="chartStyle"> <template slot="itemTemplate" render={chartItem}></template> </oj-chart> </div> </div> ); };Save the file. Your code should look similar to
item-detail-container-tsx.txt. -
Navigate to the
JET-Virtual-DOM-app/src/stylesdirectory and open theapp.cssfile in an editor. -
Add the following style classes to the file that are used to format the item details.
.hr-margin {
  margin-top: 12px;
}

.data-name {
  font-size: 20px;
  font-weight: bolder;
}

.data-desc {
  font-size: 14px;
  font-weight: 400;
  font-style: italic;
  margin-bottom: 10px;
}

.float-right {
  float: right;
}
Save the file. Your code should look similar to
app.css.
Task 5: View the Changes in the App
-
Return to the browser to view the changes in your virtual DOM app.
In the Item Detail Container, databound text fields and the Oracle JET Avatar and Chart components display the data for the SureCatch Baseball Glove item. However, the lists in the Activity Item Container and Activity Container do not respond to selection. In the next tutorial, you will add selection functionality.

-
Close the browser window or tab that displays your running app.
-
In the terminal window, press Ctrl+C, and if prompted, enter
yto exit the Oracle JET tooling batch job.
Next Step
Proceed to the next tutorial in this module.
This tutorial is part of the module Master Detail Views in Oracle JET.
- Create the Master View in an Oracle JET Virtual DOM App
- Create the Detail View in an Oracle JET Virtual DOM App
- Handle Selection Events in an Oracle JET Virtual DOM App
You can return to the virtual DOM learning path’s main page to access all the modules on building virtual DOM apps.
More Learning Resources
Explore other labs on docs.oracle.com/learn or access more free learning content on the Oracle Learning YouTube channel. Additionally, visit education.oracle.com/learning-explorer to become an Oracle Learning Explorer.
For product documentation, visit Oracle Help Center.
Create the detail view in an Oracle JET virtual DOM app
F72826-03