Configure BYOIP in Oracle Cloud Infrastructure Using an IPv6 CIDR from RIPE NCC
Introduction
In this tutorial, we will walk through the complete process of Bring Your Own IP (BYOIP) address space into Oracle Cloud Infrastructure (OCI) using an IPv6 CIDR block allocated and administered through Réseaux IP Européens Network Coordination Centre (RIPE NCC). This approach benefits organizations that already own IPv6 ranges or need to maintain consistent IP addressing across hybrid or multicloud environments.
By following this tutorial, you will not only learn how to prepare your IPv6 address space for import into OCI but also how to configure the administrative records in the RIPE NCC portal properly, authorize Oracle to advertise your prefix, and ultimately assign your custom IPv6 addresses to OCI resources such as Virtual Cloud Networks (VCNs) and compute instances.
This tutorial covers each task in detail from acquiring or verifying your IPv6 CIDR to updating registry records to using your imported range within OCI networking. Whether you are migrating workloads, setting up hybrid connectivity, or building an Internet facing architecture, this tutorial gives you the foundation to integrate BYOIP IPv6 into your OCI.
BYOIP address space into OCI empowers you with full control over your IP identity. This capability supports consistent networking across hybrid and multicloud environments, while enabling more flexible and customized network design.
In this tutorial, you will learn how to acquire or use an existing IPv6 CIDR block, complete the necessary administrative steps with RIPE NCC, and import and validate the CIDR within OCI. You will also see how to deploy the IPv6 CIDR in your Virtual Cloud Network (VCN) and manage globally routable IPv6 addresses across your workloads all under your own Regional Internet Registry (RIR) allocation. Whether your goals are driven by compliance, network ownership, or architectural consistency, OCI’s BYOIP IPv6 functionality provides a powerful foundation for building a fully autonomous cloud networking environment.
Objectives
- Task 1: Get the IPv6 range for import into OCI.
- Task 1.1: Purchase or rent an IPv6 CIDR.
- Task 1.2: Complete RIPE NCC administration tasks.
- Task 1.3: Verify IPv6 CIDR assignment in the RIPE NCC console.
- Task 2: Start the import of the IPv6 CIDR in OCI.
- Task 3: Add the token string as a new
descrfield associated with your address range. - Task 4: Create a Route Origin Authorization (ROA) object that authorizes Oracle to advertise the BYOIP CIDR block.
- Task 5: Finish the import of the IPv6 CIDR in OCI.
- Task 6: Verify the import of the IPv6 CIDR in OCI.
- Task 7: Advertise the IPv6 CIDR to the Internet.
- Task 8: Assign BYOIP IPv6 CIDR to a VCN.
- Task 9: Create a subnet within the BYOIP IPv6 CIDR range.
- Task 10: Create and assign a new routing table for VCN.
- Task 11: Create an instance and use an IPv6 address from the BYOIP IPv6 CIDR range.
Task 1: Get an IPv6 Range for Import into OCI
To use the BYOIP feature in OCI with an IPv6 CIDR block, the first requirement is to have a publicly routable IPv6 address space that is appropriately registered and administered through a Regional Internet Registry (RIR), in this case, it is RIPE NCC.
Note: We are renting IPv6 space from a third-party provider, as we do not own an IPv6 allocation. If you already own IPv6 address space and manage it directly under your RIPE account or Local Internet Registry (LIR), you can skip Task 1 and continue with Task 2.
Task 1.1: Purchase or Rent an IPv6 CIDR
If you do not already own an IPv6 range, you will need to either:
- Purchase a block of IPv6 addresses from a provider or broker,
Or,
- Rent an IPv6 CIDR from a third-party company offering leased address space, routing, and registry control.
In this tutorial, we are using a company called NoPKT LLC that provides LIR services. Several other providers offer similar LIR services, so you can choose the one that best fits your needs.
Before making any purchases at NoPKT LLC, we must create an account.
-
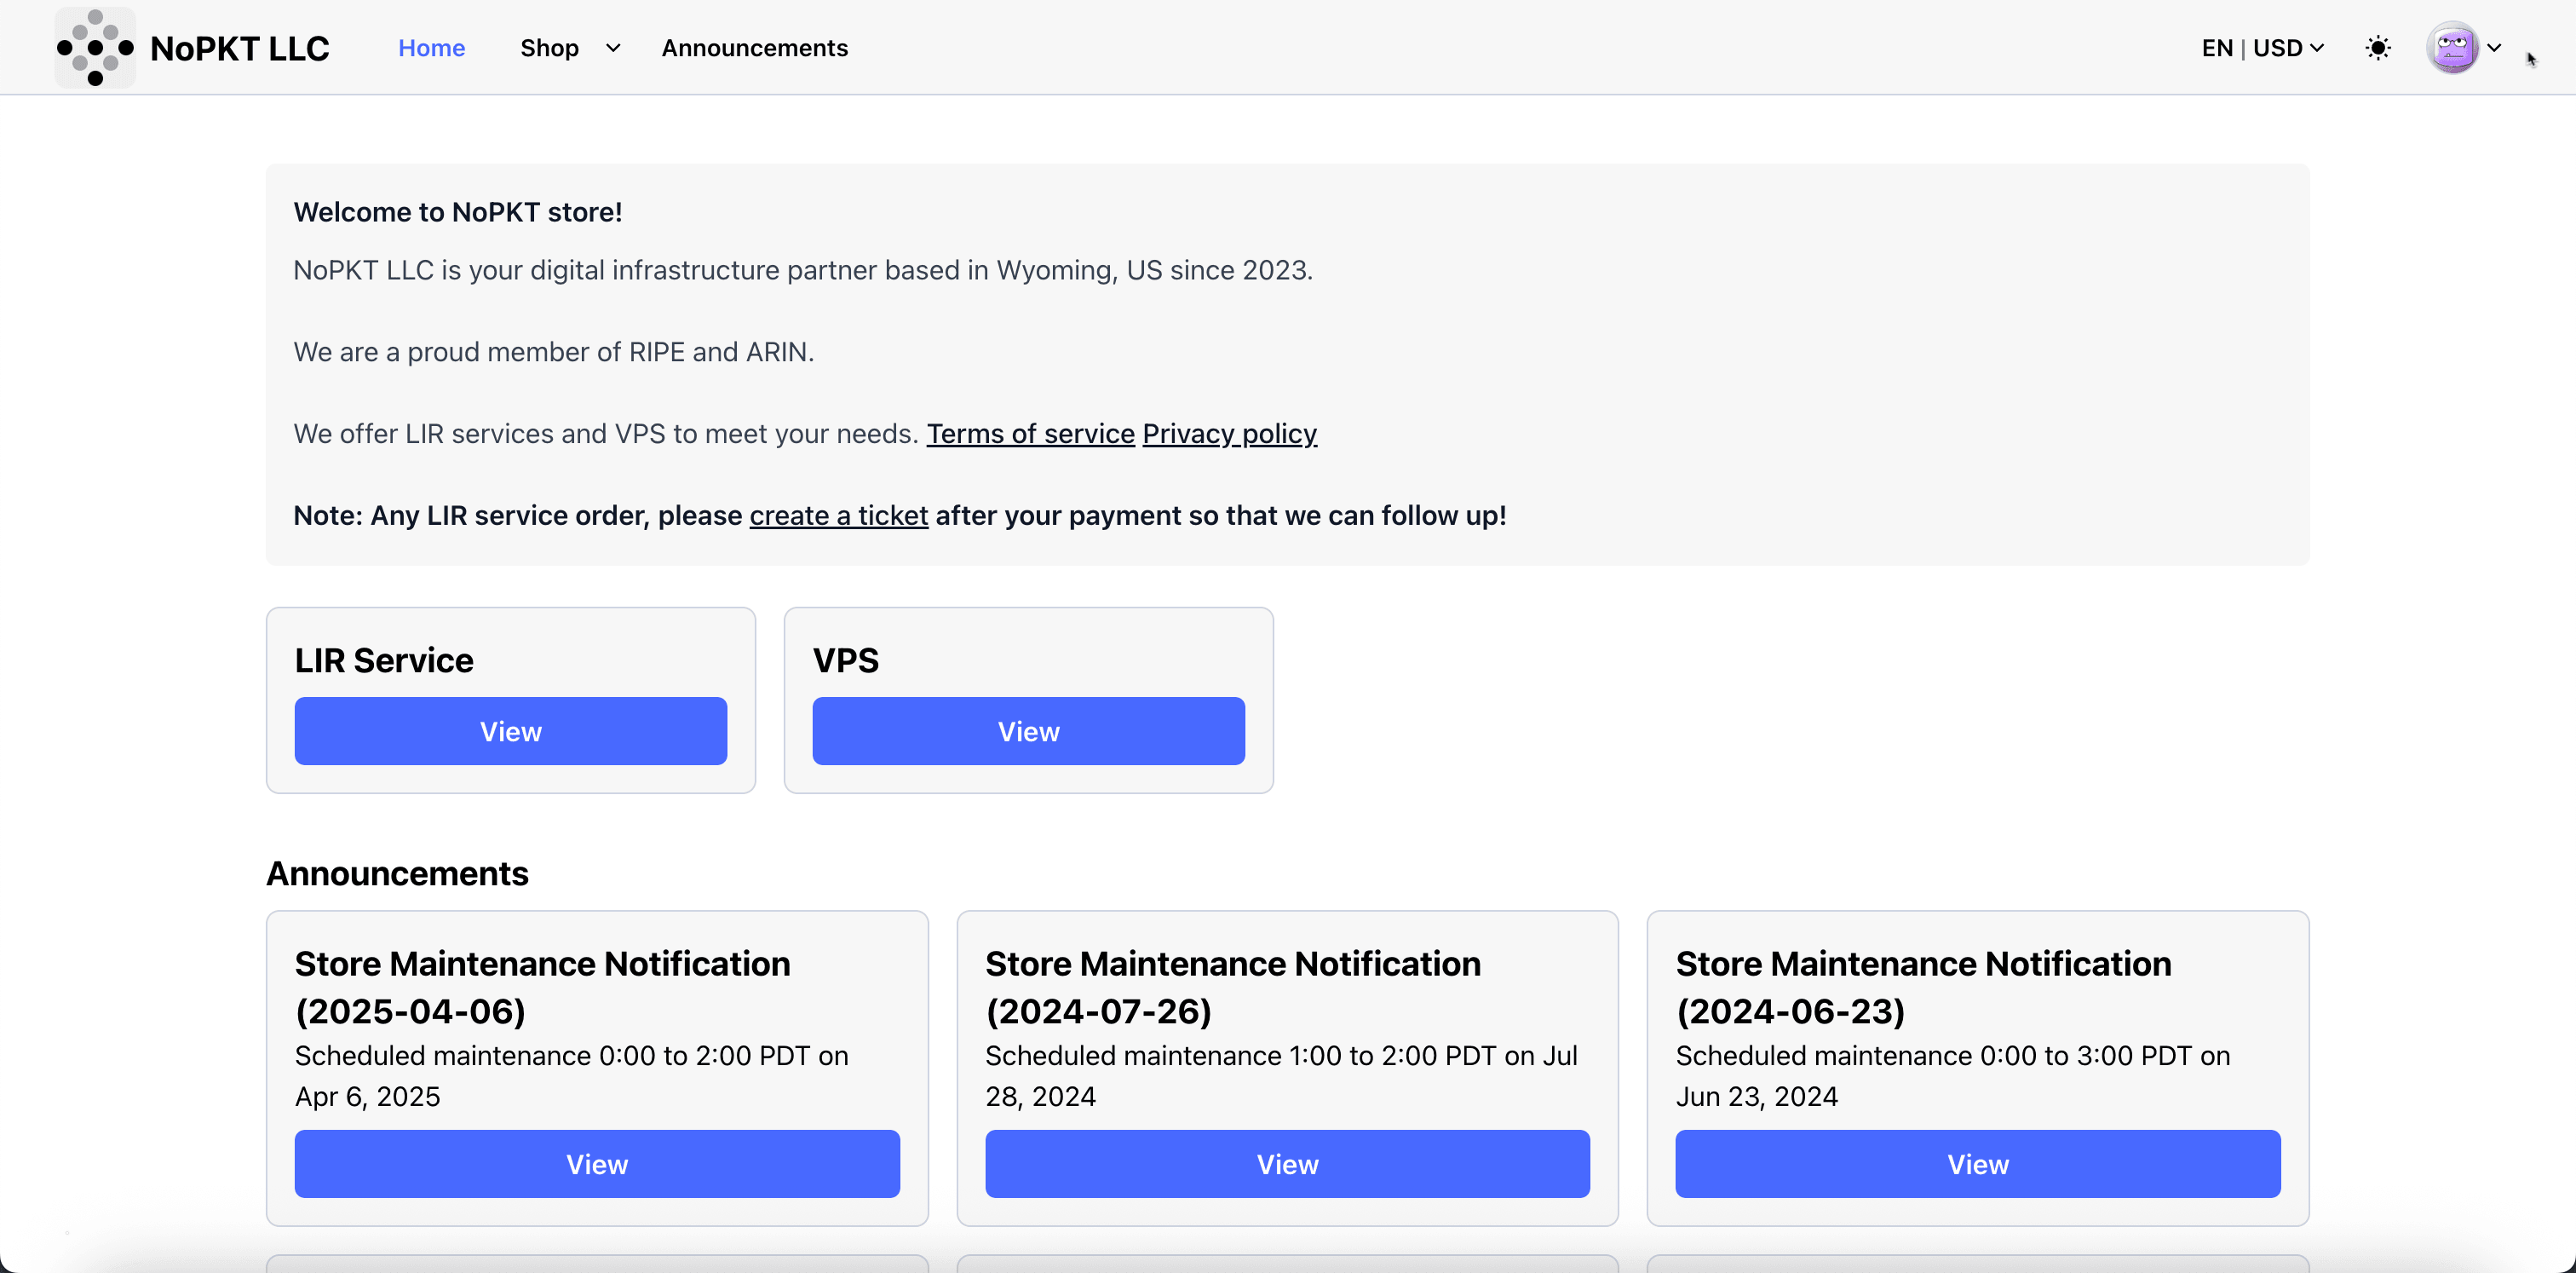
Once registered and logged in, go to the NoPKT LLC store and click LIR Service.
-
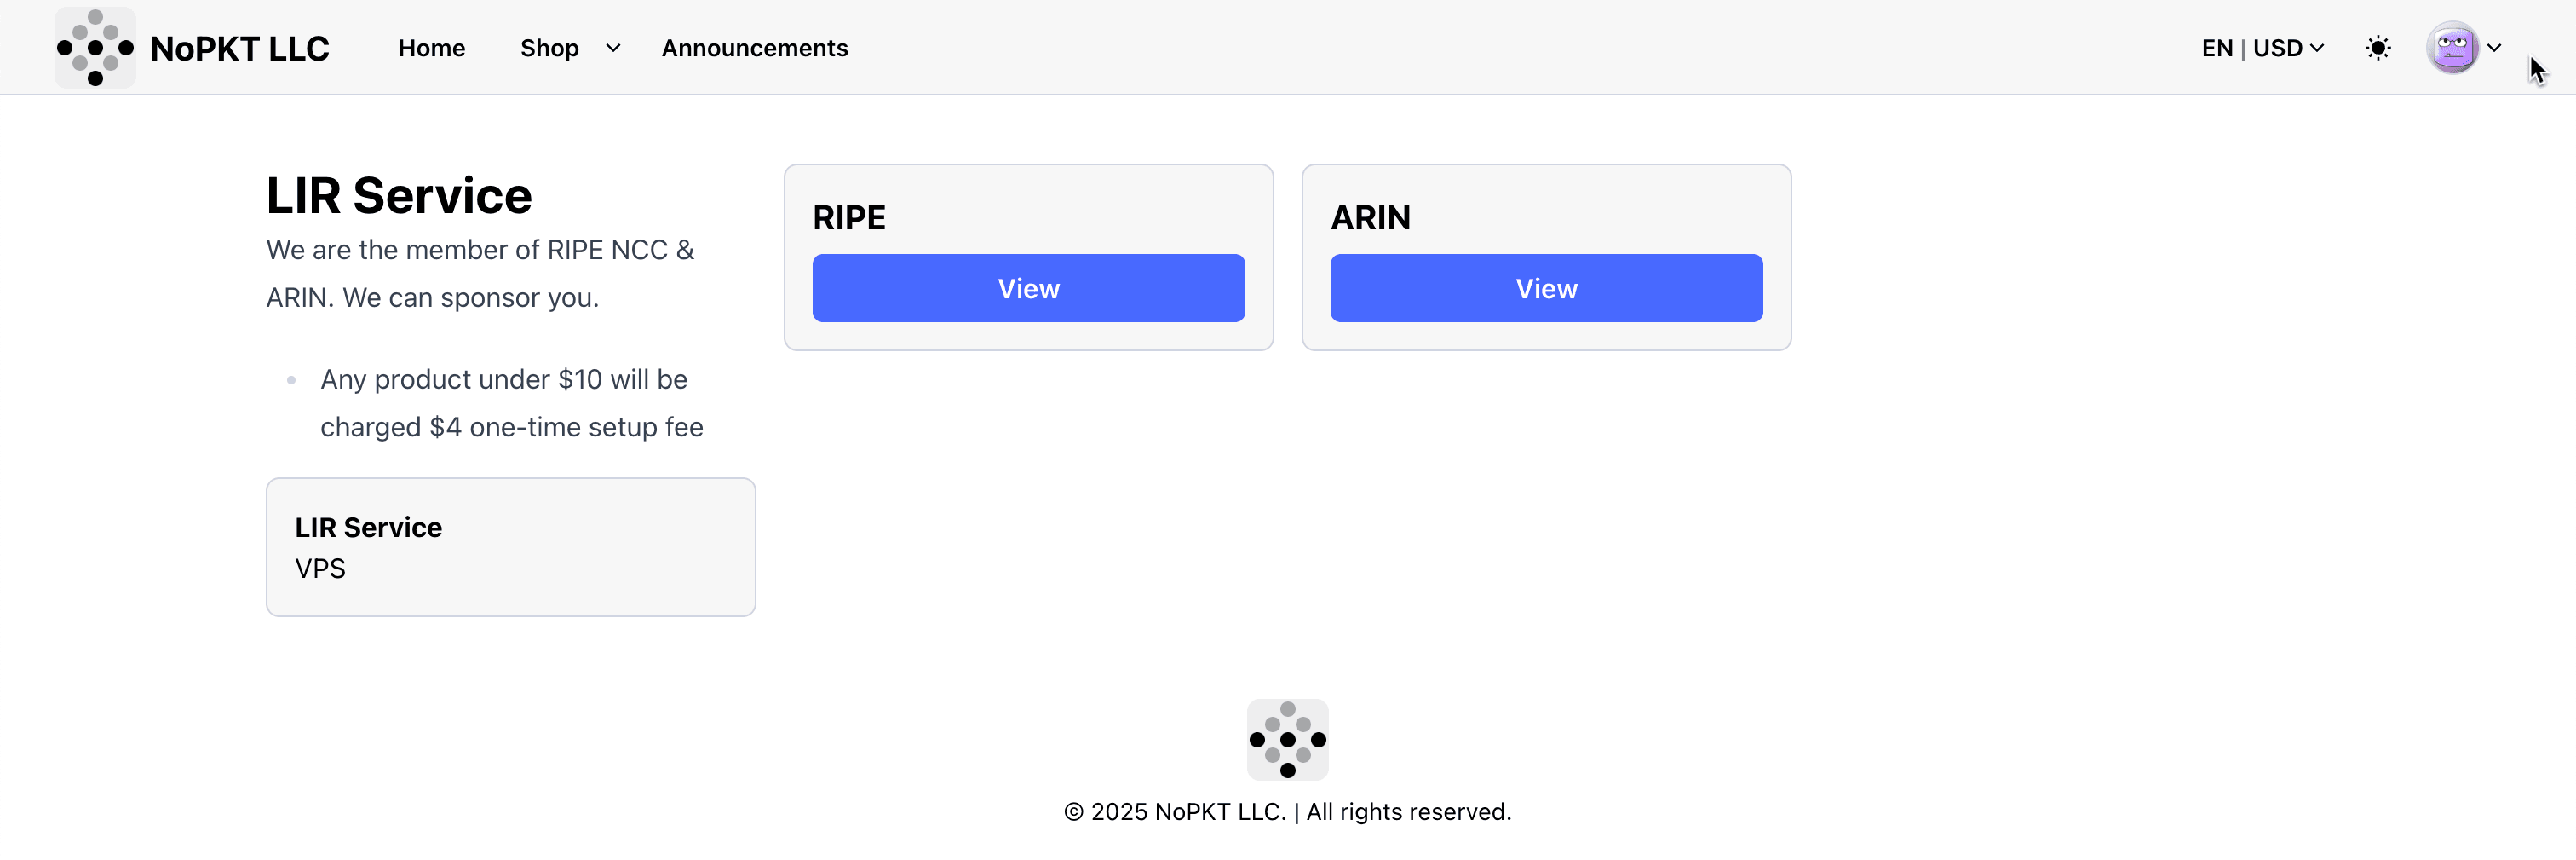
NoPKT LLC has the option to rent IPv6 CIDRs from RIPE or ARIN. We are going with the RIPE option.
-
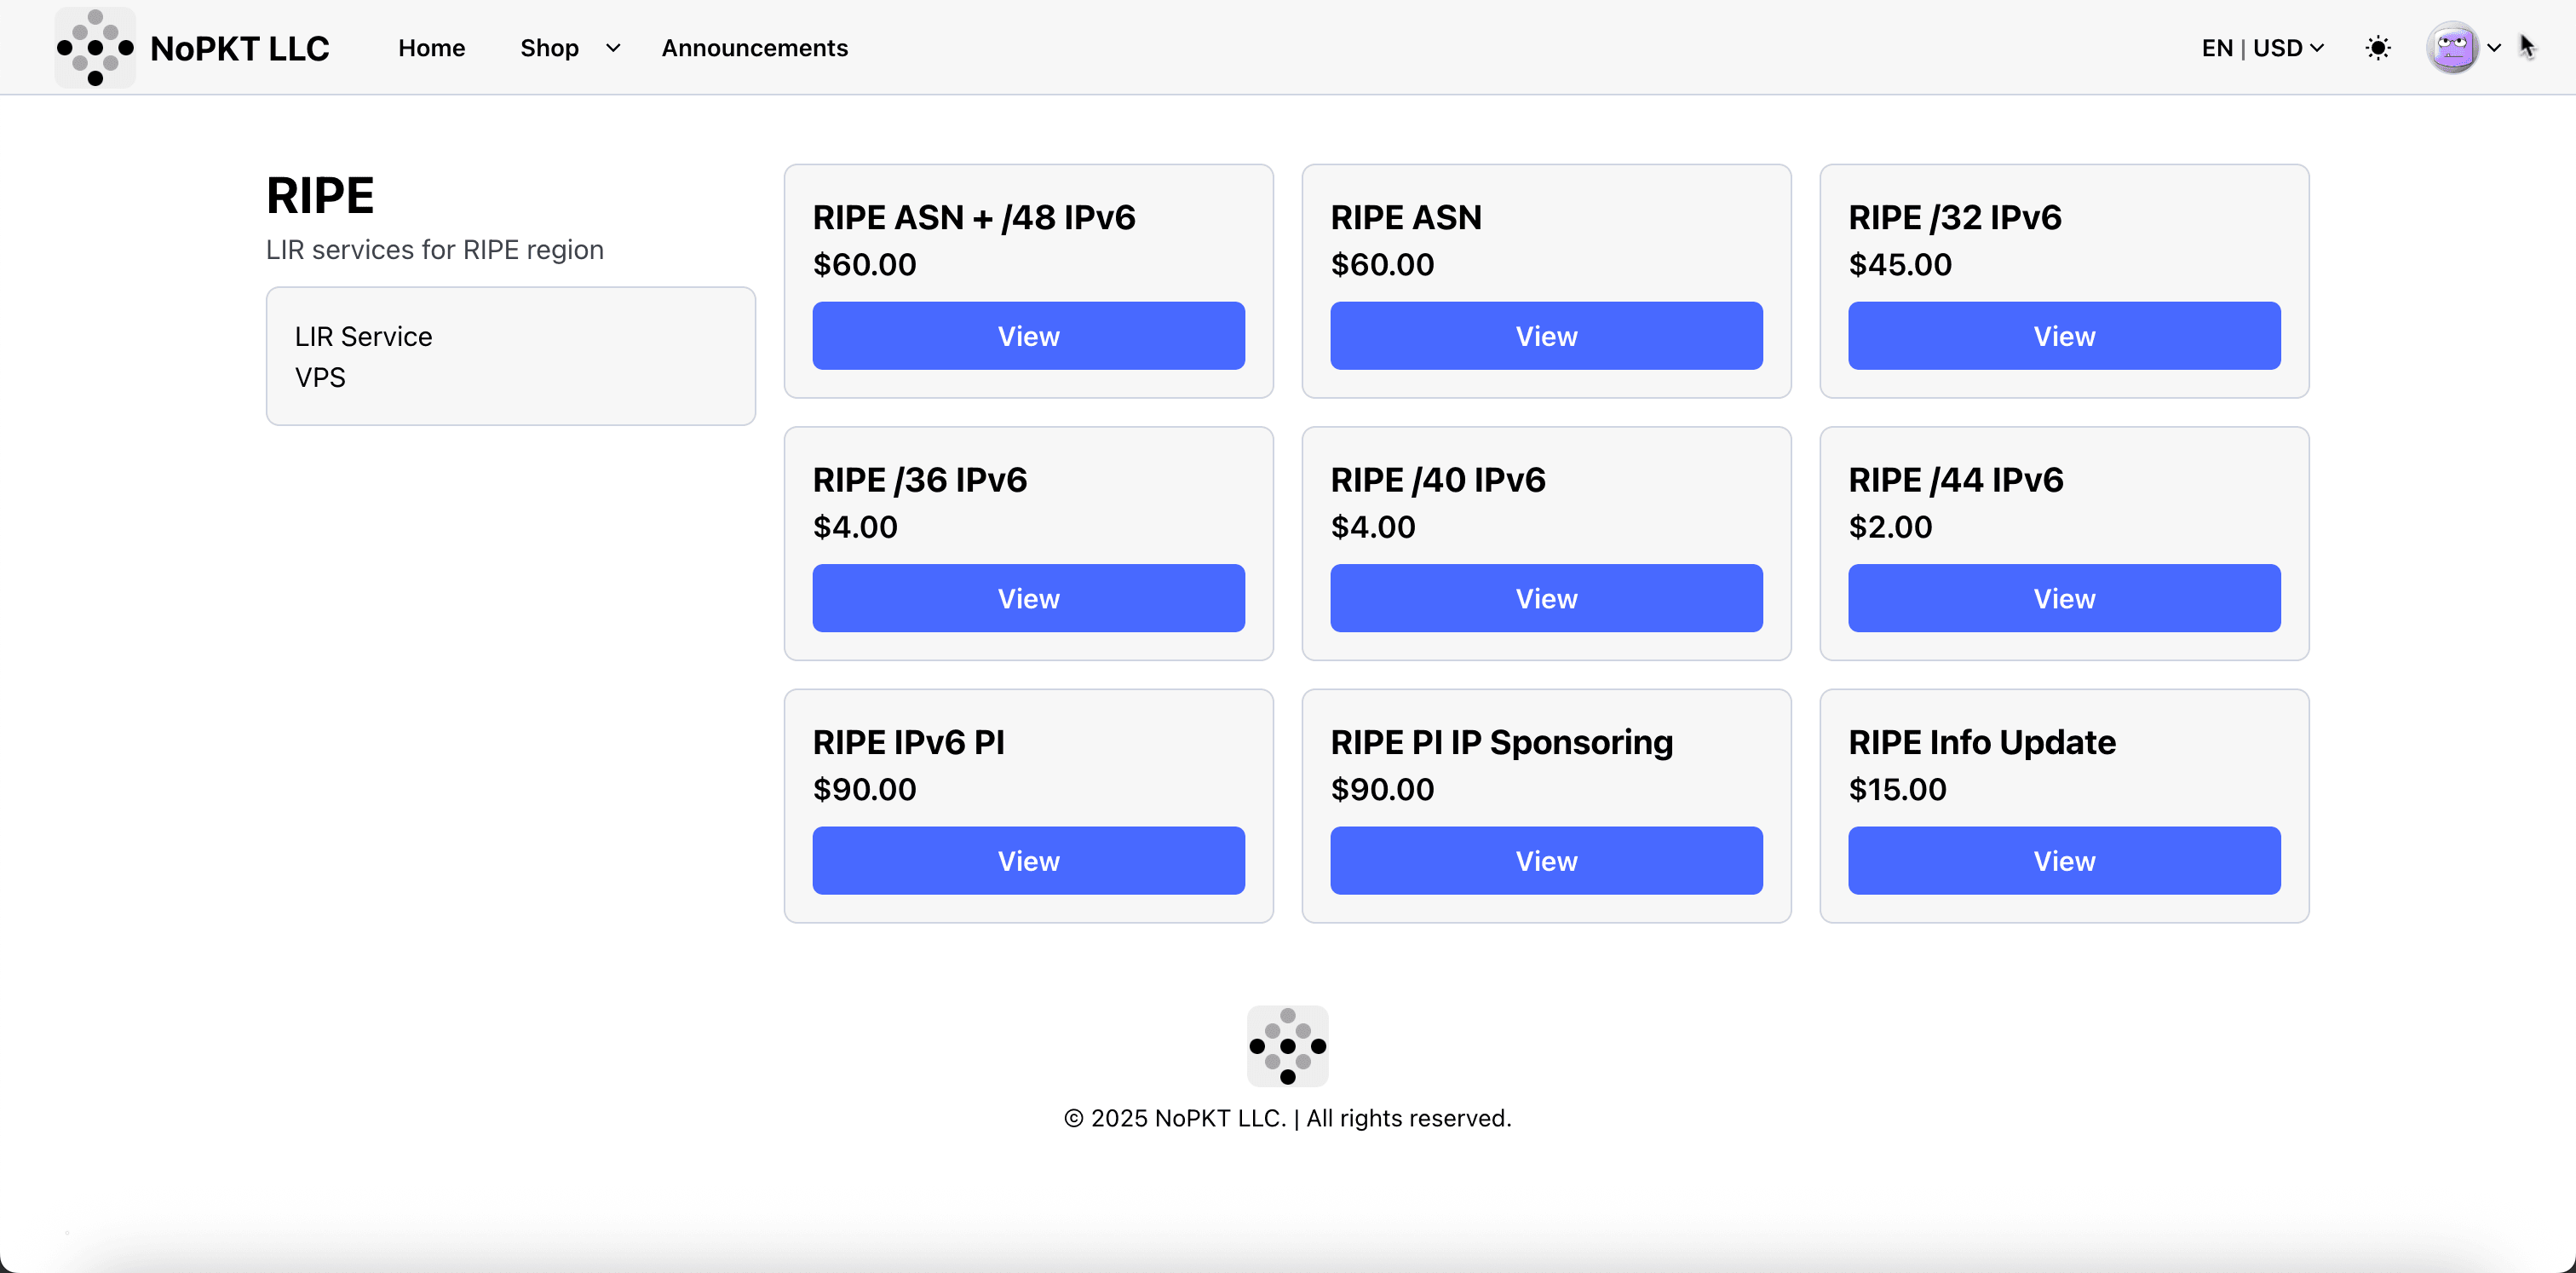
Select the RIPE /44 IPv6 ($2.00) product.
-
Add RIPE /44 IPv6 to the cart.

-
Select the plan, for this tutorial, we will select the annual plan and click Checkout.

-
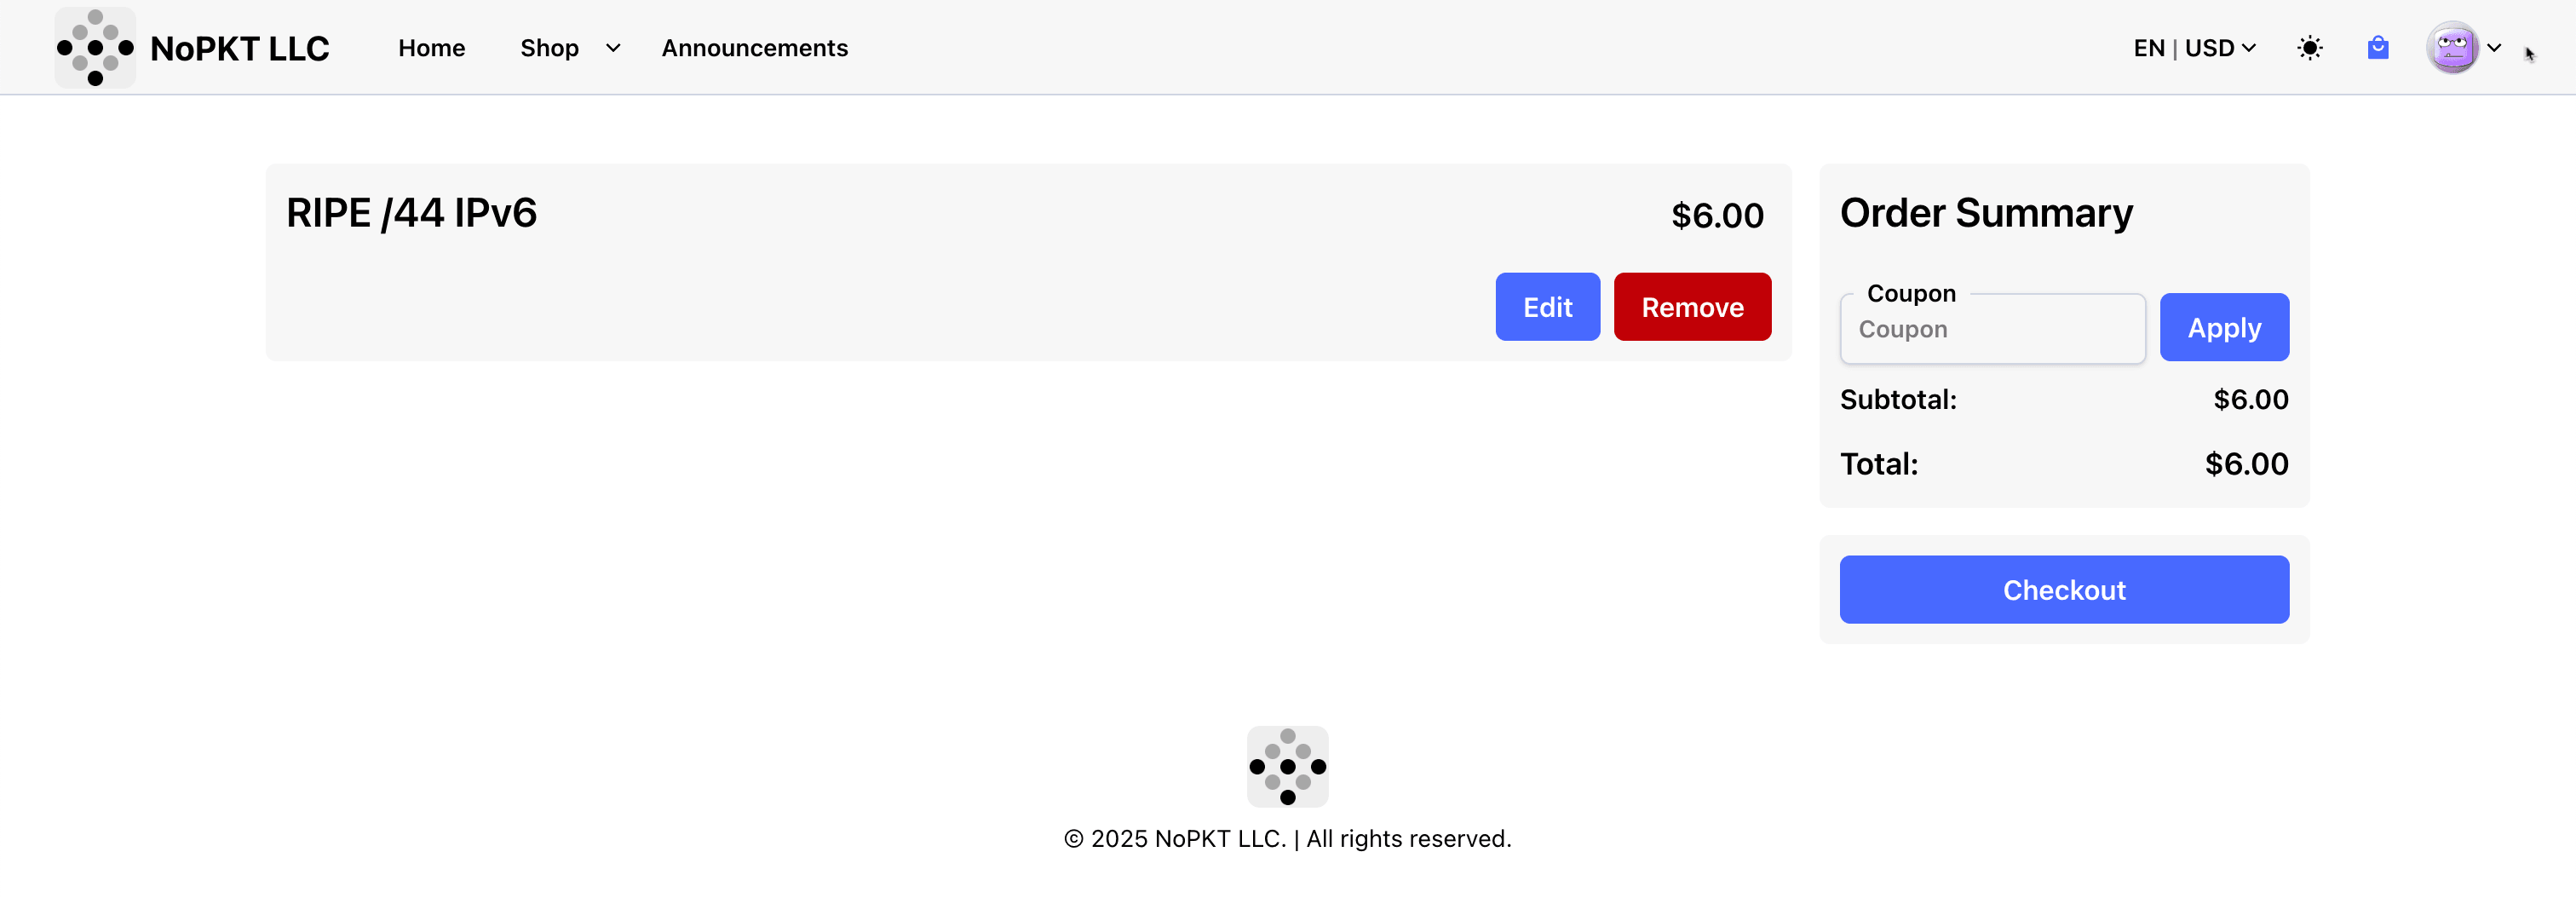
Click Checkout.
-
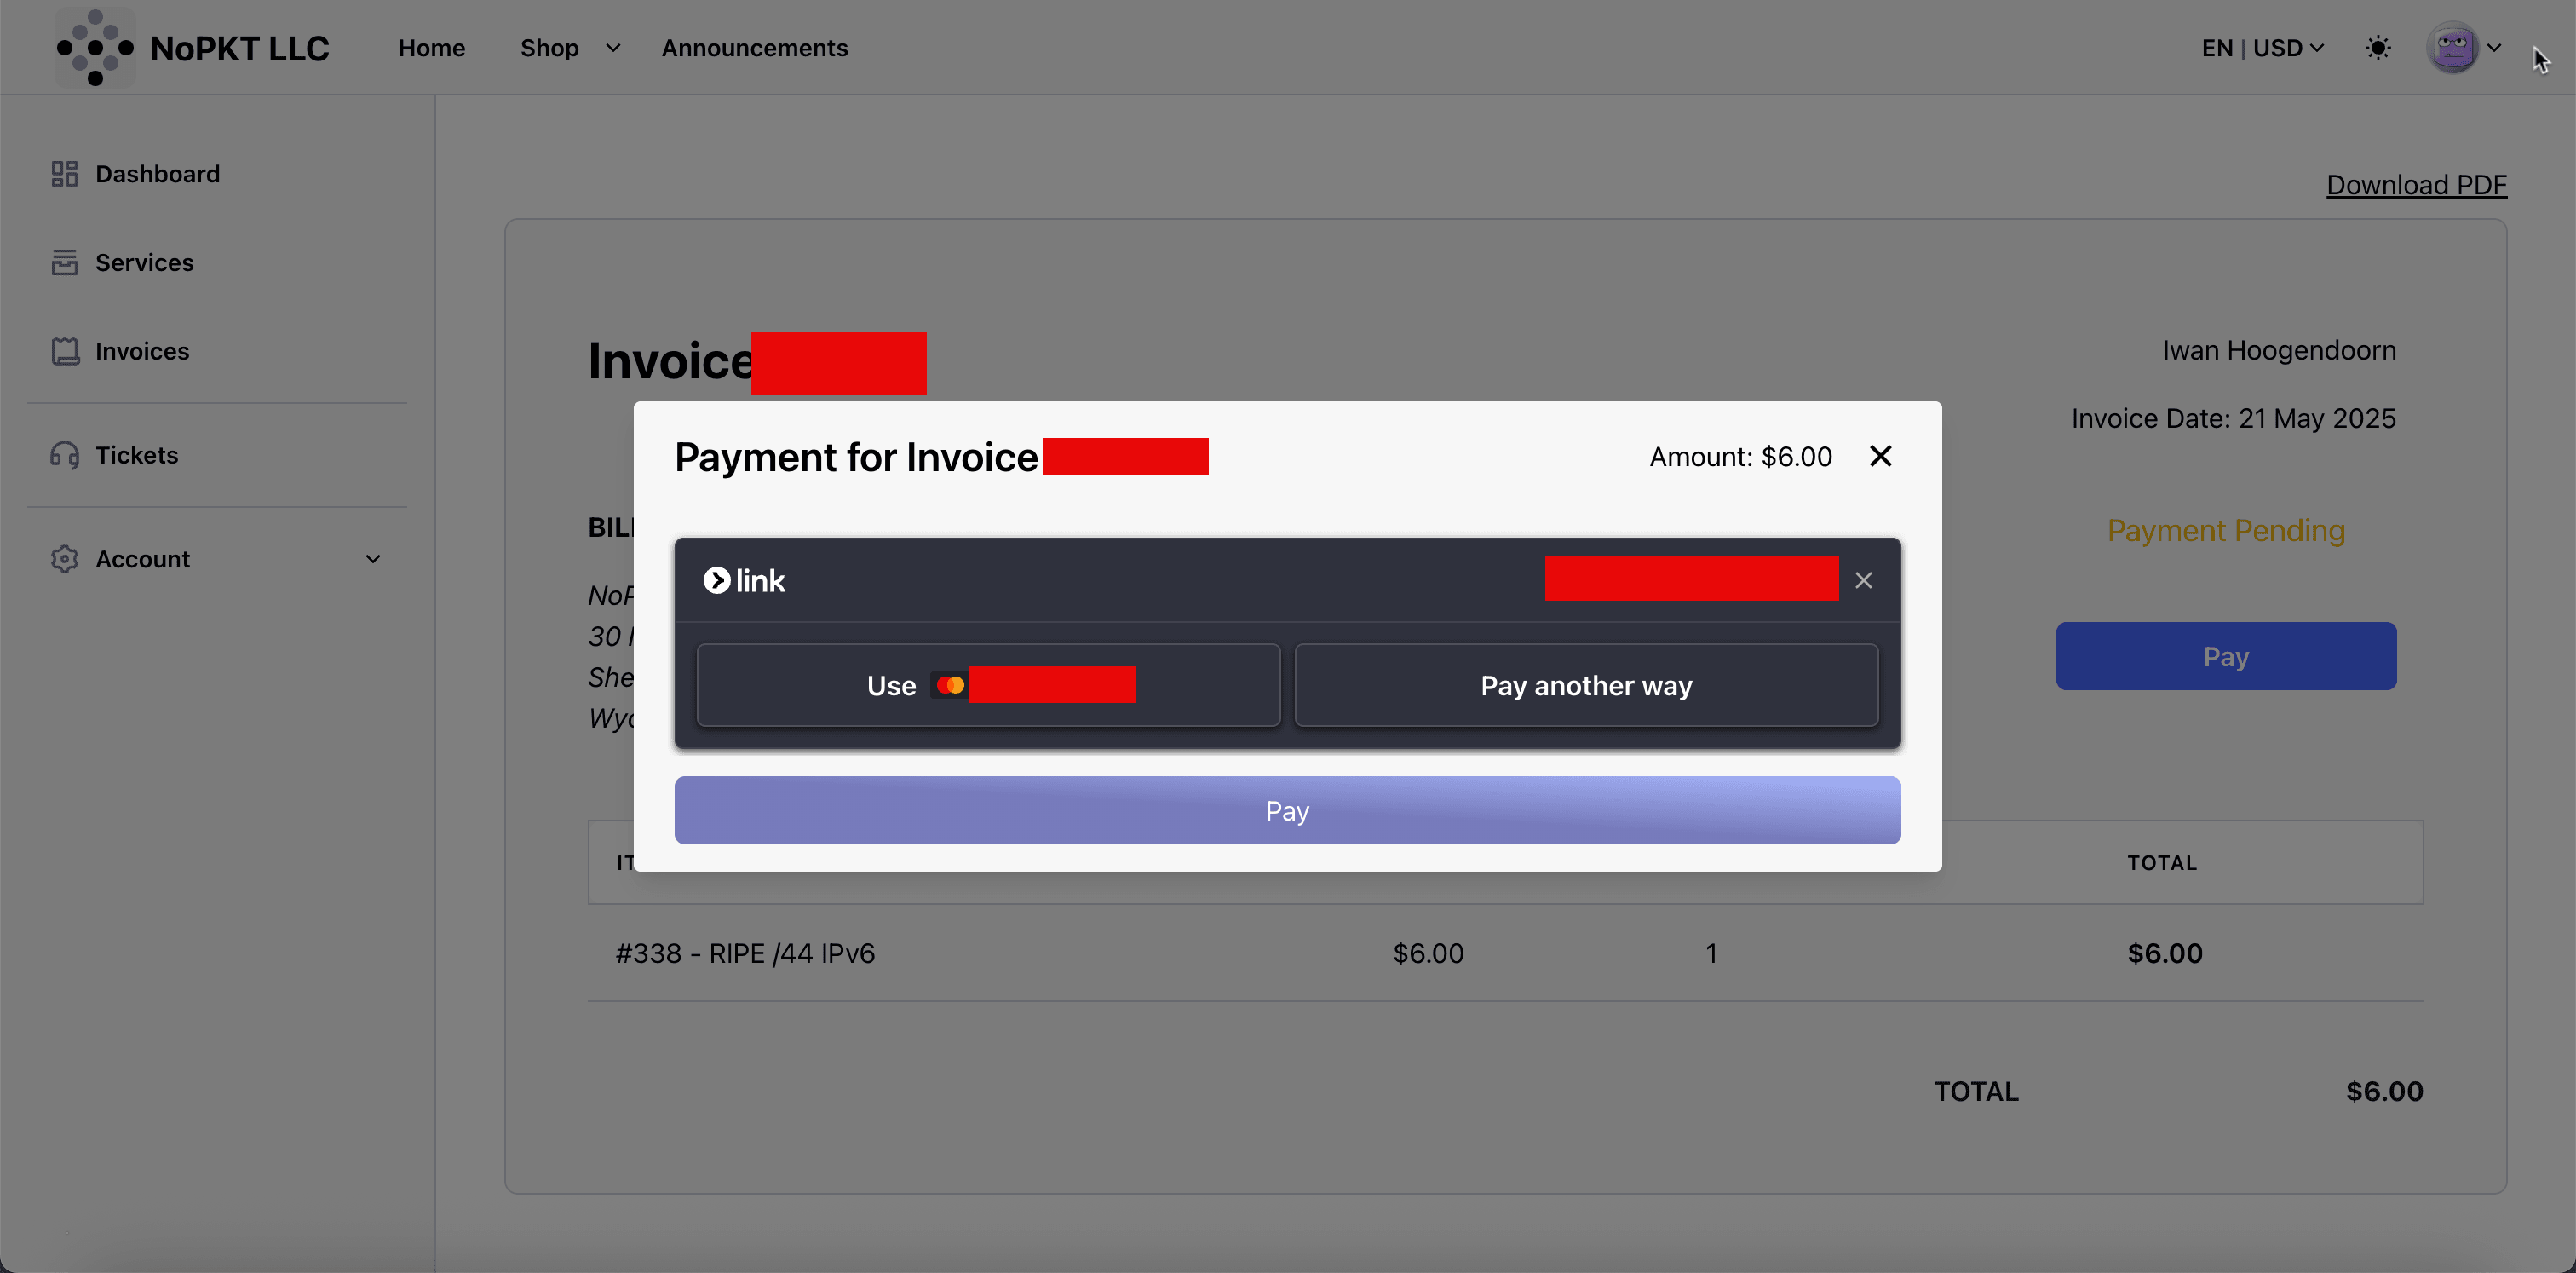
Click Pay and complete the payment.
-
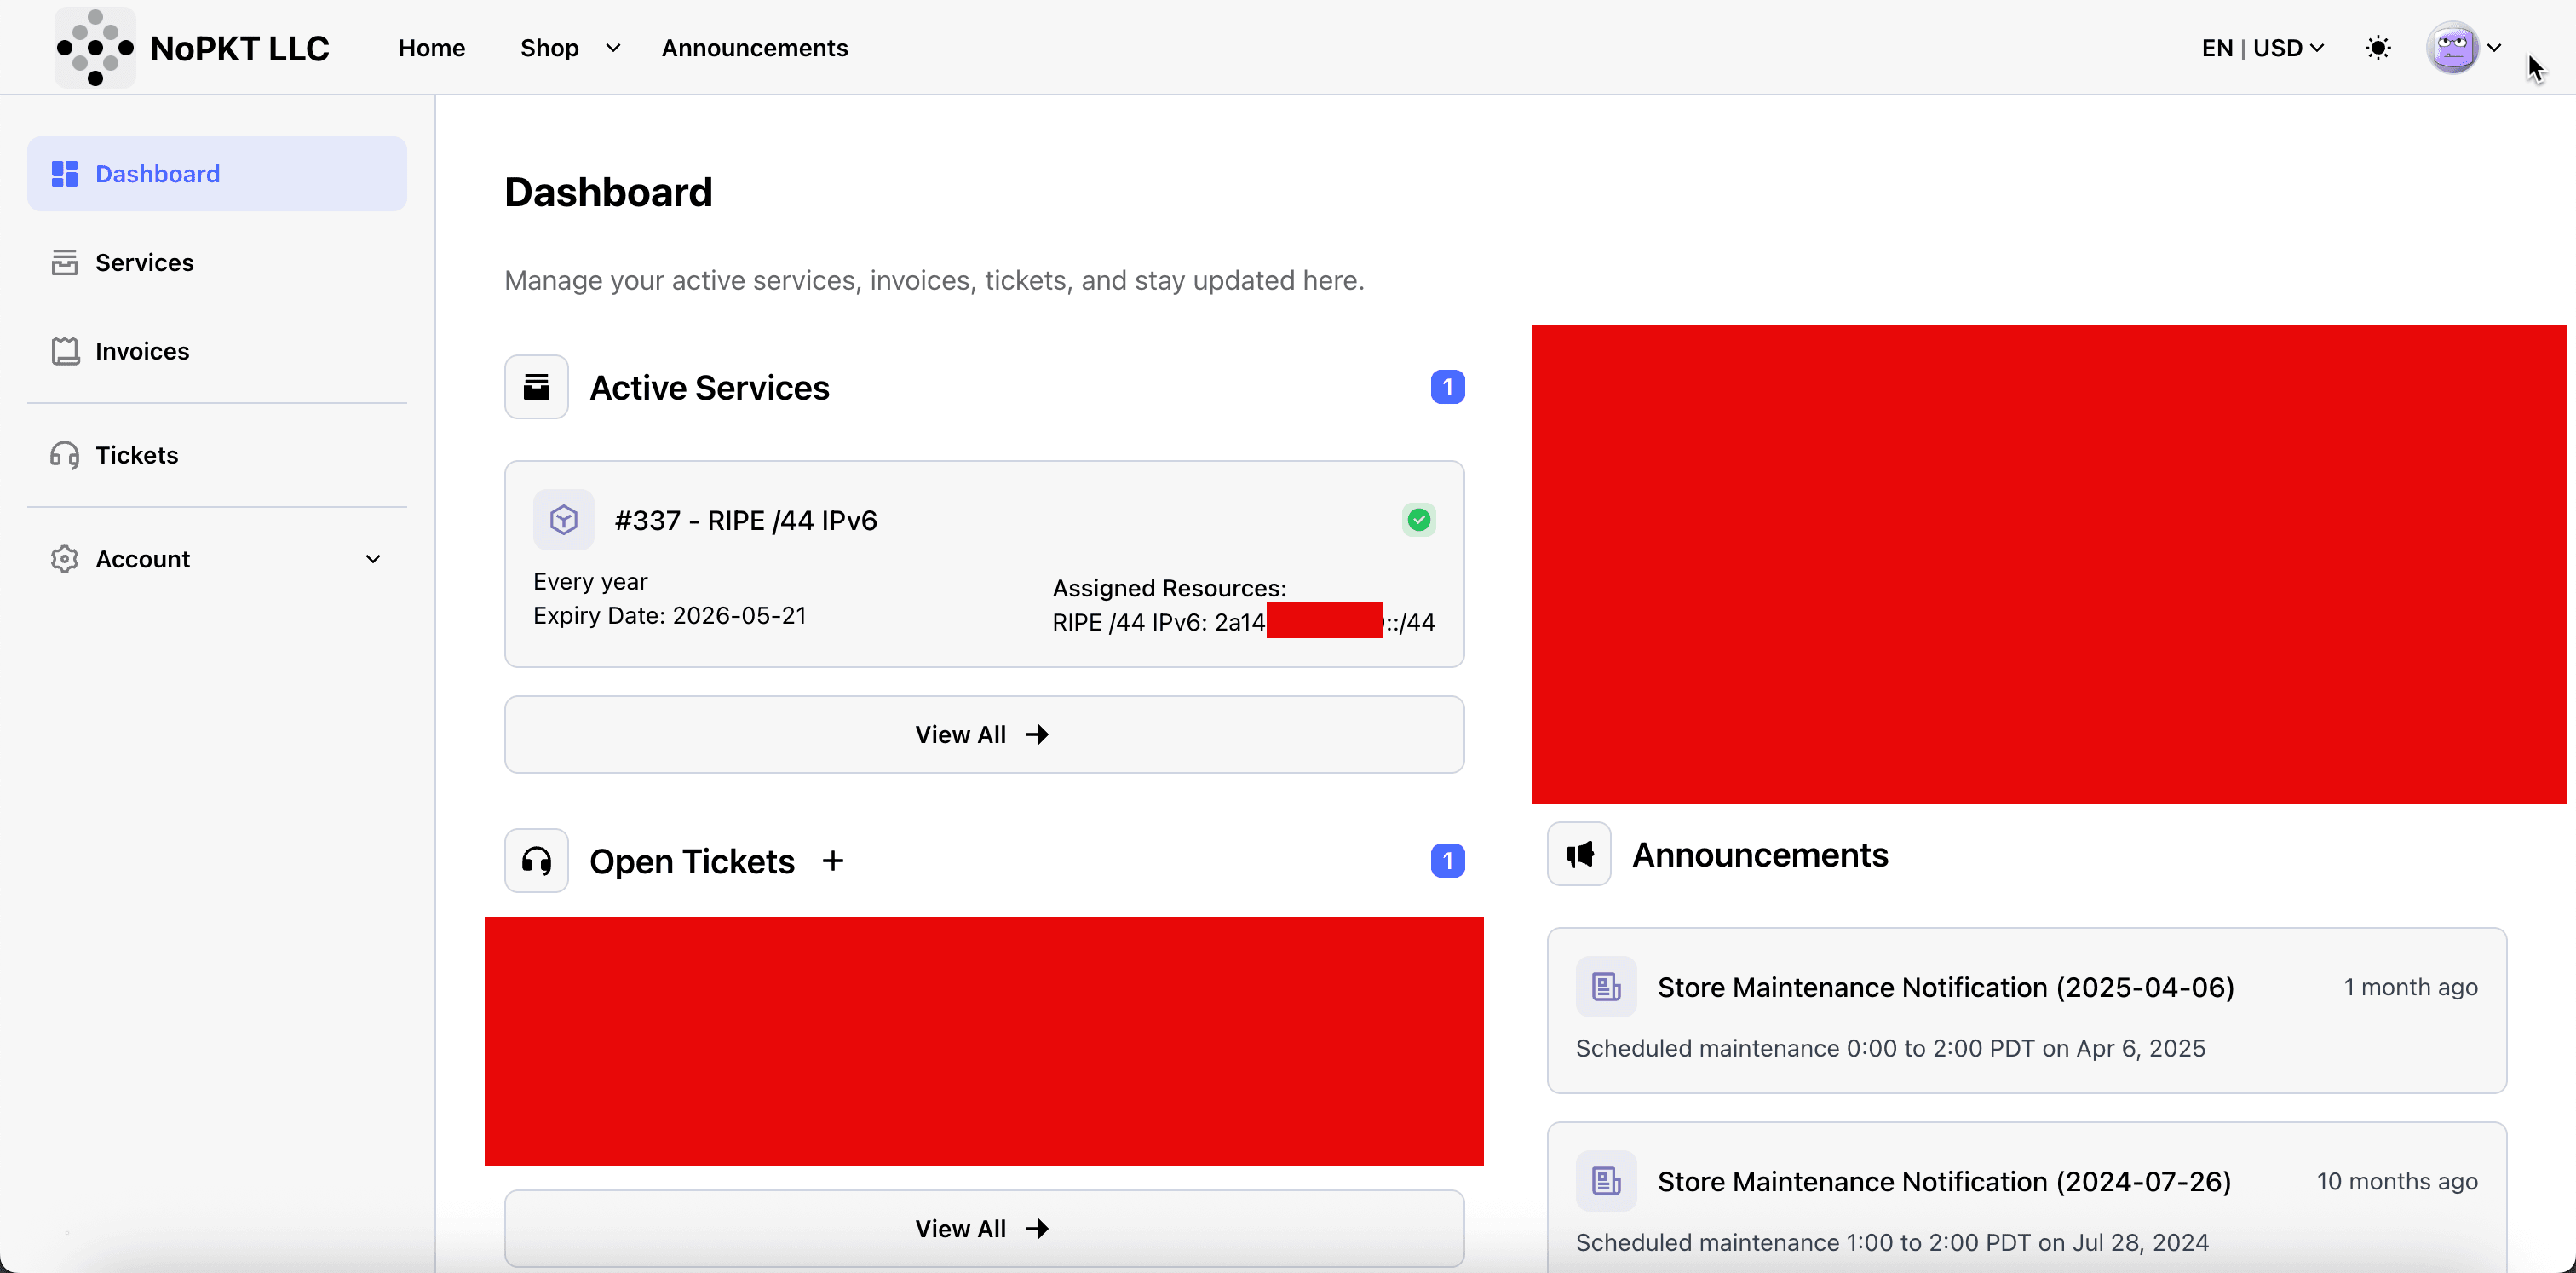
After payment completion, it can take a few hours before NoPKT LLC assigns the /44 IPv6 CIDR to your account.
- You can see that the order is an Assigned Resource.
- This is the IPv6 range we will use inside OCI with BYOIP.
-
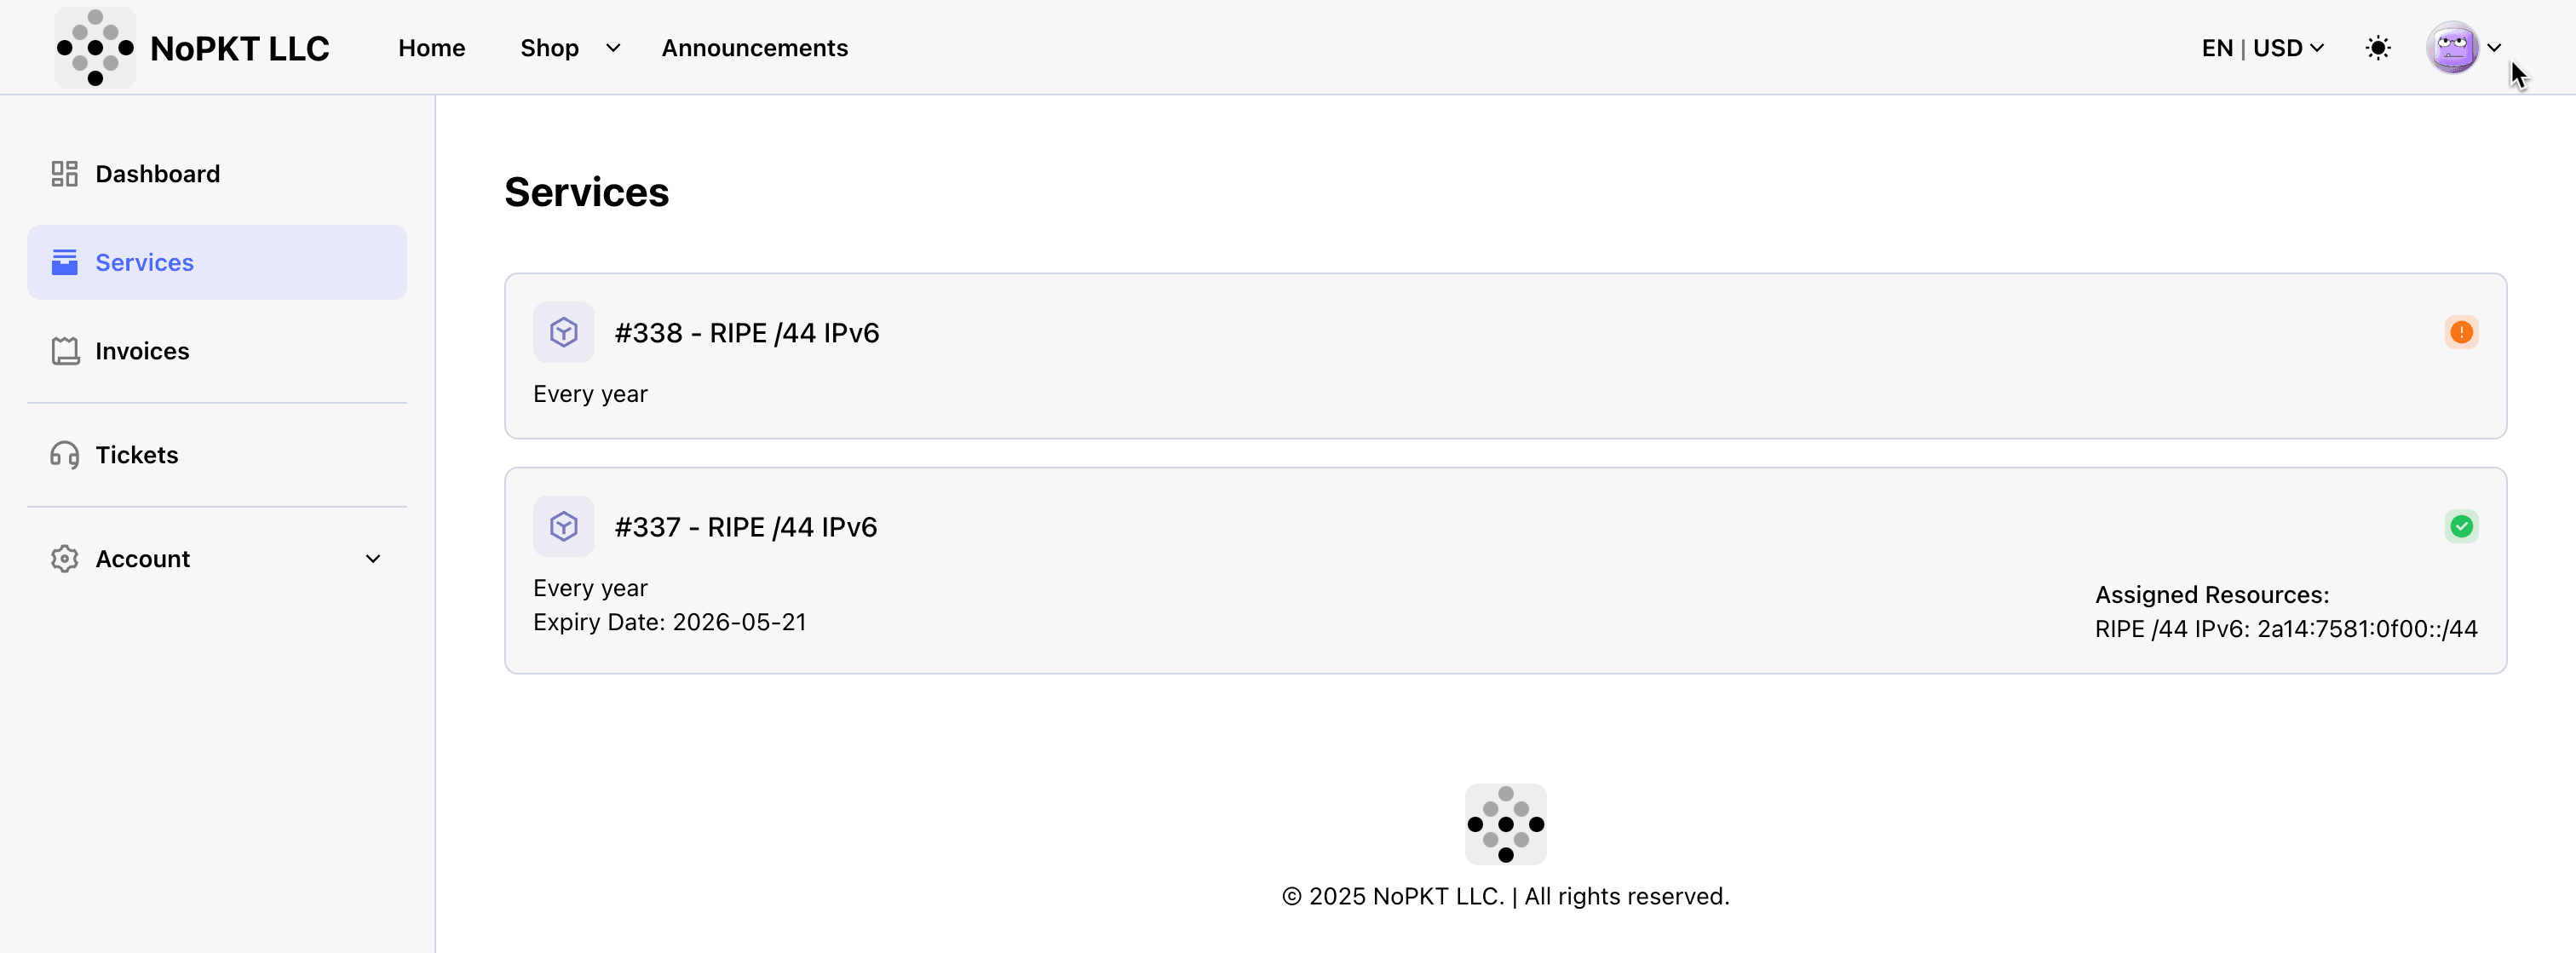
Click Services to review the services.
-
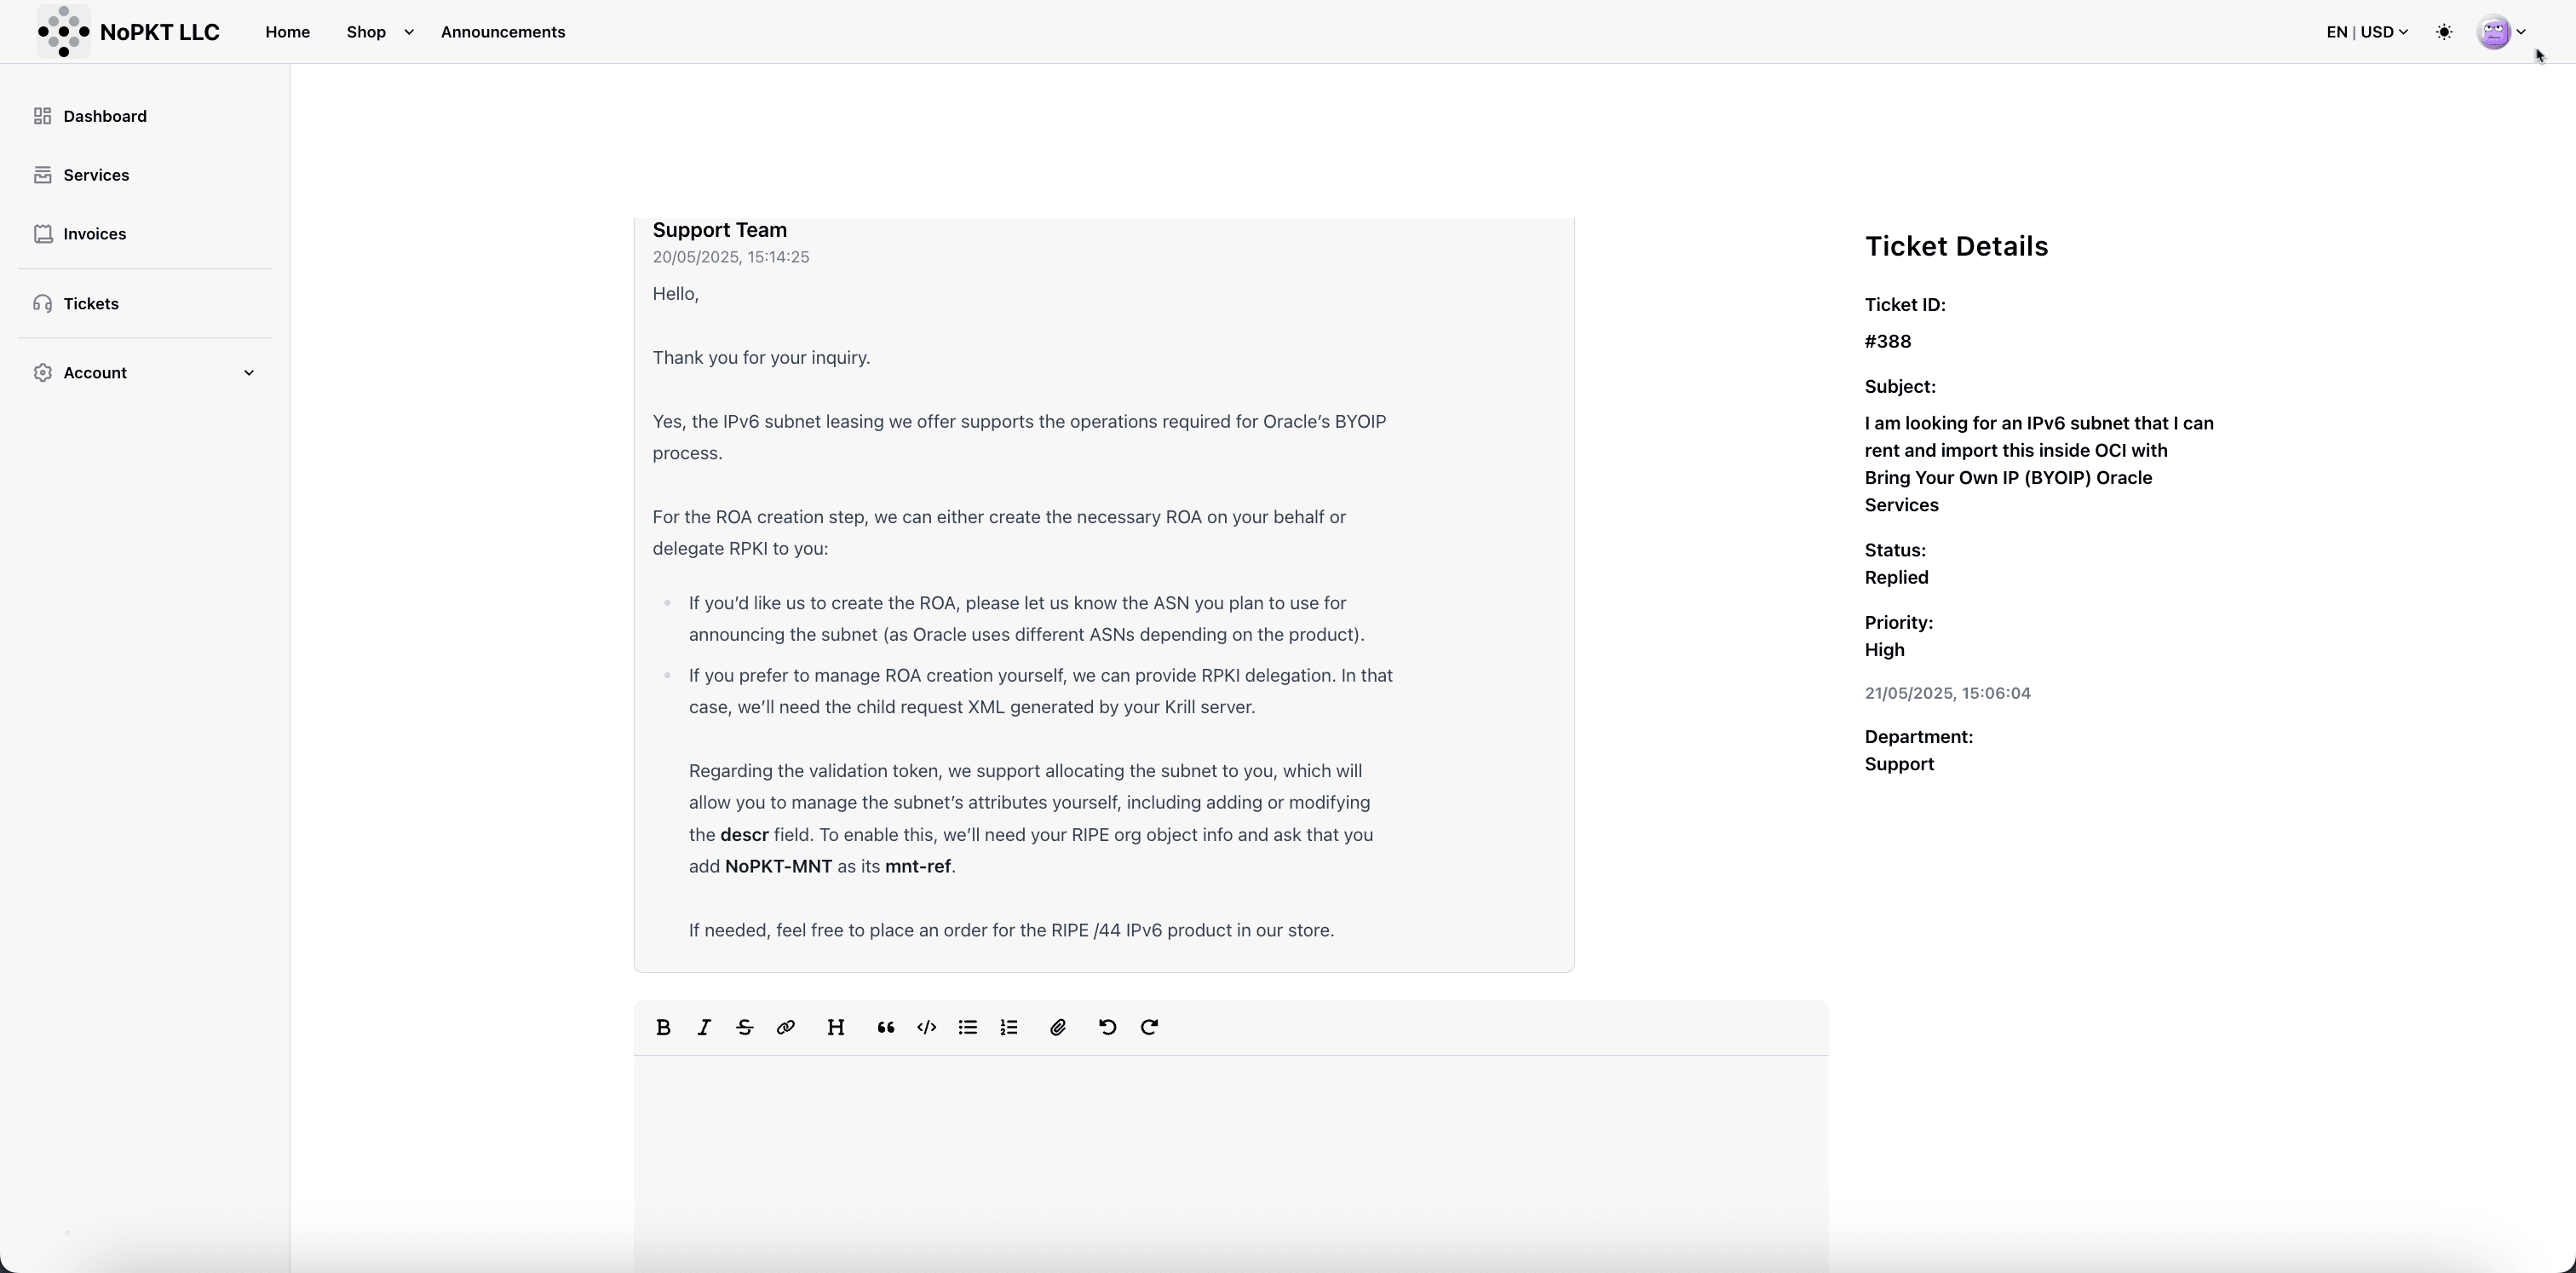
OCI requires the Route Origin Authorization (ROA) to be done with Resource Public Key Infrastructure (RPKI) because this is an industry-standard security mechanism used to validate BGP route origin. For more information, see Bring Your Own IP.
-
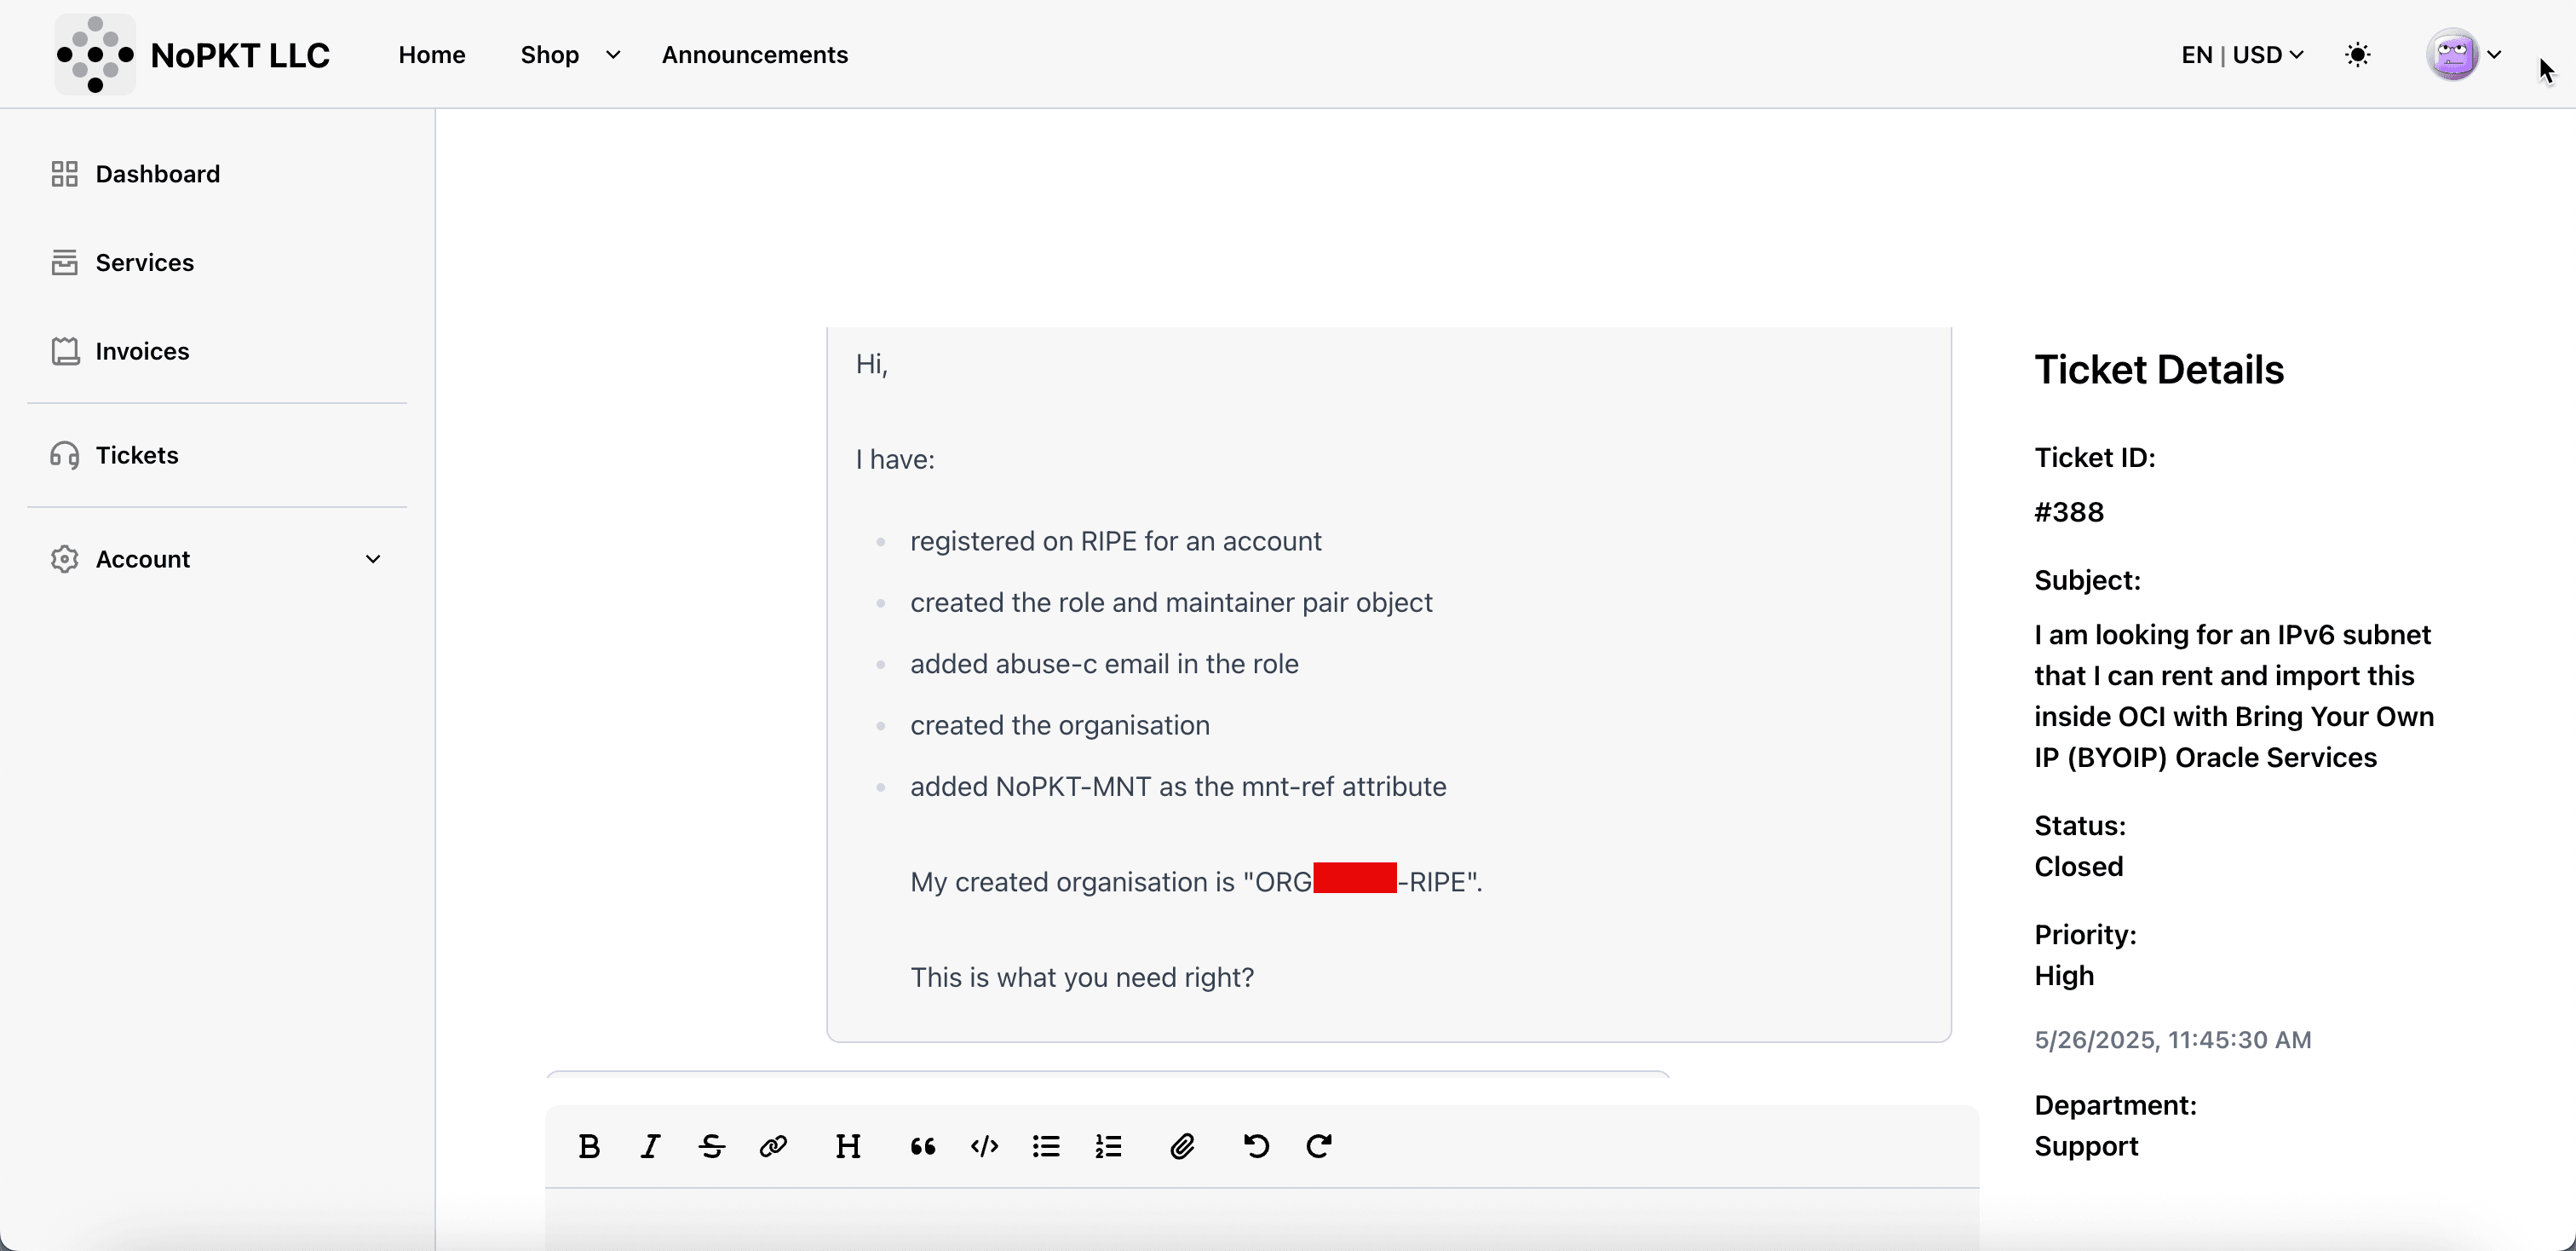
We opened a support ticket with this request and provided the Oracle BGP ASN so the LIR can complete the request.
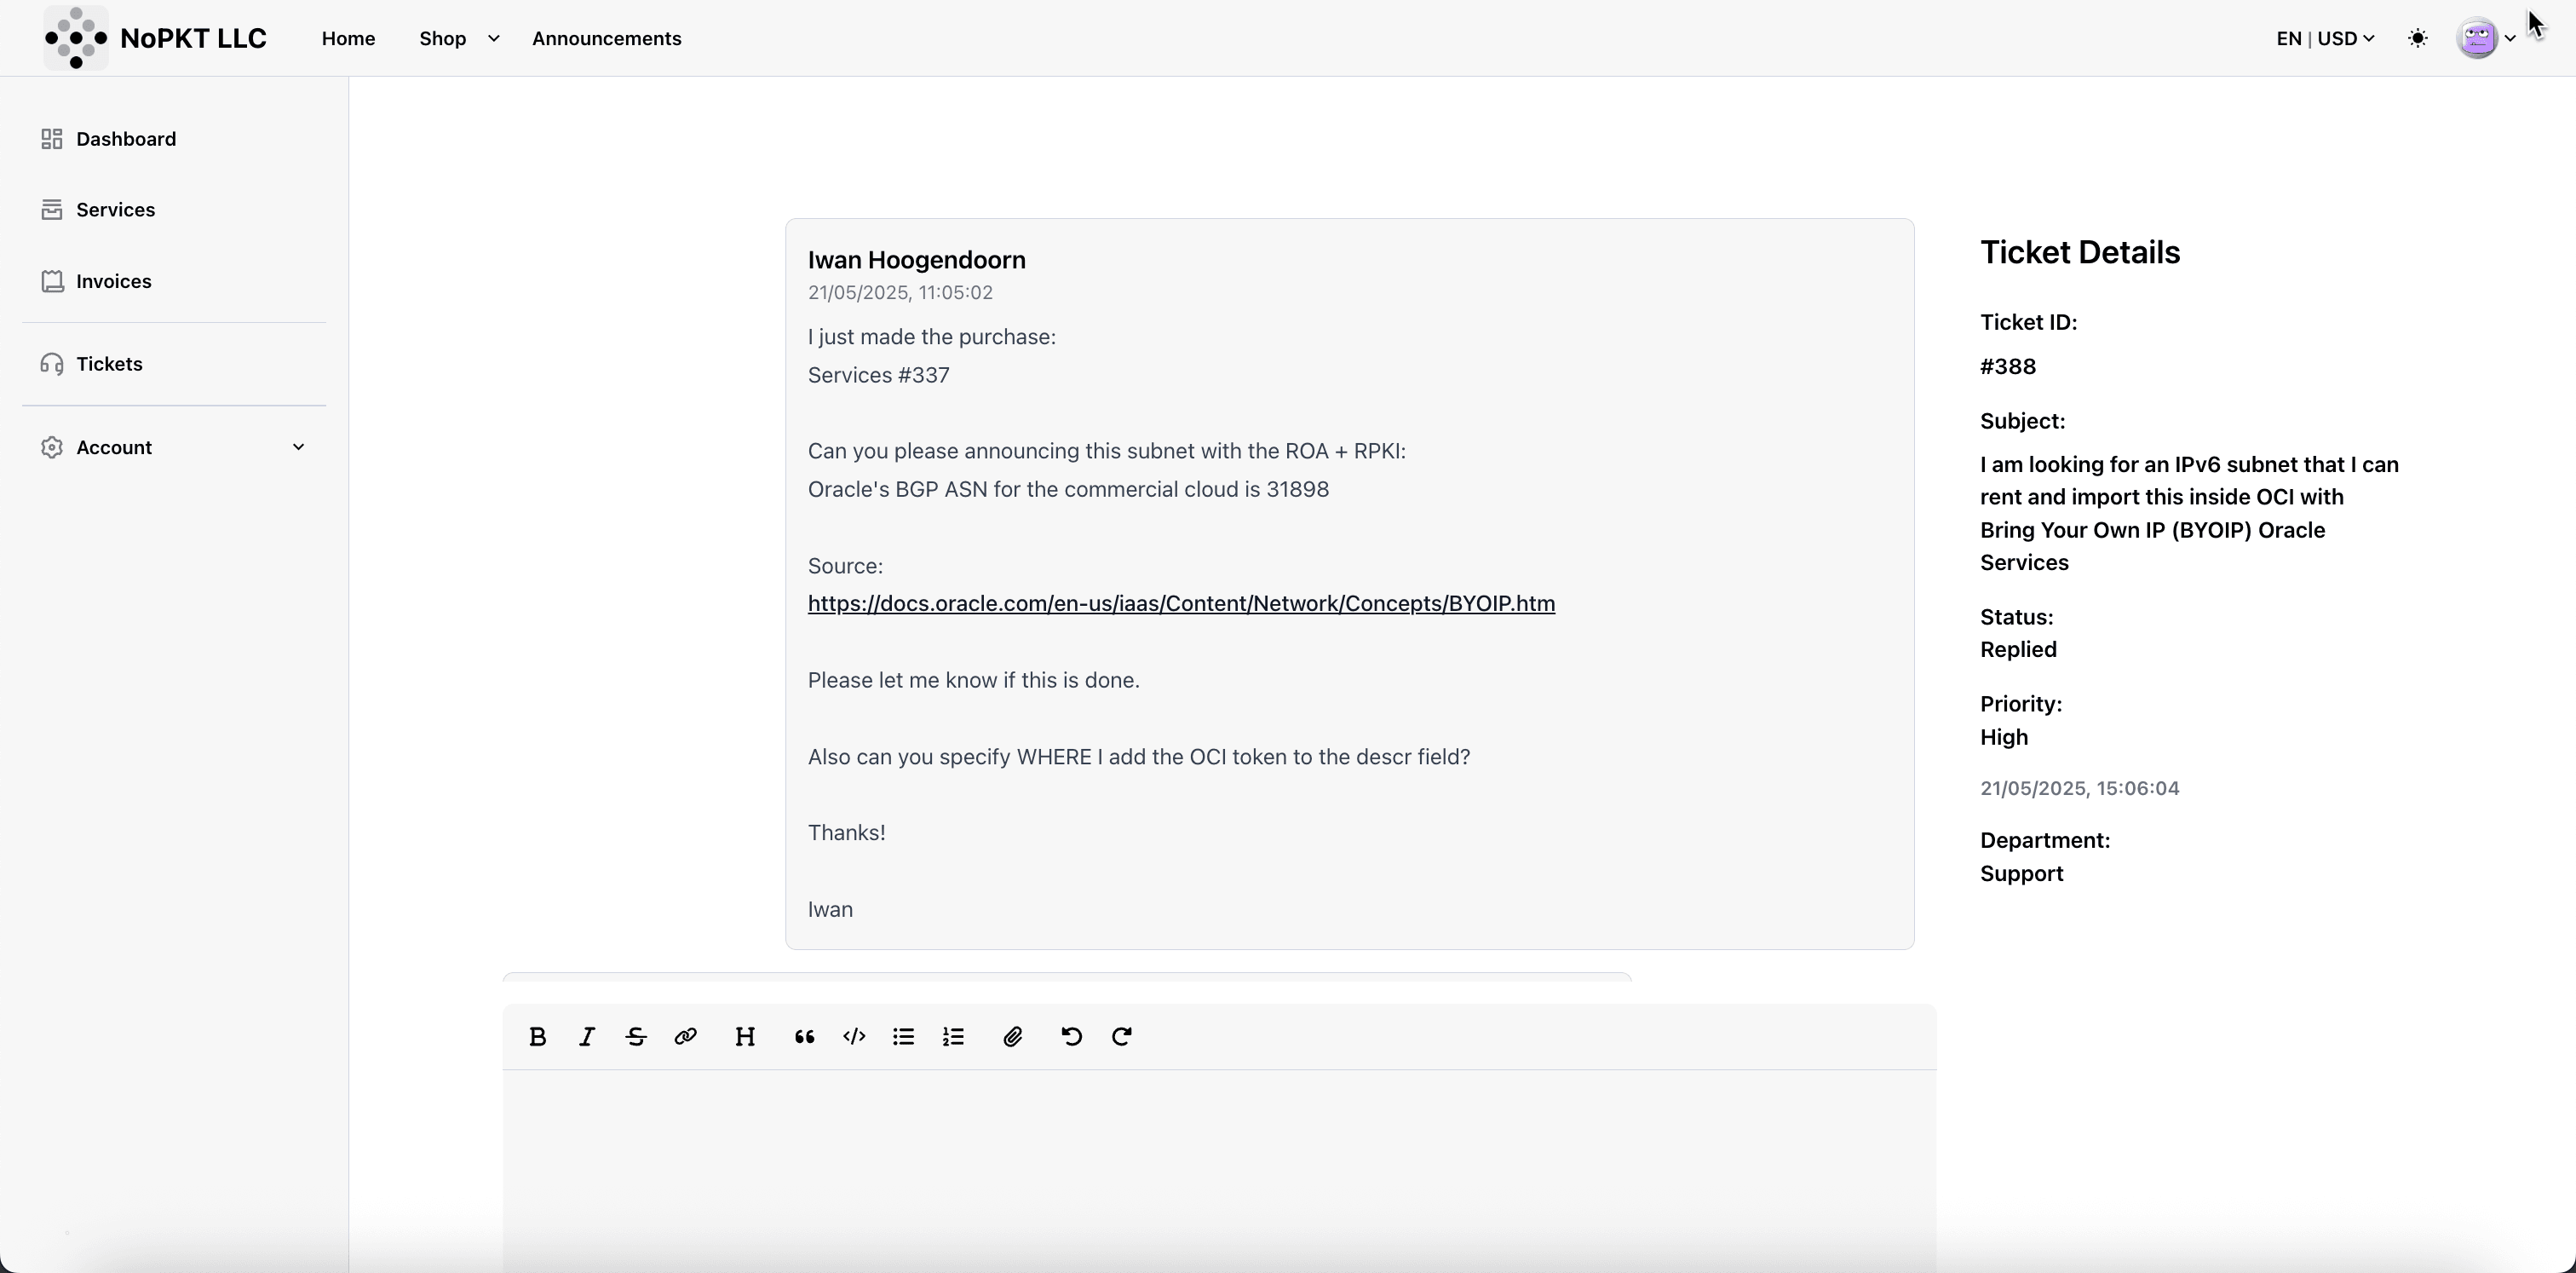
Before the LIR can assign the rented IPv6 range to your account so you can complete the required administrative tasks. You must first create a RIPE NCC account and set up the necessary administrative objects. These objects (such as the role, mntner, and organization) must be appropriately configured and linked. Once this setup is complete, RIPE NCC will issue an Organization ID, which you must provide to the LIR. The LIR will then use this ID to assign the IPv6 range to your RIPE NCC account.
Task 1.2: Complete RIPE NCC Administration Tasks
To prepare your IPv6 CIDR for import into OCI, you must complete the following administrative tasks in the RIPE NCC database. These steps ensure you have proper control over the address space and meet OCI’s validation requirements.
You must:
-
Register for a RIPE NCC account, if you do not already have one. This account will give you access to the LIR portal and allow you to manage registry objects.
-
Create a
roleobject and amntner(maintainer) object. These objects are required to define who manages the resources and to secure access to the registry entries. -
Add an
abuse-cattribute to yourroleobject. This is a mandatory field for reporting abuse related to the IP space. -
Create an
organizationobject to represent your entity in the RIPE database.- This object will be linked to the IPv6 CIDR block and other registry entries.
- Once this is done and the organization is identified, you will get a unique organization ID which you must provide to the LIR so they can assign the rented IPv6 range to your RIPE NCC account (organization).
-
Add your LIR provider’s maintainer (for example,
NoPKT-MNTif you are using NoPKT LLC) as themnt-refin your organization object. This ensures that the LIR can continue to manage the allocation on your behalf.
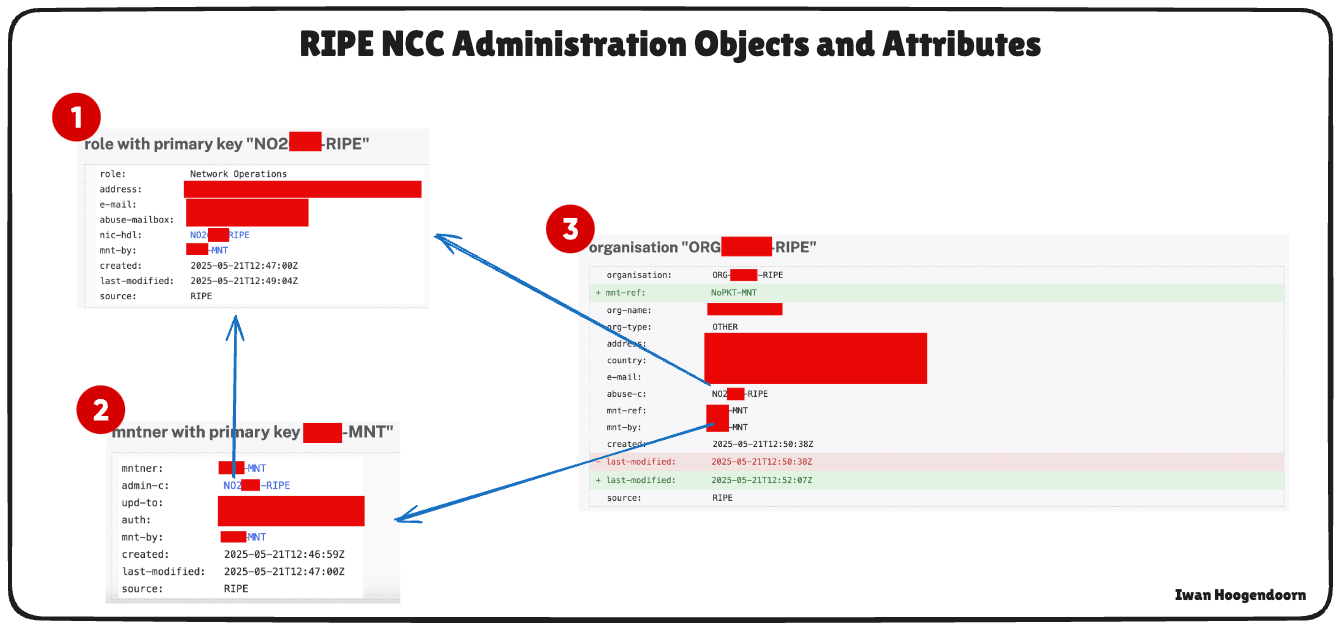
Make sure all objects are correctly linked and visible in the RIPE Database. You will later update the inet6num object associated with your IPv6 range to complete the OCI validation steps.
This administrative step is critical, OCI will validate your ownership or control of the prefix through the changes you make in the RIPE Database.
-
Create a RIPE NCC account and log in.
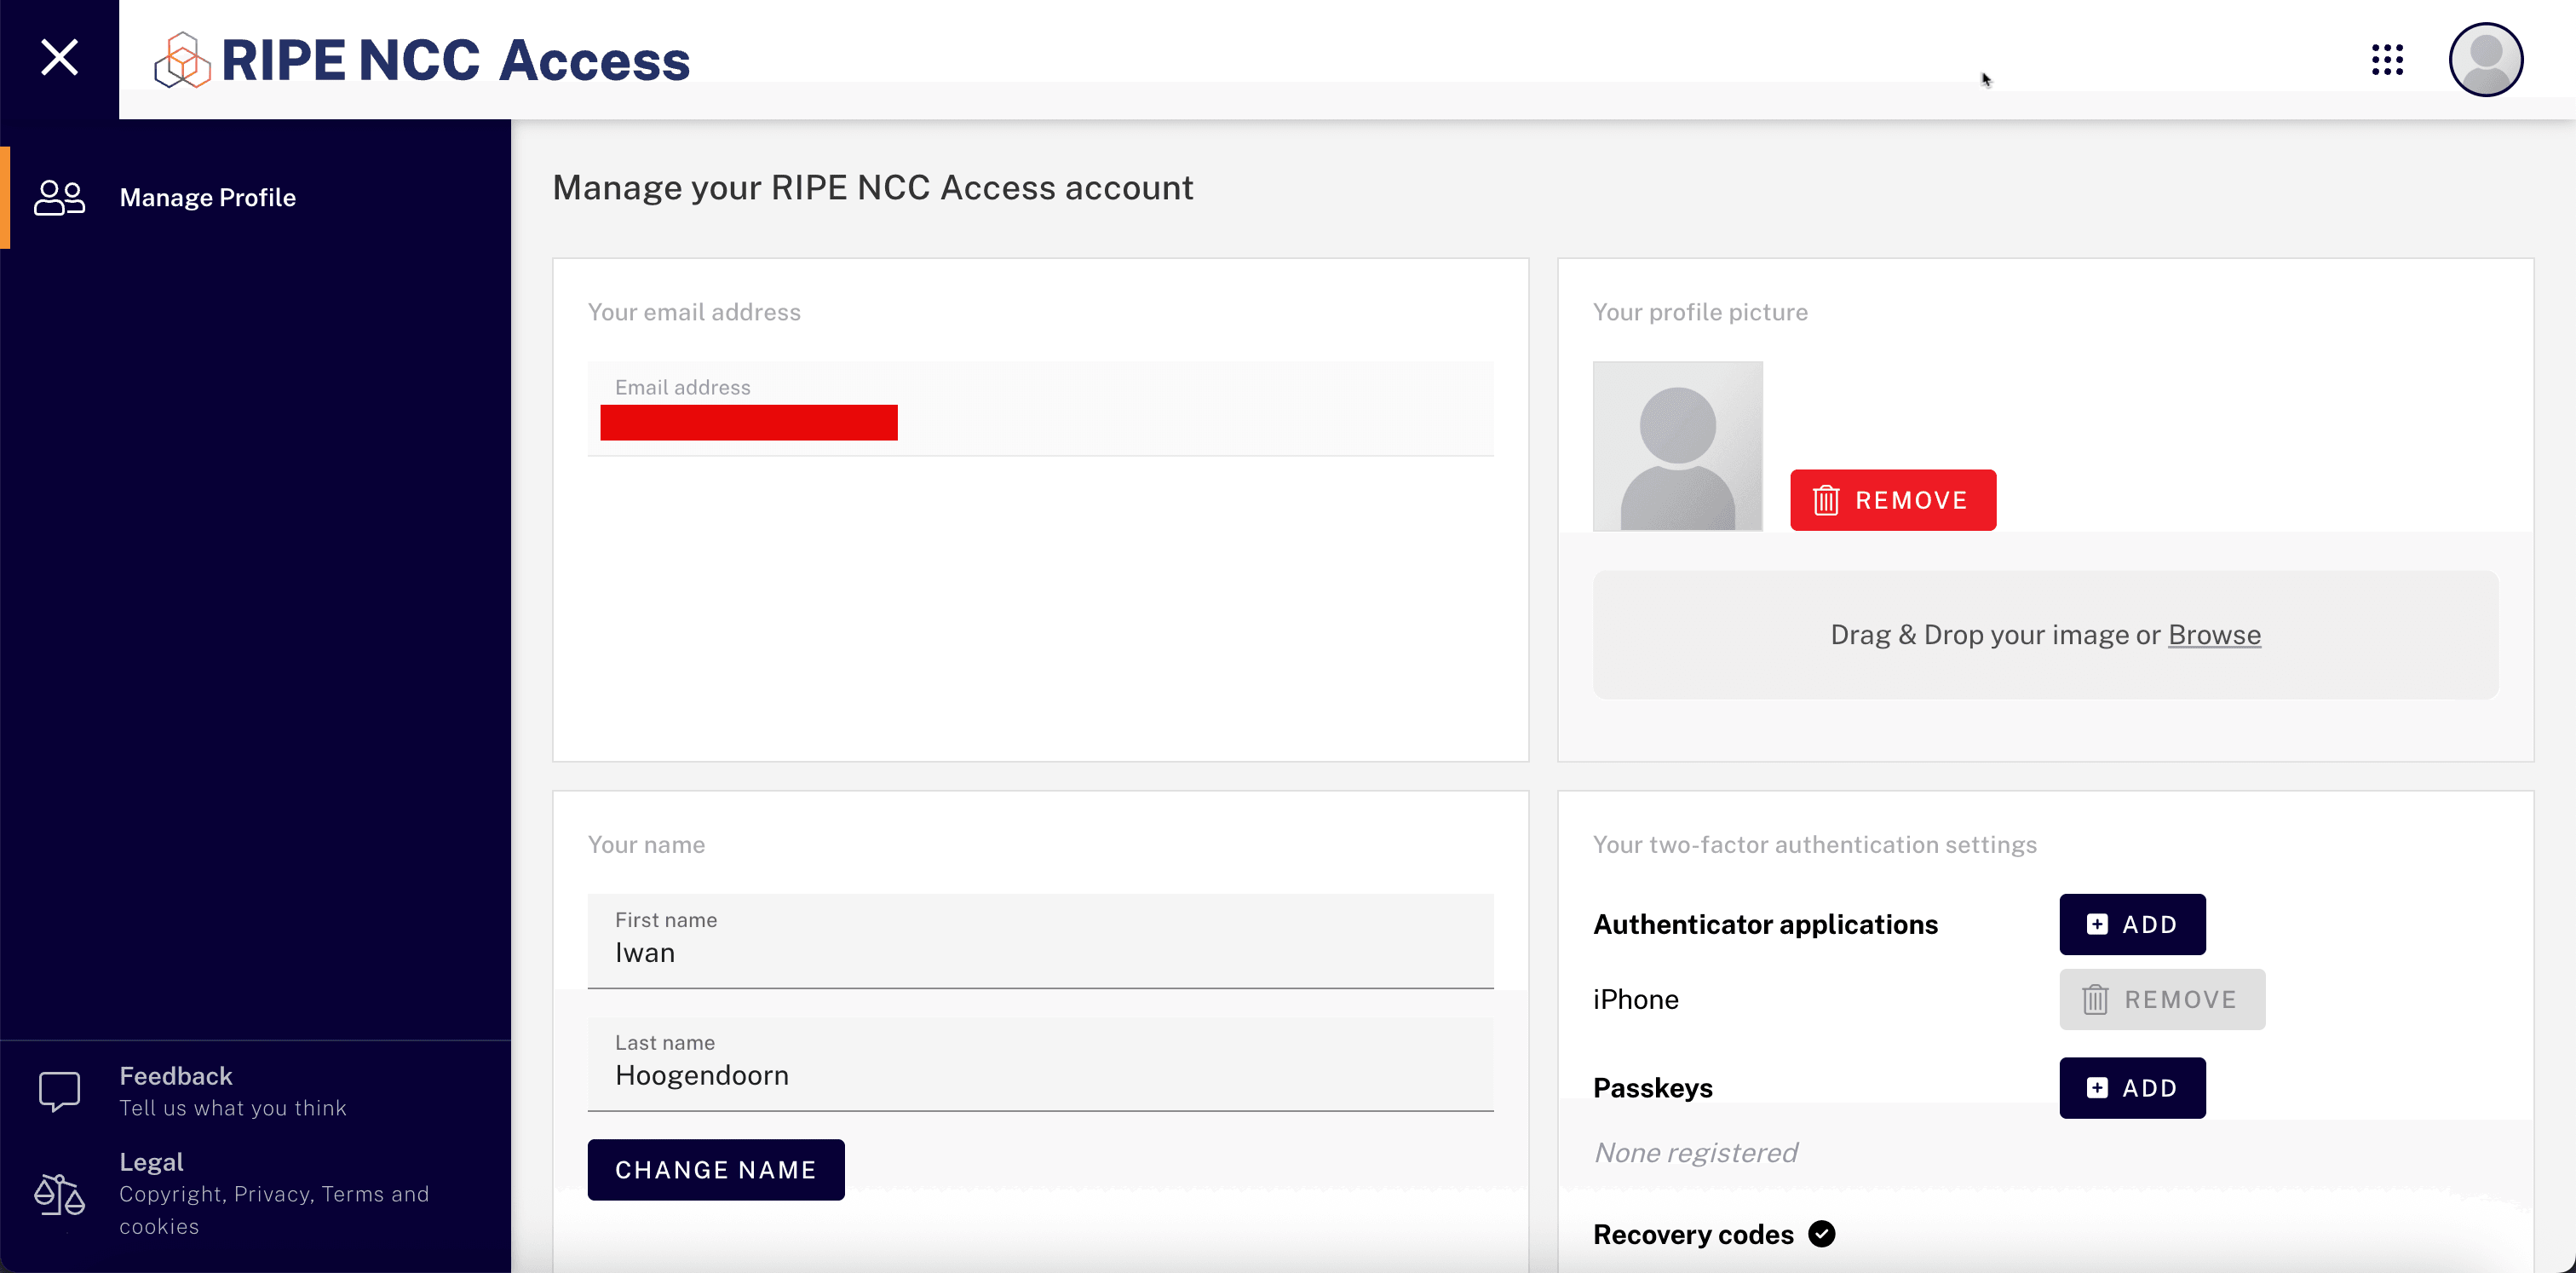
-
Click Create an Object.
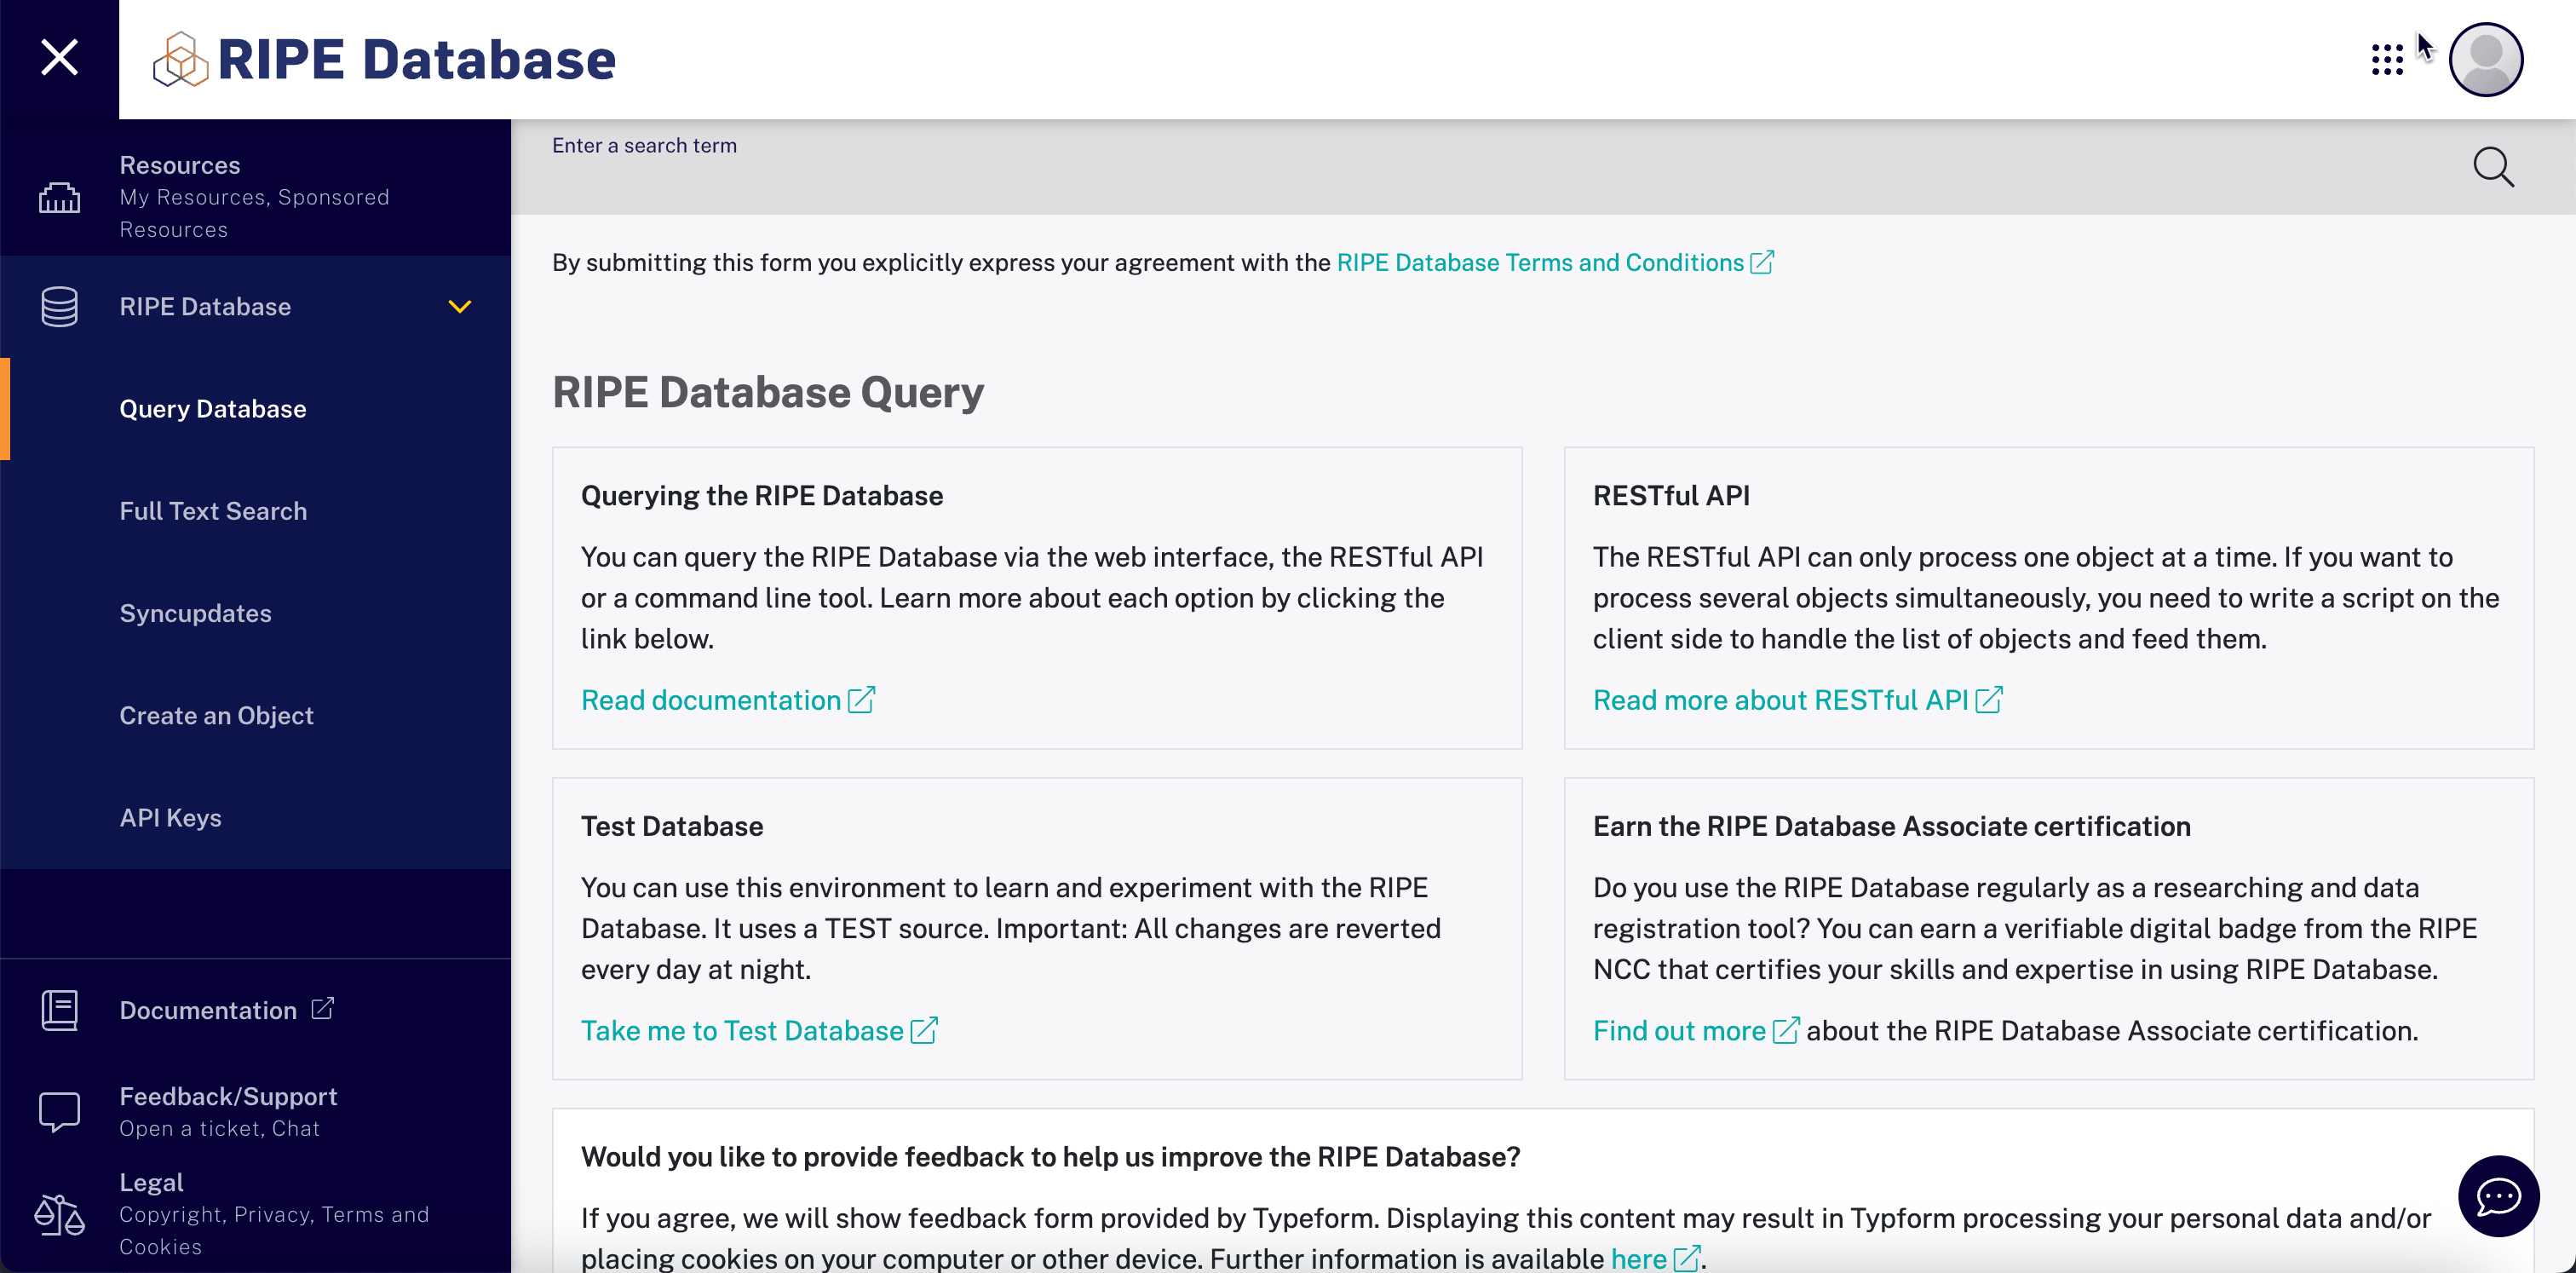
-
Select Object type as role and maintainer pair and click Create.
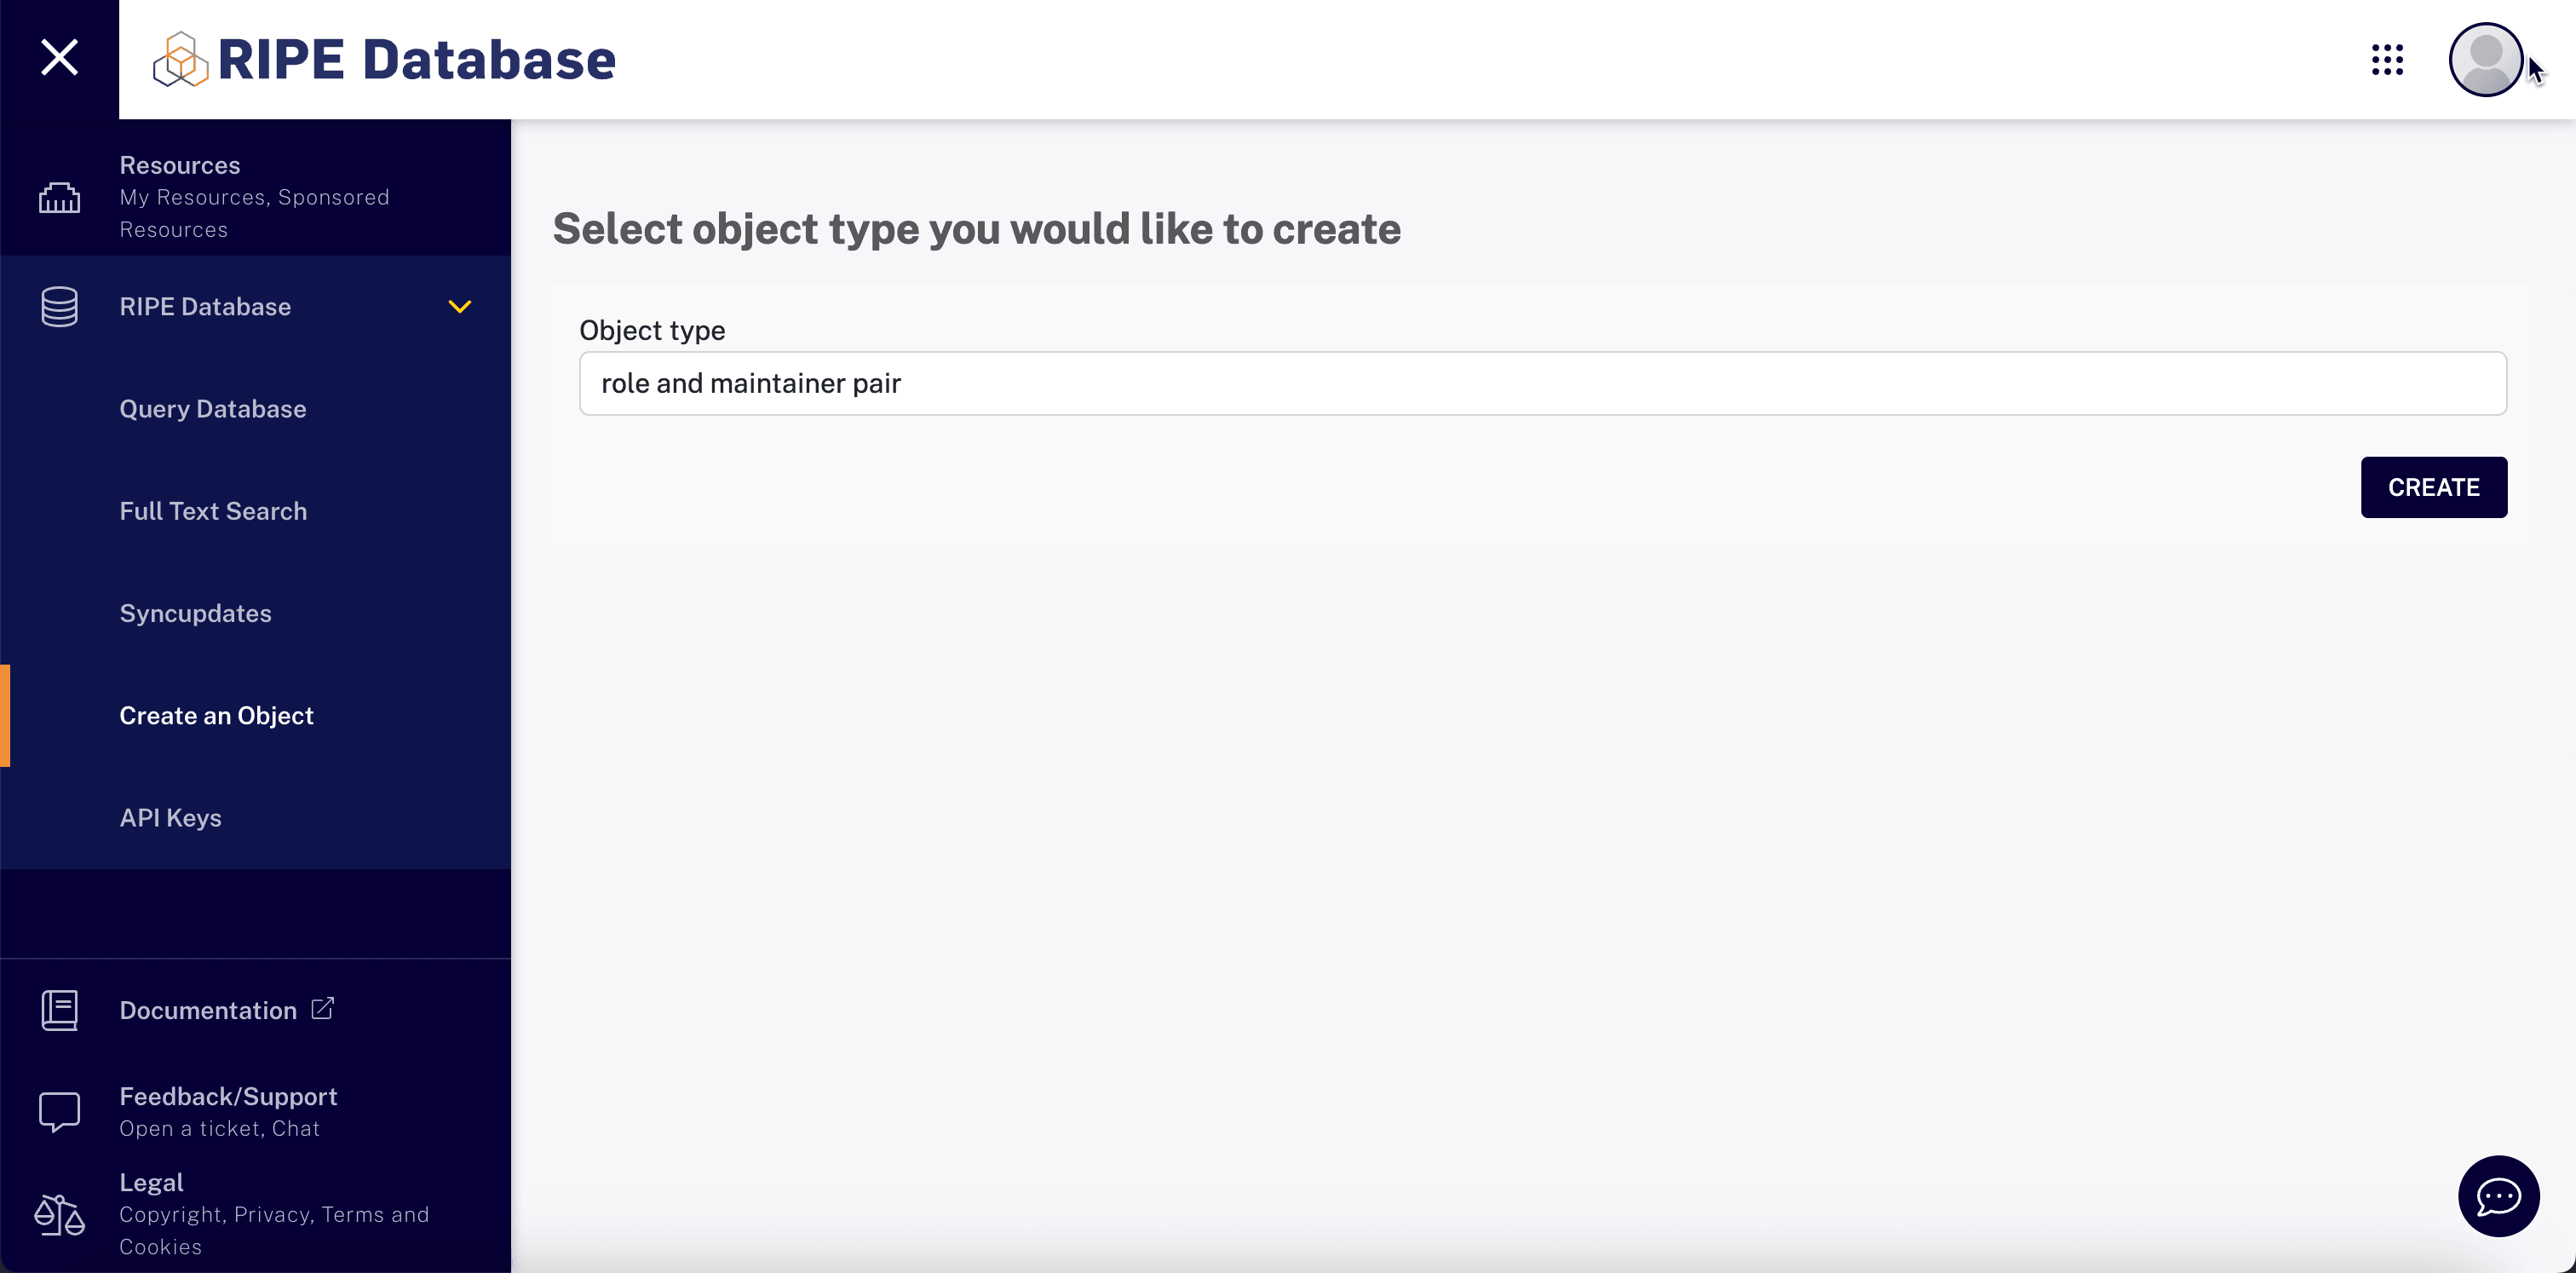
-
Create RIPE Maintainer and Role, and make sure the maintainer is linked to the role. Make sure you specify all fields as shown in the following image.
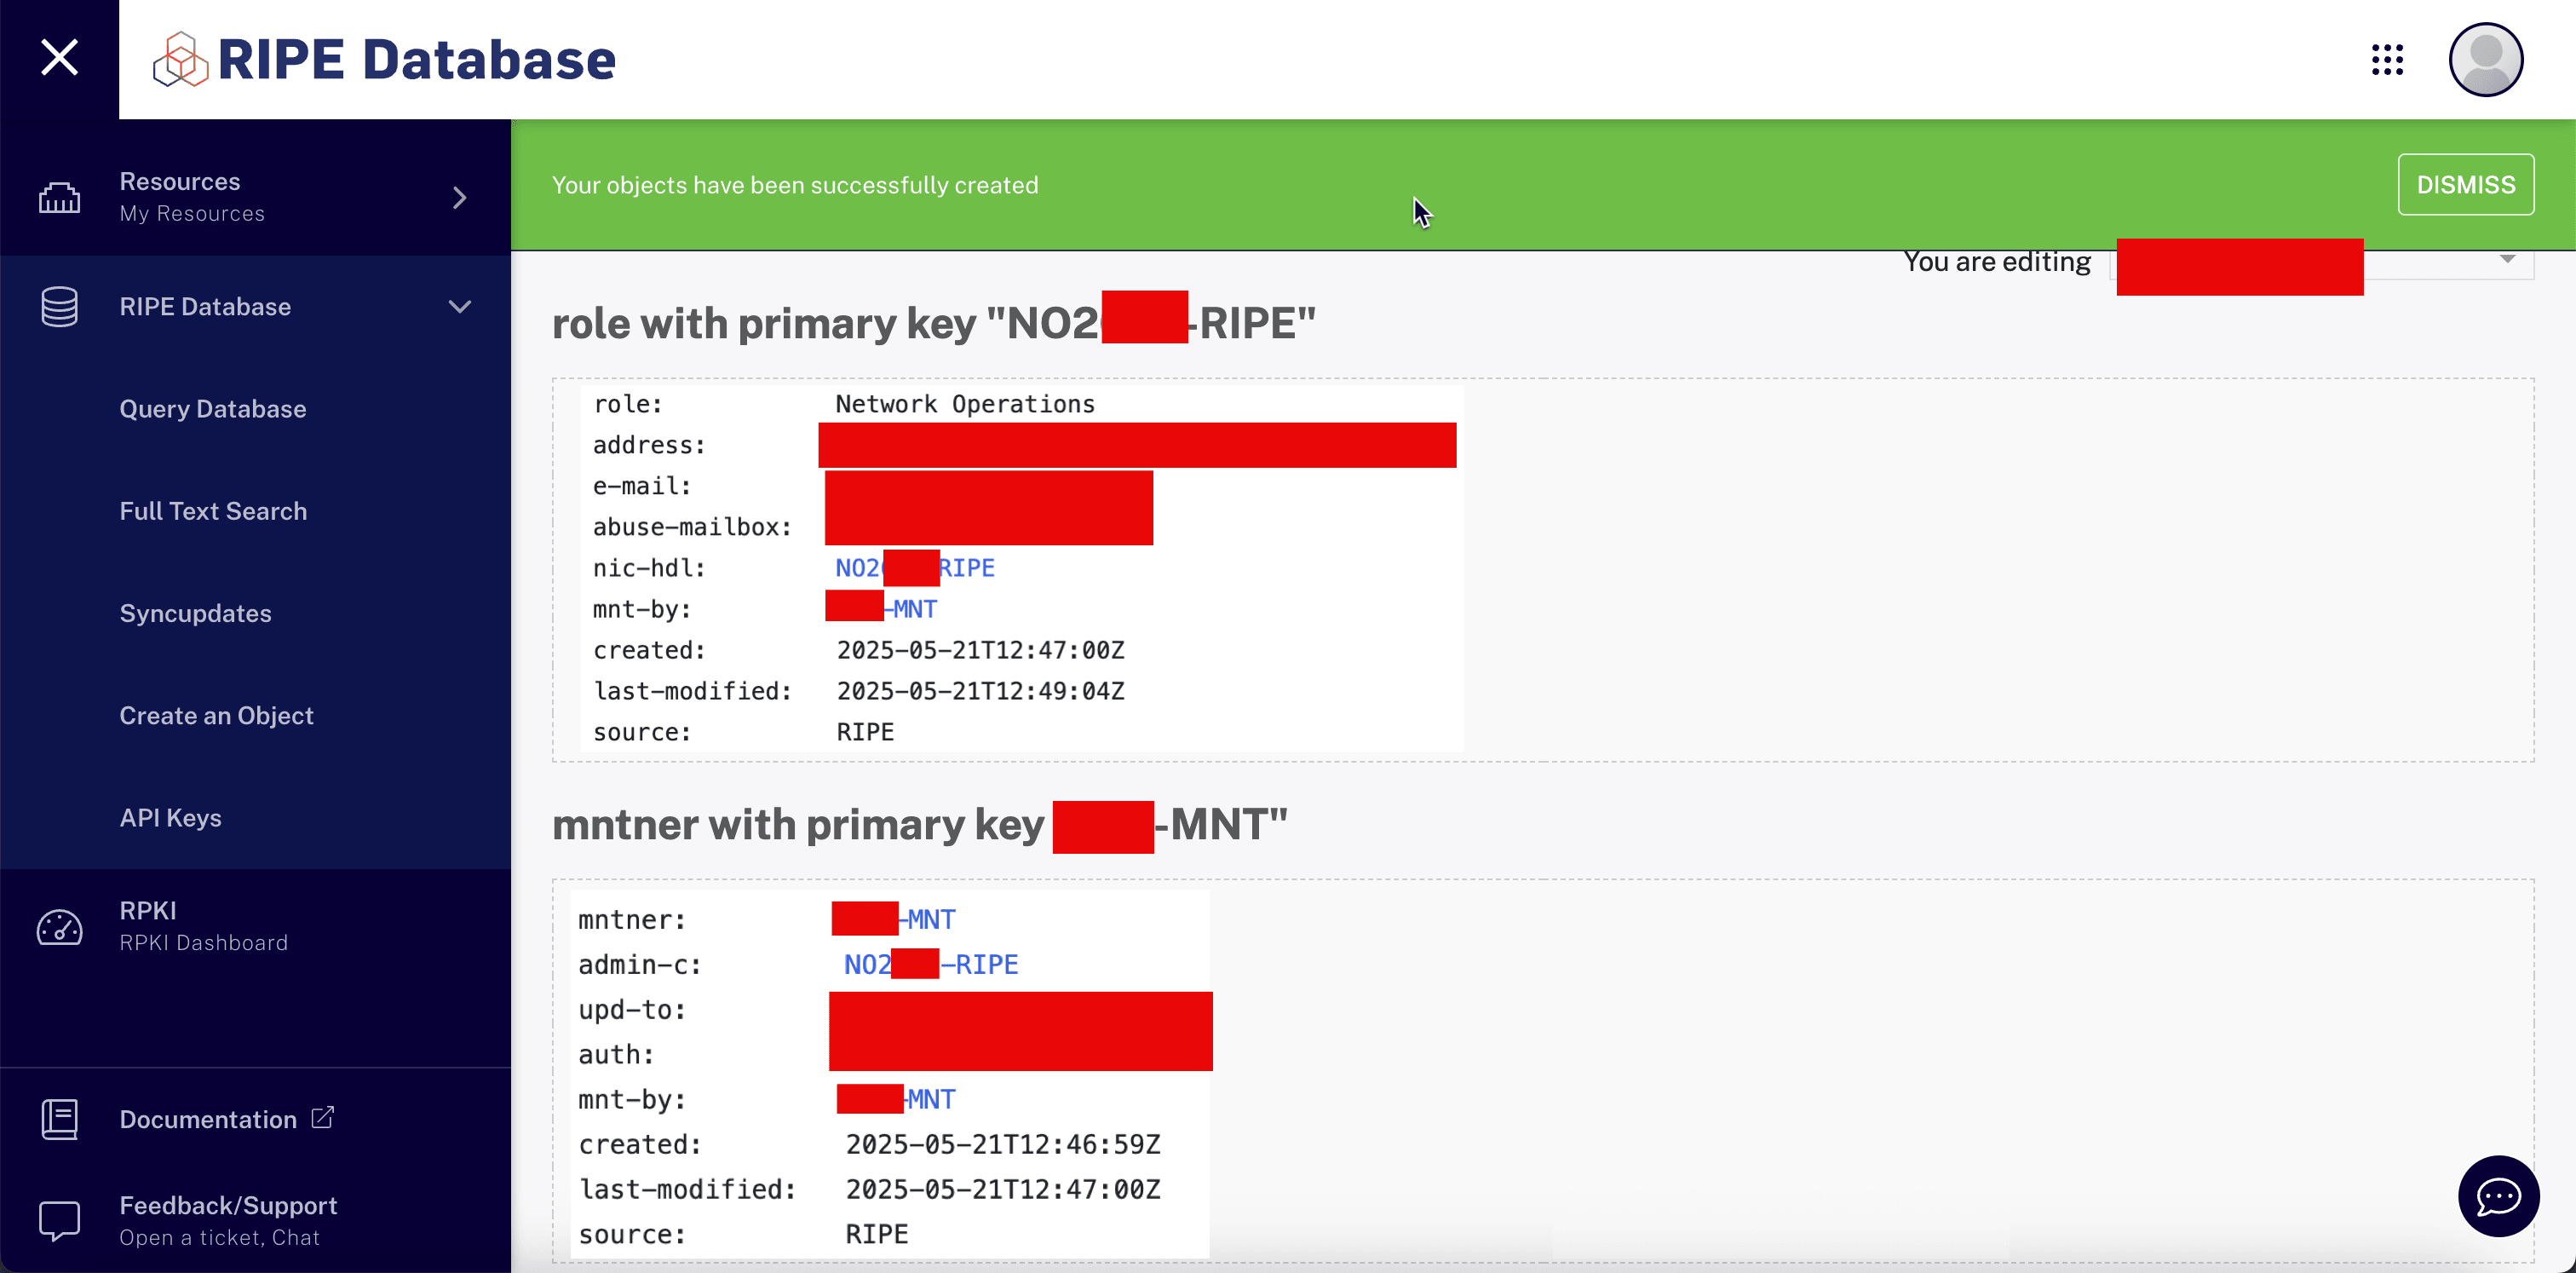
-
Link a new organization object to the correct maintainer object.
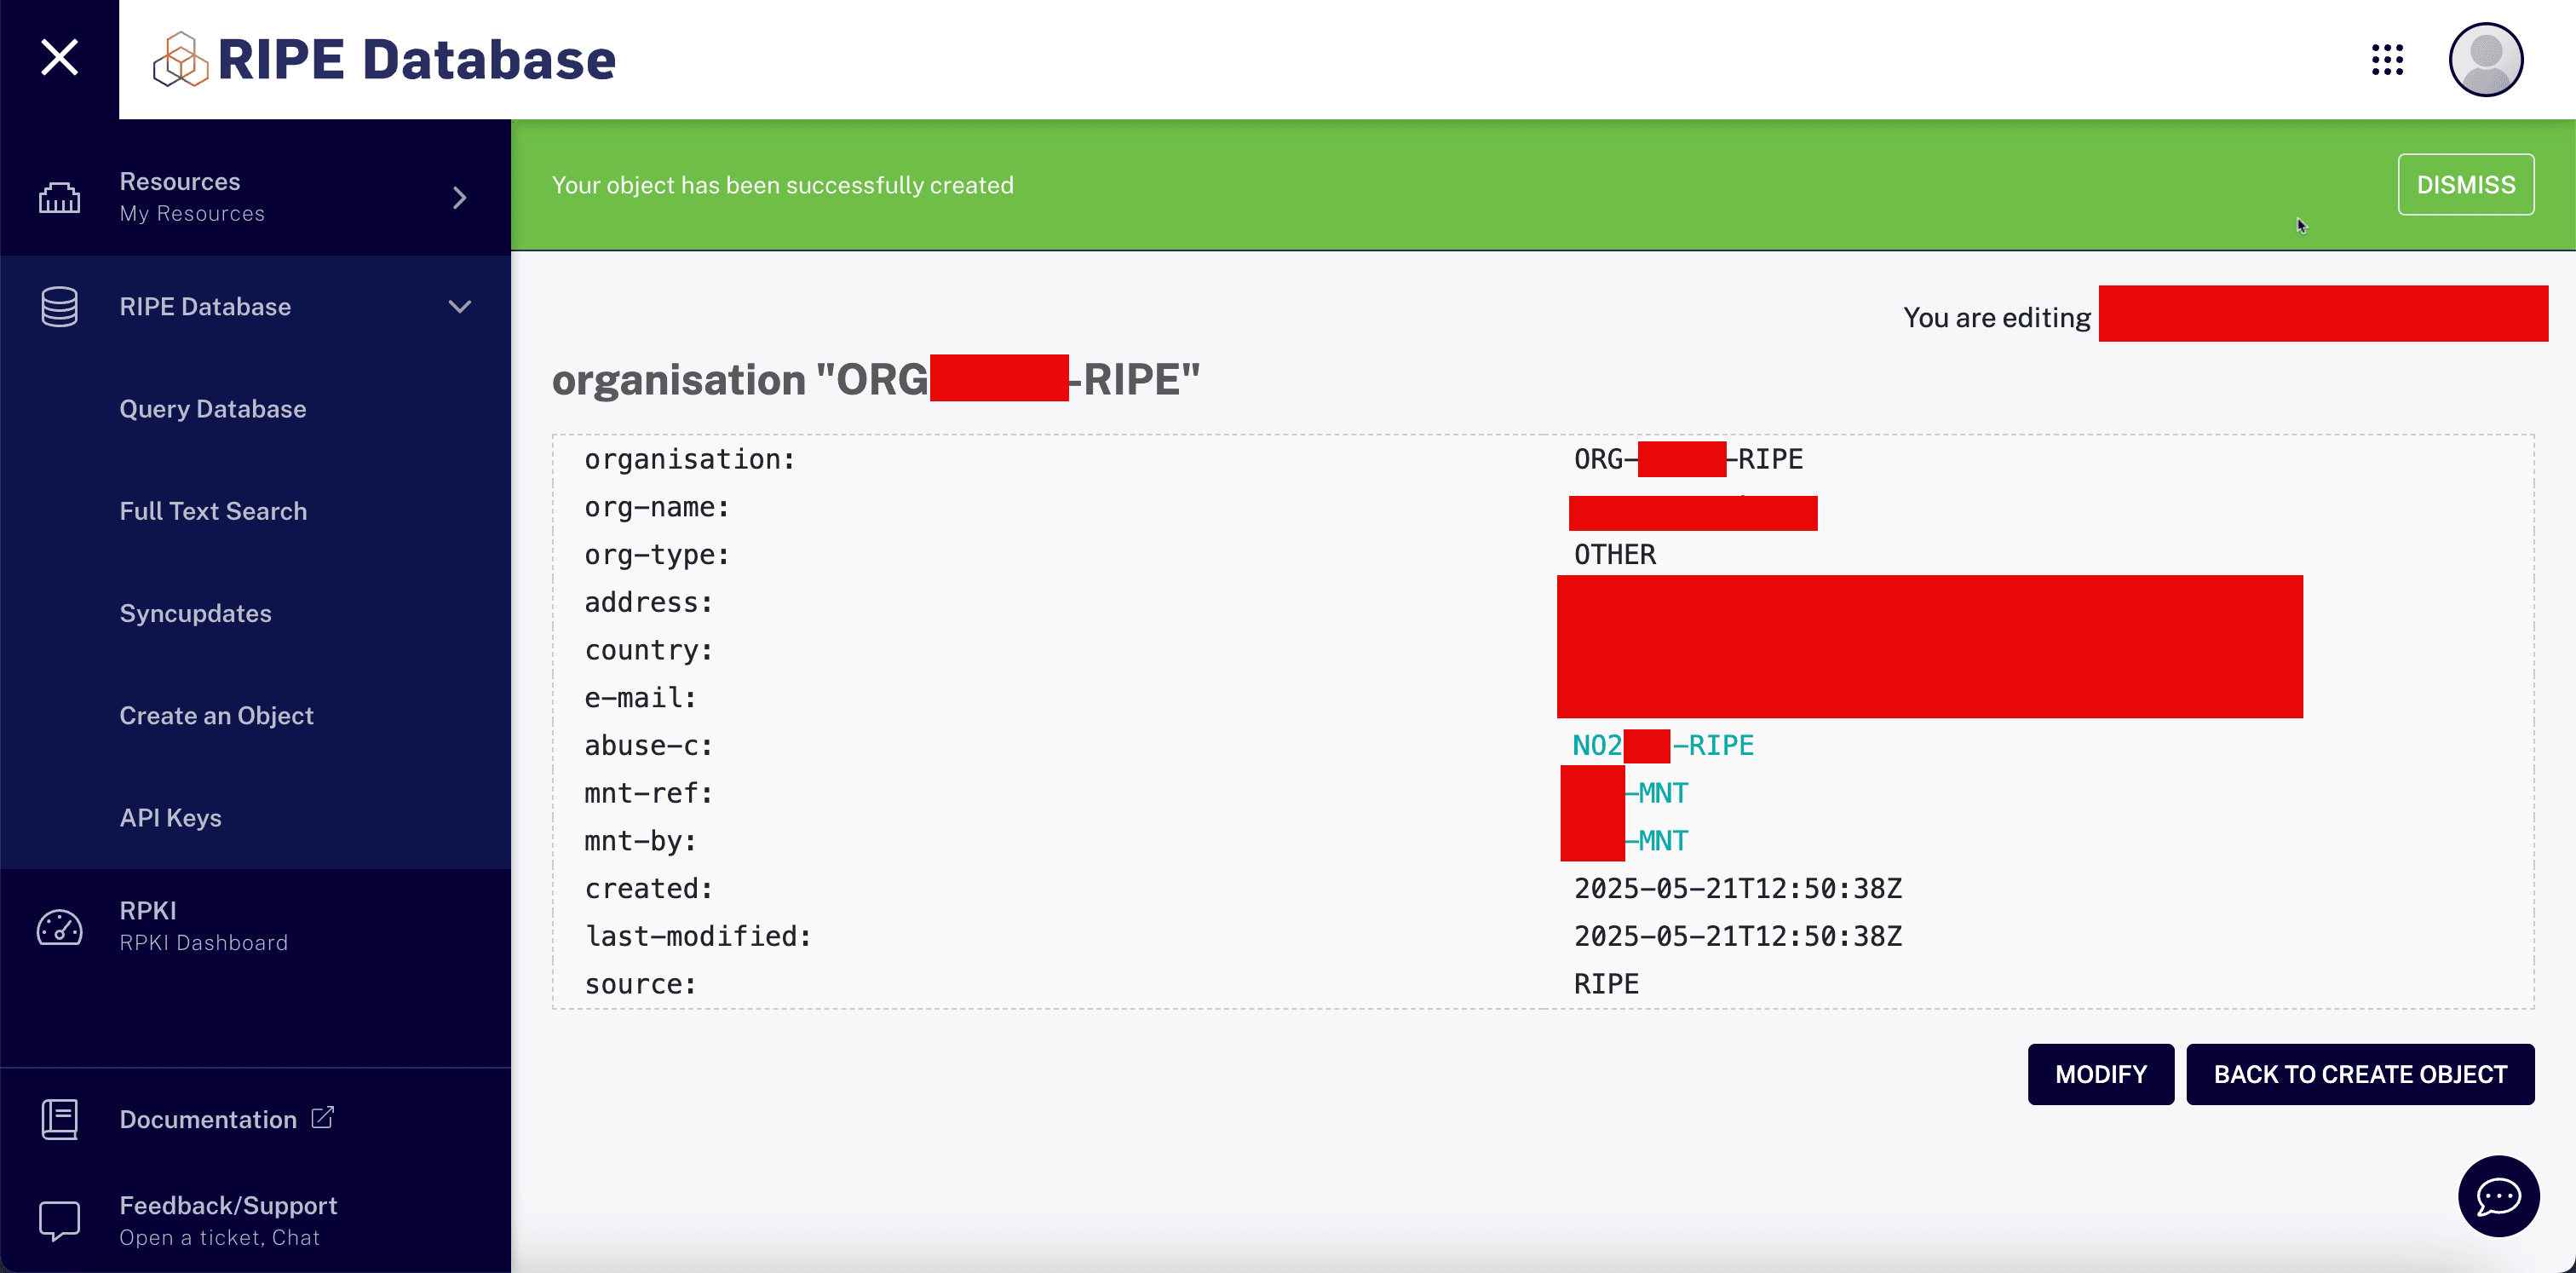
-
Adding
NoPKT-MNTto your RIPE organization object is necessary for authorization and control over your RIPE resources. Make sure theNoPKT-MNTmaintainer is added as the organization using themnt-reffield.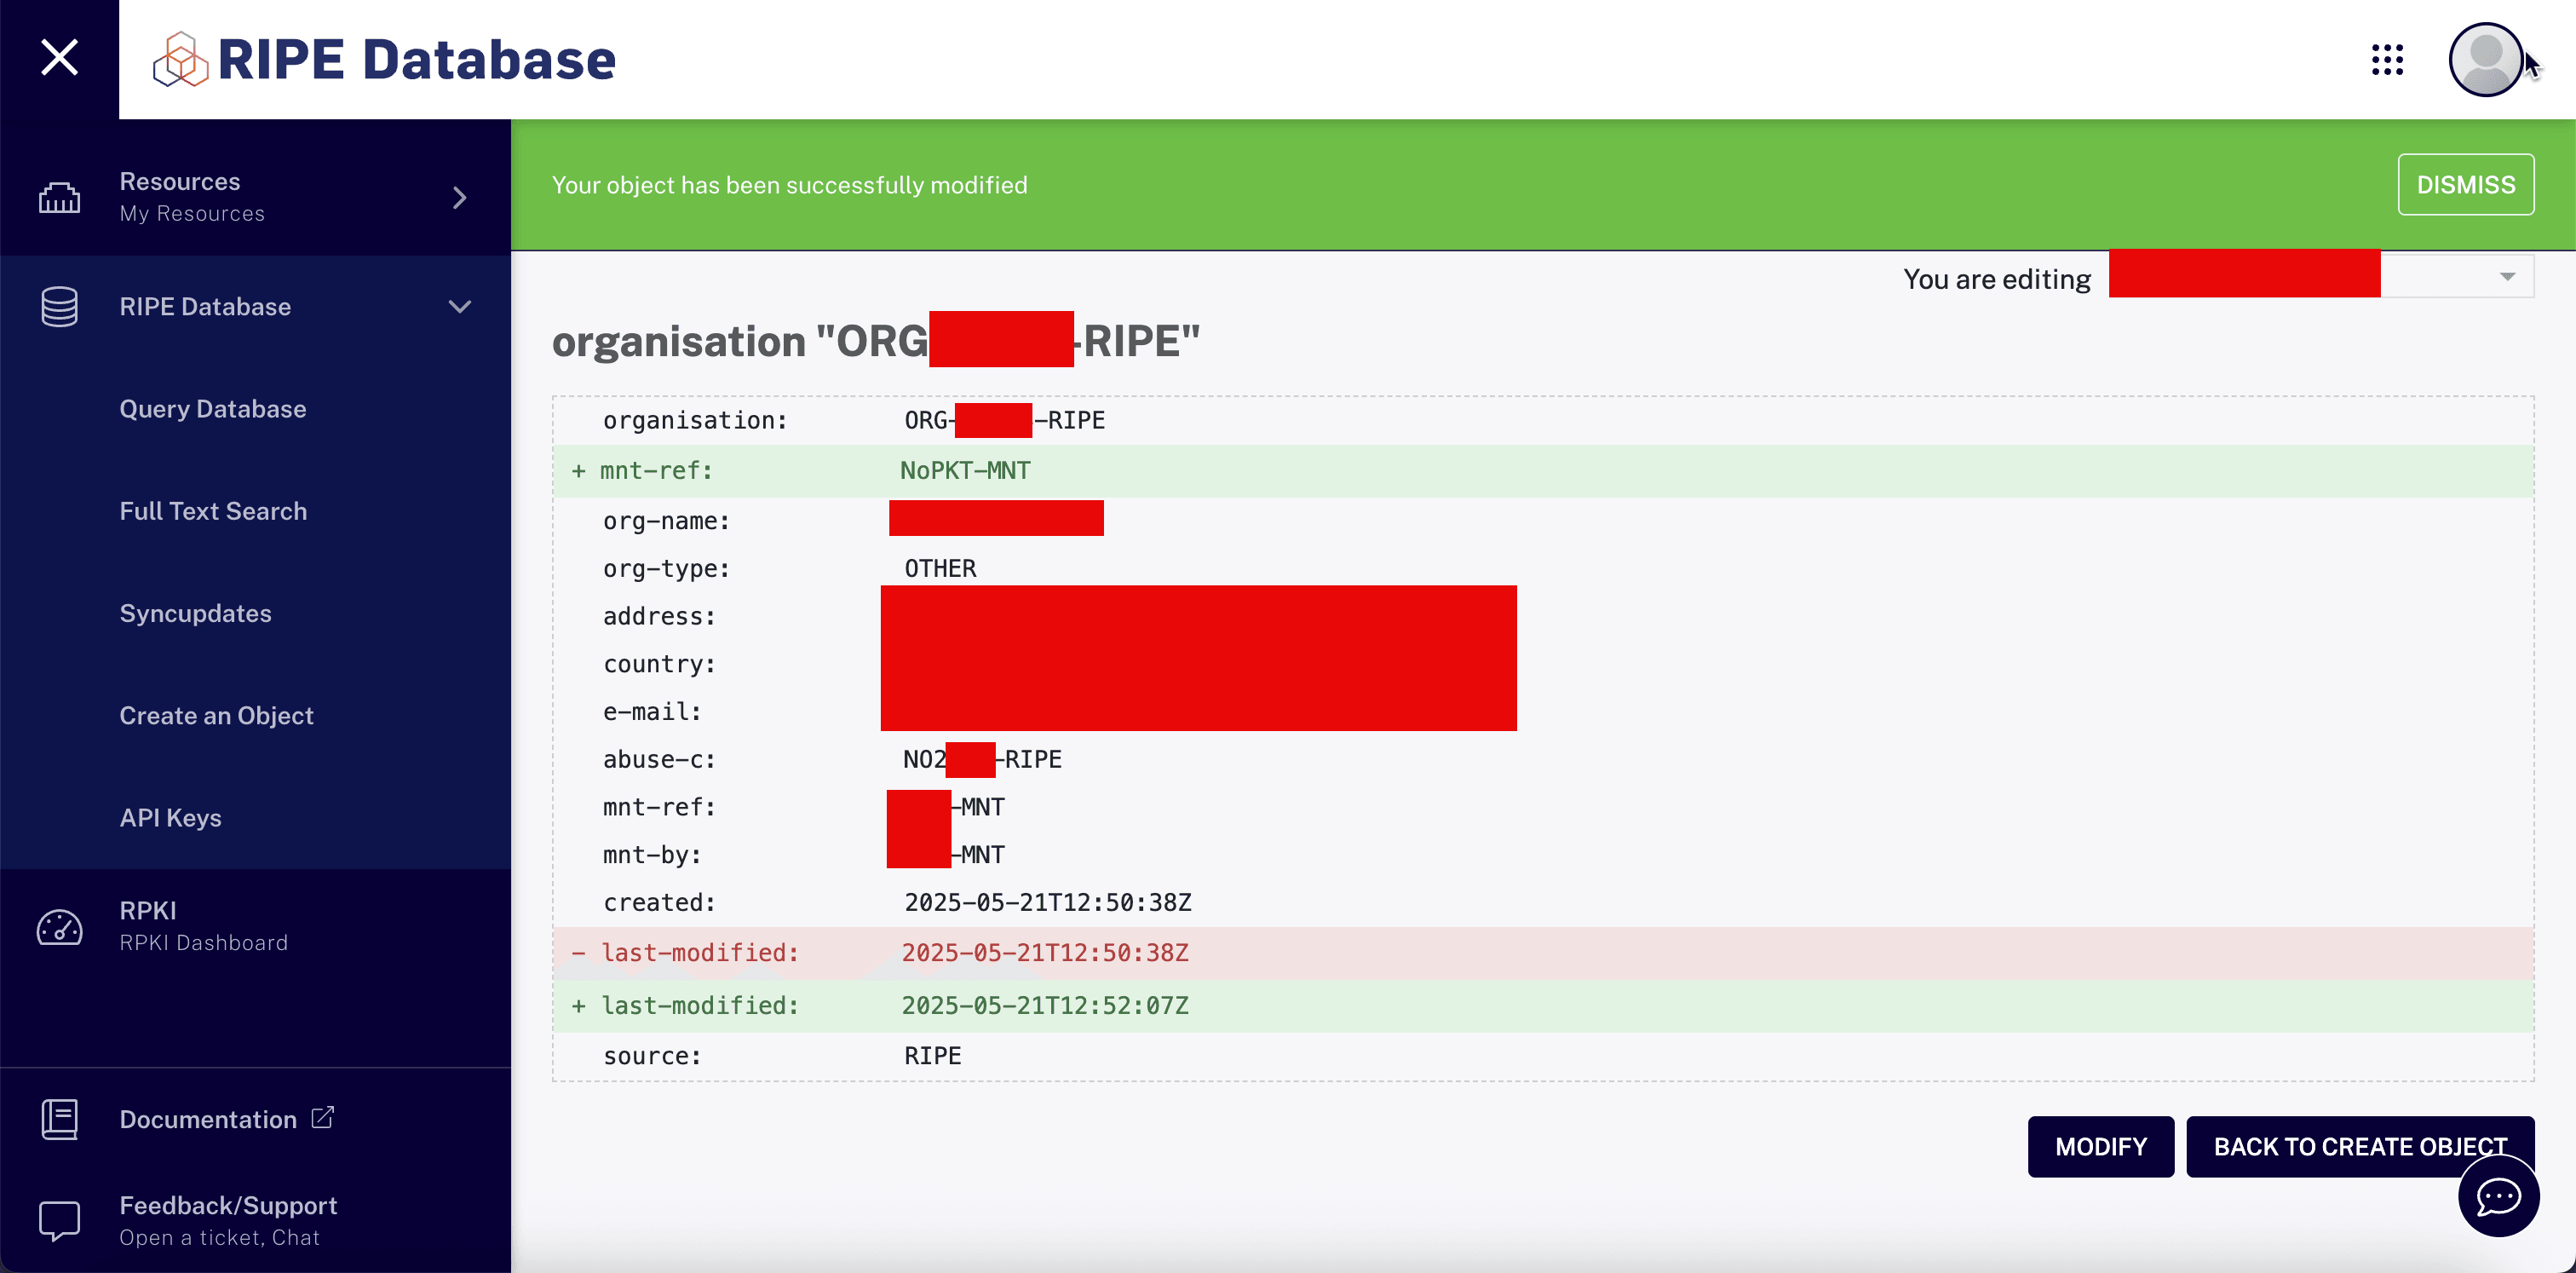
-
Note down Unique RIPE IDs:
- Role with primary key:
NO2XXX-RIPE. - Maintainer with the primary key:
XXX-MNT. - Organization:
ORG-XXXXX-RIPE.
- Role with primary key:
-
Enter the organization ID to the LIR so they can assign the rented IPv6 block to your RIPE account/role/organization.
Task 1.3: Verify IPv6 CIDR Assignment in the RIPE NCC Console
-
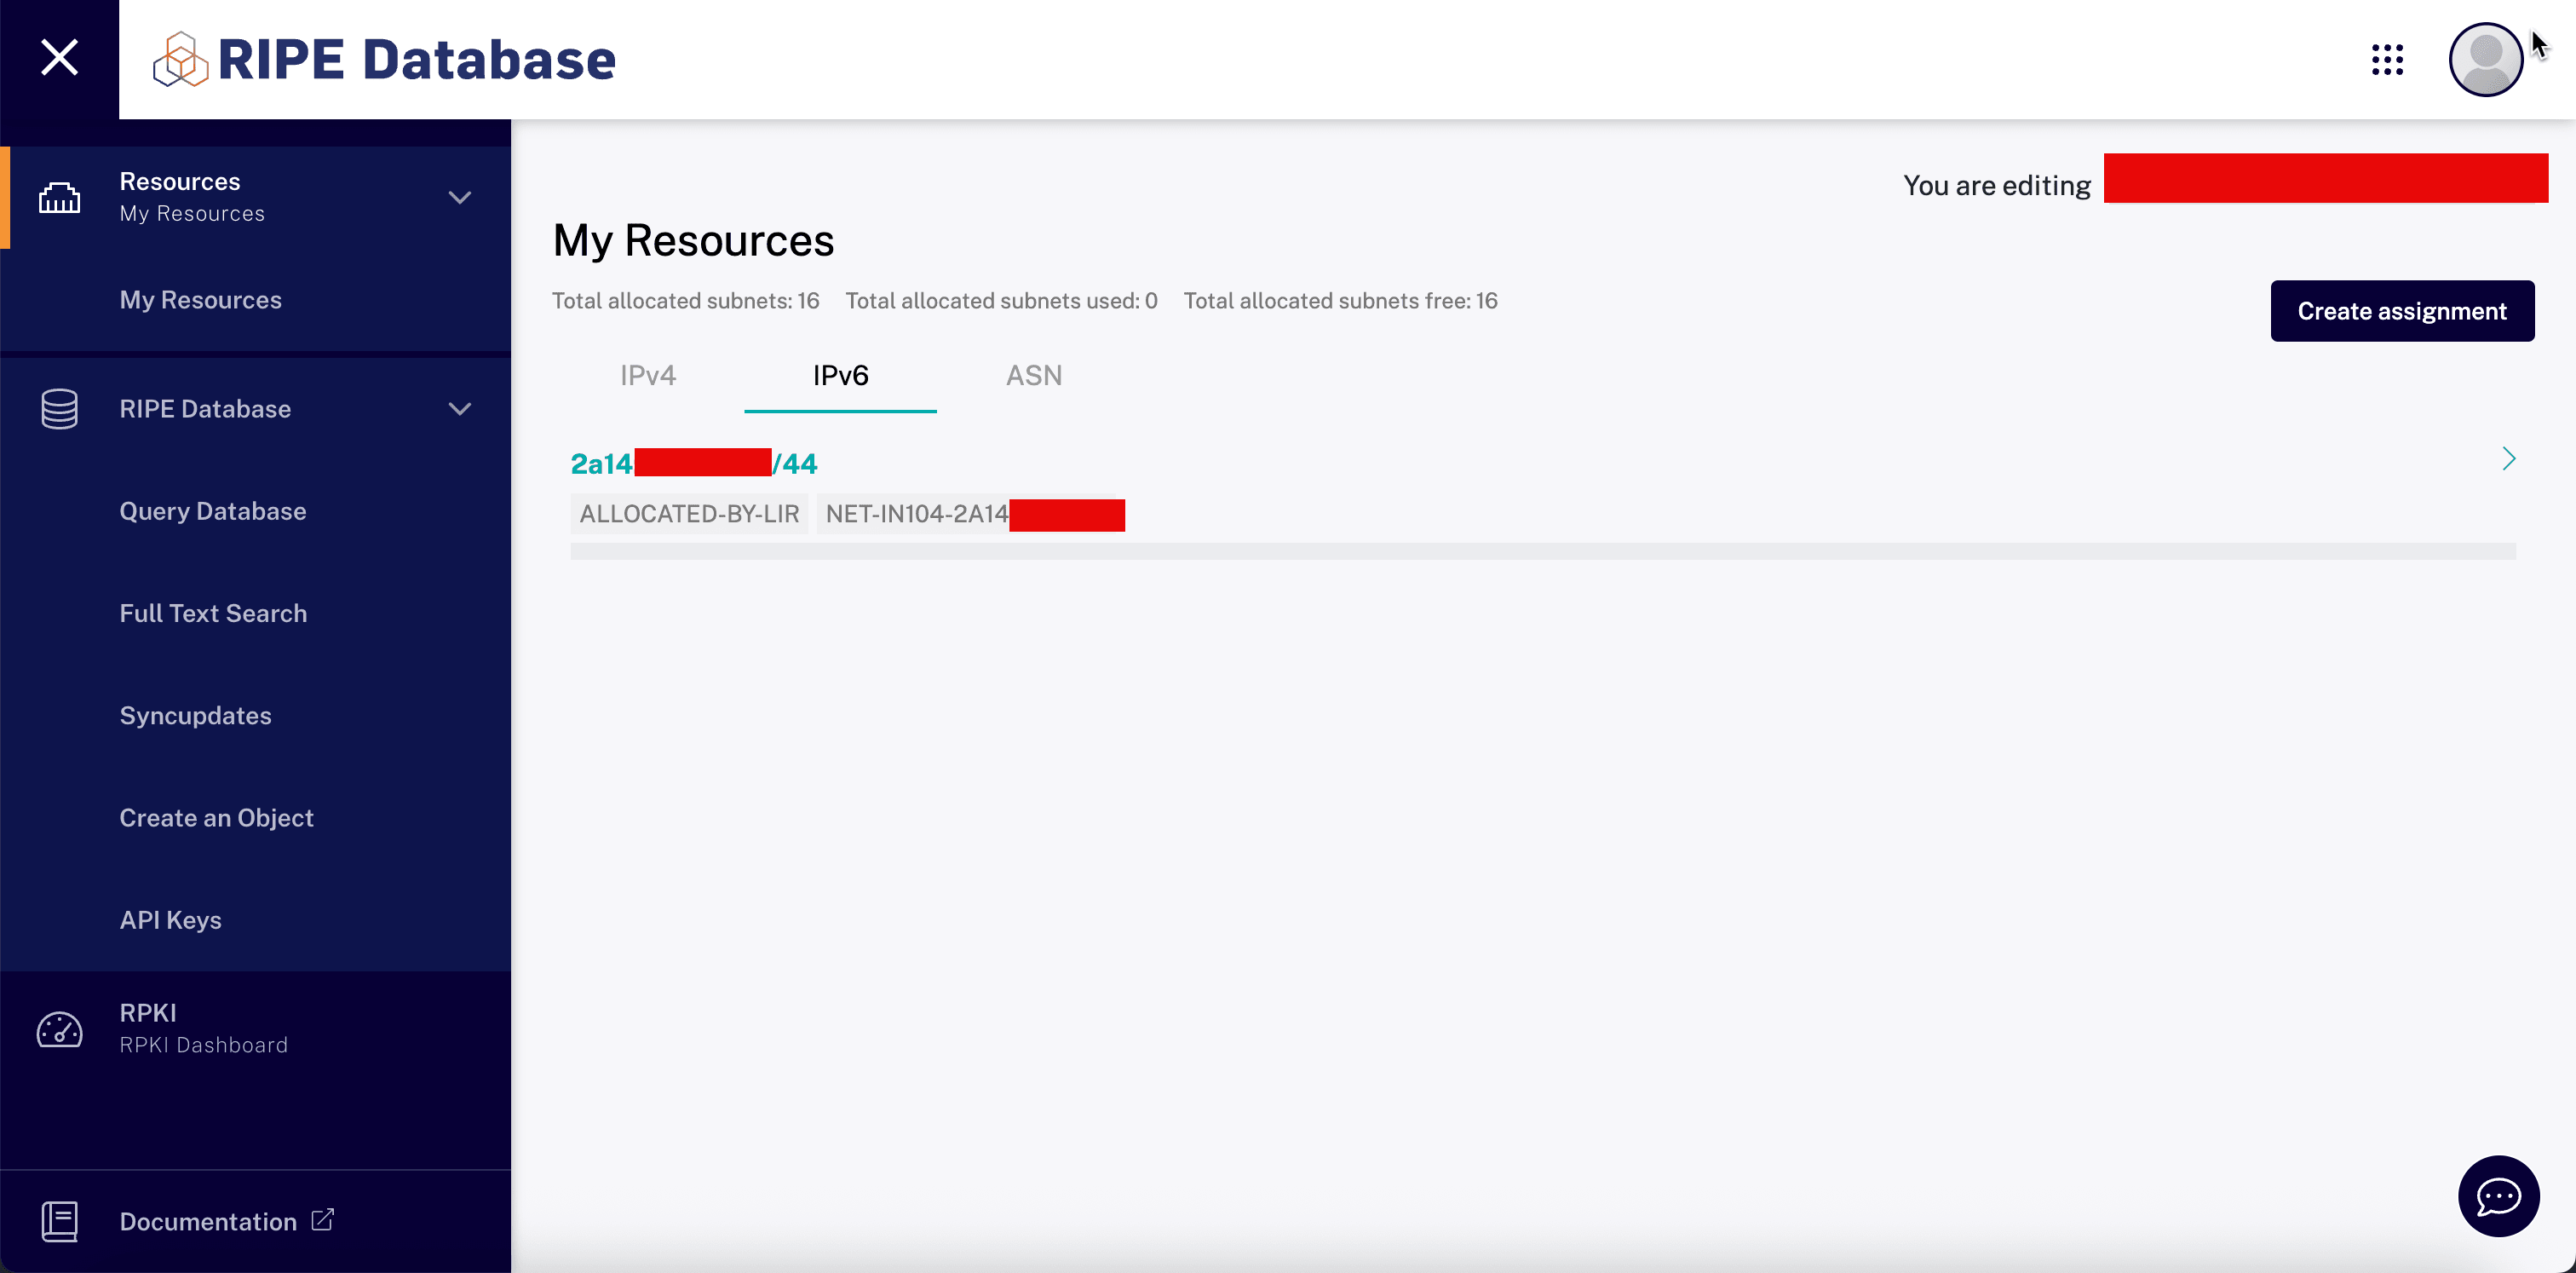
The LIR will assign the rented IPv6 block to your RIPE account/role/organization. Once this is done, they will notify you.

-
In the RIPE NCC Console, click My Resources, IPv6 and review the rented IPv6 range. Now, you can perform administration tasks on the subnet which the OCI BYOIP must complete.
Task 2: Start the Import of the IPv6 CIDR in OCI
Once your IPv6 CIDR is registered and visible in the RIPE NCC database under your Organization ID, you can begin the BYOIP import process in OCI.
-
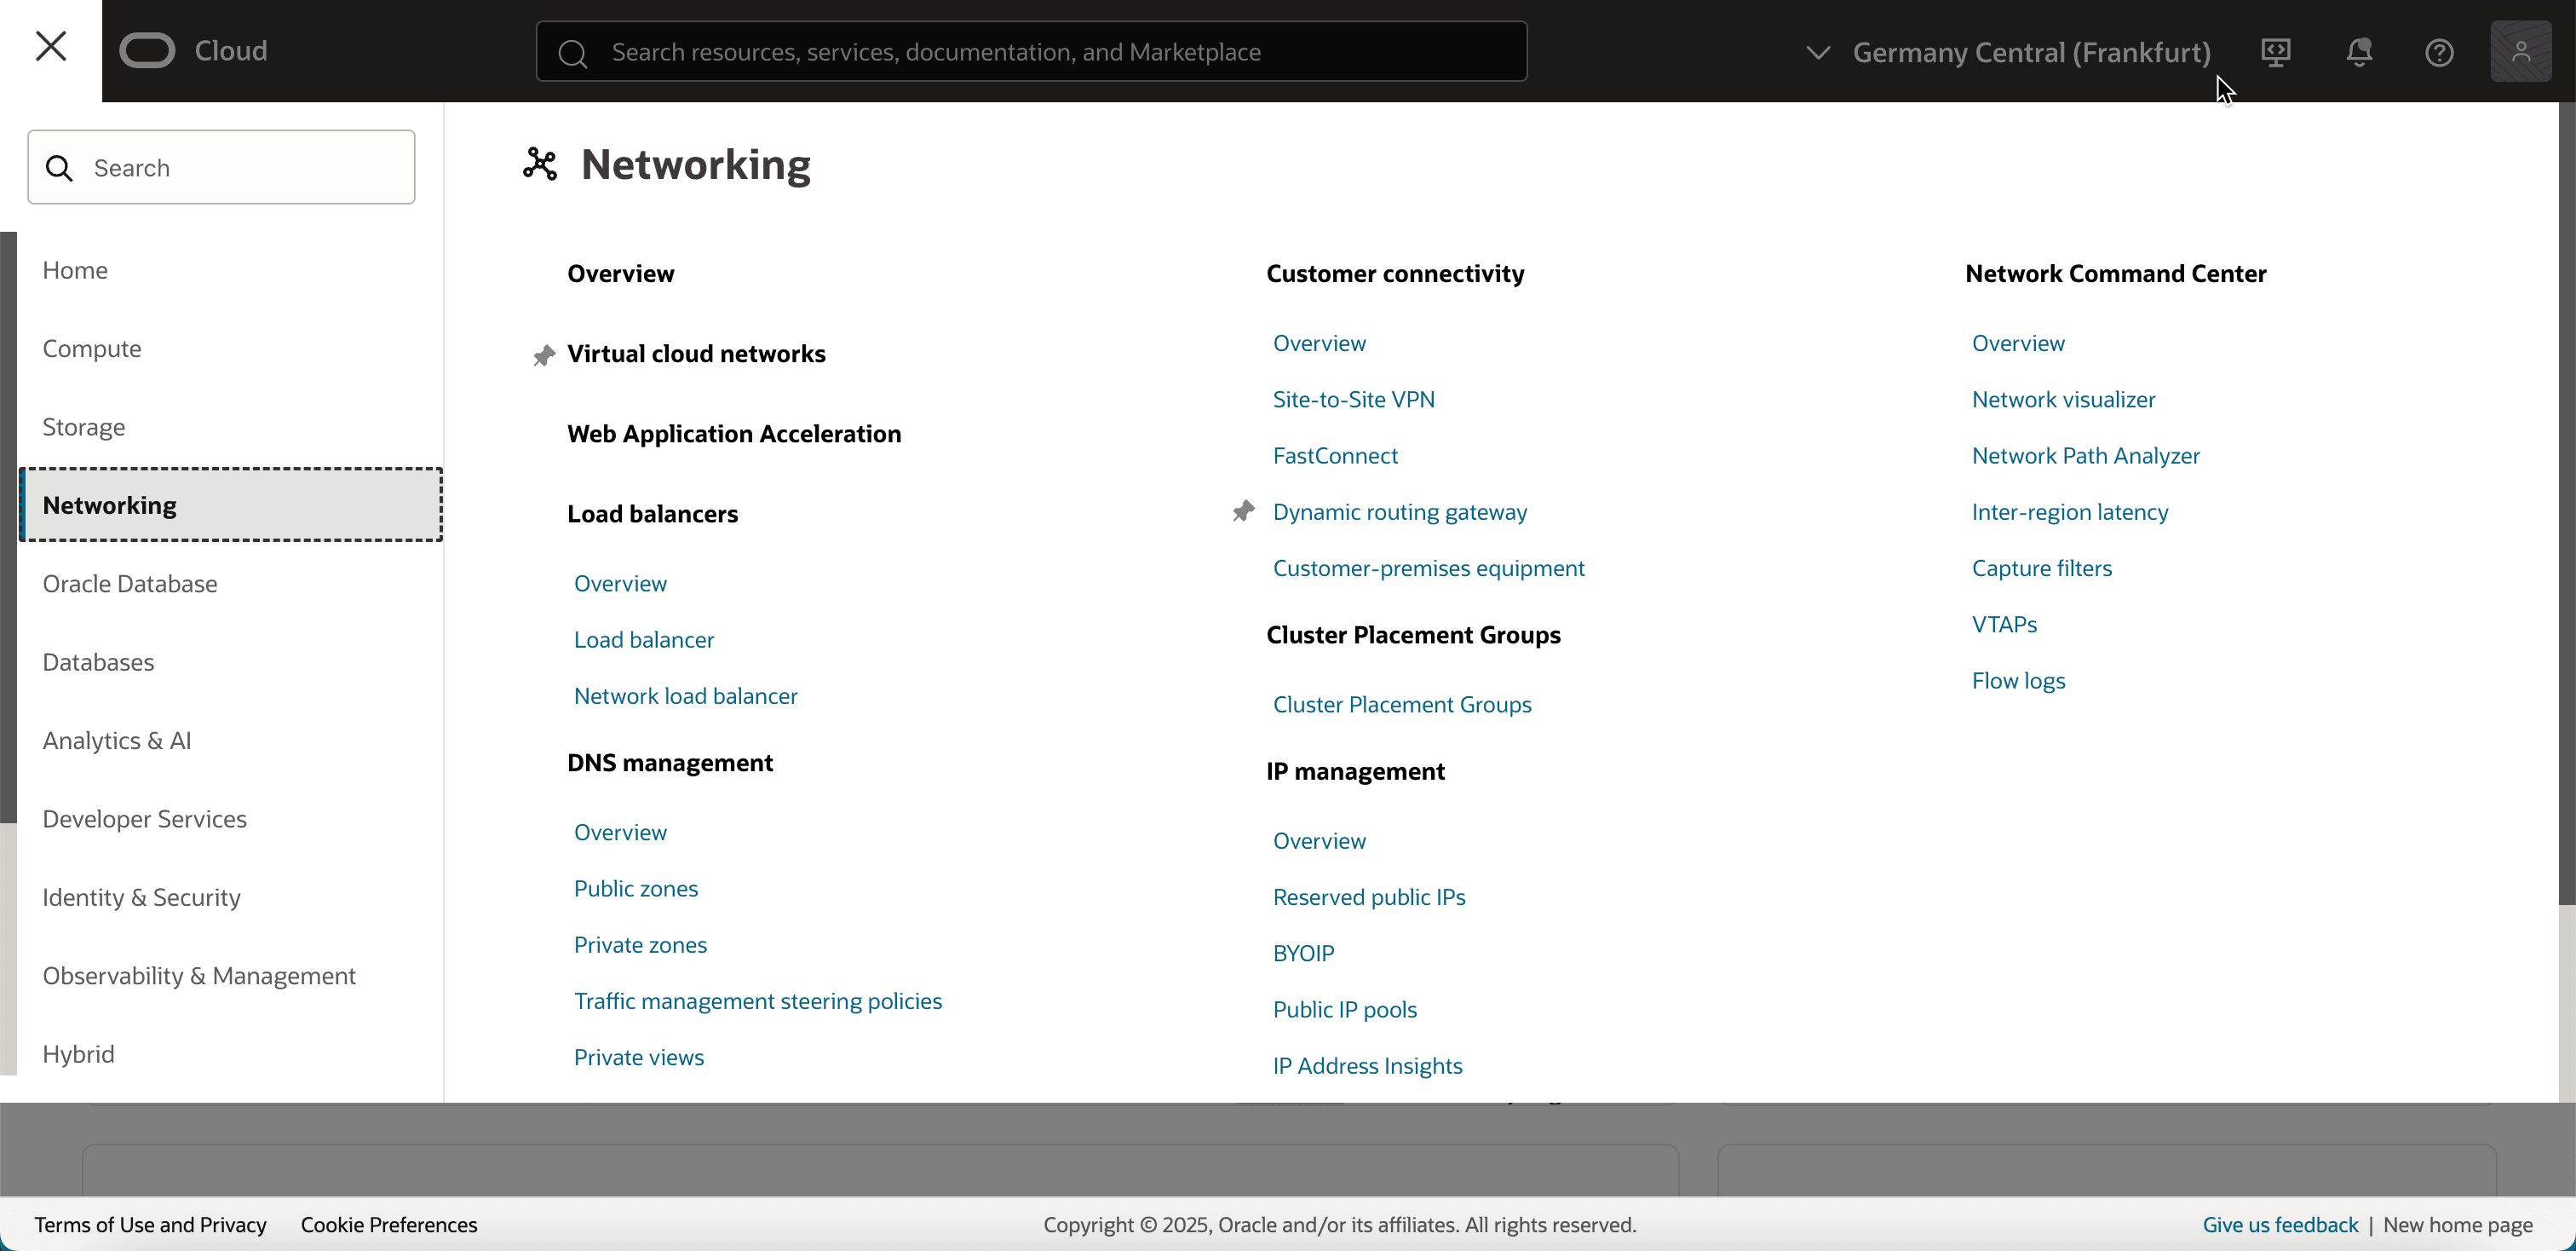
Go to the OCI Console, navigate to Networking and click BYOIP (Bring Your Own IP).
-
Click Import BYOIP CIDR block/prefix.

-
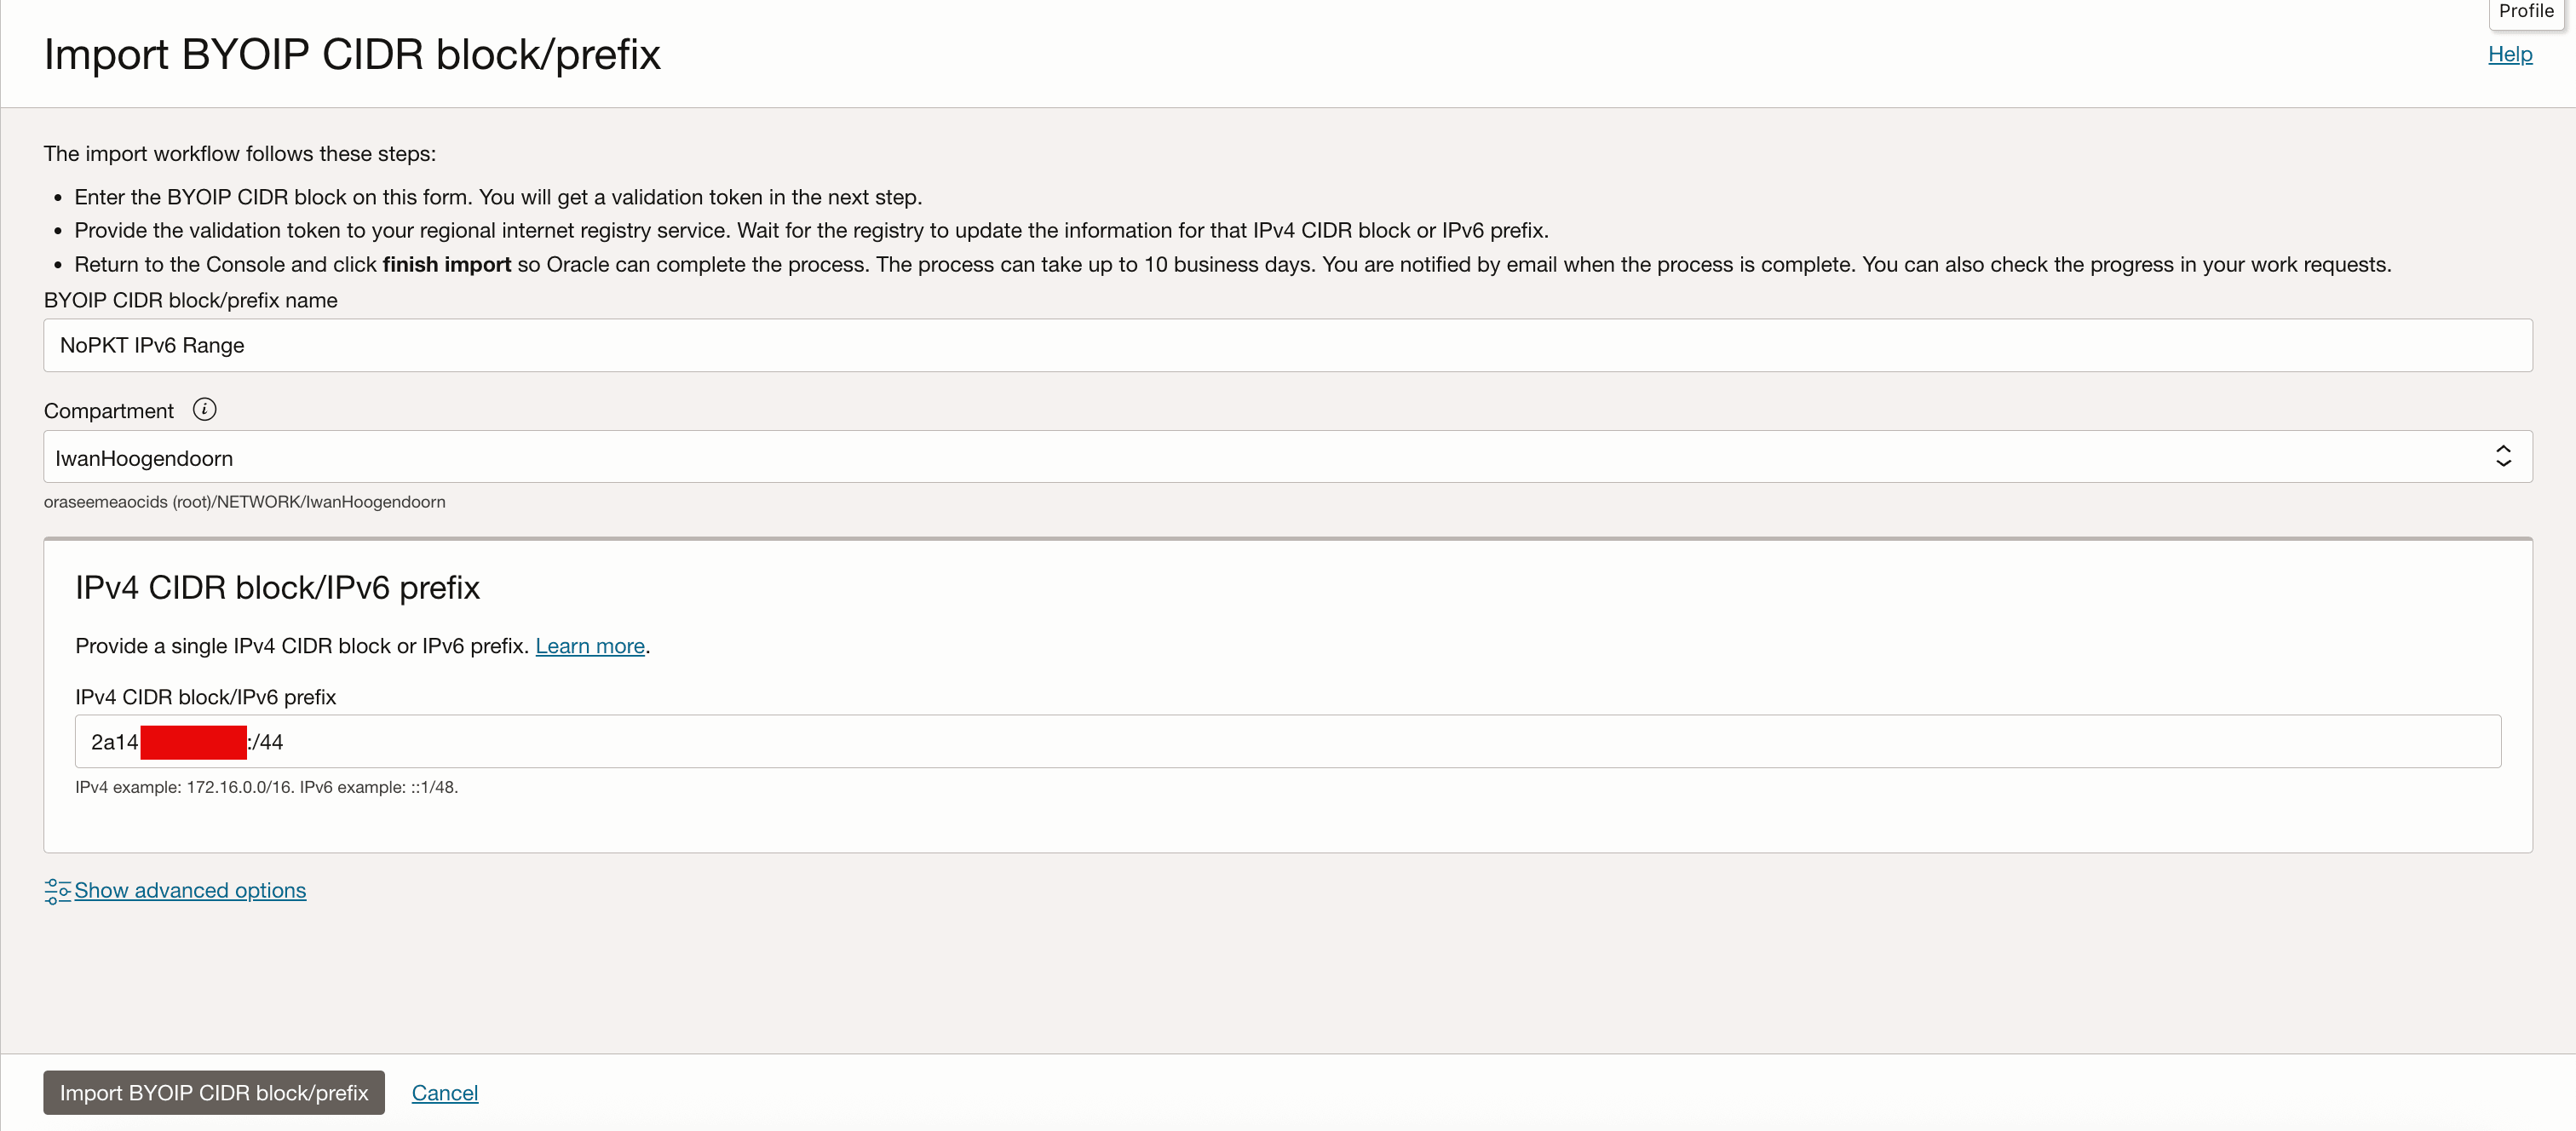
Enter the following information and click Import BYOIP CIDR block/prefix.
- Name: Specify a name for the prefix.
- IPv6 CIDR Block: Enter the exact IPv6 prefix as it appears in the RIPE database.
-
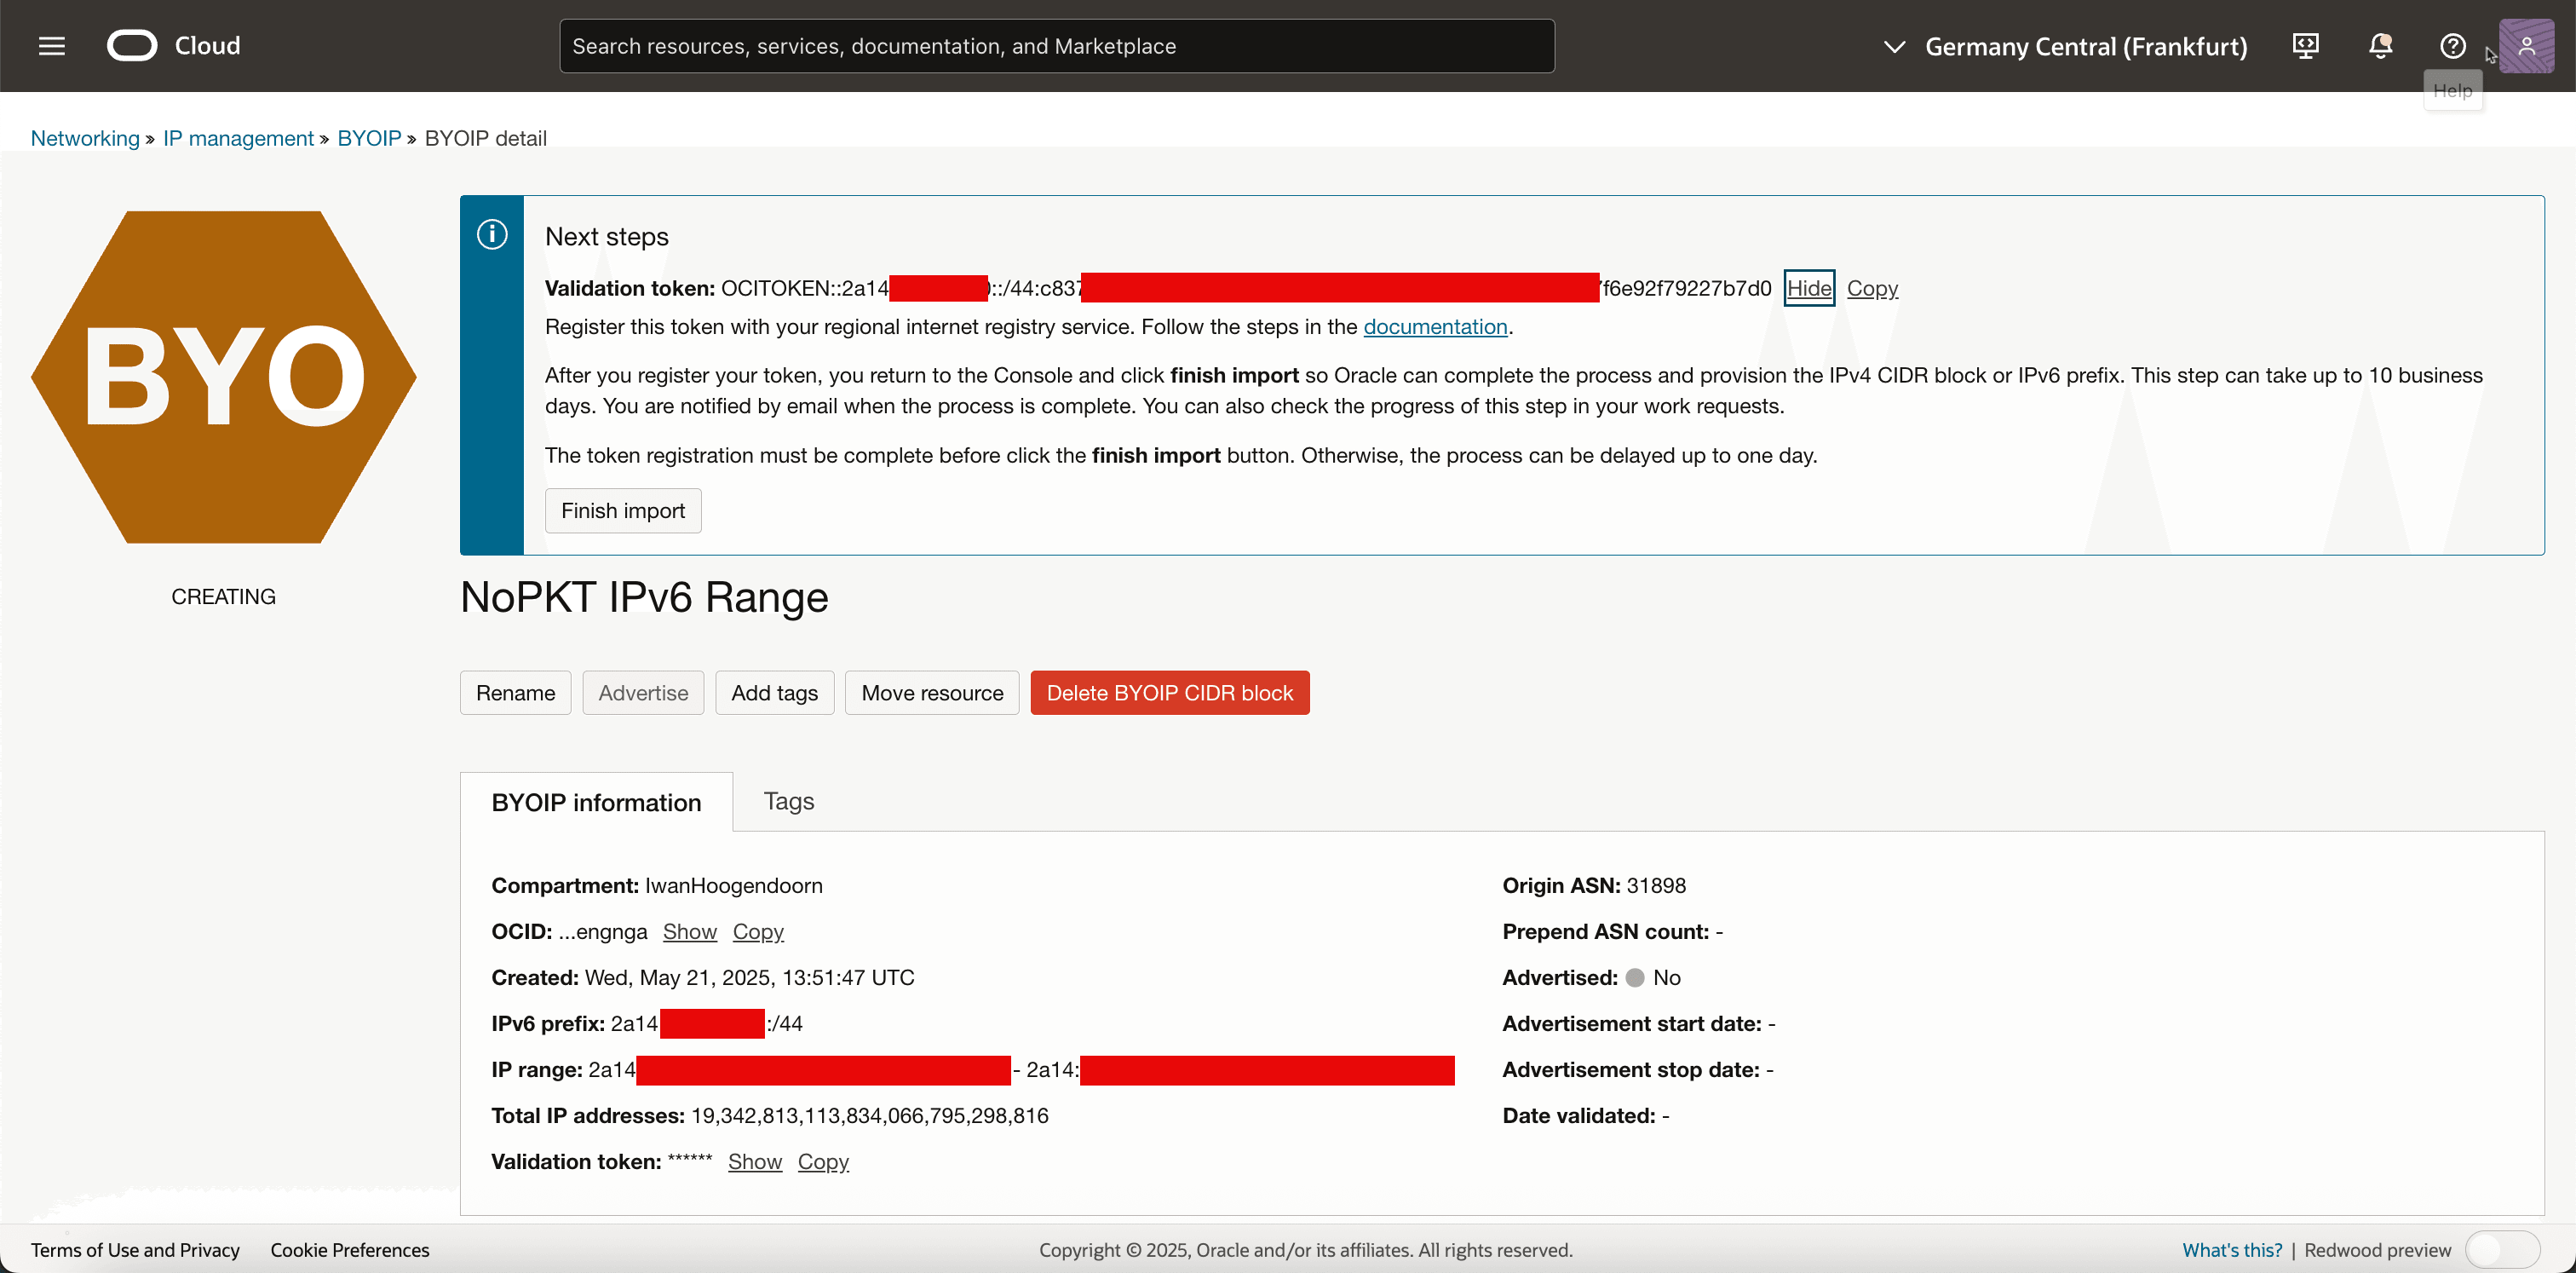
Notice that the state of the prefix will be Creating.
-
Click the prefix name.

-
OCI will generate a validation token, which you must publish in the RIPE Database in the next task. Copy this validation token in a notepad. OCI will later validate this token to confirm that you have administrative control over the IPv6 block.
Note:
- Do not proceed with finishing the import yet.
- You first need to add the verification token to your RIPE
inet6numobject in Task 3 and create an ROA object in Task 4.- Only after both are done can OCI validate and complete the import process.
Task 3: Add the Token as a New descr Associated with your Address Range
After initiating the import process in OCI, a verification token is generated. This token is a unique string that Oracle uses to confirm you have administrative control over the IPv6 CIDR block you are attempting to bring into the cloud.
To verify ownership, you must add this token as a new descr in the inet6num object for your IPv6 range in the RIPE Database.
-
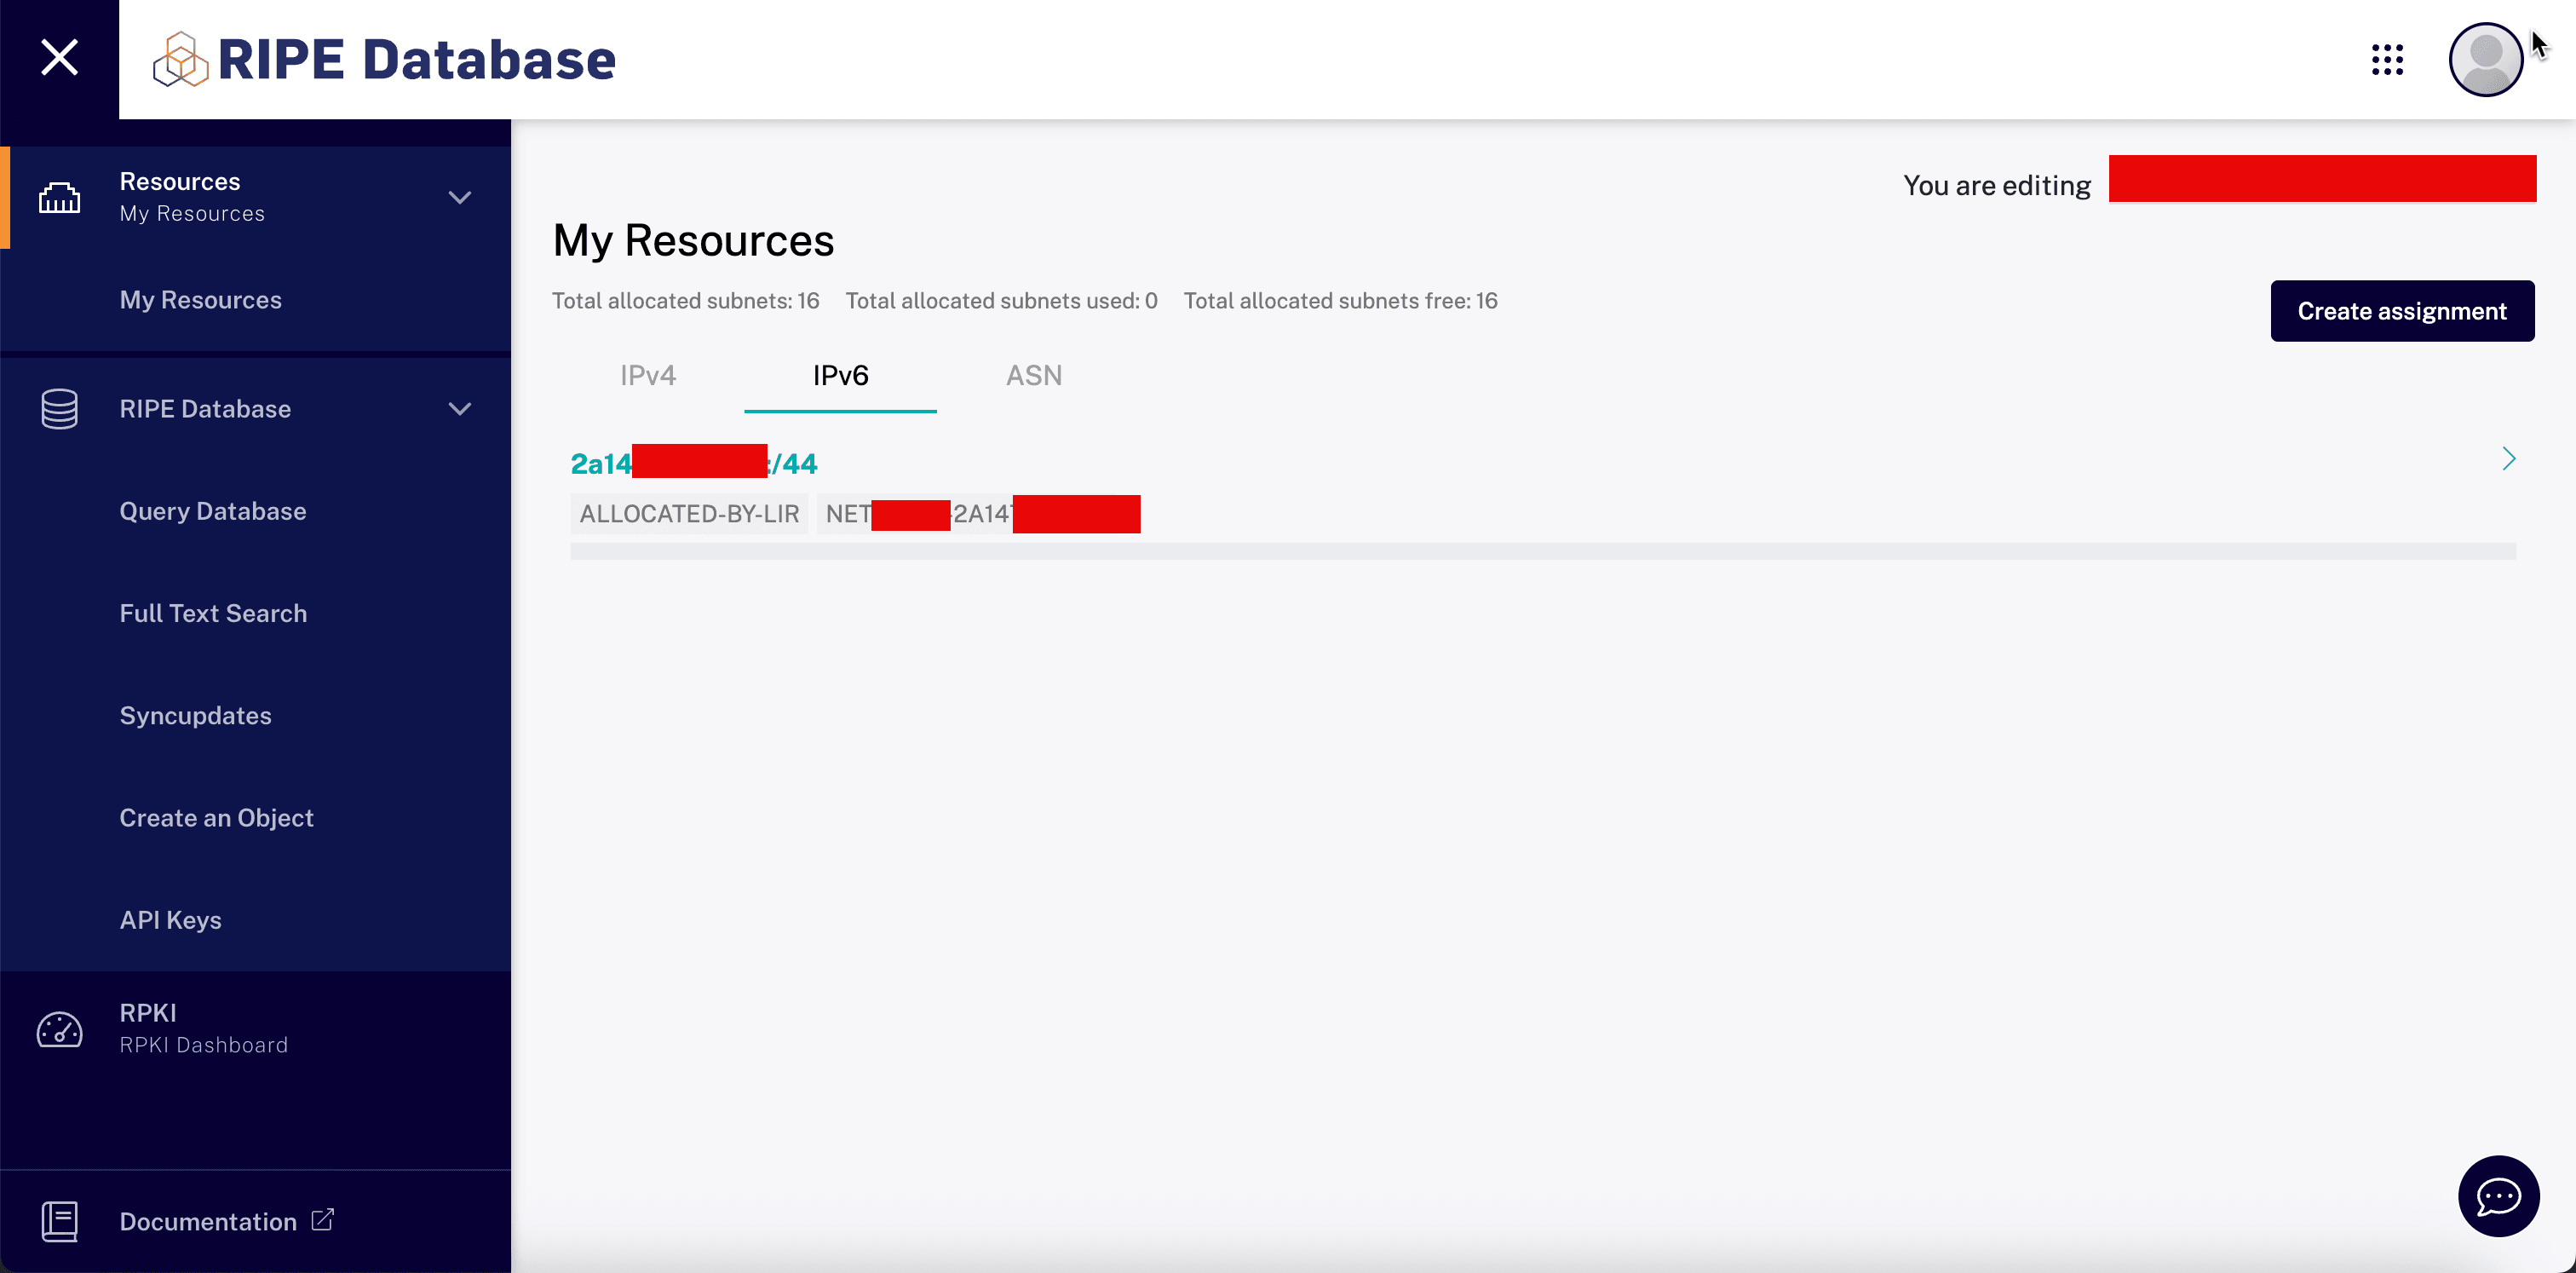
In the RIPE Database console, navigate to My Resources, IPv6 and click the IPv6 subnet.
-
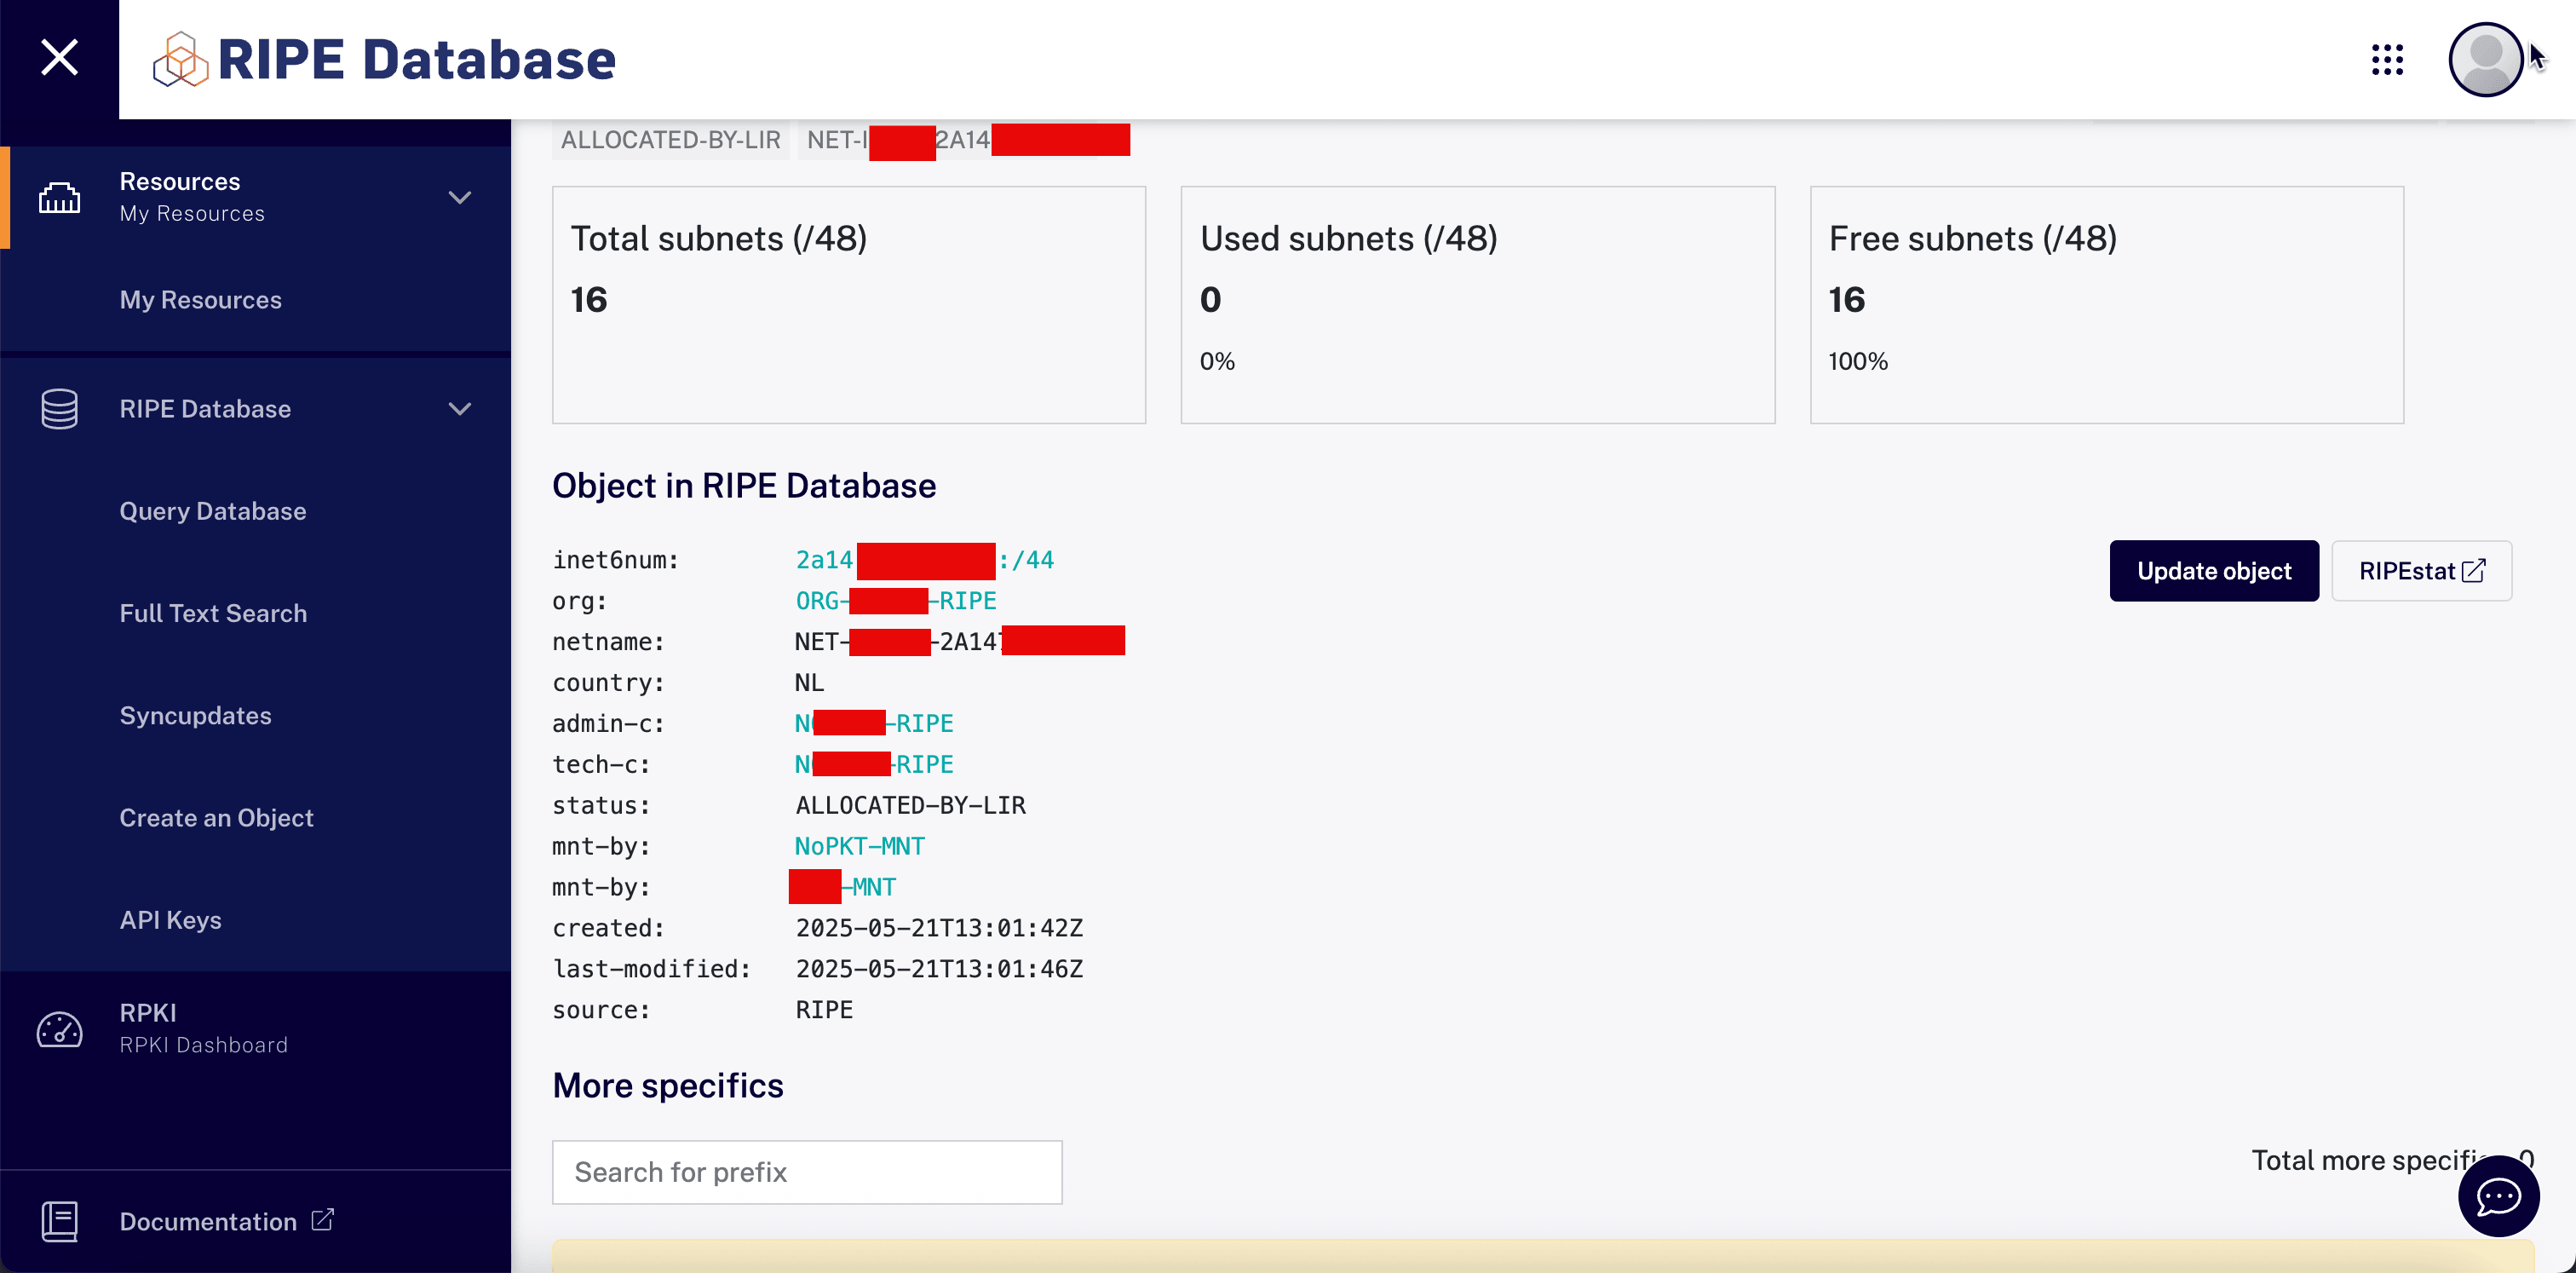
Click Update object.
-
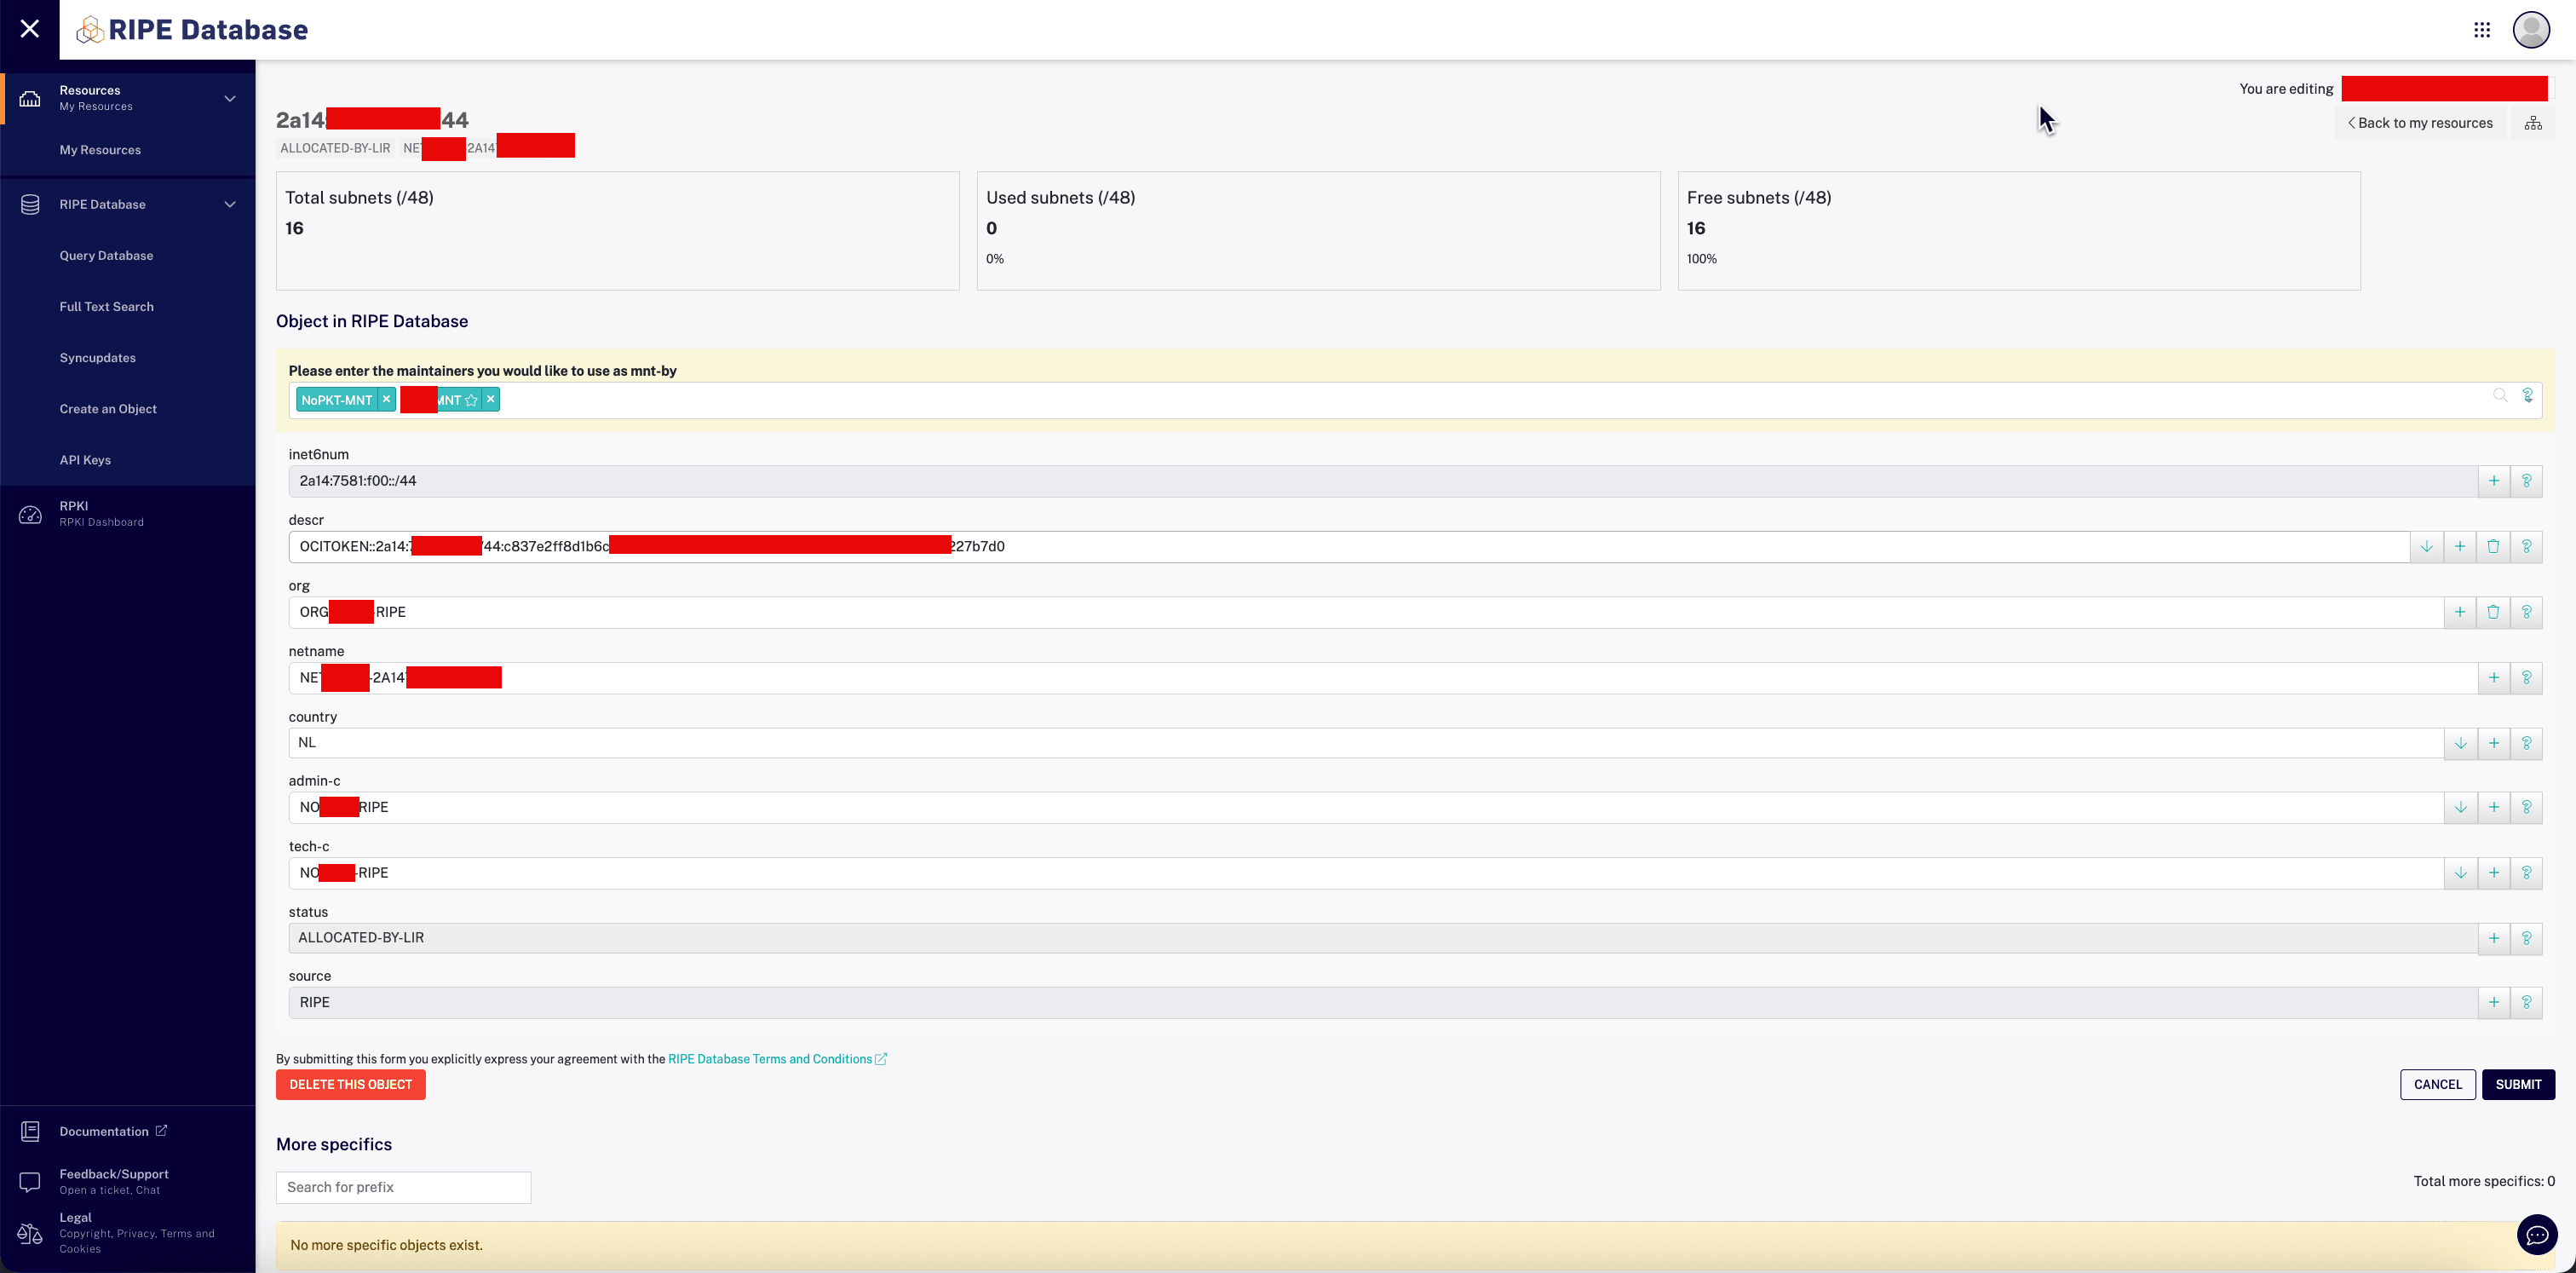
Click any + sign and enter the following information.
- To add a new
descr, paste the OCI token provided in the OCI Console. - Click Submit.
- To add a new
-
Note that the object has been successfully updated with the new
descrattribute.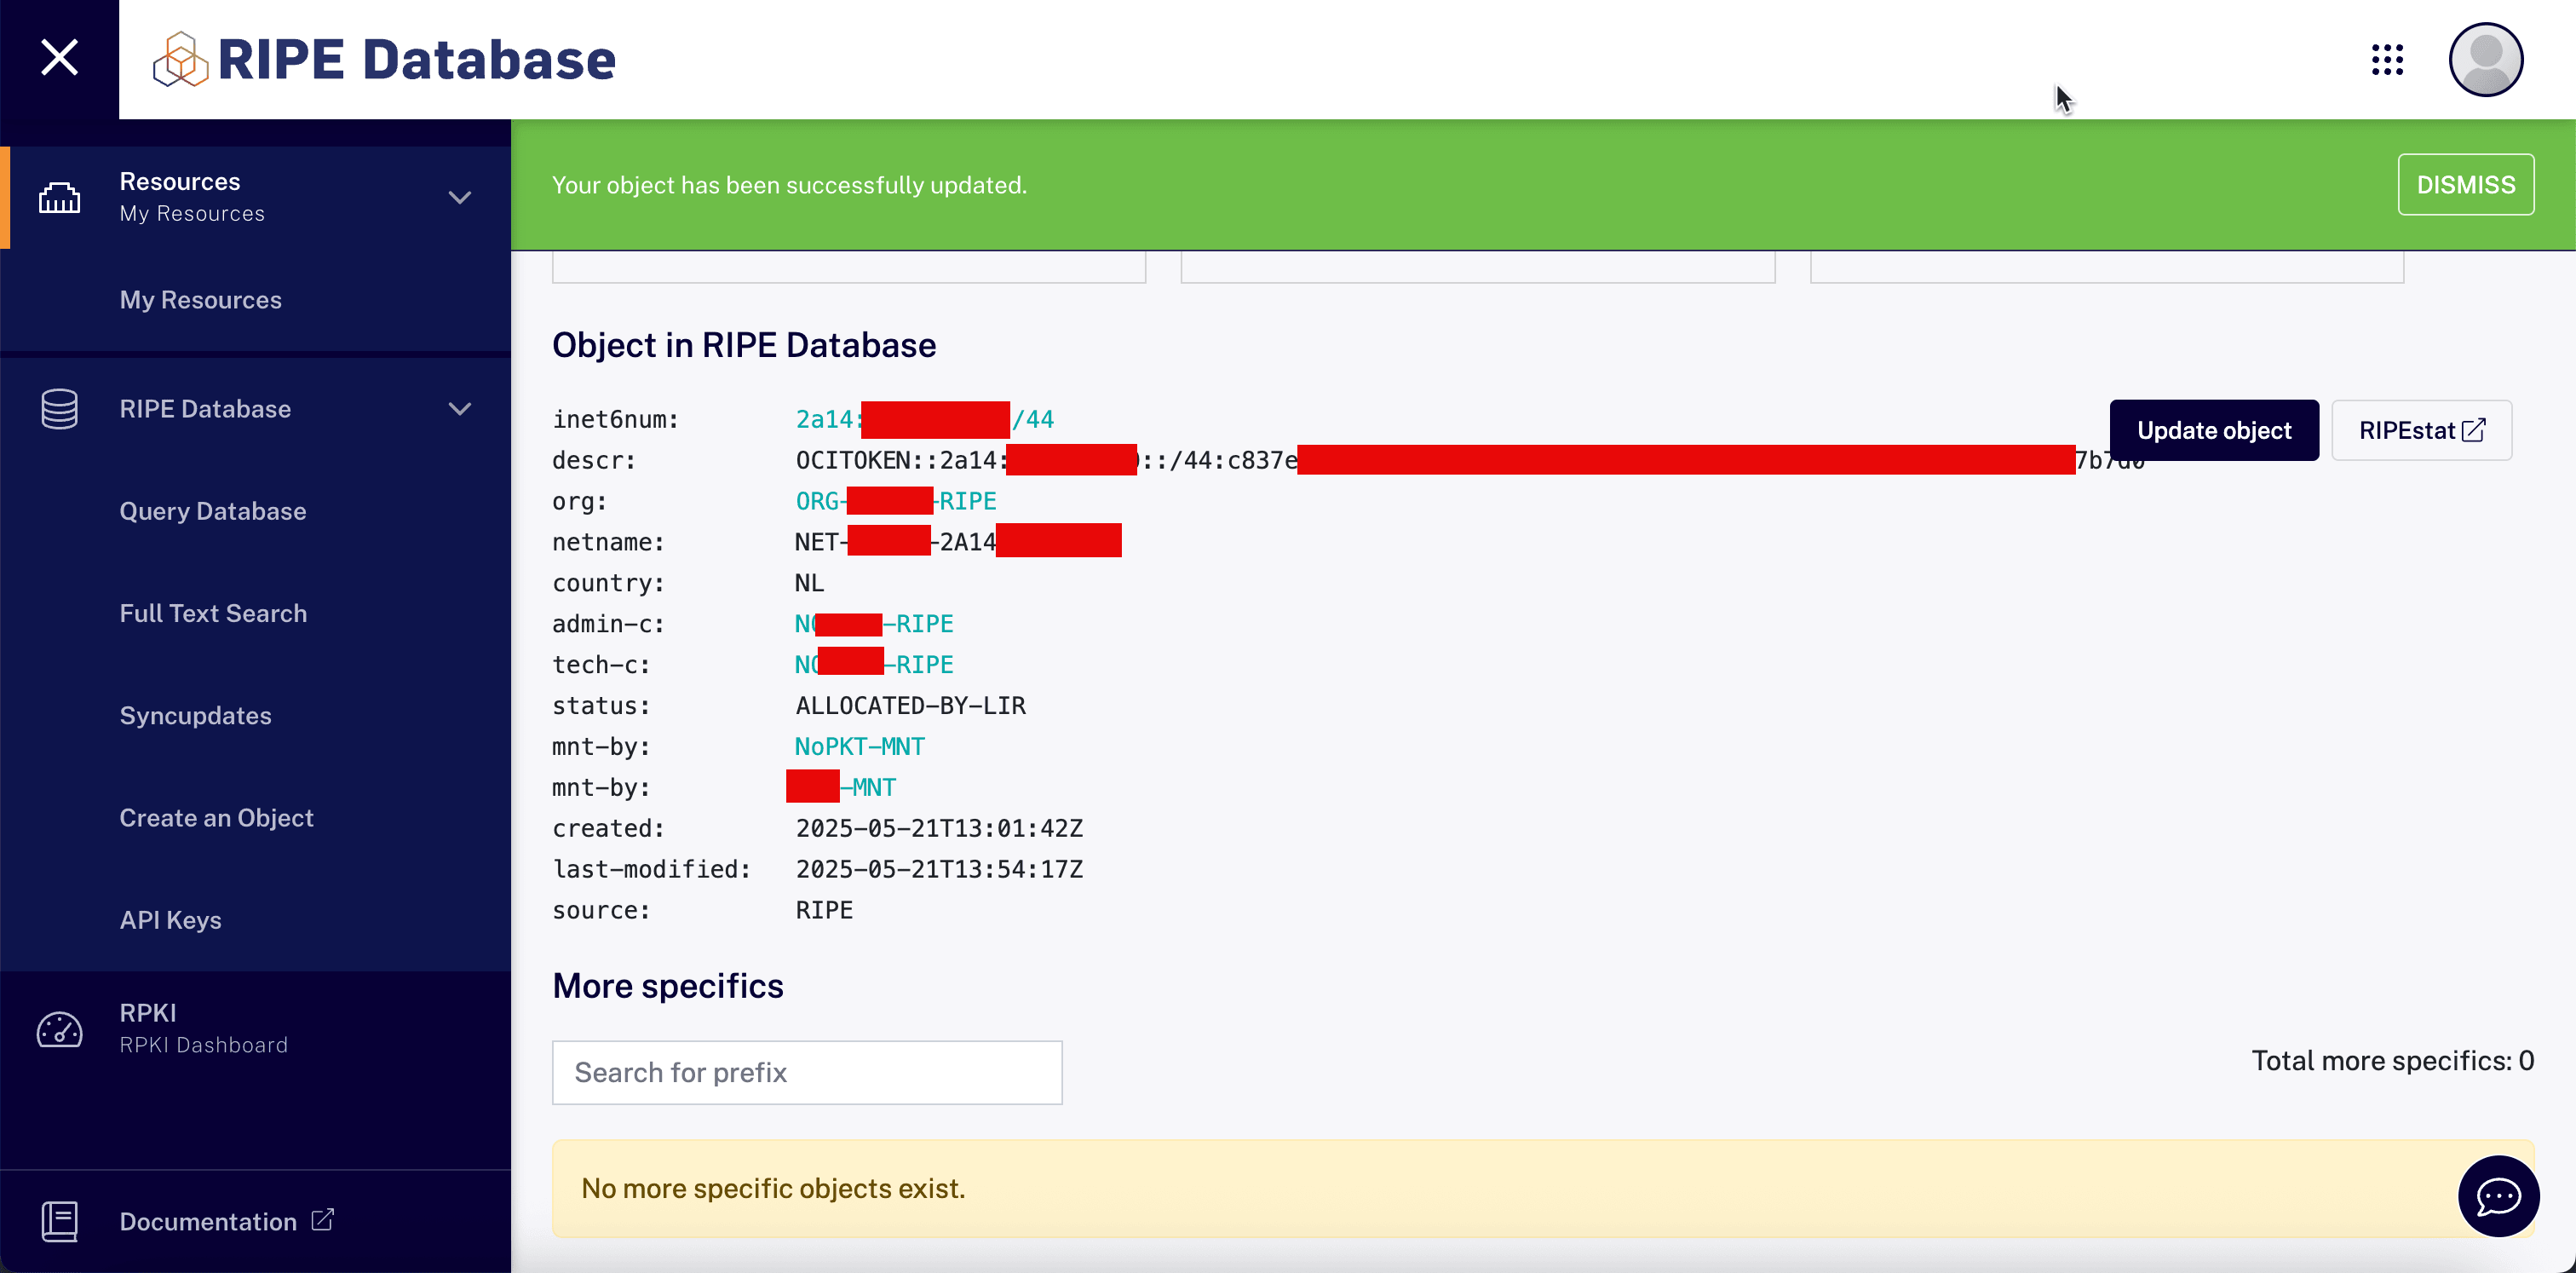
OCI will now periodically check the RIPE registry for the presence of this token. Once the token is detected, the CIDR can move to the next verification stage (ROA validation).
Task 4: Create a ROA Object to Authorize Oracle to Advertise the BYOIP CIDR Block
In addition to adding the verification token to the RIPE Database, Oracle requires that you explicitly authorize it to advertise your IPv6 CIDR block through BGP. This is done by creating a ROA object in the RIPE NCC RPKI dashboard.
The ROA object tells the internet routing ecosystem that Oracle (identified by its Autonomous System Number (ASN)) can announce your IPv6 prefix. Without this authorization, OCI will not complete the BYOIP import process.
We have requested the LIR to do this, and they confirmed in the ticket in Task 1.3 that this is done.
We can also check this from here: Routinator.
-
Go to the website.
-
Enter your IPv6 prefix.
-
Enter your ASN (This will be Oracle’s AS Number AS31898).
-
Click Validate.
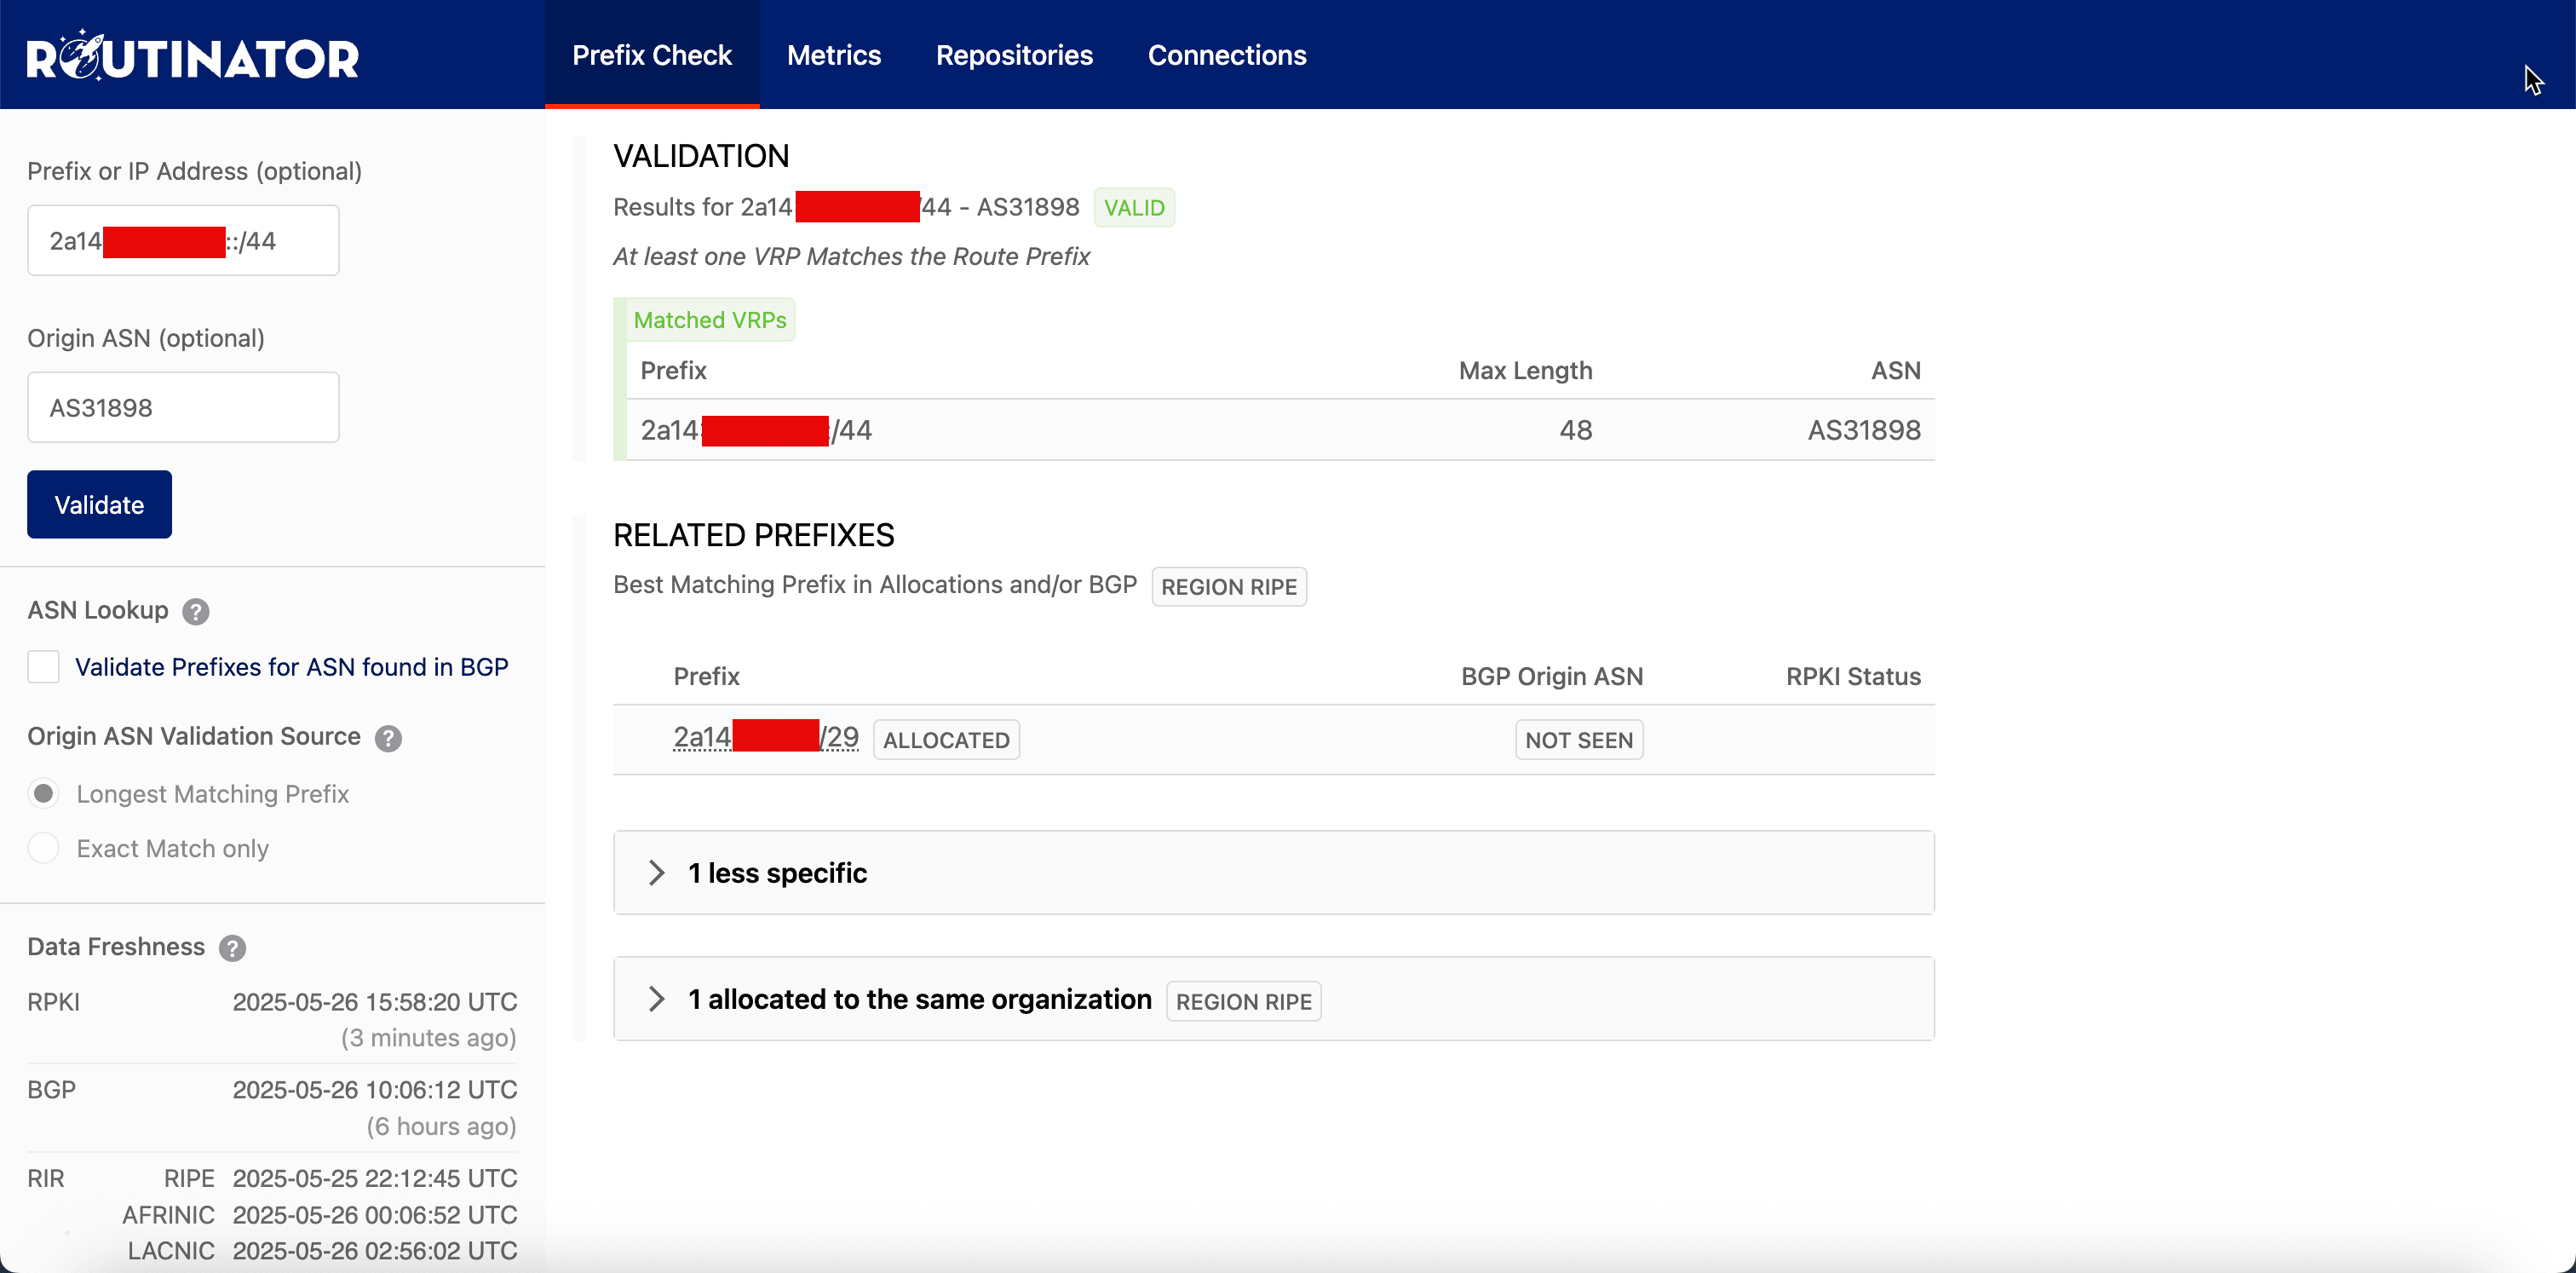
Once both the verification token and the ROA object are published and recognized, Oracle will validate the ownership and routing authorization of your BYOIP IPv6 CIDR block. But before this is done, you must still click Finish import in the OCI Console.
Task 5: Finish the Import of the IPv6 CIDR in OCI
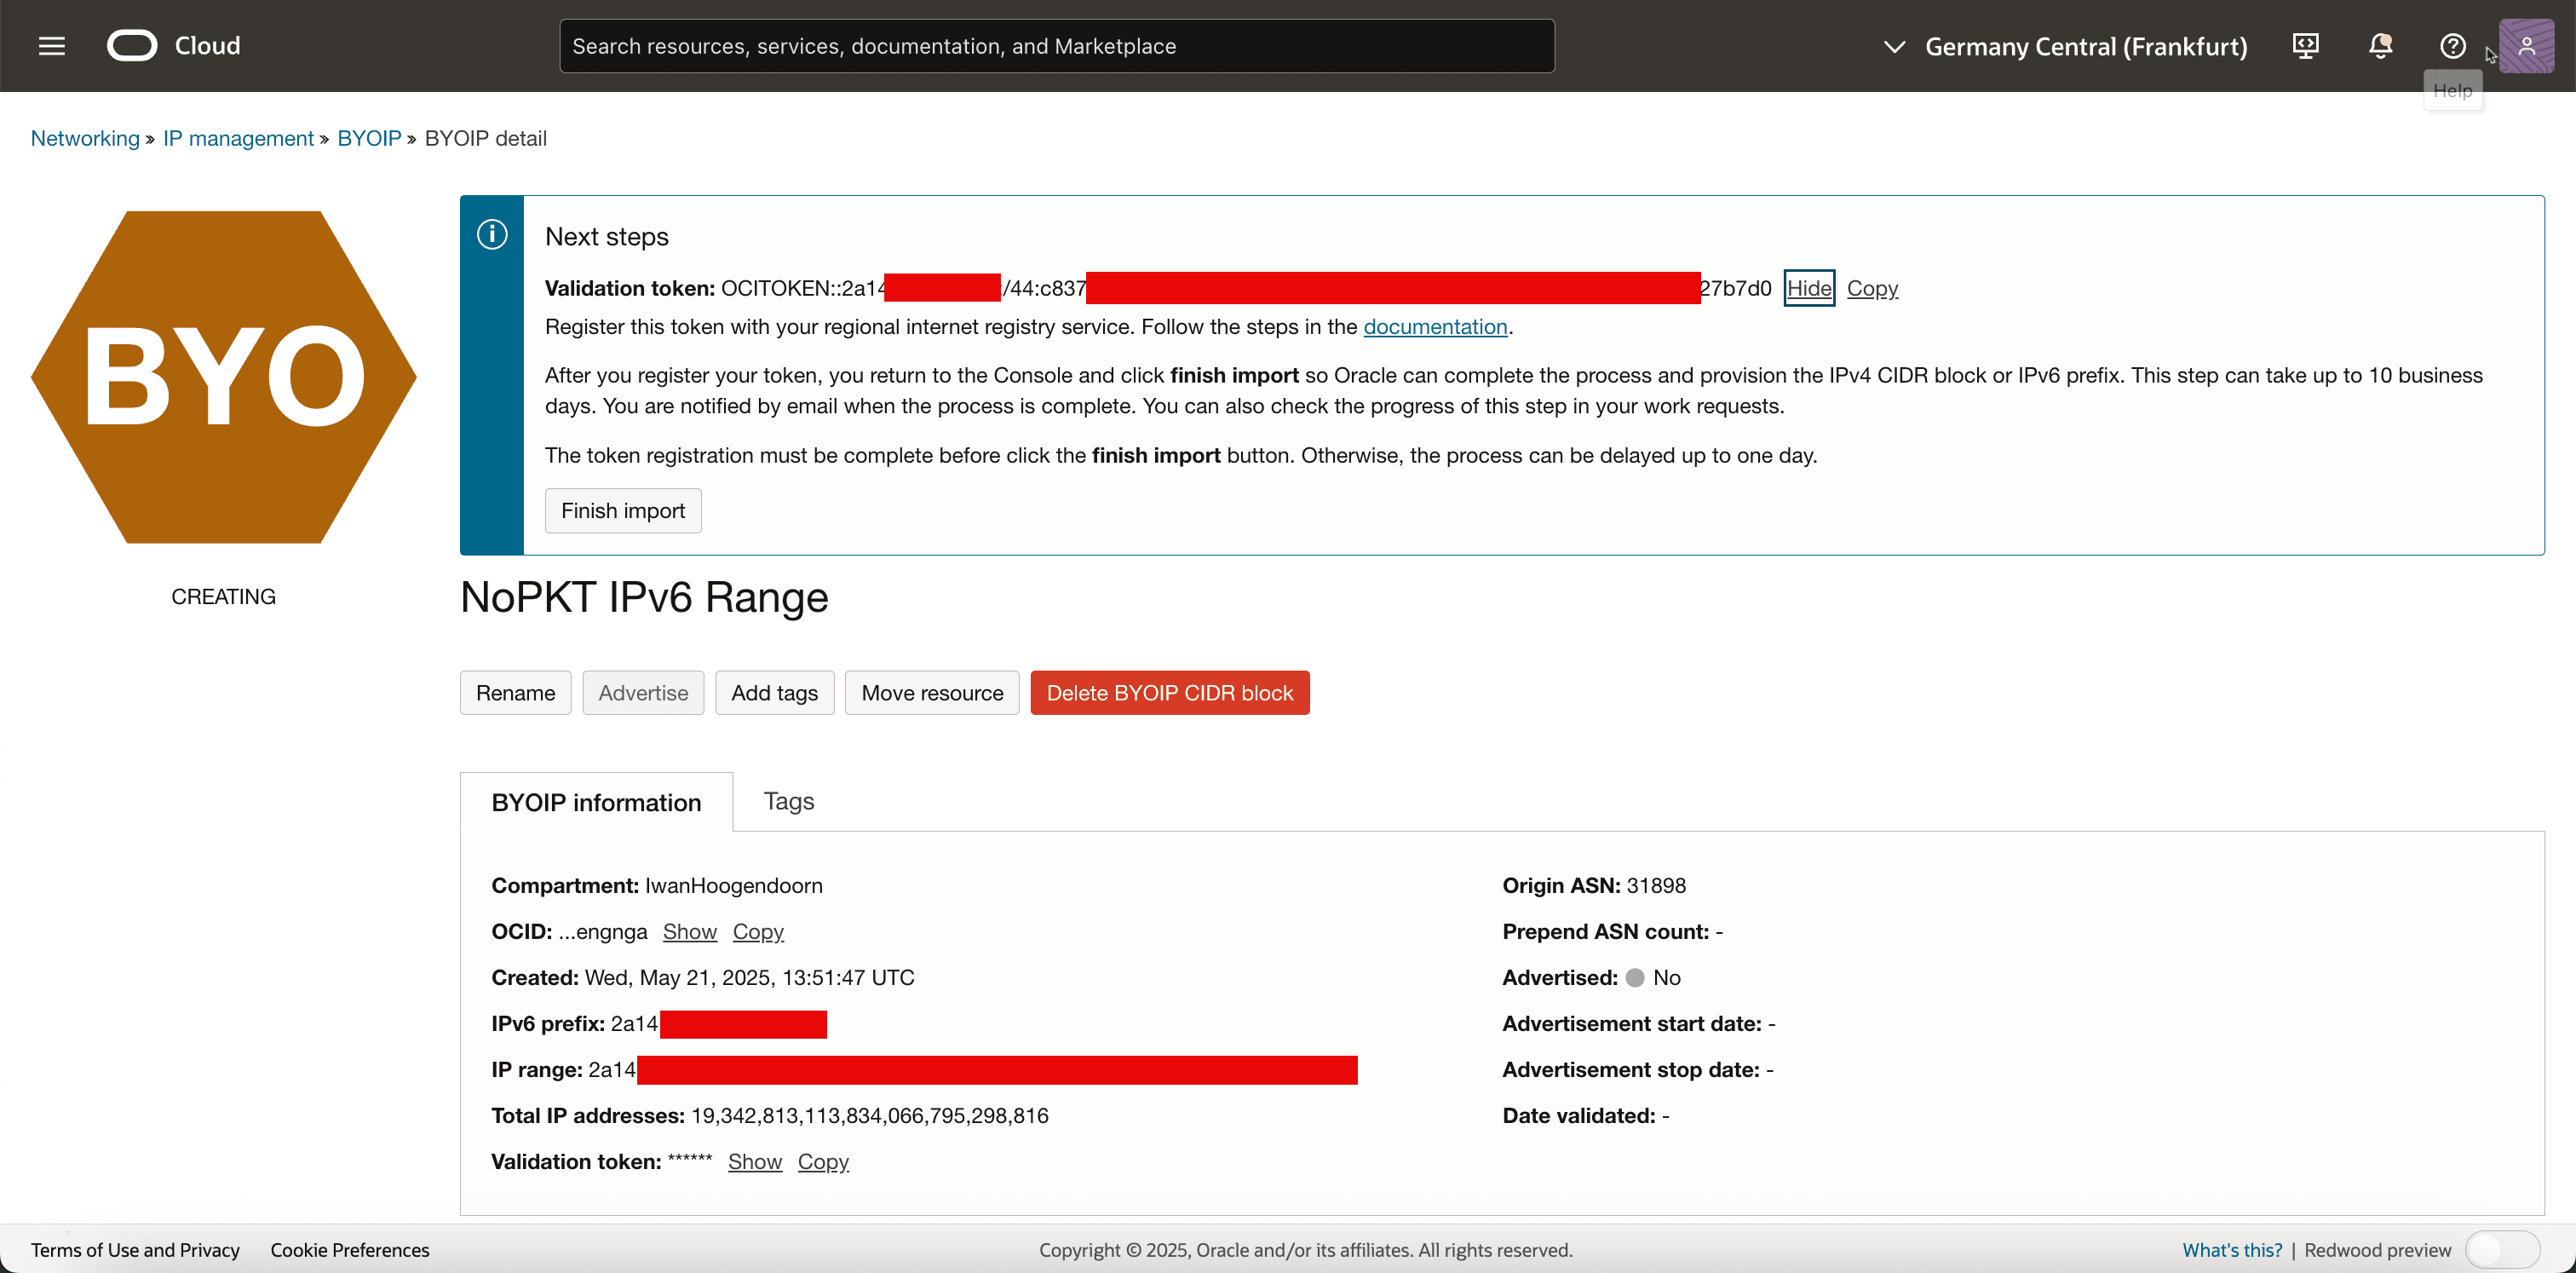
When you have added the verification token as a descr in the RIPE inet6num object and created a valid ROA object authorizing Oracle’s ASN AS31898, OCI will automatically begin the verification process once you click Finish import.
-
Click Finish import to confirm.

-
Note that the status went from CREATING to VALIDATING and there will be a message that the import process can take up to 10 business days.

-
Review the BYOIP status screen.

Oracle will take the required internal validations and do the required internal configurations to complete the import.
Task 6: Verify the Import of the IPv6 CIDR in OCI
After completing the import process in the OCI Console, it is essential to verify that your IPv6 CIDR has been successfully validated and provisioned and is ready for use.
-
In the BYOIP management screen, you will see that the state of the imported BYOIP range is now set to Provisioned.
-
Note that the Advertised column is set to No.

-
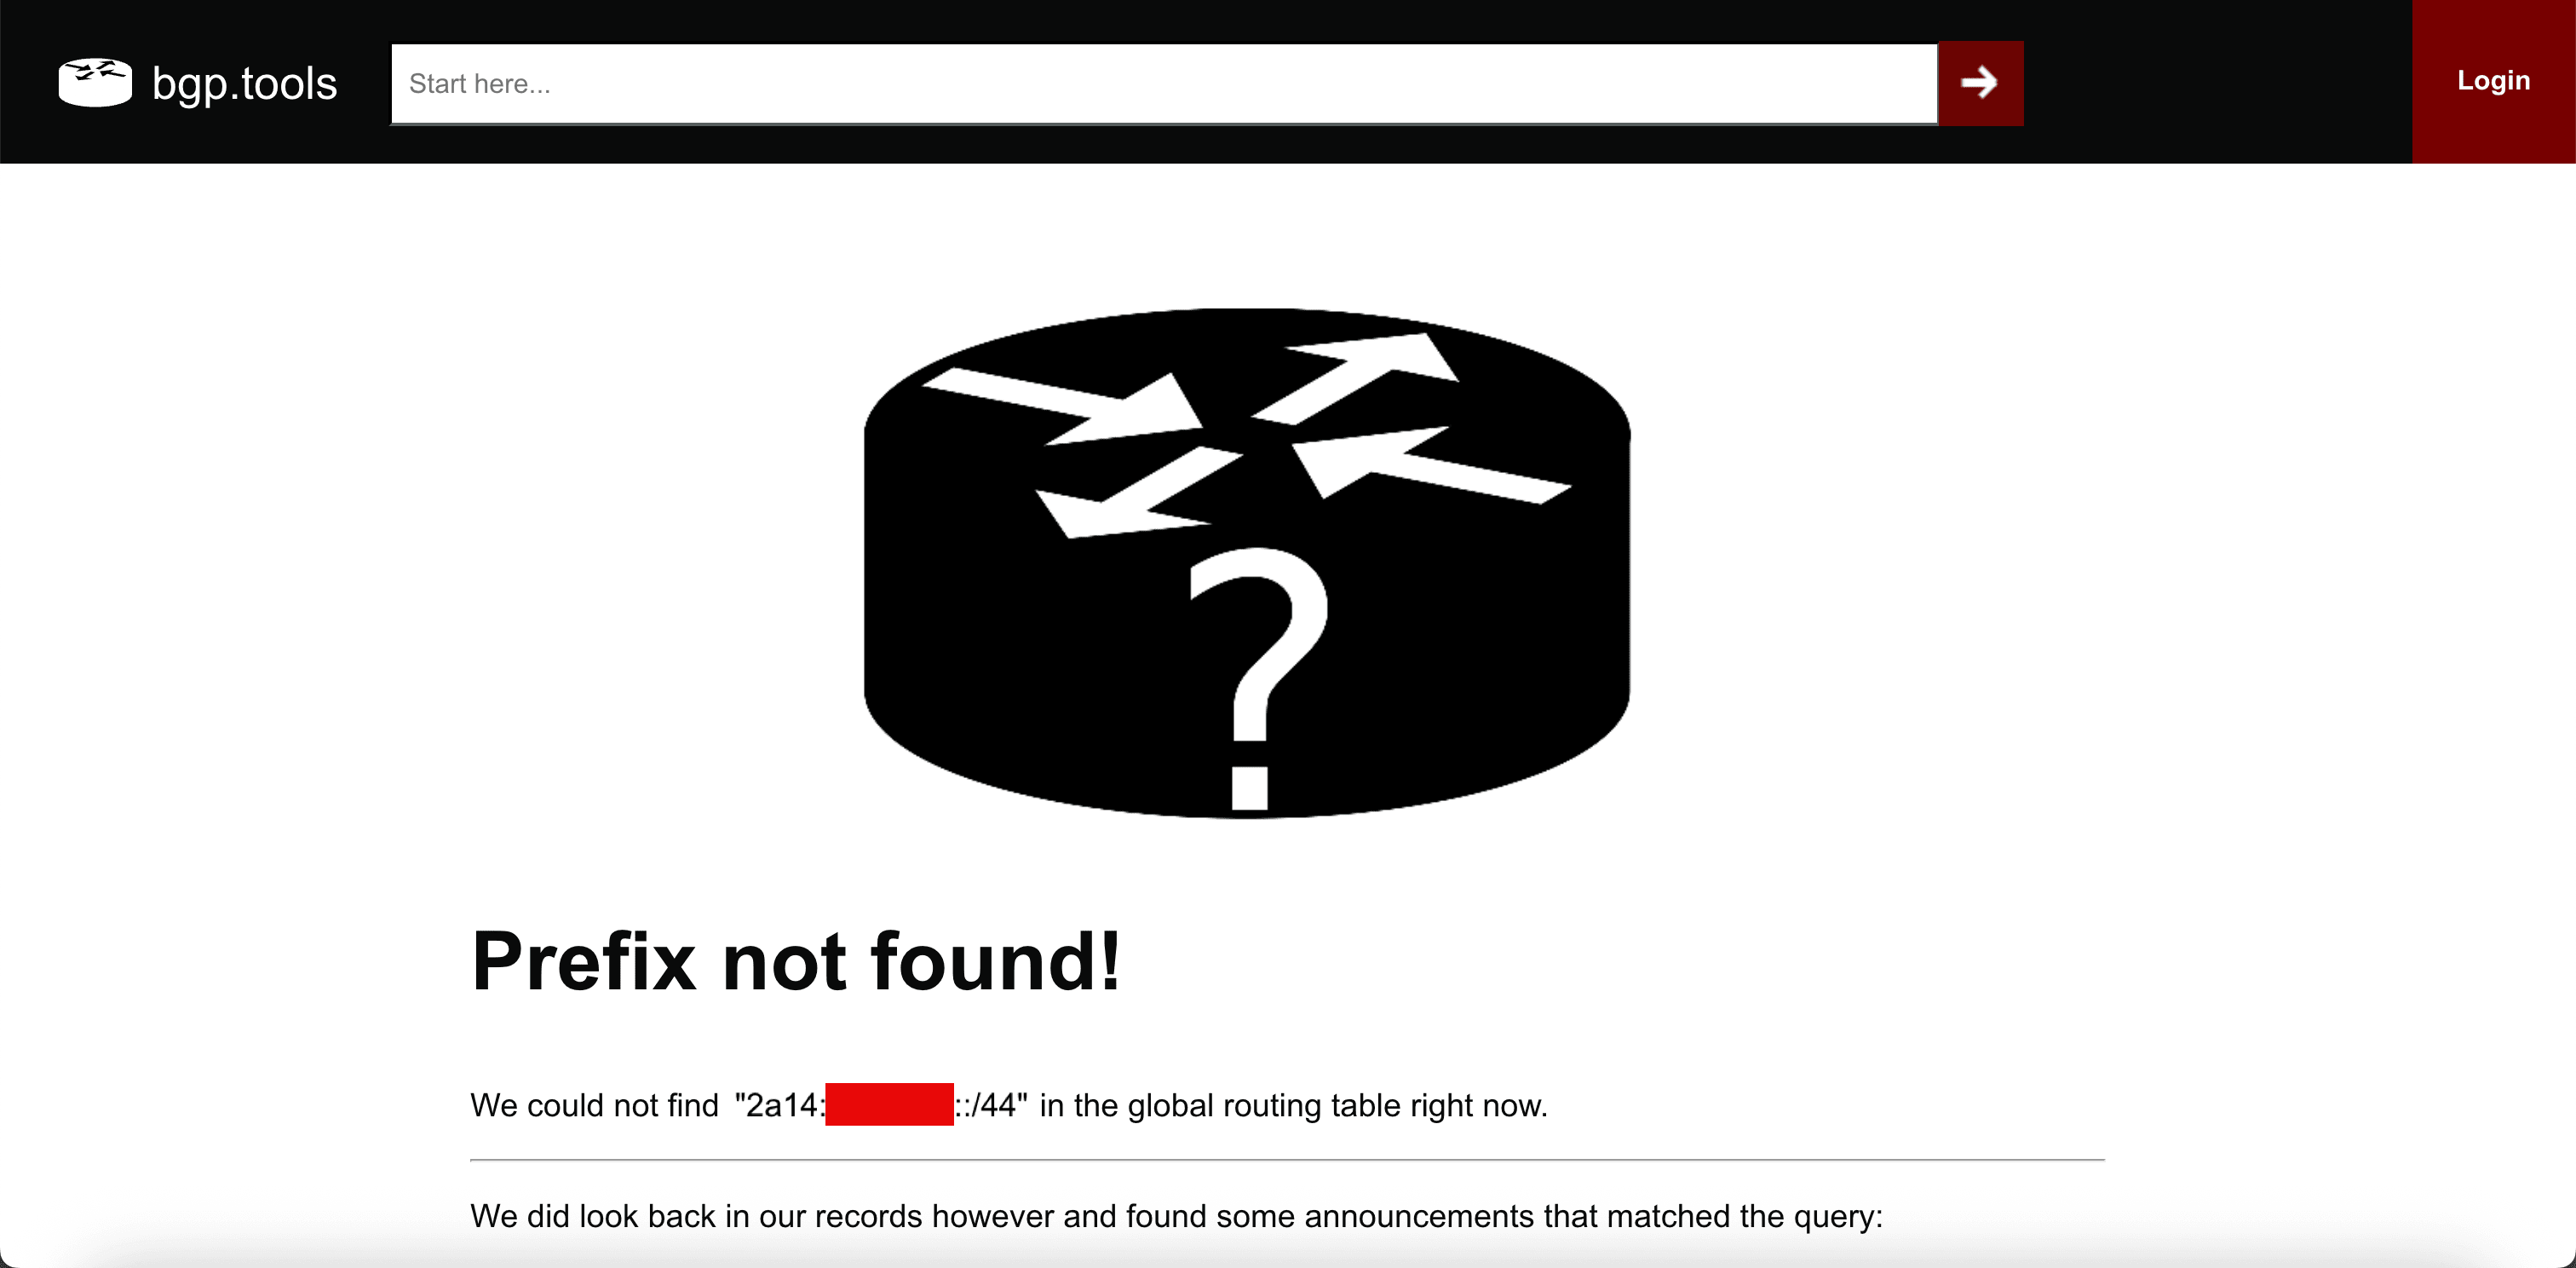
We can verify if the subnet is available online from here: bgp.tools website.
-
When we enter the prefix and search for it, we can see that it is not found on the Internet.
Once verified, your IPv6 CIDR is fully onboarded and ready to be advertised and assigned within OCI. In the next task, make it available on the Internet.
Task 7: Advertise the IPv6 CIDR to the Internet
Once your IPv6 CIDR has been successfully imported and verified in OCI, the final task in making it globally reachable is to advertise it to the Internet.
This task tells OCI to start announcing your IPv6 CIDR through BGP from Oracle’s network (ASN 31898), allowing traffic from the public Internet to reach your IPv6 space in the cloud.
Note: Advertising the CIDR is required before using the IPv6 range with internet-facing OCI resources such as OCI Load Balancer, OCI Compute instances, and so on.
-
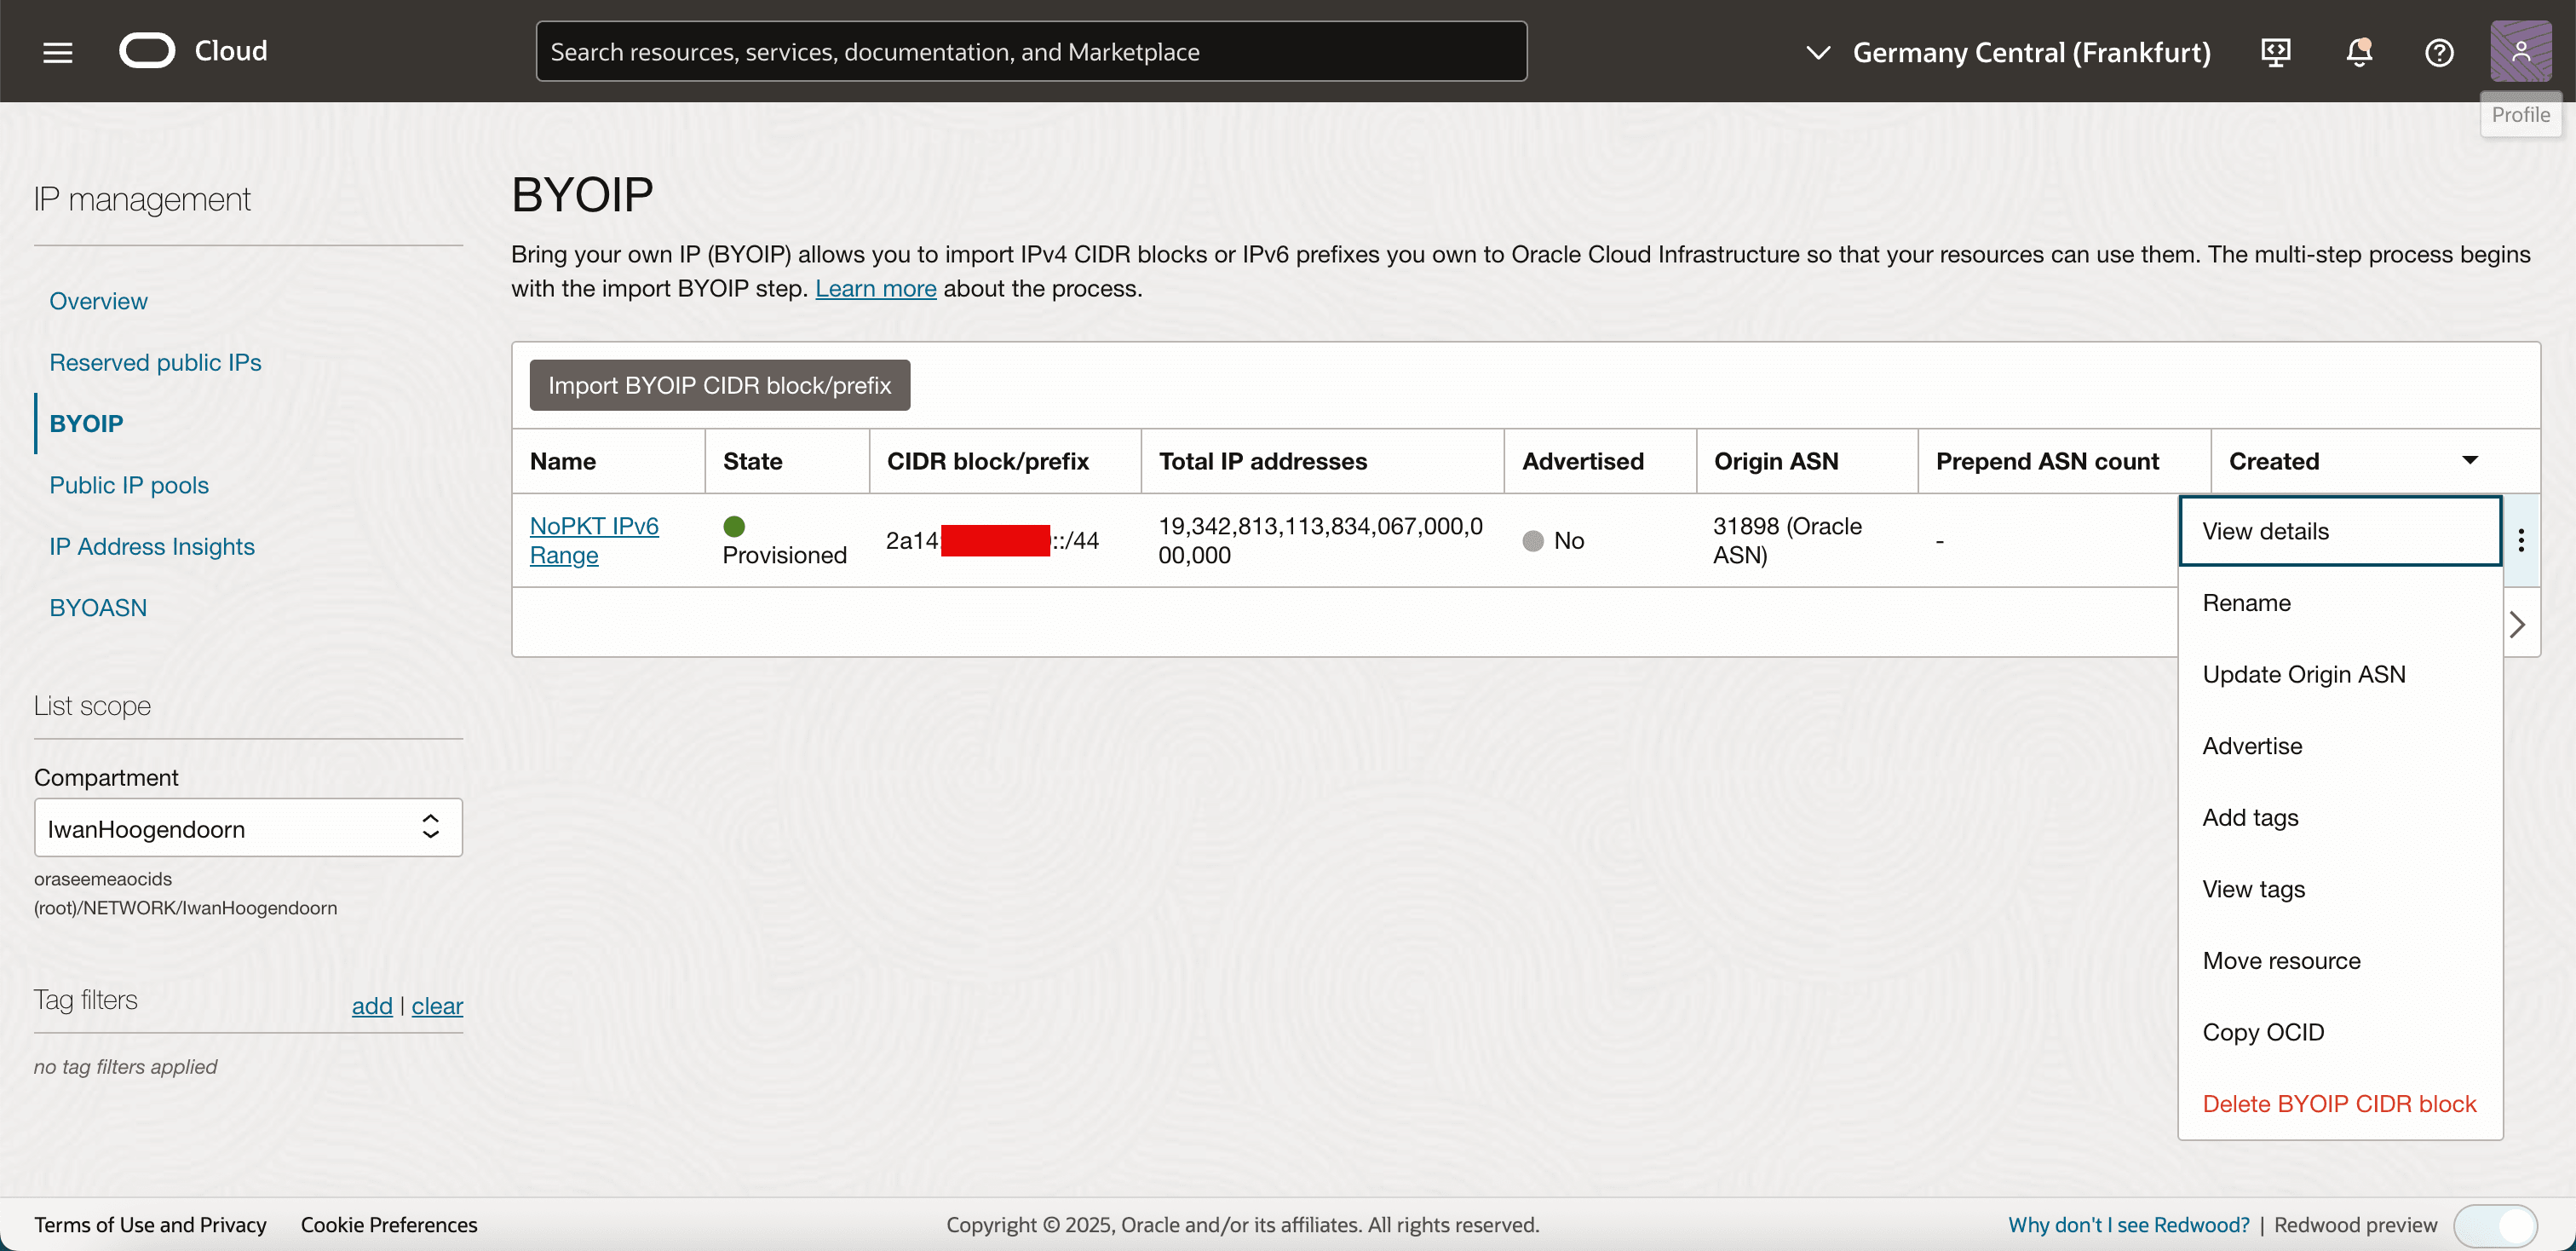
Click the three dots at the end of the subnet and select Advertise.
-
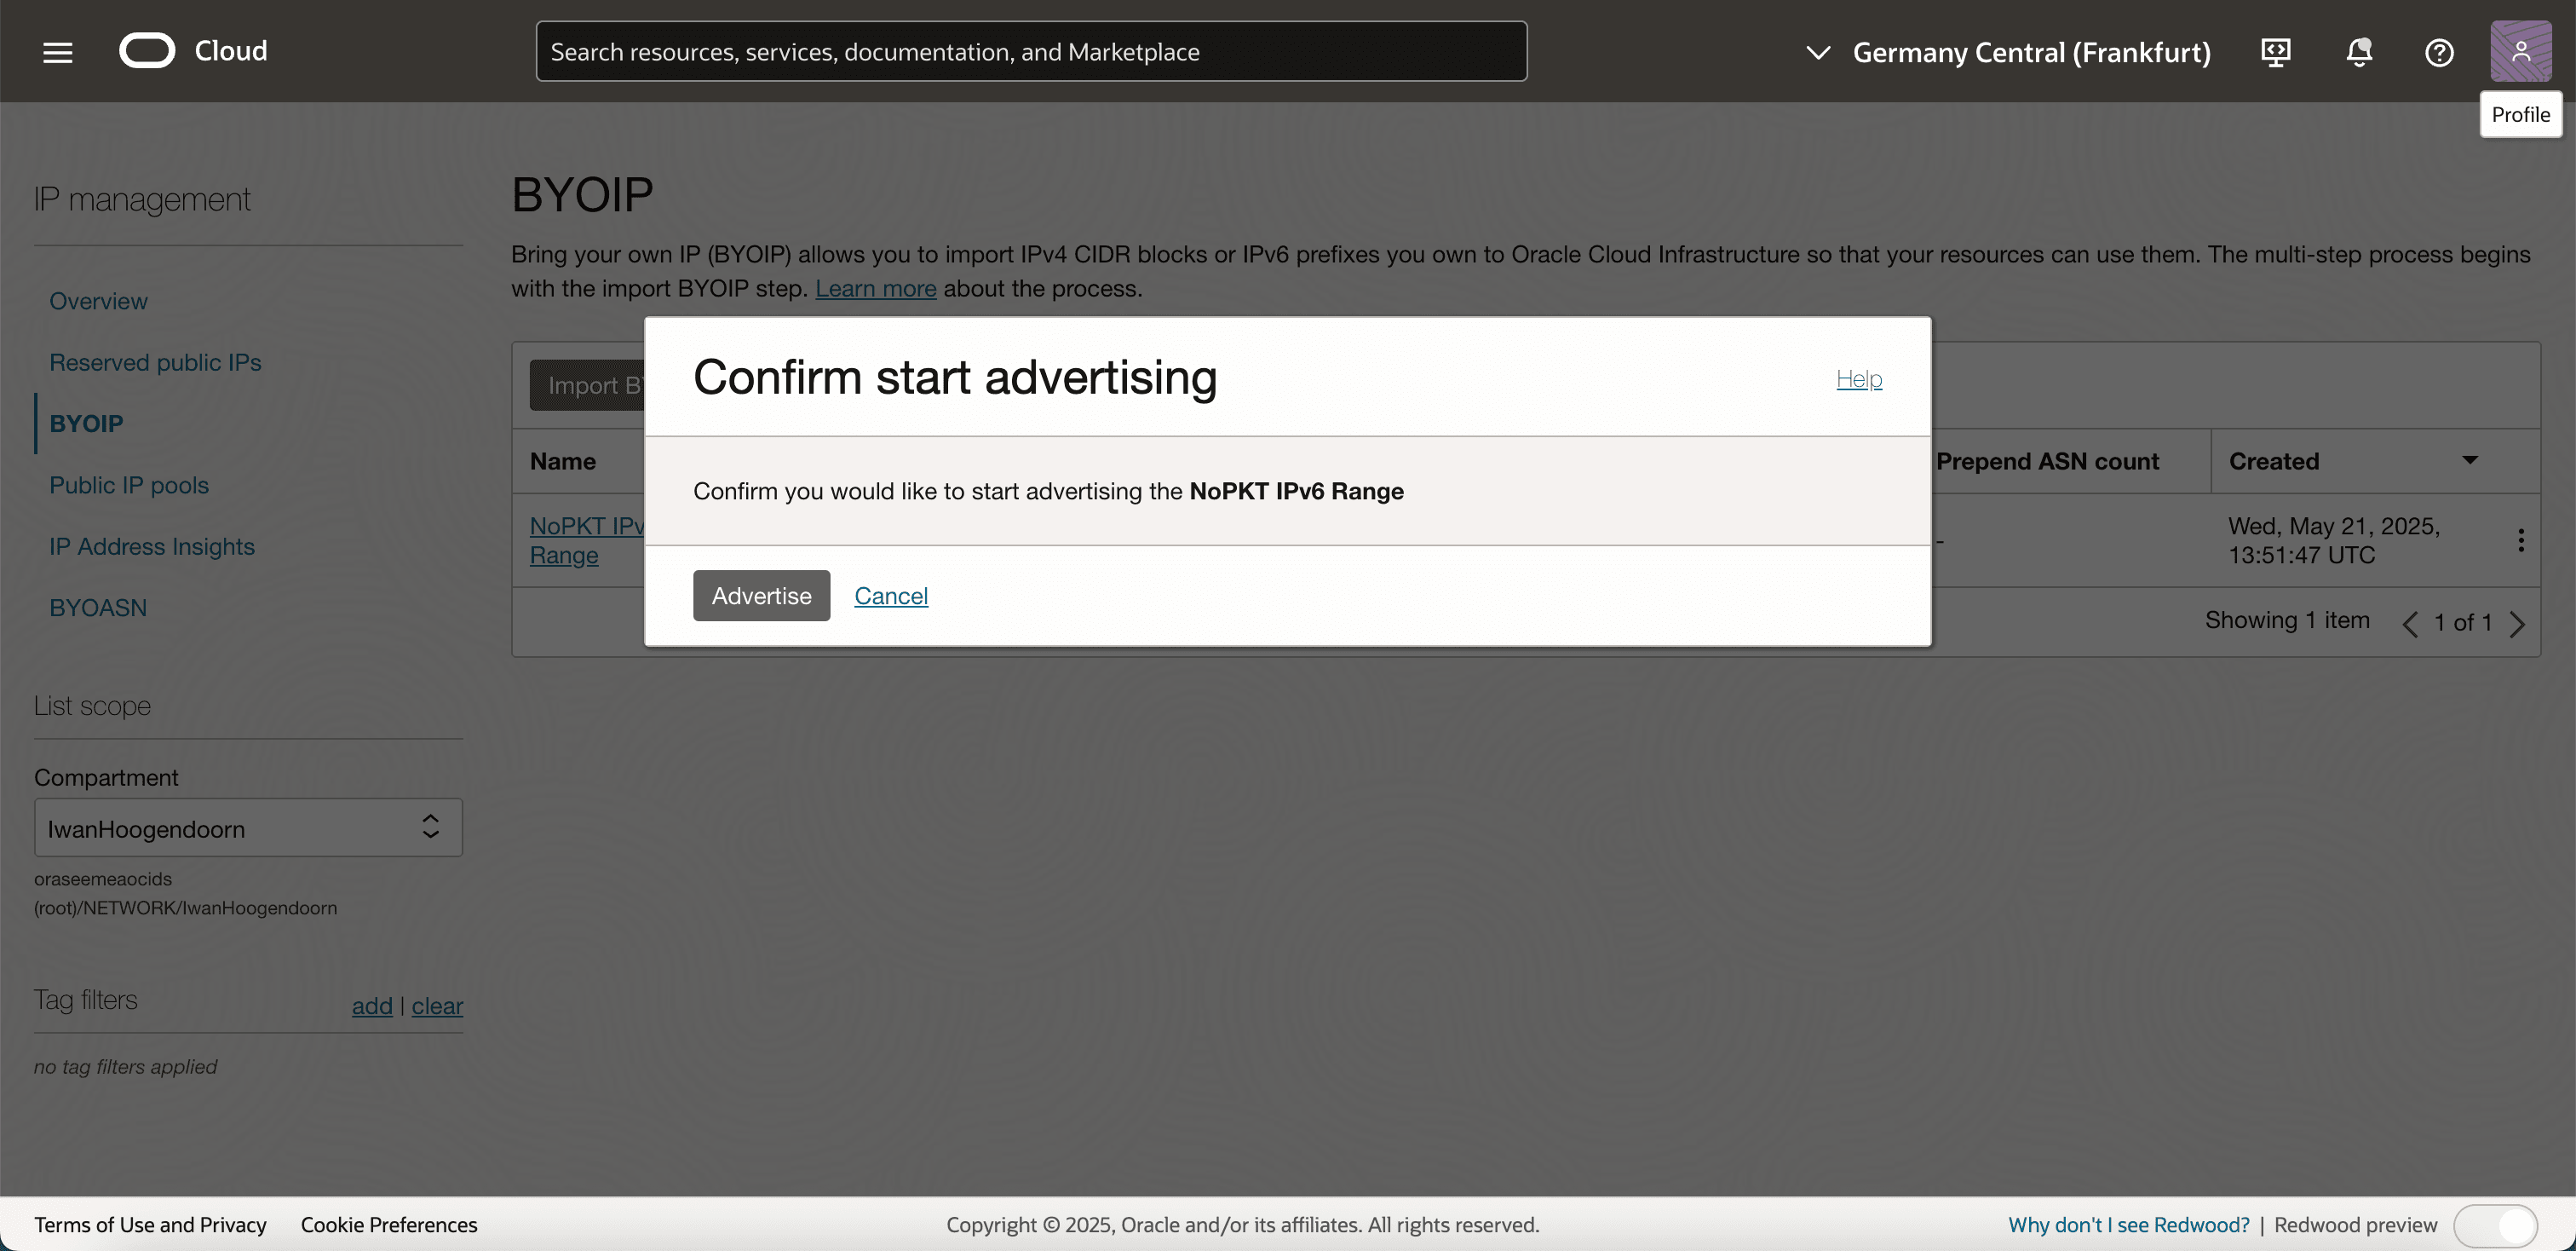
Click Advertise to confirm.
-
Note that the the Advertised column is set to Yes.

-
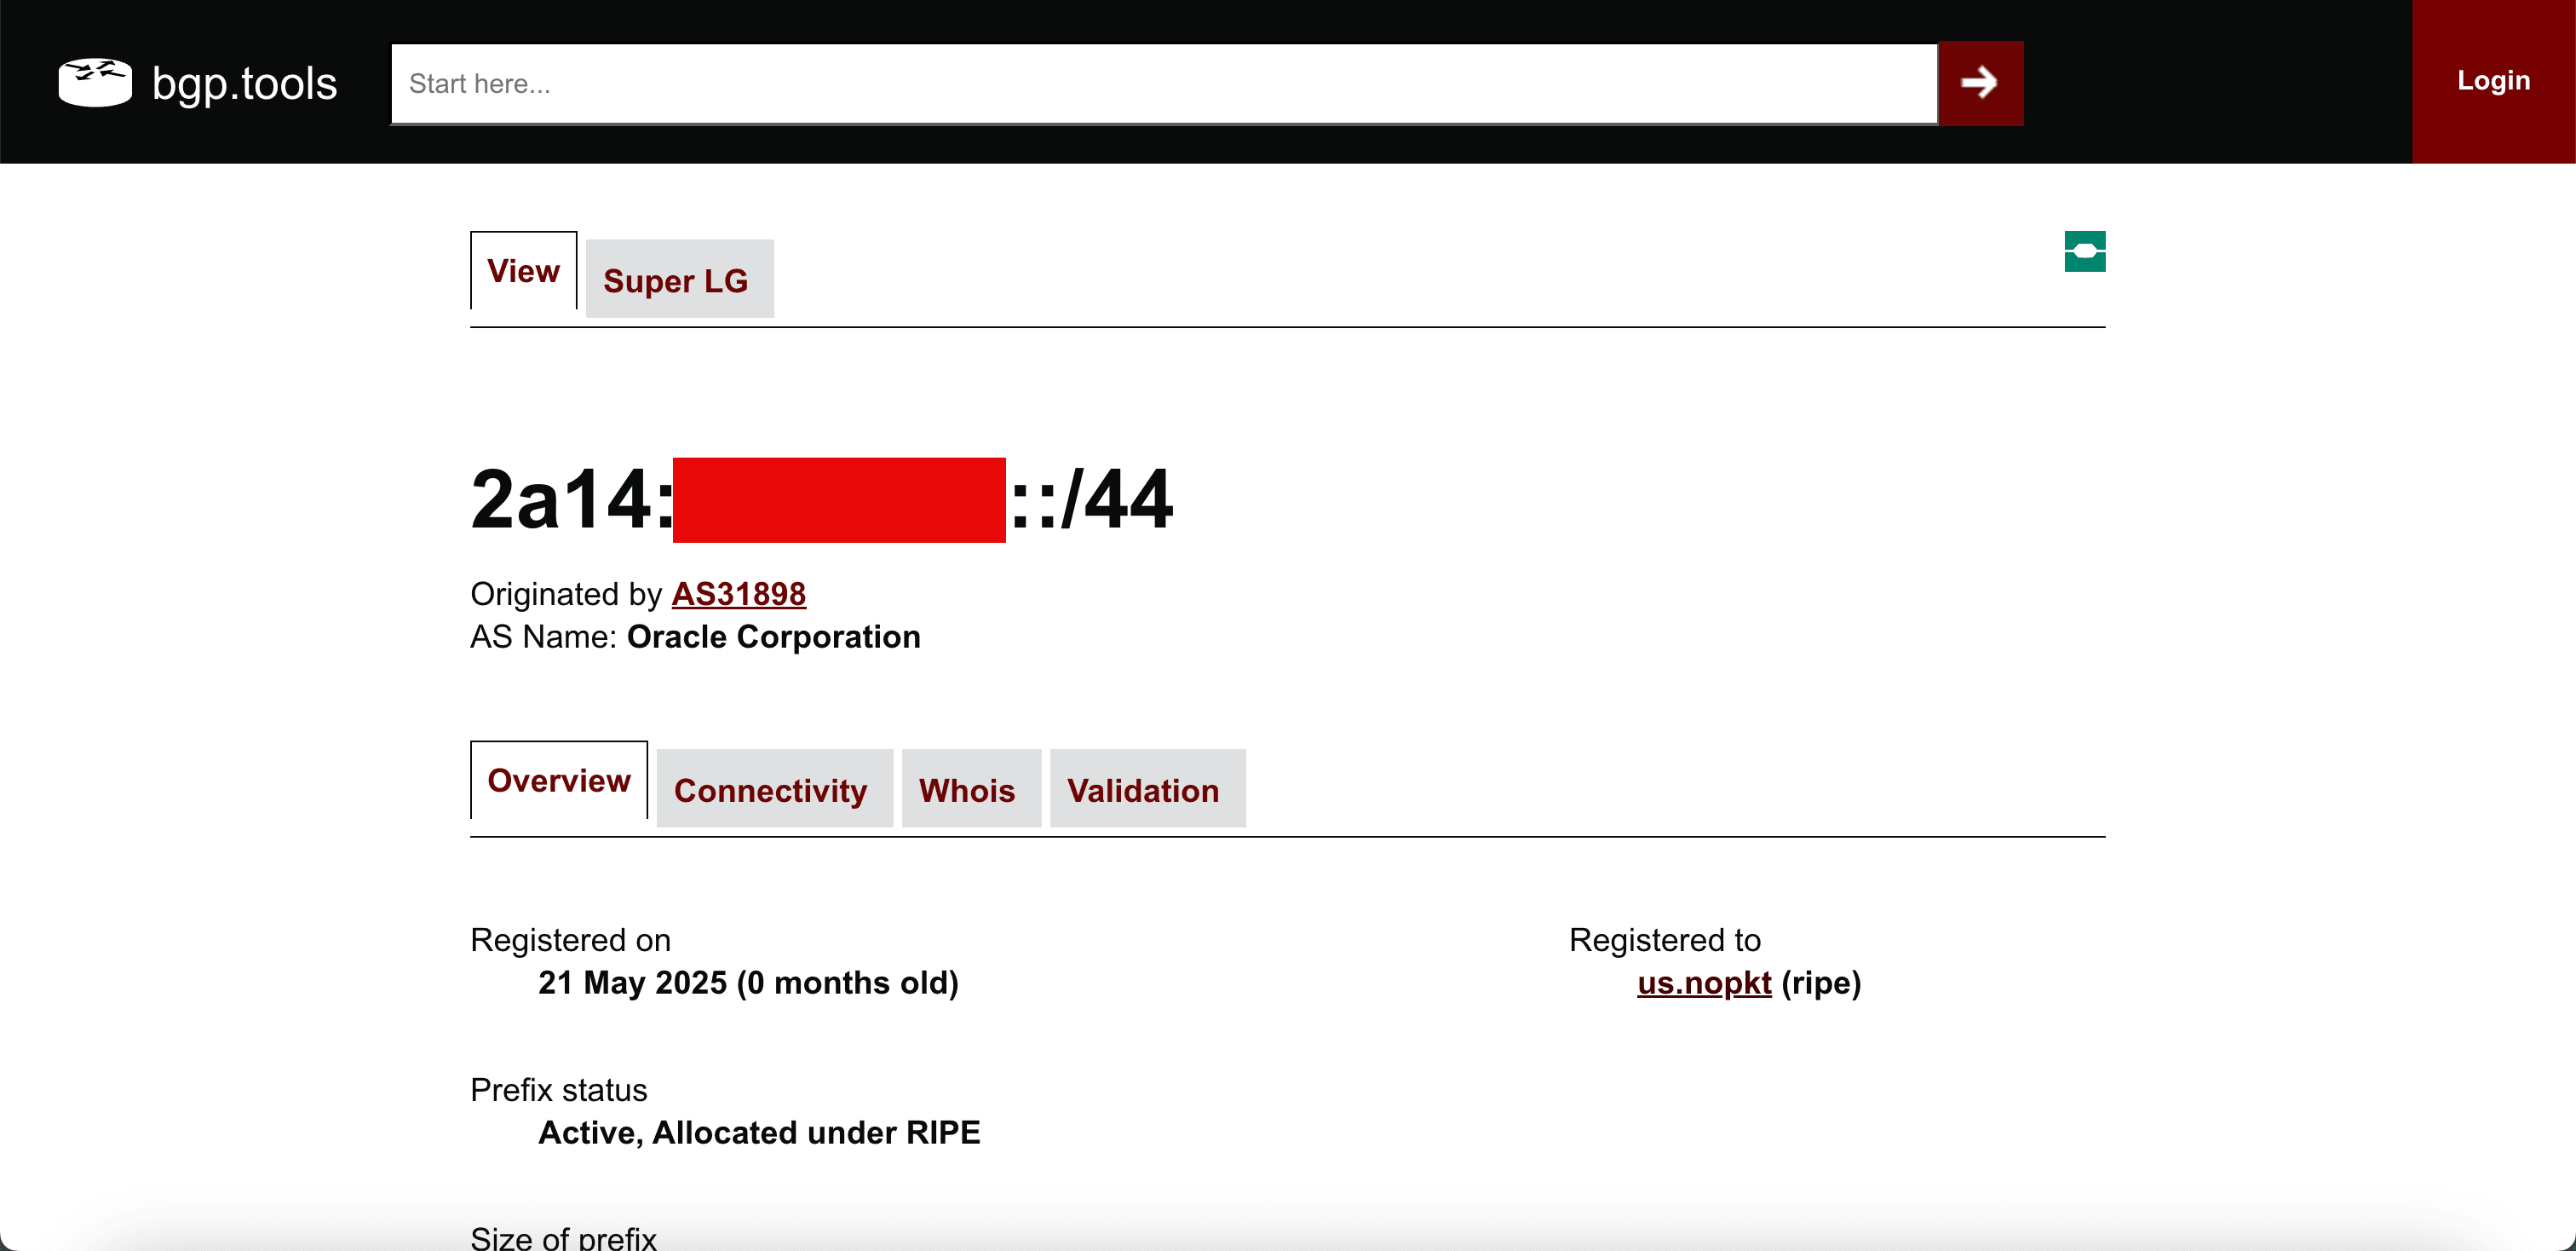
To verify if the subnet is available online,go to bgp.tools website.
-
Enter the prefix and search for it, we can see that it is found on the Internet.
Once advertising is active, you can assign your IPv6 range to a VCN and use it inside OCI.
Task 8: Assign BYOIP IPv6 CIDR to a VCN
In this task, assign IPv6 CIDR to a VCN. This makes the CIDR usable for creating subnets and attaching IPv6 addresses to resources like OCI Compute instances and OCI Load Balancer.
-
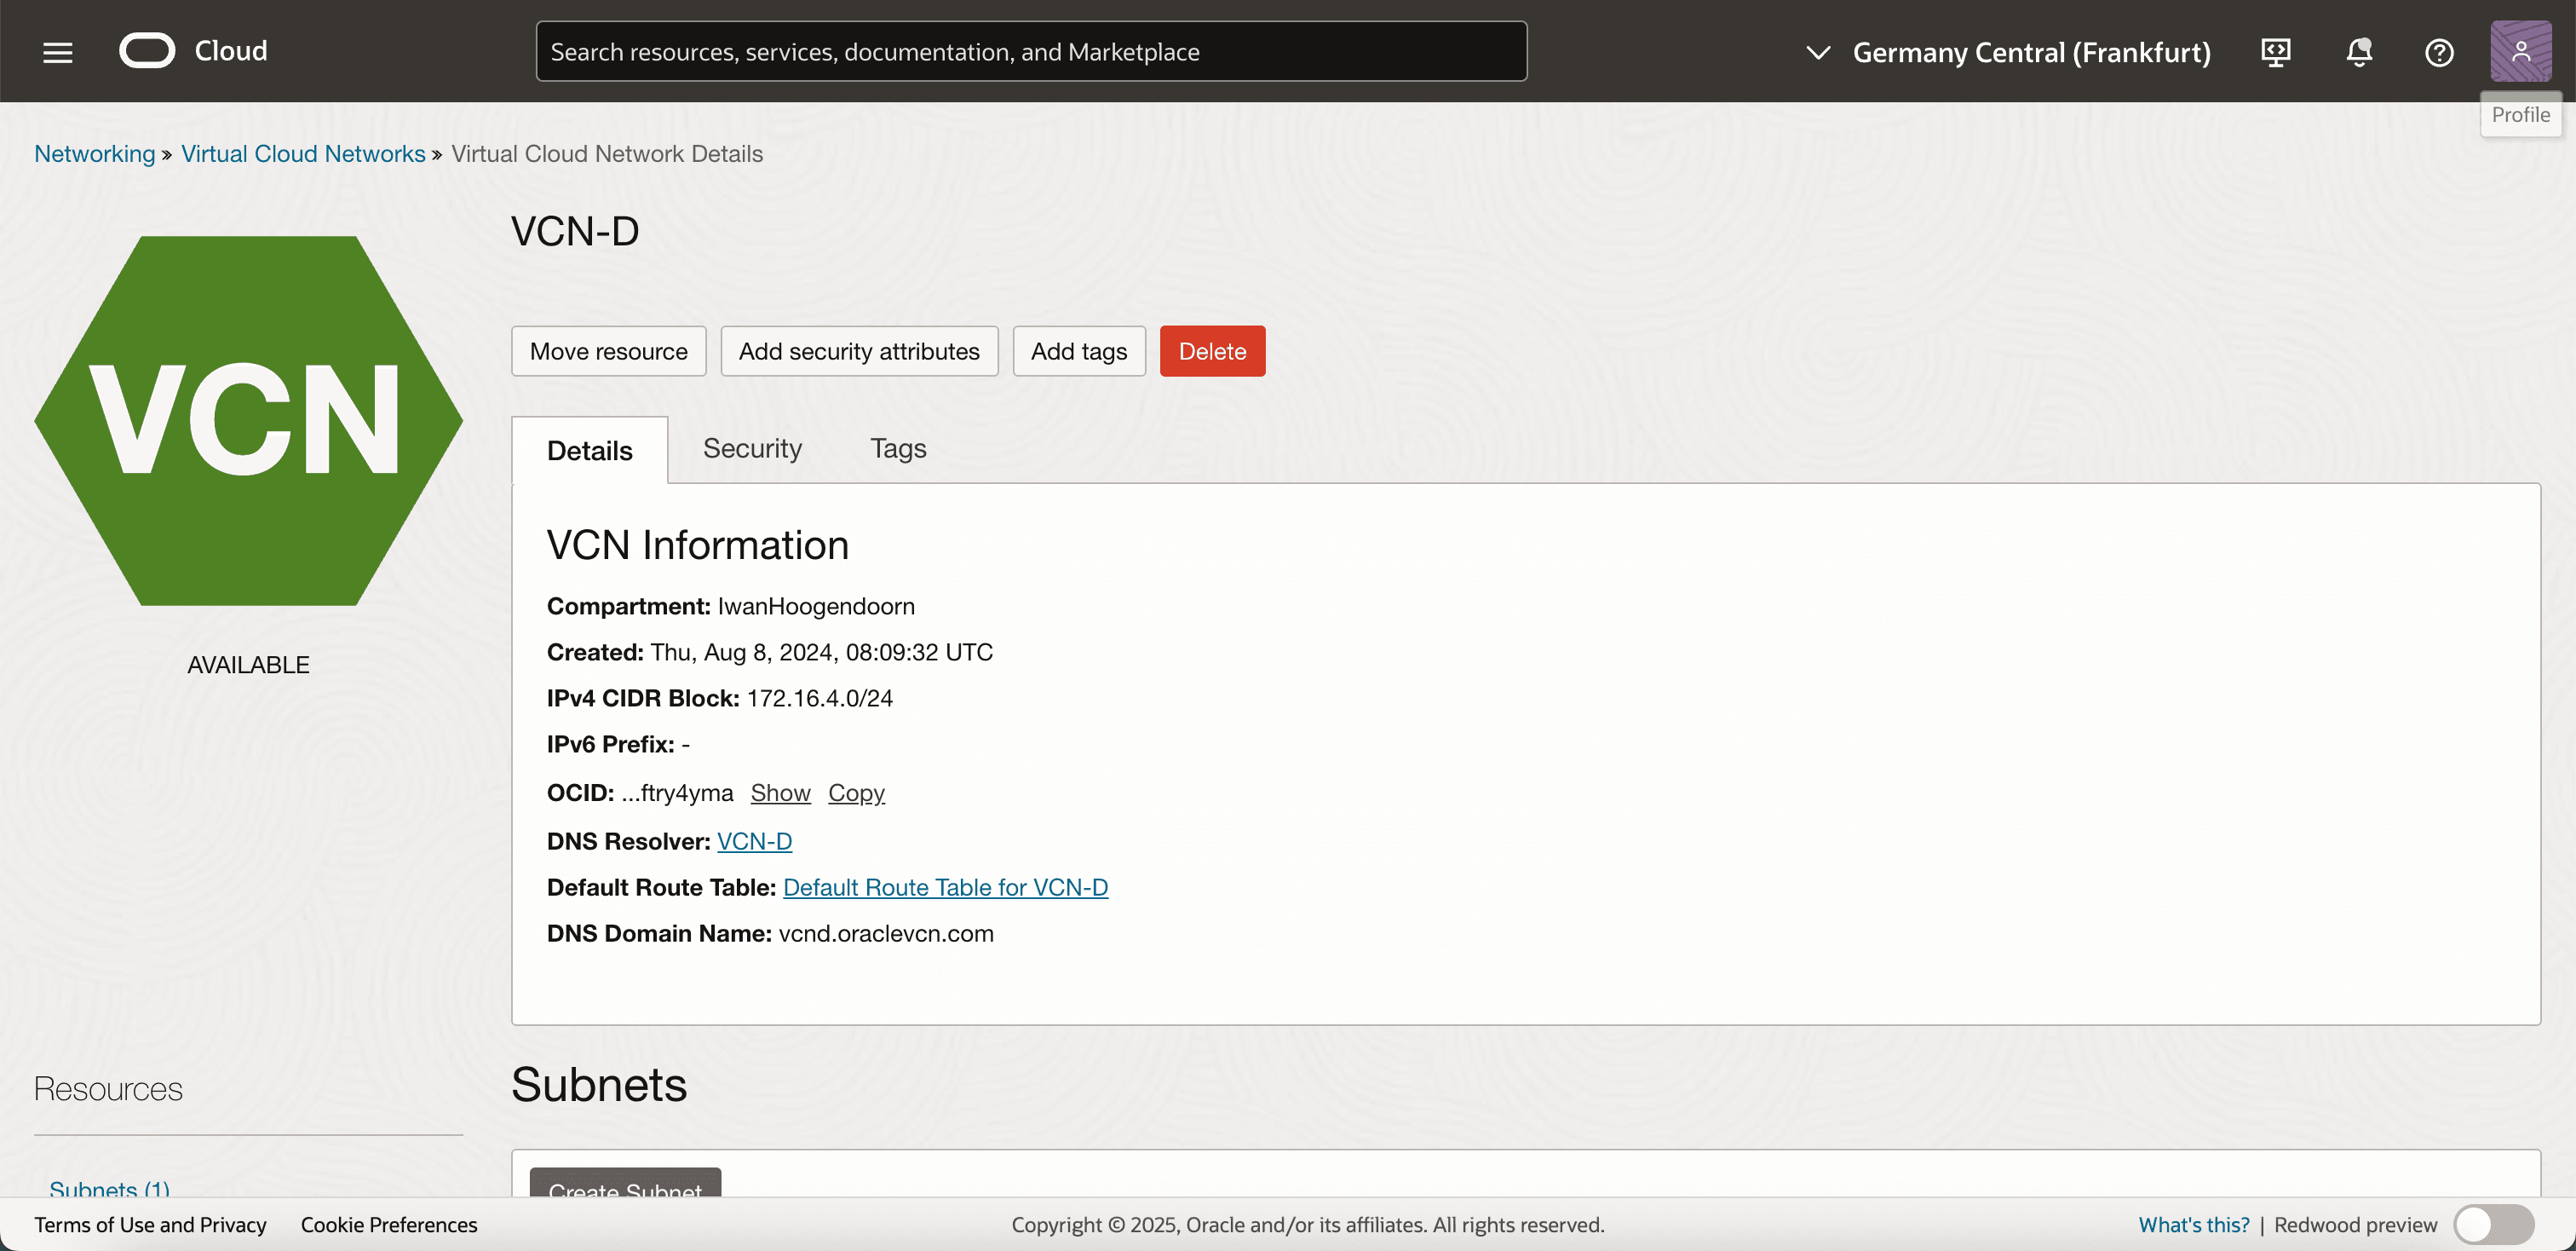
Go to the OCI Console, navigate to Networking, Virtual Cloud Networks and click the VCN to which you want to assign this IPv6 BYOIP.

-
Scroll down.
-
Note that only one subnet is available, and this is a private subnet.

-
Click CIDR Blocks/Prefixes. Note that only one CIDR Blocks/Prefix is available.
-
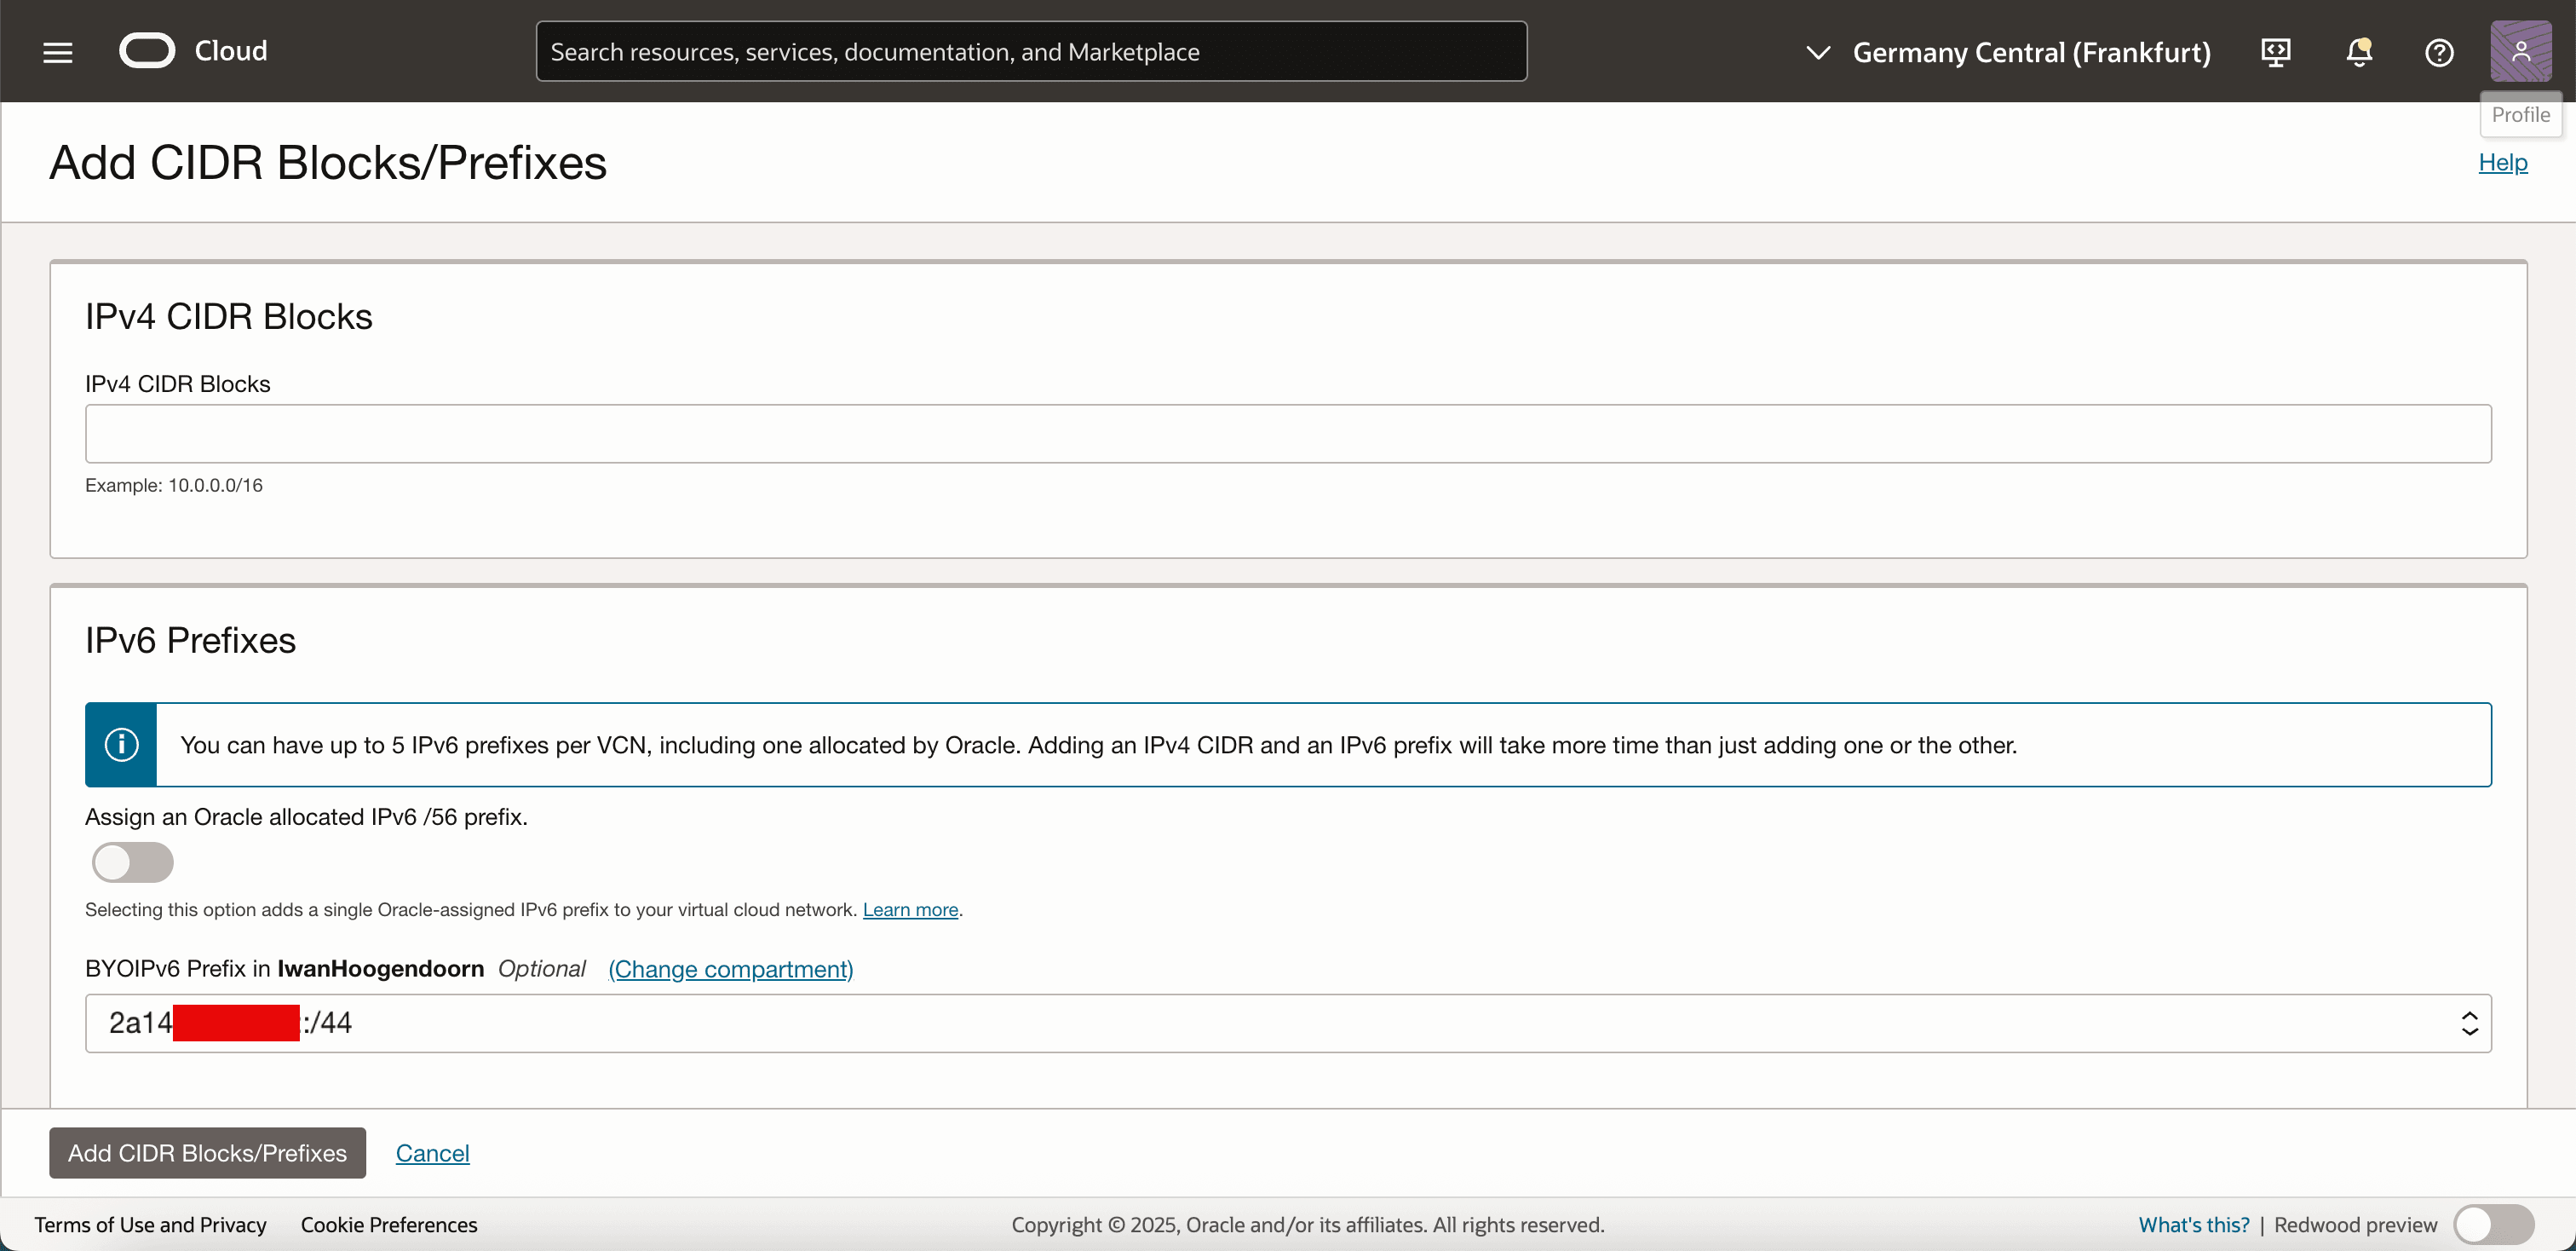
Click Add CIDR Block/IPv6 Prefix.

-
Select the BYOIP prefix from the drop-down menu and click Add CIDR Blocks/IPv6 Prefixes.
-
Note that the BYOIP IPv6 CIDR is now added to the VCN.

-
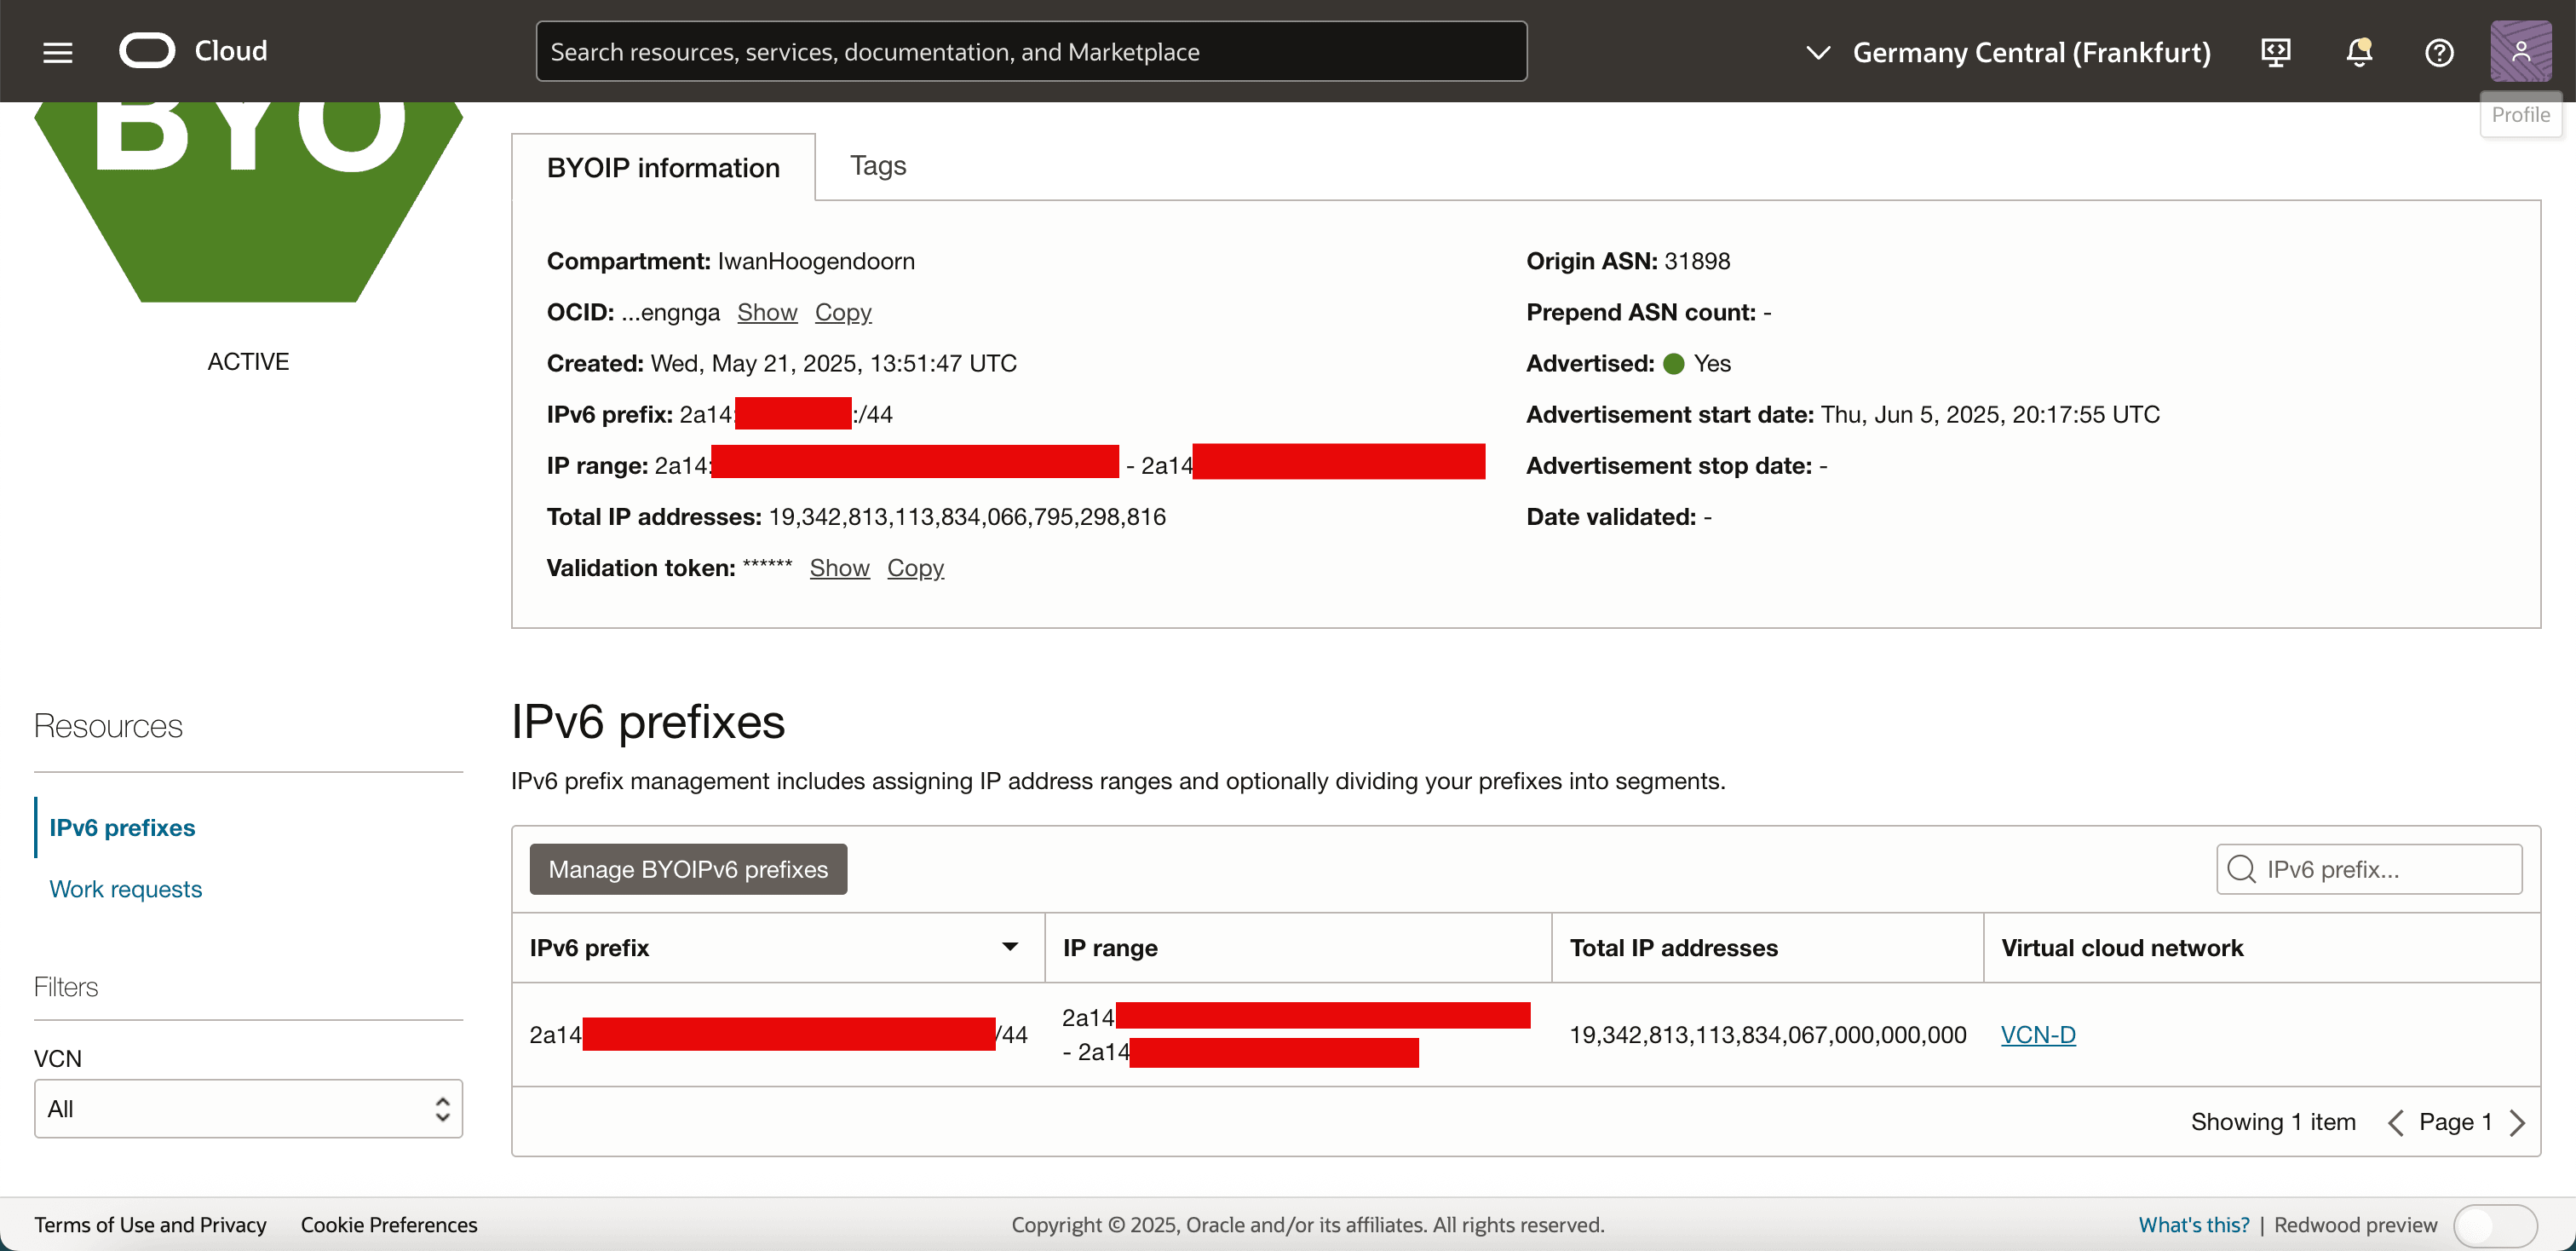
Go to the OCI Console, navigate to Networking, BYOIP and click the imported BYOIP range. Note that the range is now assigned to the VCN.
-
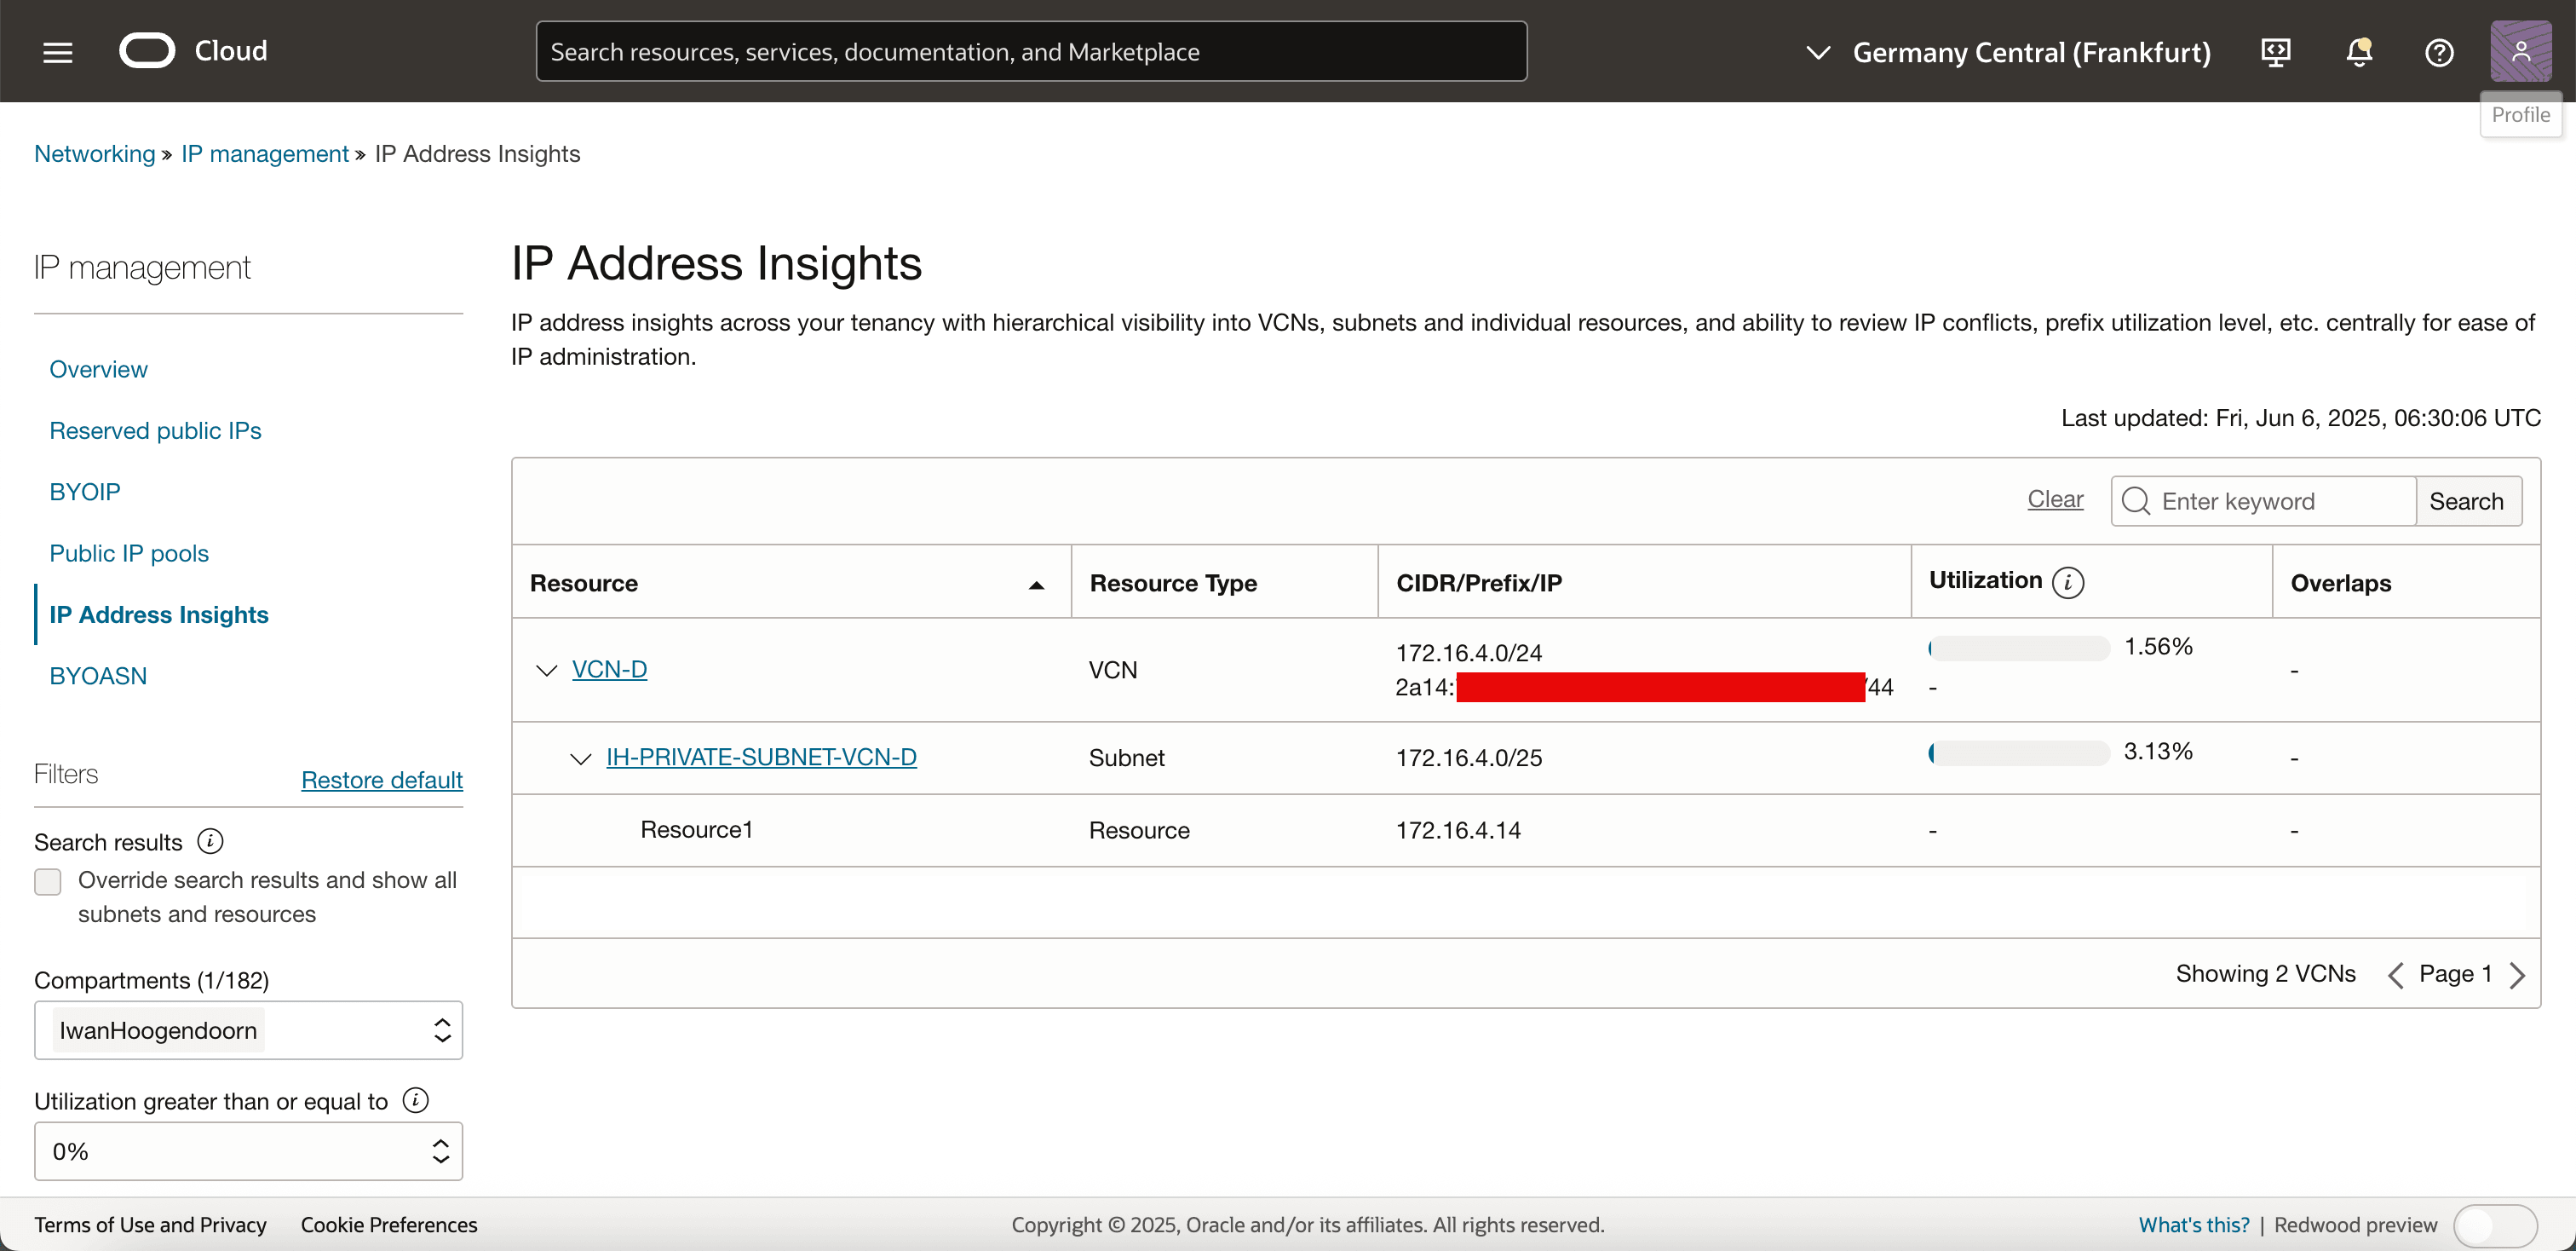
Navigate to Networking, IP management and click IP Address Insights. Note that VCN has the IPv6 range assigned.
-
Navigate to Networking and click VCN. Note that the BYOIP IPv6 range has also been added to the VCN.
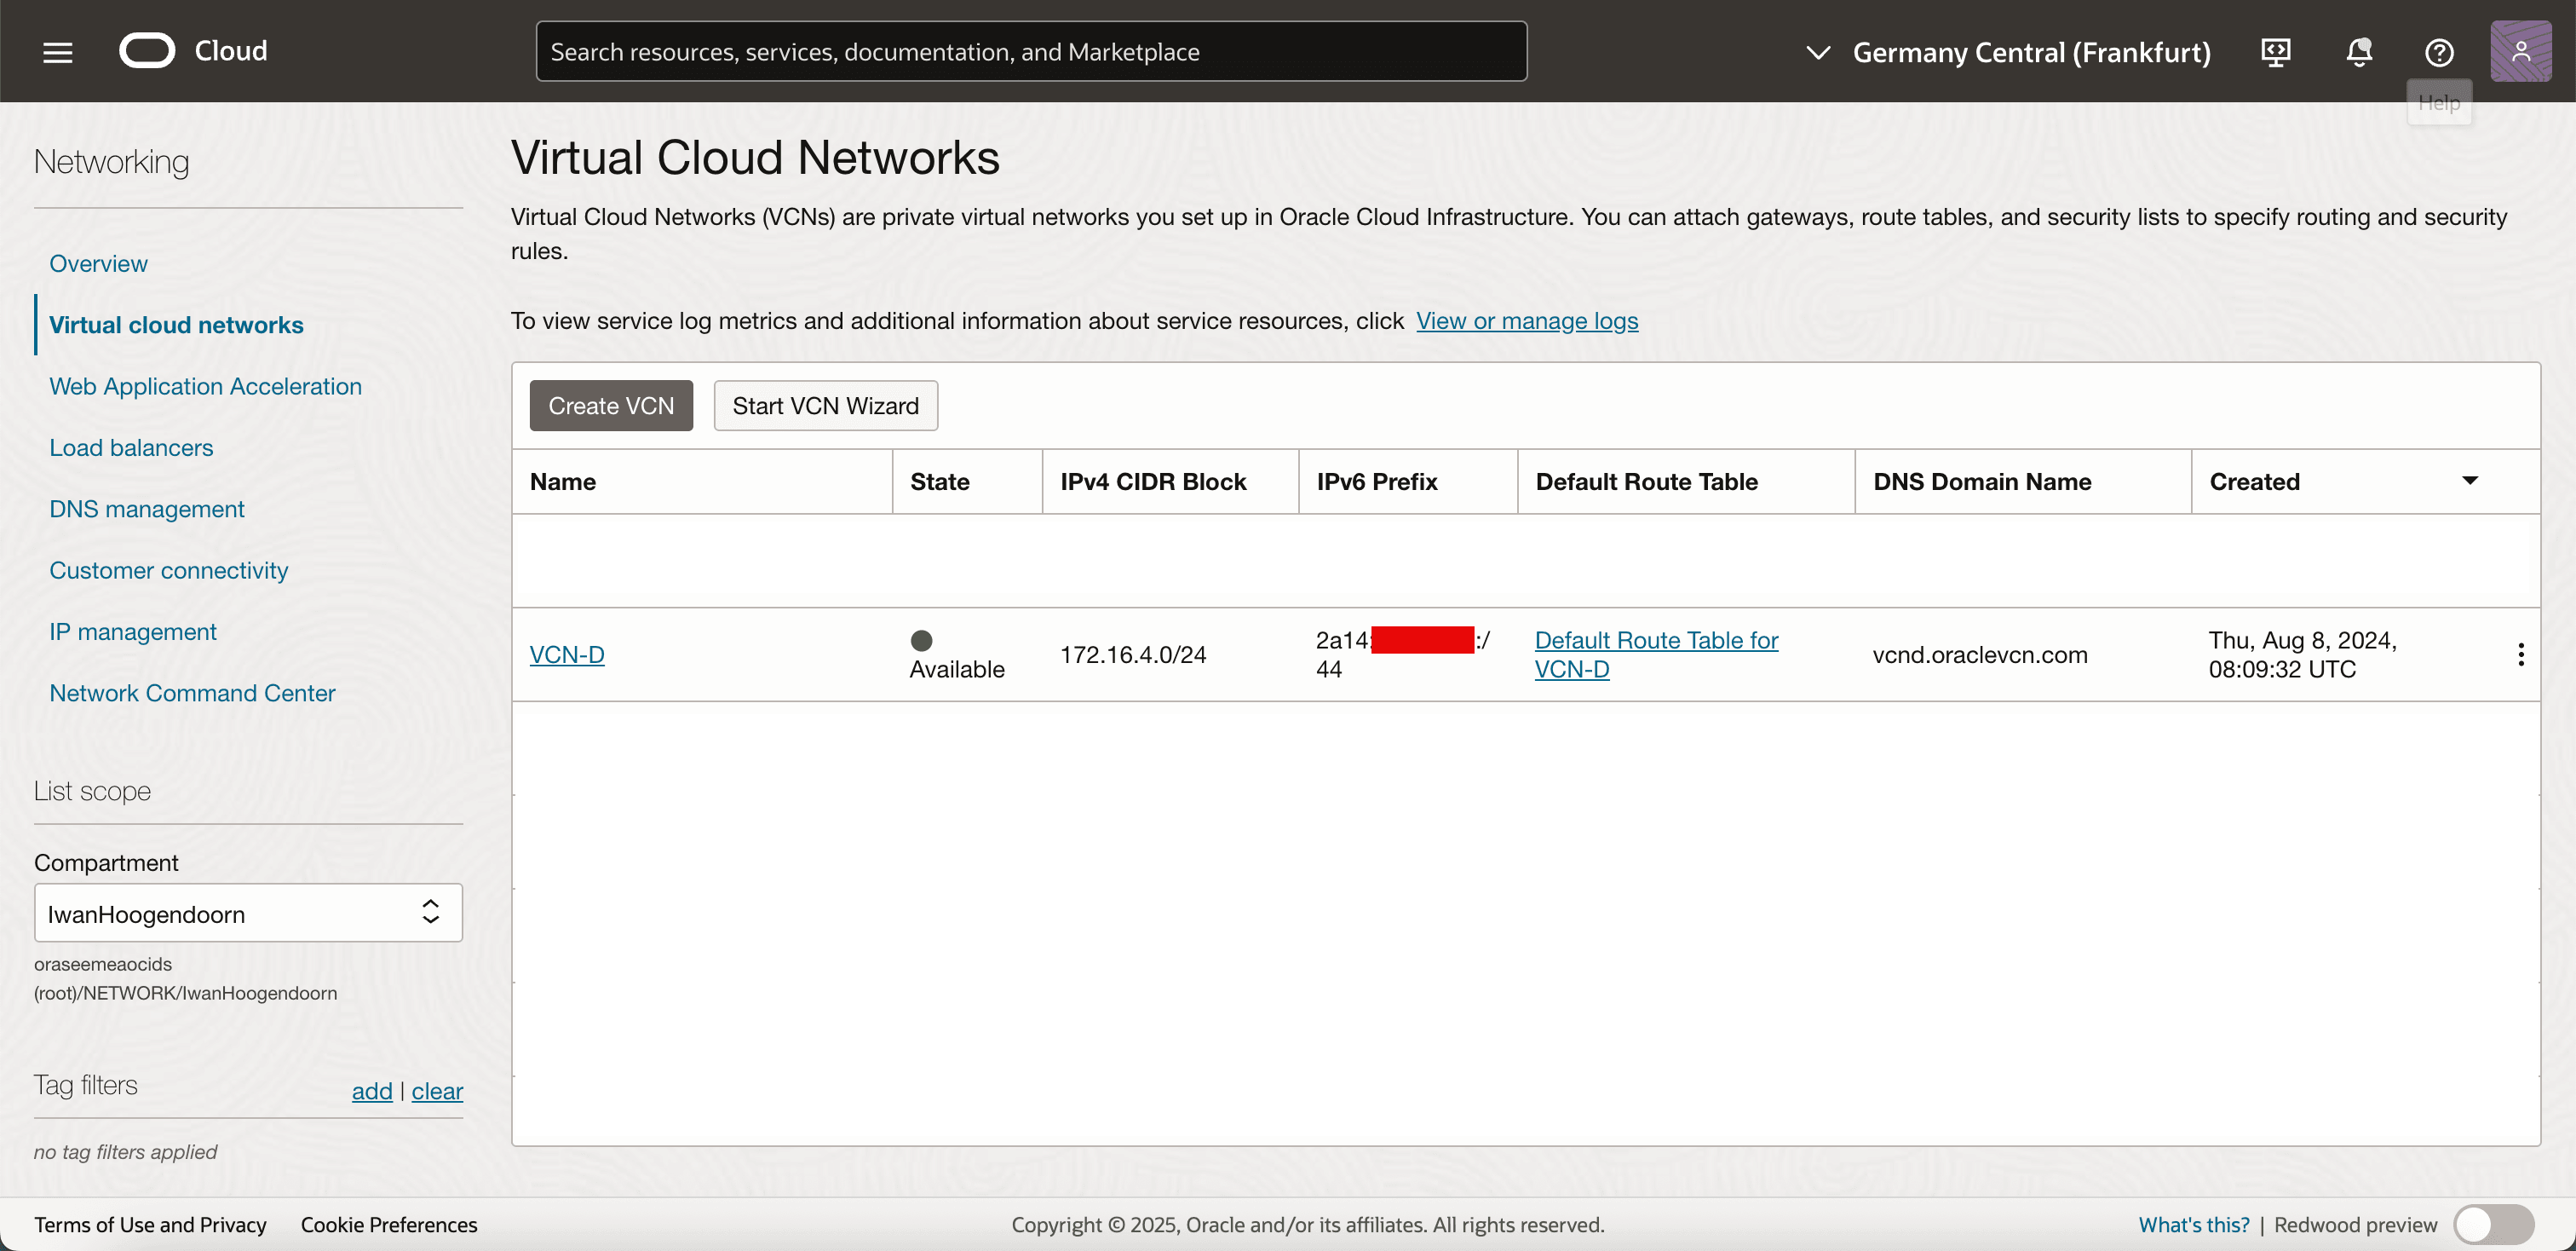
We are ready to carve out subnets within your BYOIP IPv6 CIDR and assign them to OCI resources.
Task 9: Create a Subnet within the BYOIP IPv6 CIDR Range
Create a subnet within the IPv6 range. This subnet will allow you to allocate IPv6 addresses to OCI resources, such as compute instances or load balancers.
-
Go to the OCI Console and navigate to Networking and click Virtual Cloud Networks.
-
Select the VCN to which you assigned your BYOIP IPv6 CIDR.
-
In the VCN details page, go to the Subnets section.
-
Click Create Subnet.

-
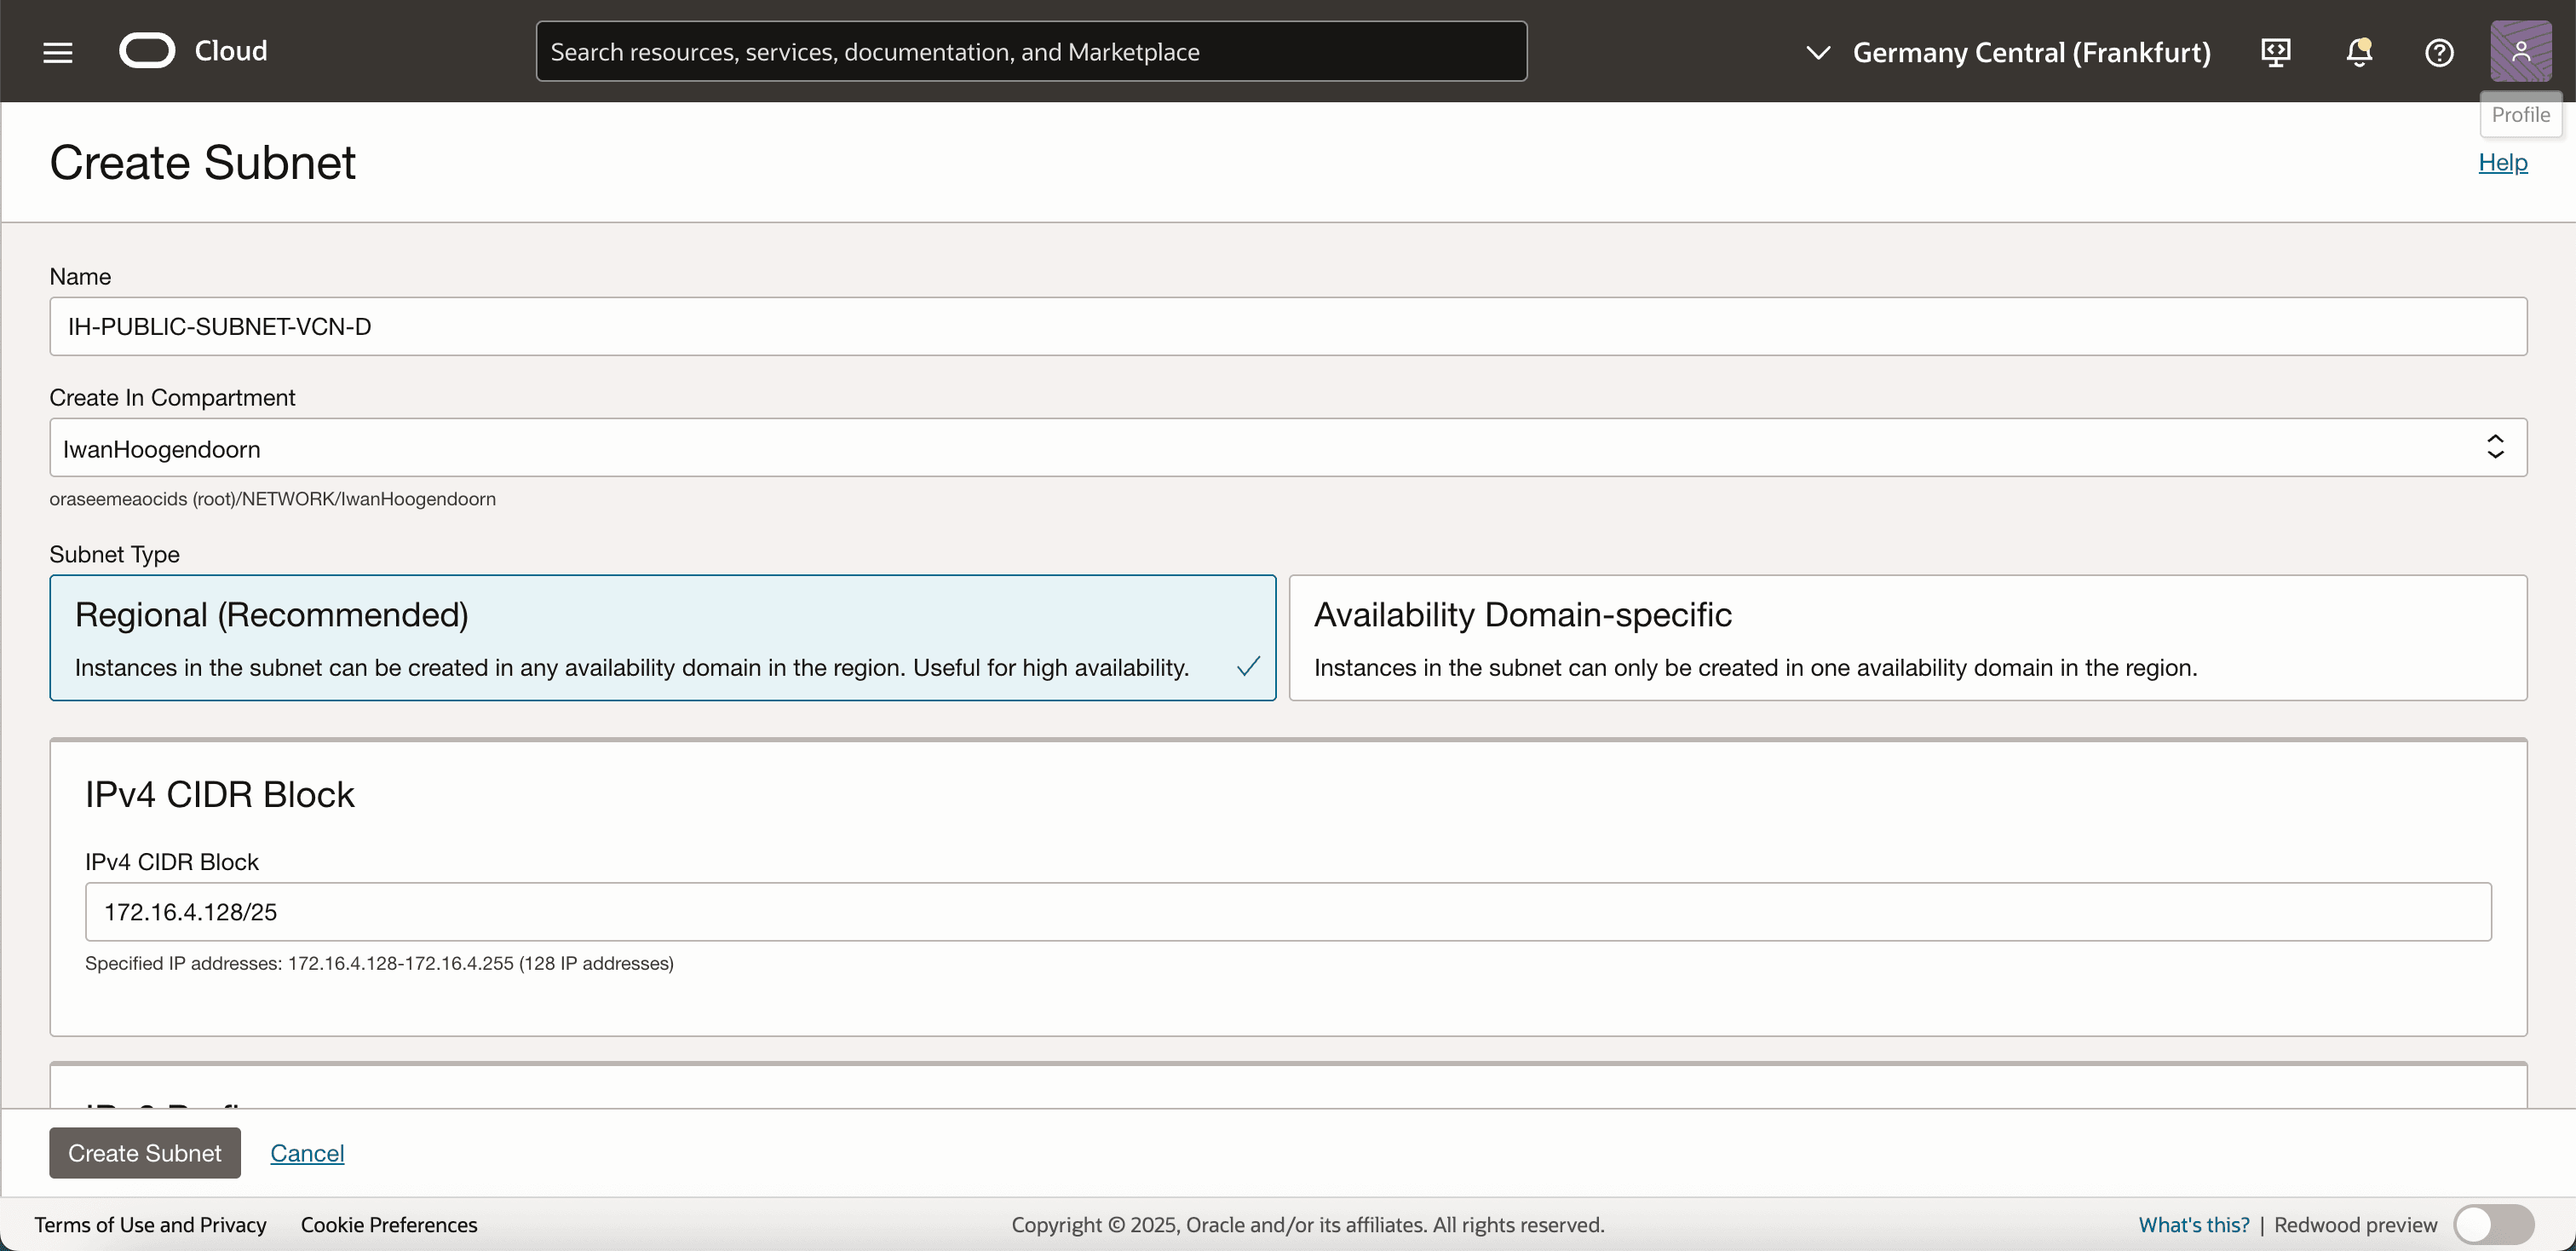
Enter the following information.
- Name: Enter a name for the subnet.
- Subnet Type: Select a specific AD or select Regional for high availability.
- IPv4 CIDR Block (Optional): Enter an IPv4 block if you are creating a dual-stack subnet.
-
IPv6 Prefixes: Select a subnet range from the BYOIP IPv6 CIDR. For example, if your imported range is
/44, you can assign a/64subnet. The first part of the prefix is already provided, and to create a/64subnet, only provide the last part0::.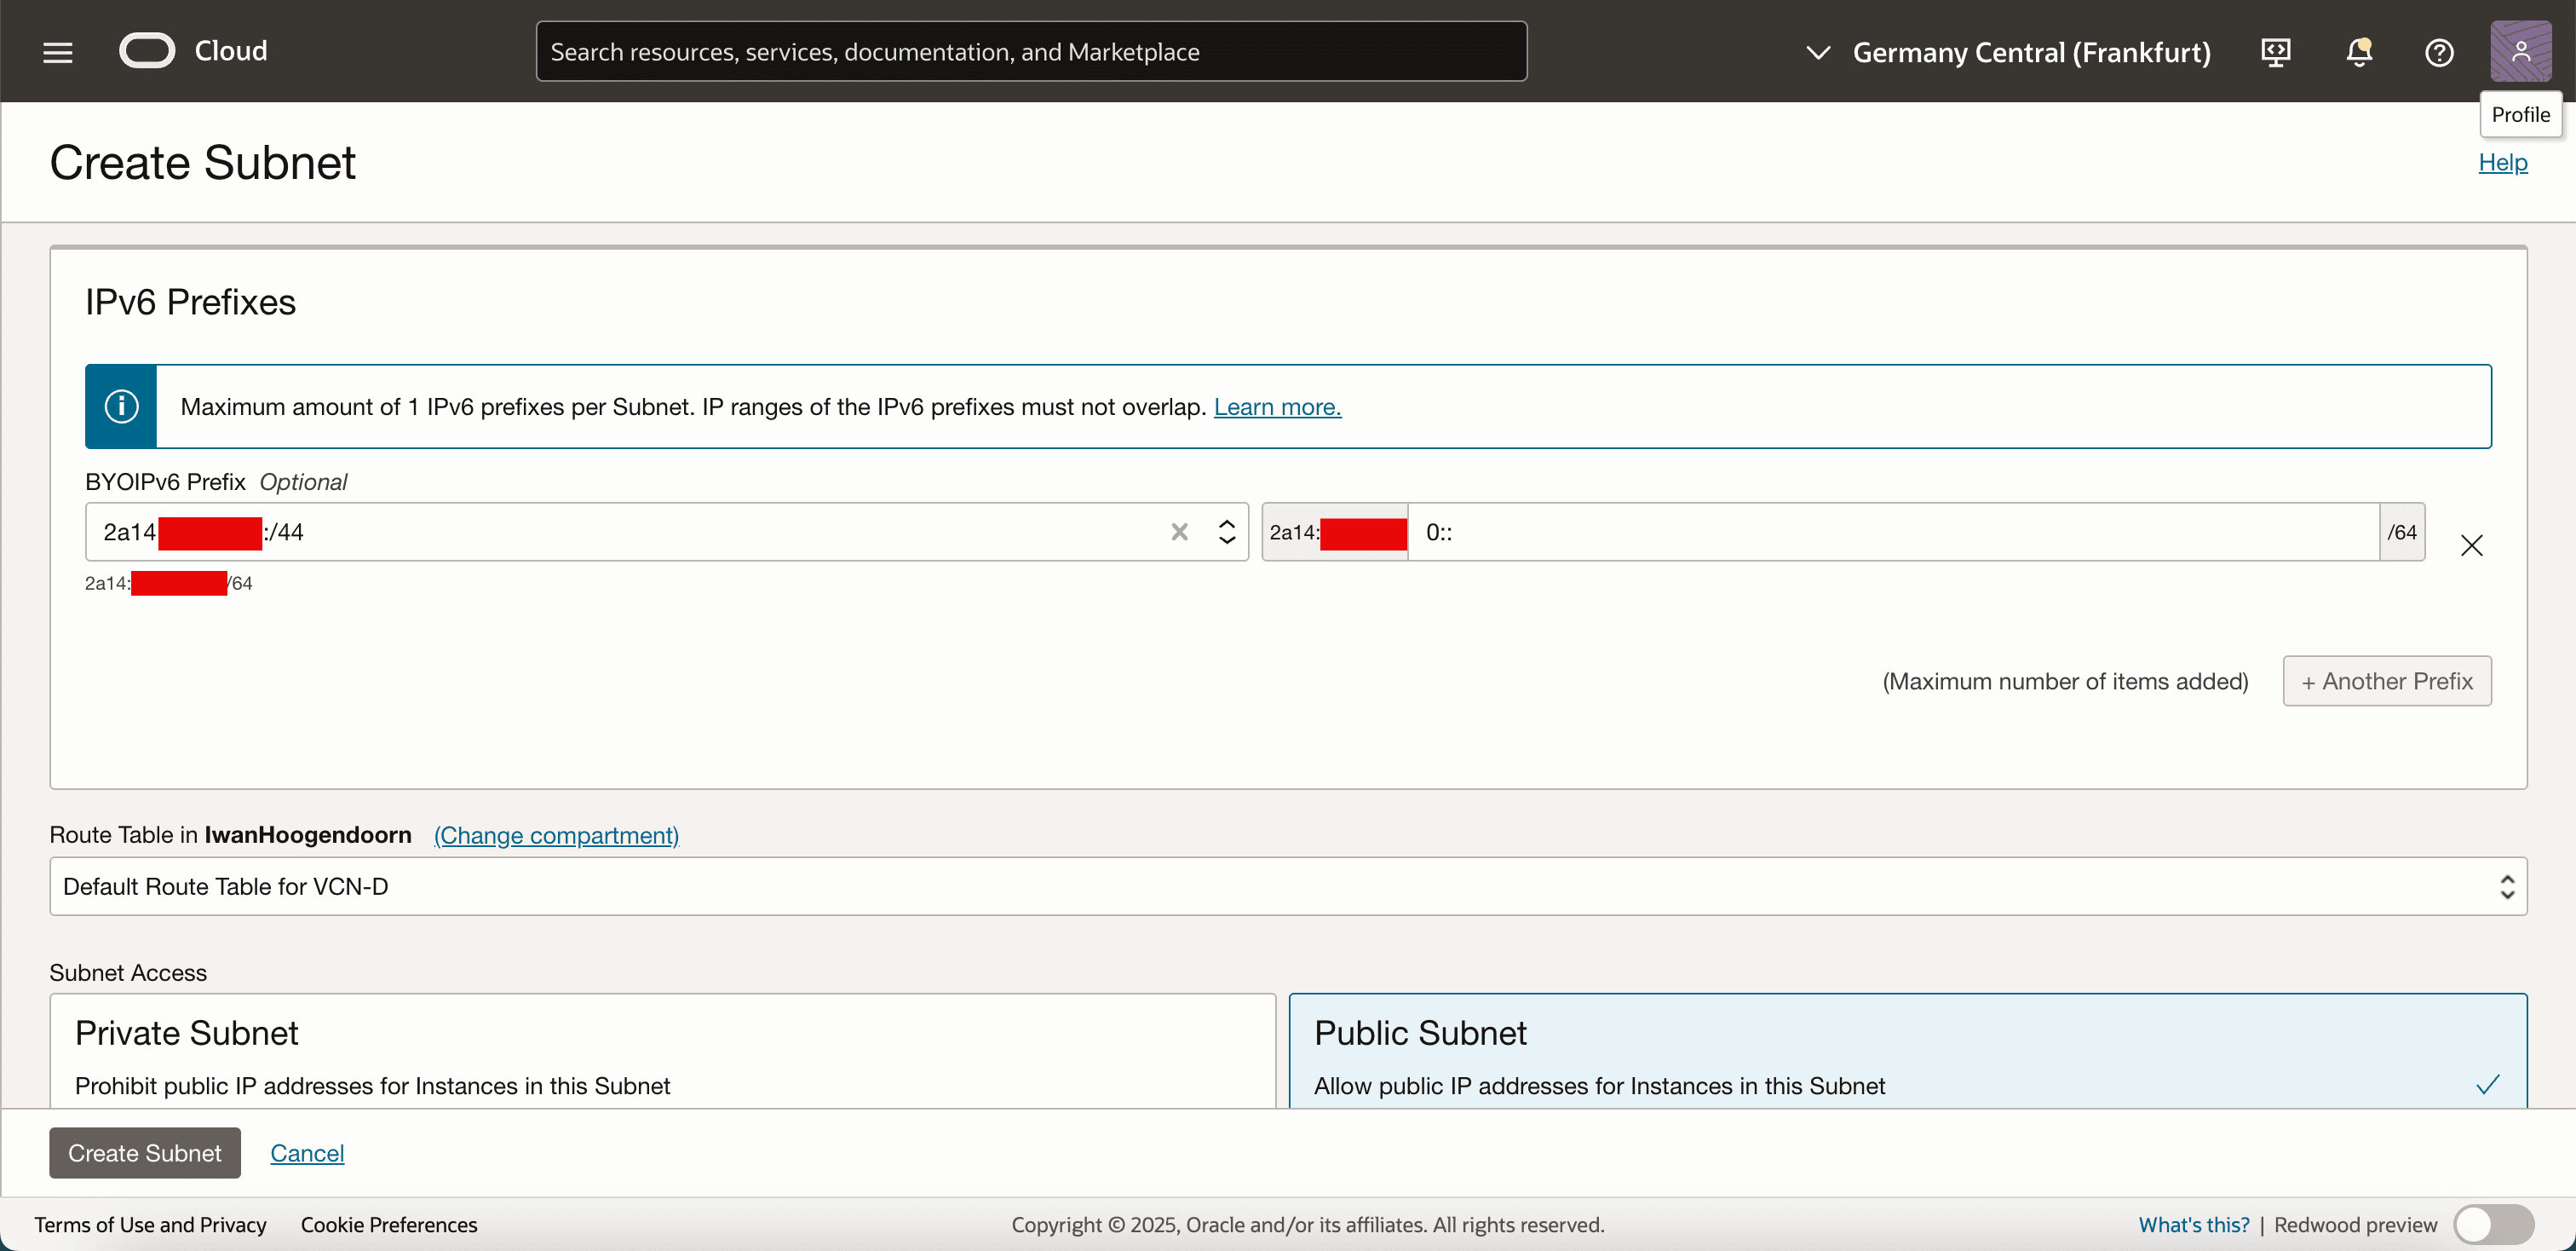
-
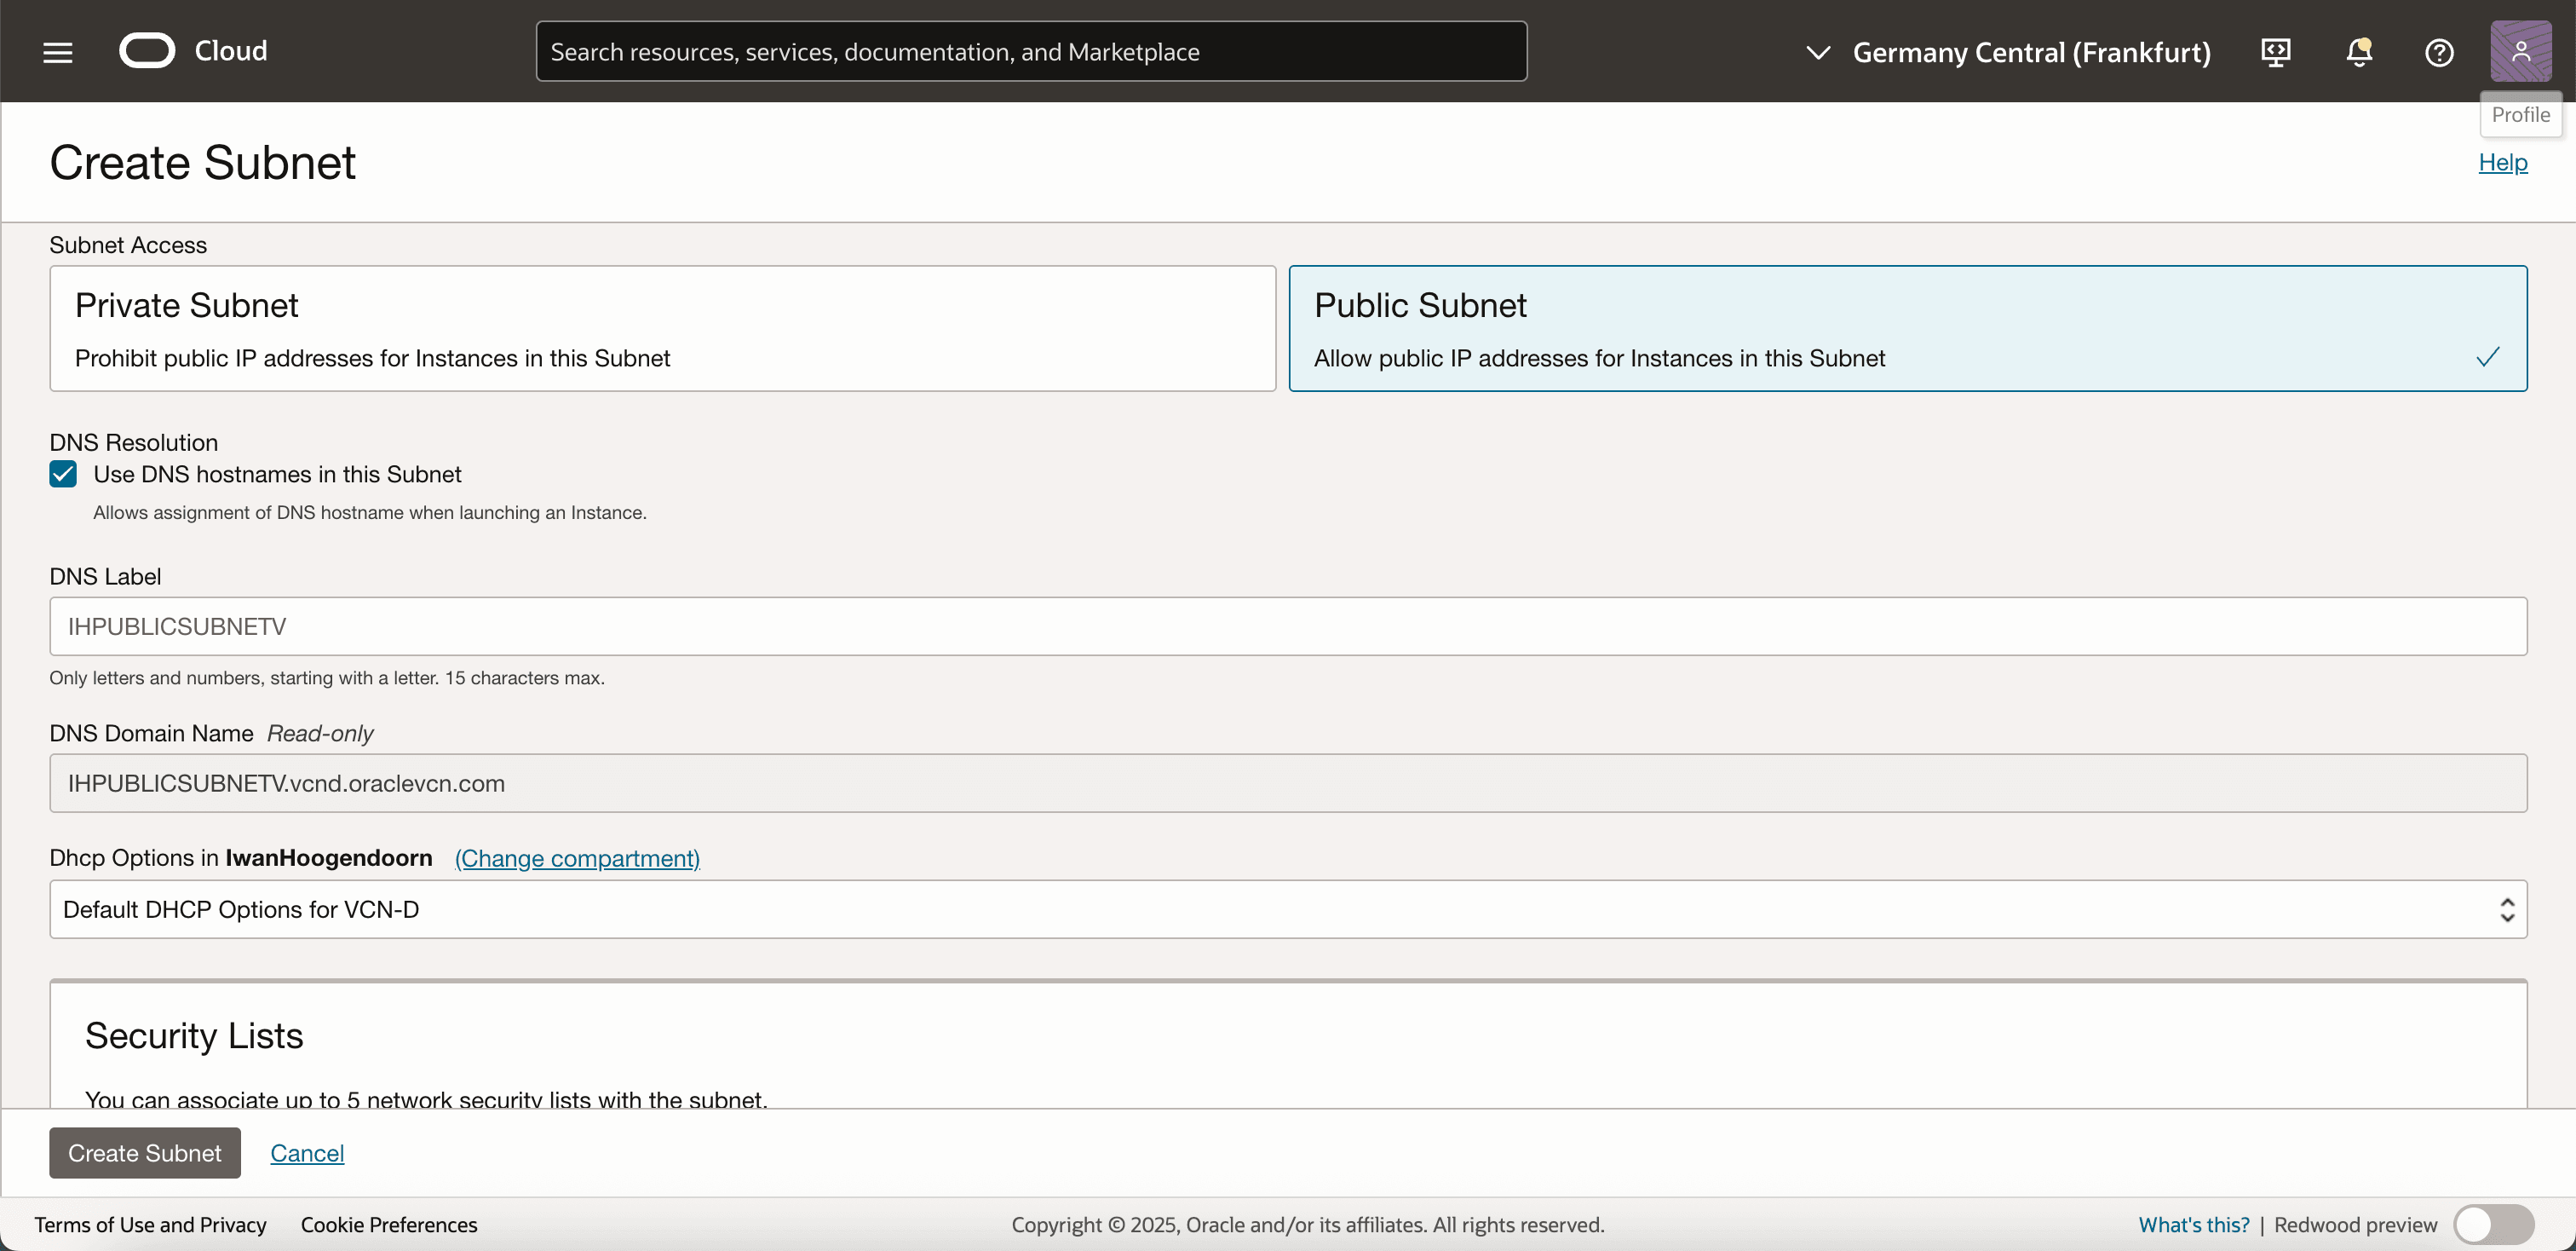
In Subnet Access, select Public Subnet and click Create Subnet.
-
Note that the new subnet is created with an IPv6 prefix carved out of the imported BYOIP range.

In the next task, you will configure routing so the subnet can send and receive traffic over the Internet.
Task 10: Create and Assign a New Routing Table for VCN
In this task, create and assign a routing table that enables the correct network traffic flow. This route table will define how traffic from your subnet (IPv6 traffic) is routed within and outside the VCN, including to the Internet.
-
Go to the OCI Console, navigate to Networking and Virtual Cloud Networks.
-
Select your VCN.
-
In Resources, click Route Tables.
-
Click Create Route Table.
-
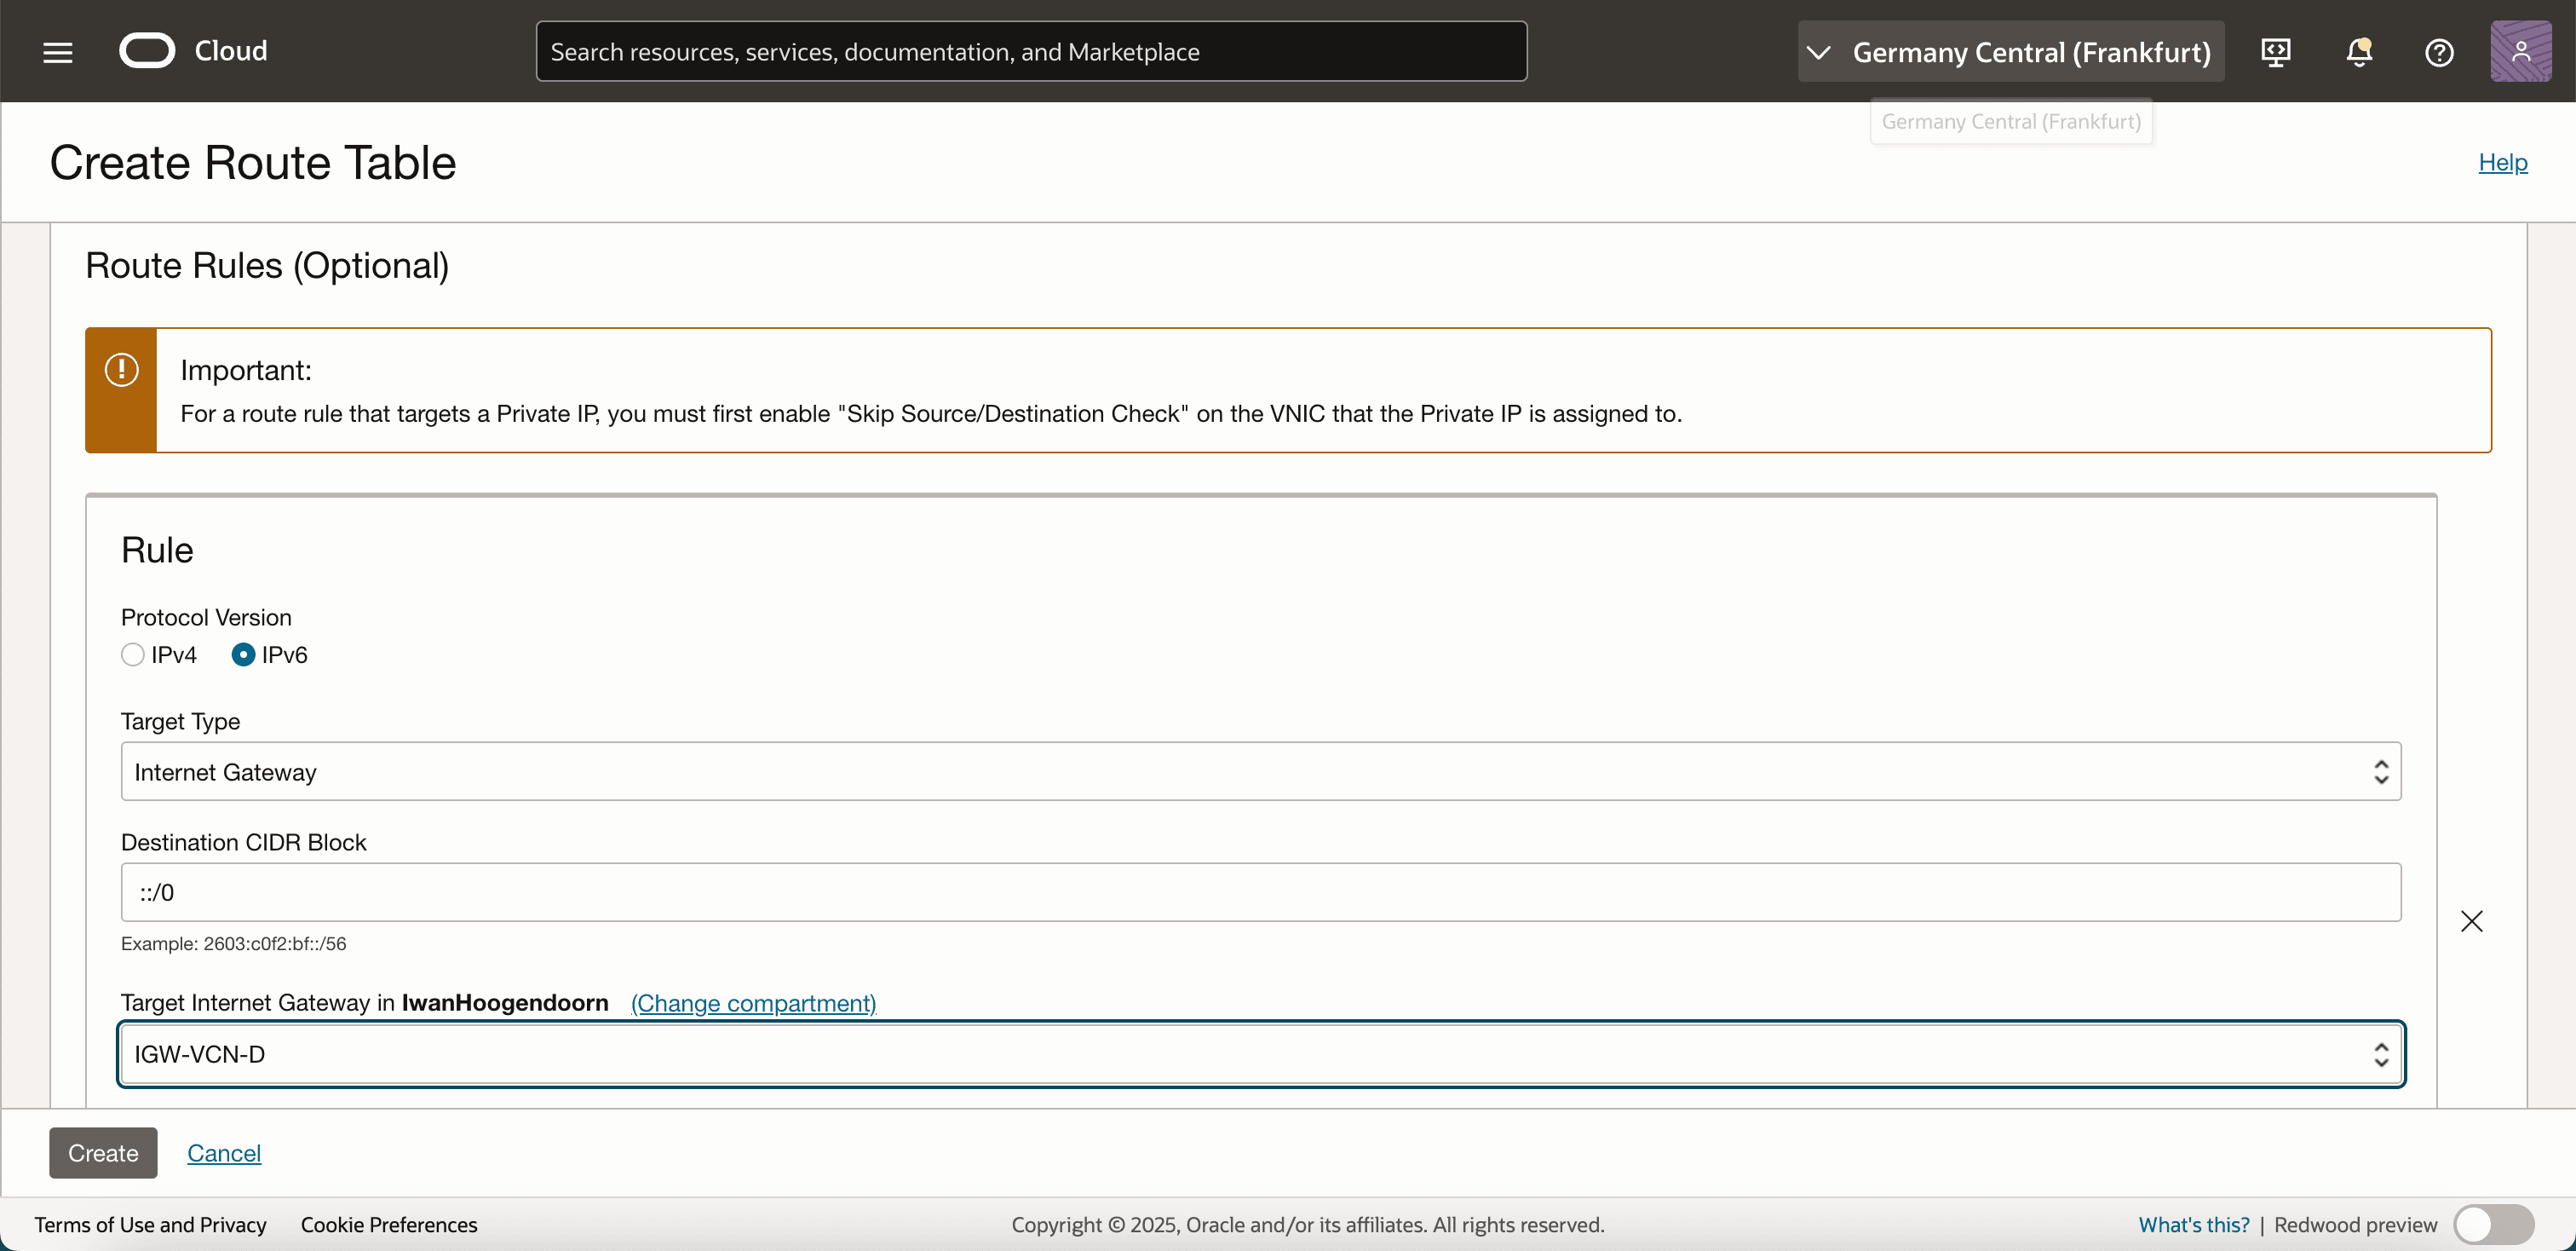
In Route Rules, enter the following information.
- Name: Enter a descriptive name for your route table.
- Protocol Version: Select IPv6.
- Target Type: Select Internet Gateway, if the subnet requires public internet access.
- Destination CIDR Block: Enter
::/0to allow outbound IPv6 traffic to the internet. - Target: Select the Internet Gateway associated with your VCN.
- Click Create to save the route table.
-
Note that the new routing table is created.

-
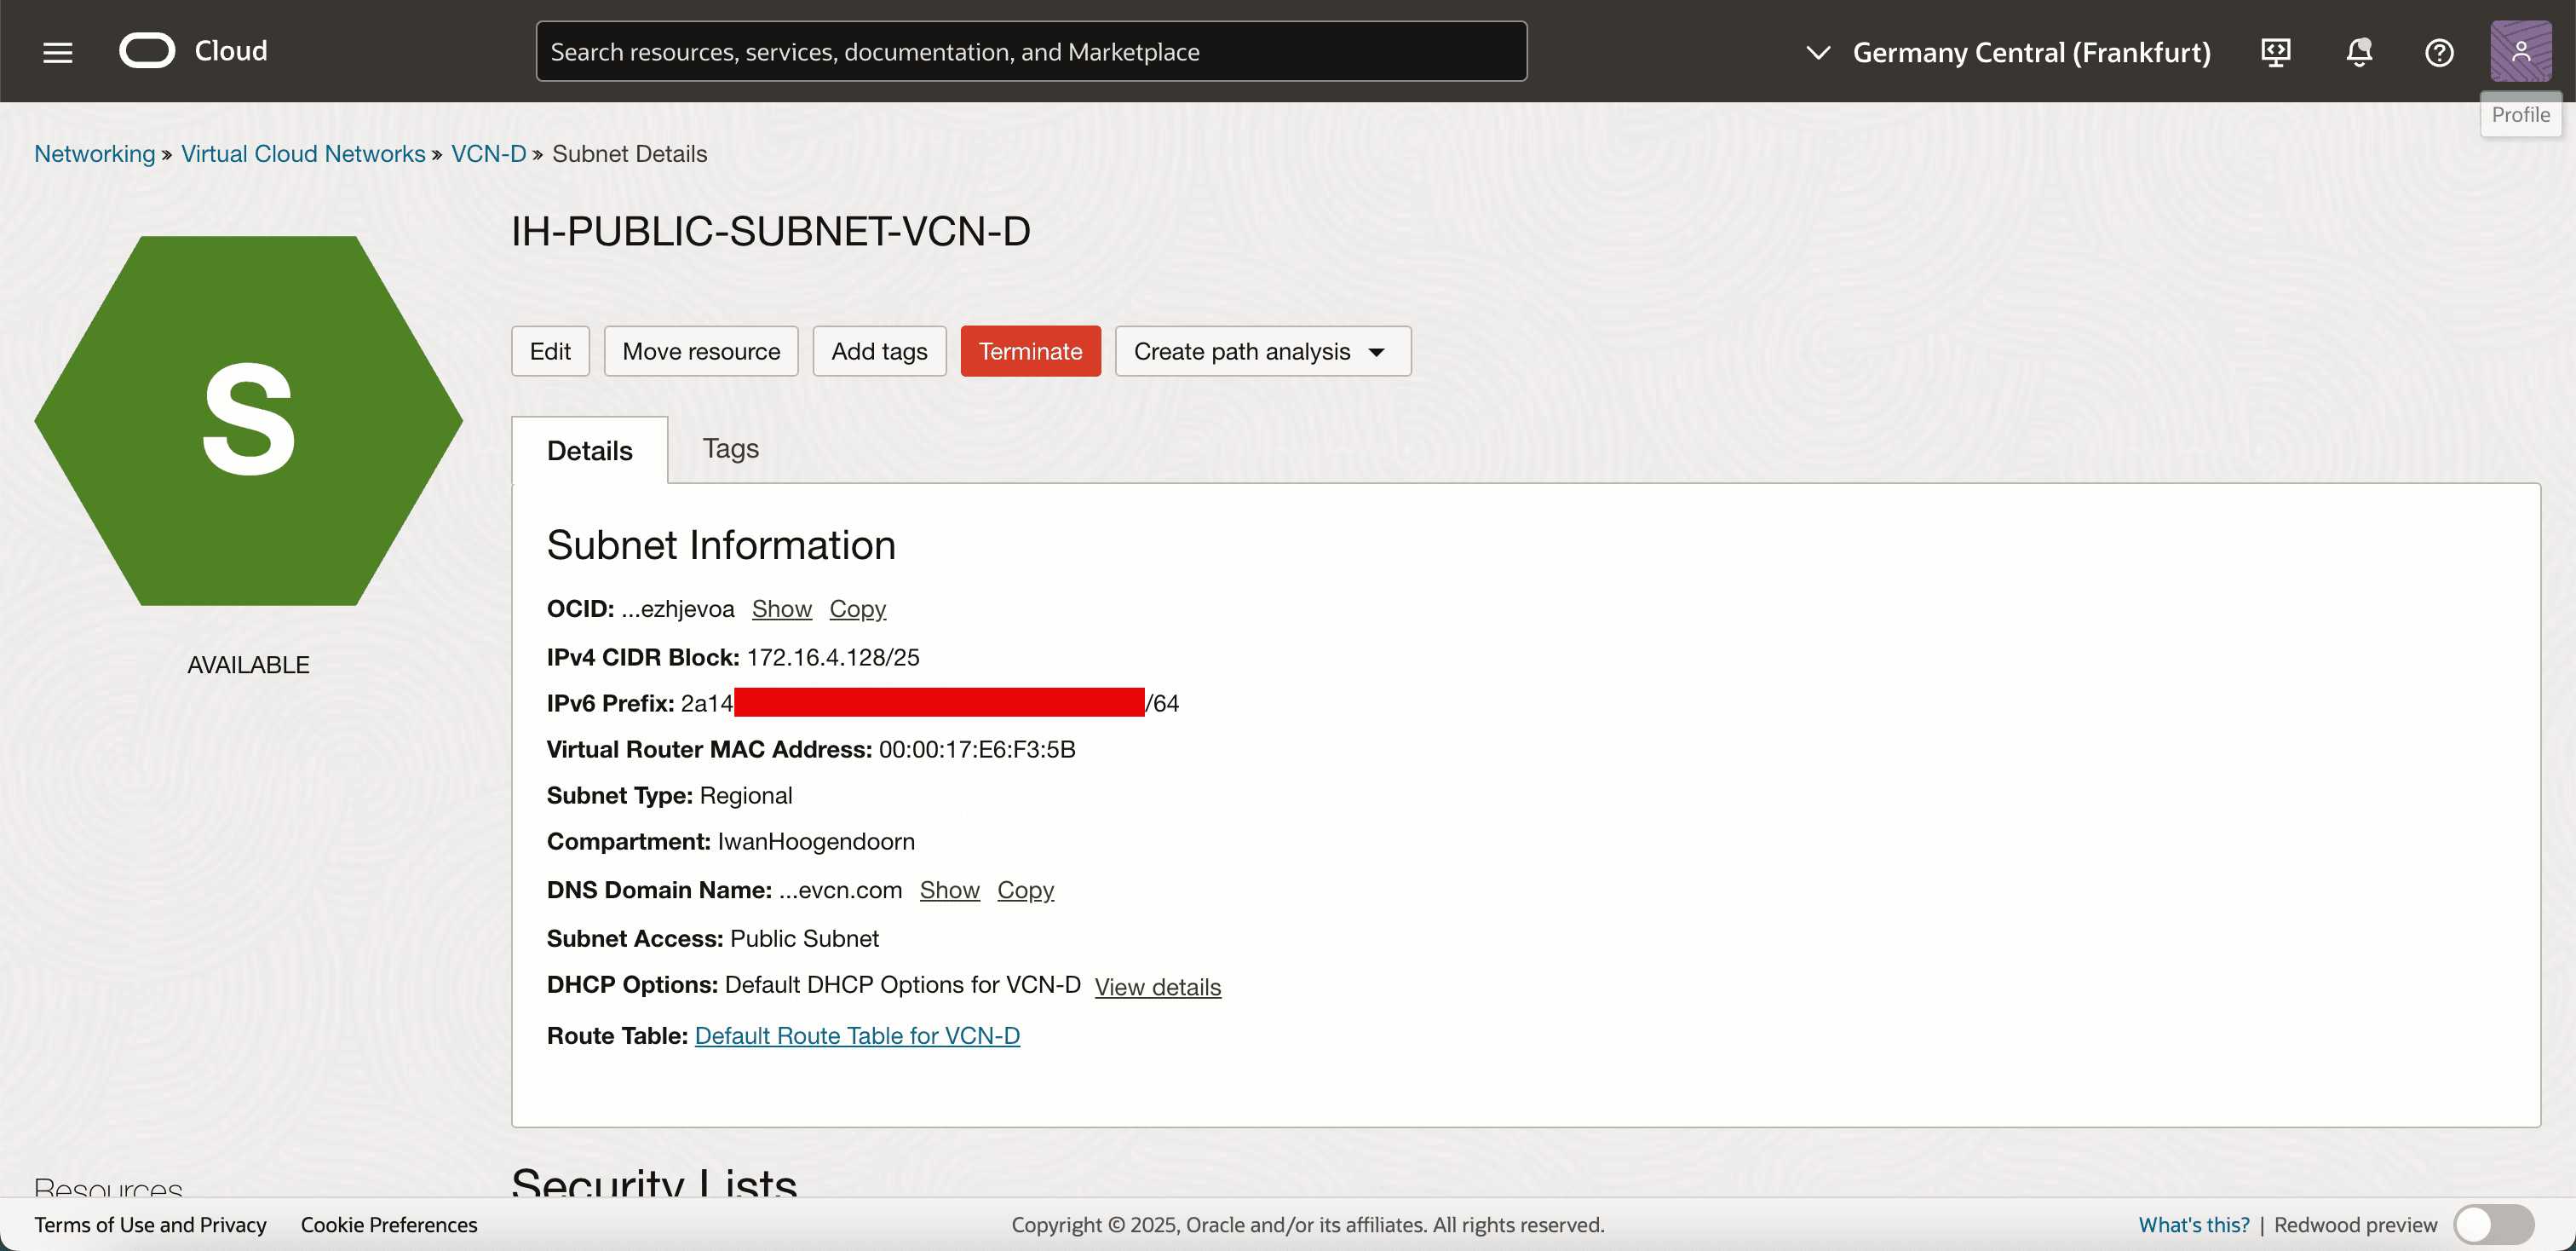
Now, we need to assign the route table to the subnet.
- Navigate to VCN and Subnets.
- Click the name of the subnet.
- Click Edit.
-
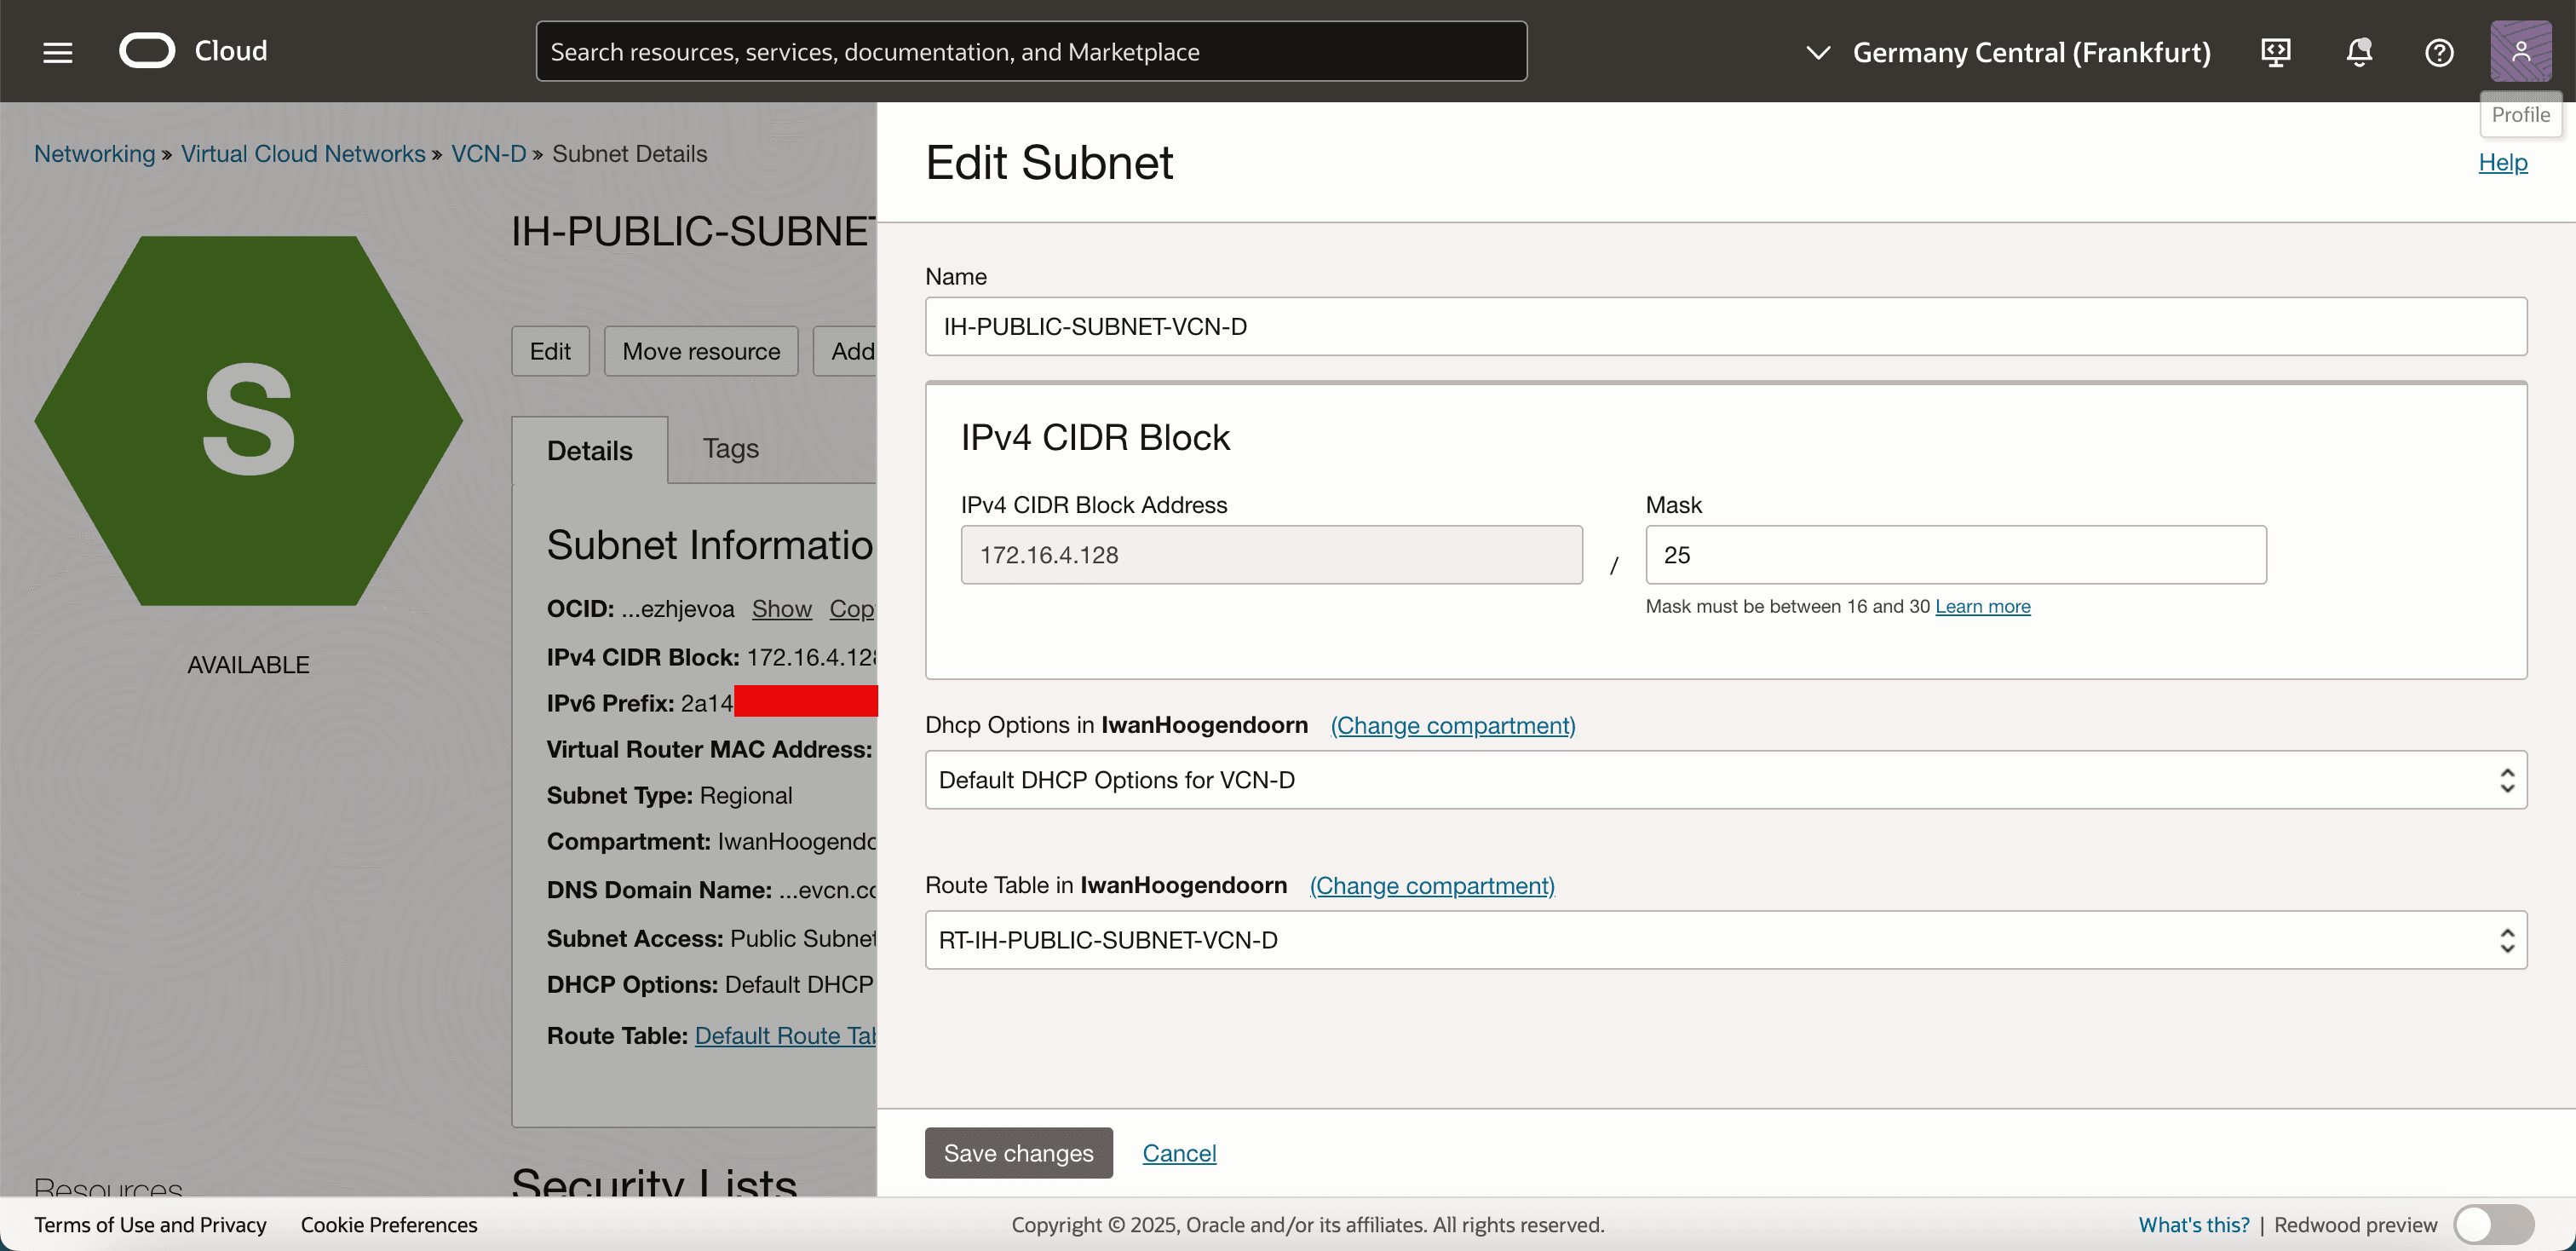
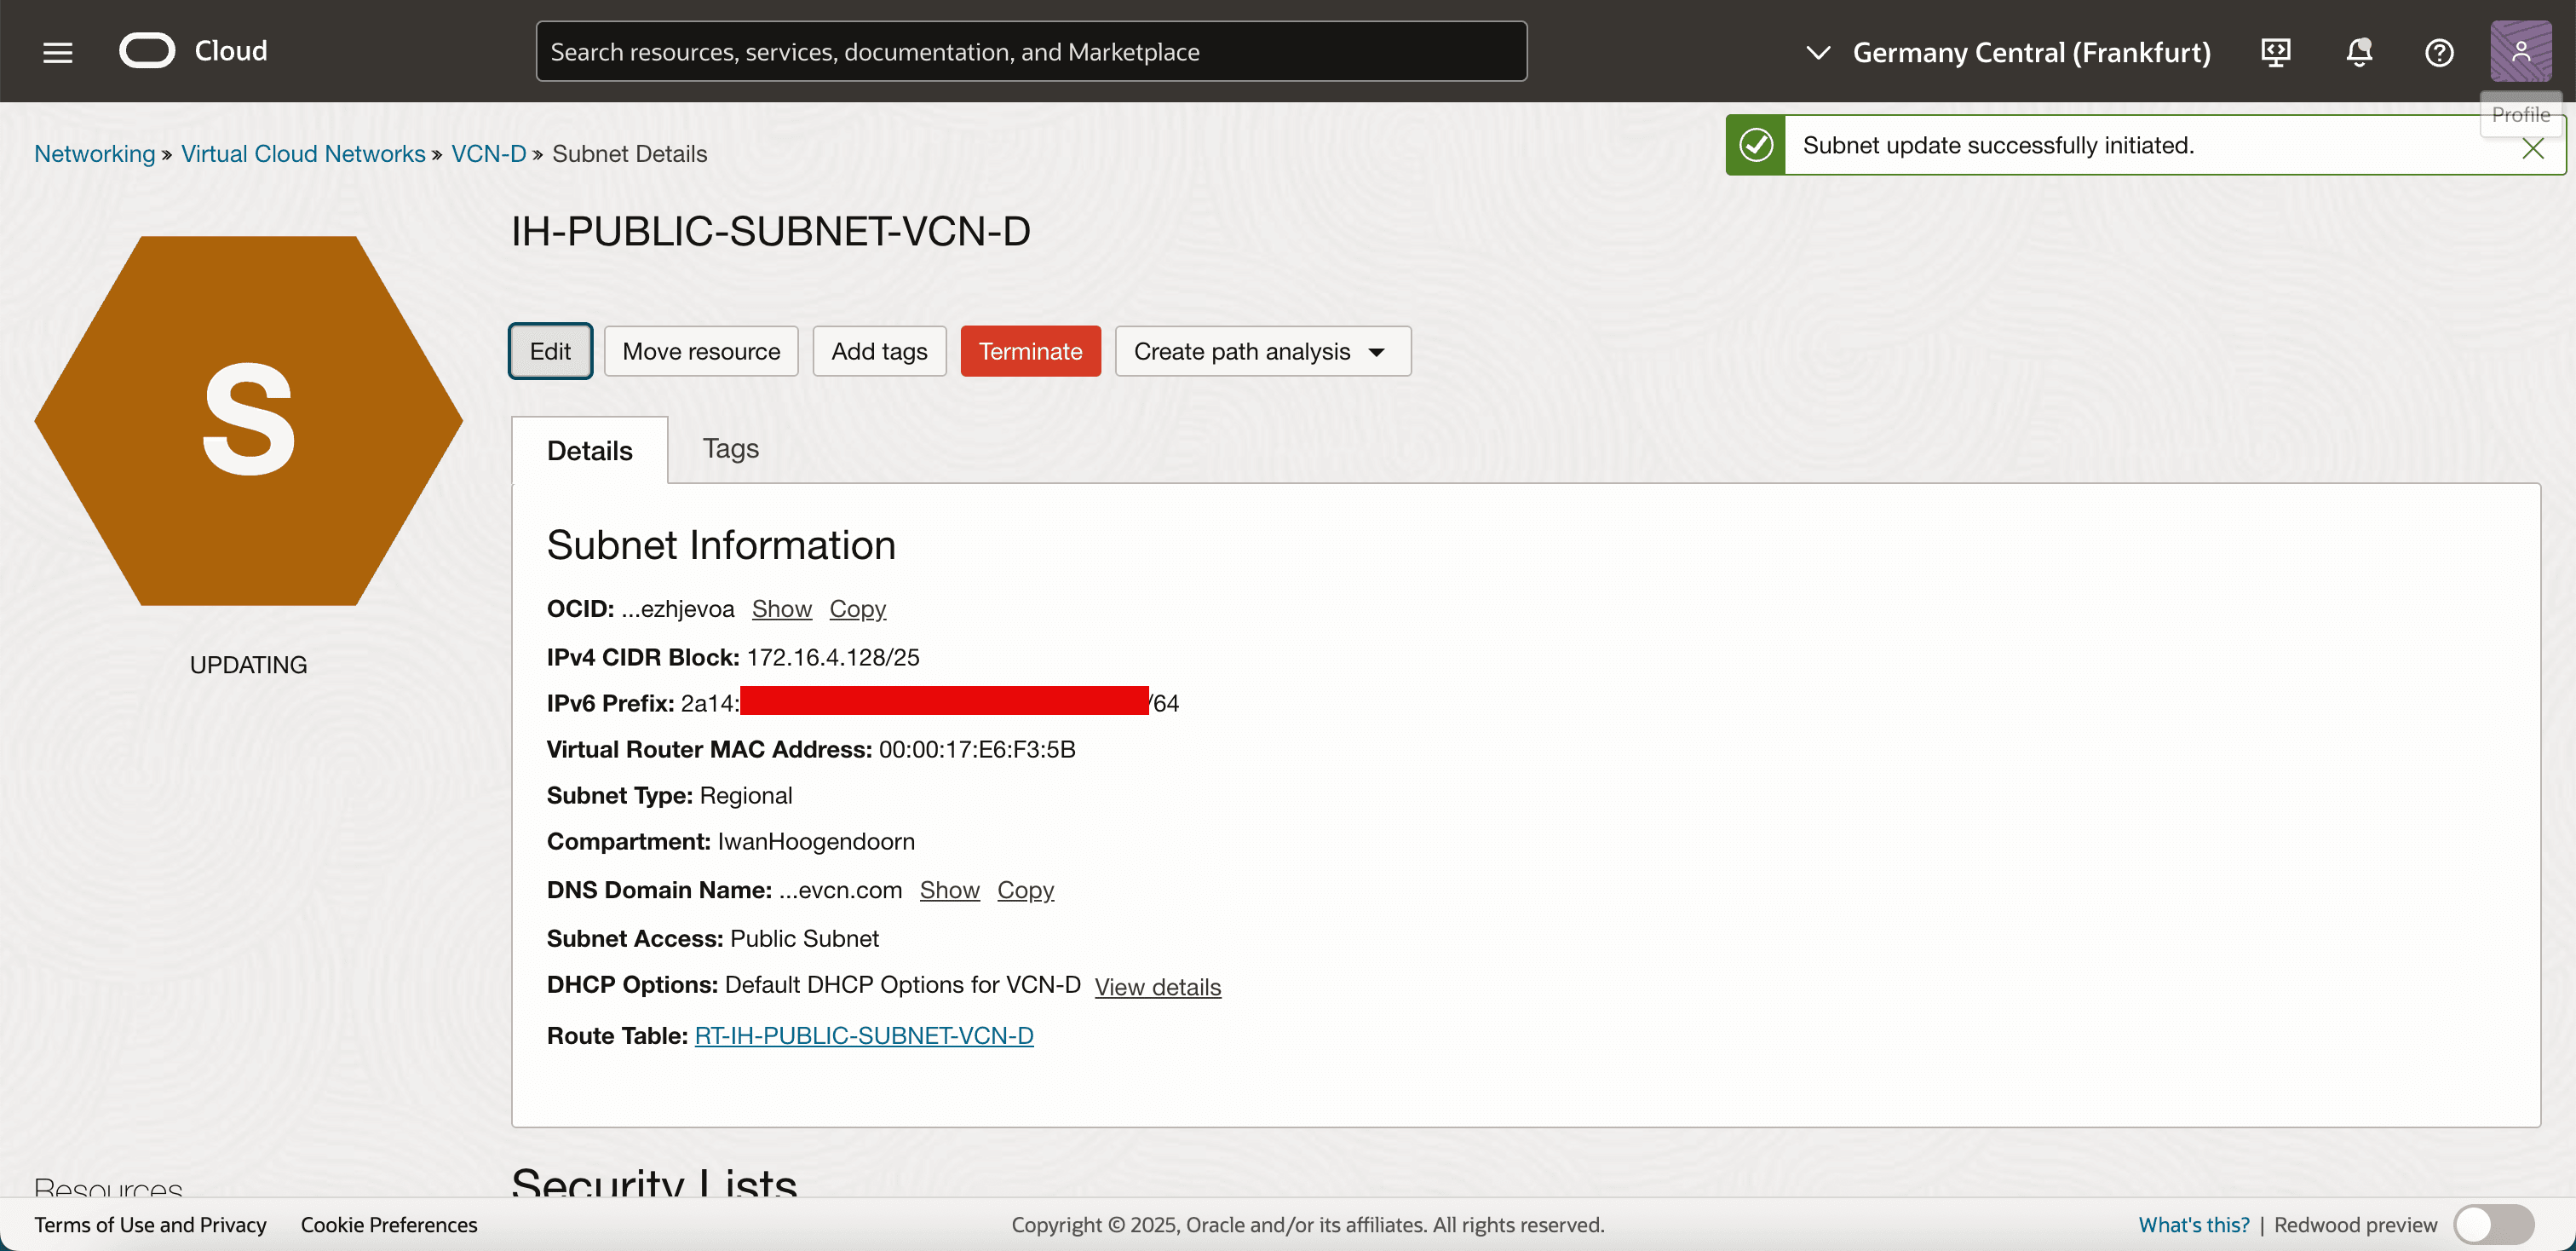
In Route Table, select the new route table you just created and click Save Changes.
-
Your subnet is now using a route table that allows IPv6 traffic to reach the Internet through OCI. Any instance or resource with a public IPv6 address in this subnet can now send and receive IPv6 traffic.
Next, you are ready to launch a compute instance and assign it an IPv6 address from your BYOIP range.
Task 11: Create an Instance and use an IPv6 Address from the BYOIP IPv6 CIDR Range
Now that your VCN and subnet are configured and routing is in place, you can launch a compute instance and assign it an IPv6 address from your imported BYOIP IPv6 CIDR range. This makes the instance reachable over the Internet using your IPv6 space, which you control and manage.
-
Go to the OCI Console, navigate to Compute, Instances and click Create Instance.

-
Enter the following information.
- Name: Enter a name for the instance.
- Compartment: Select the appropriate compartment.
- Availability domain: Select an AD or use regional availability, depending on your setup.
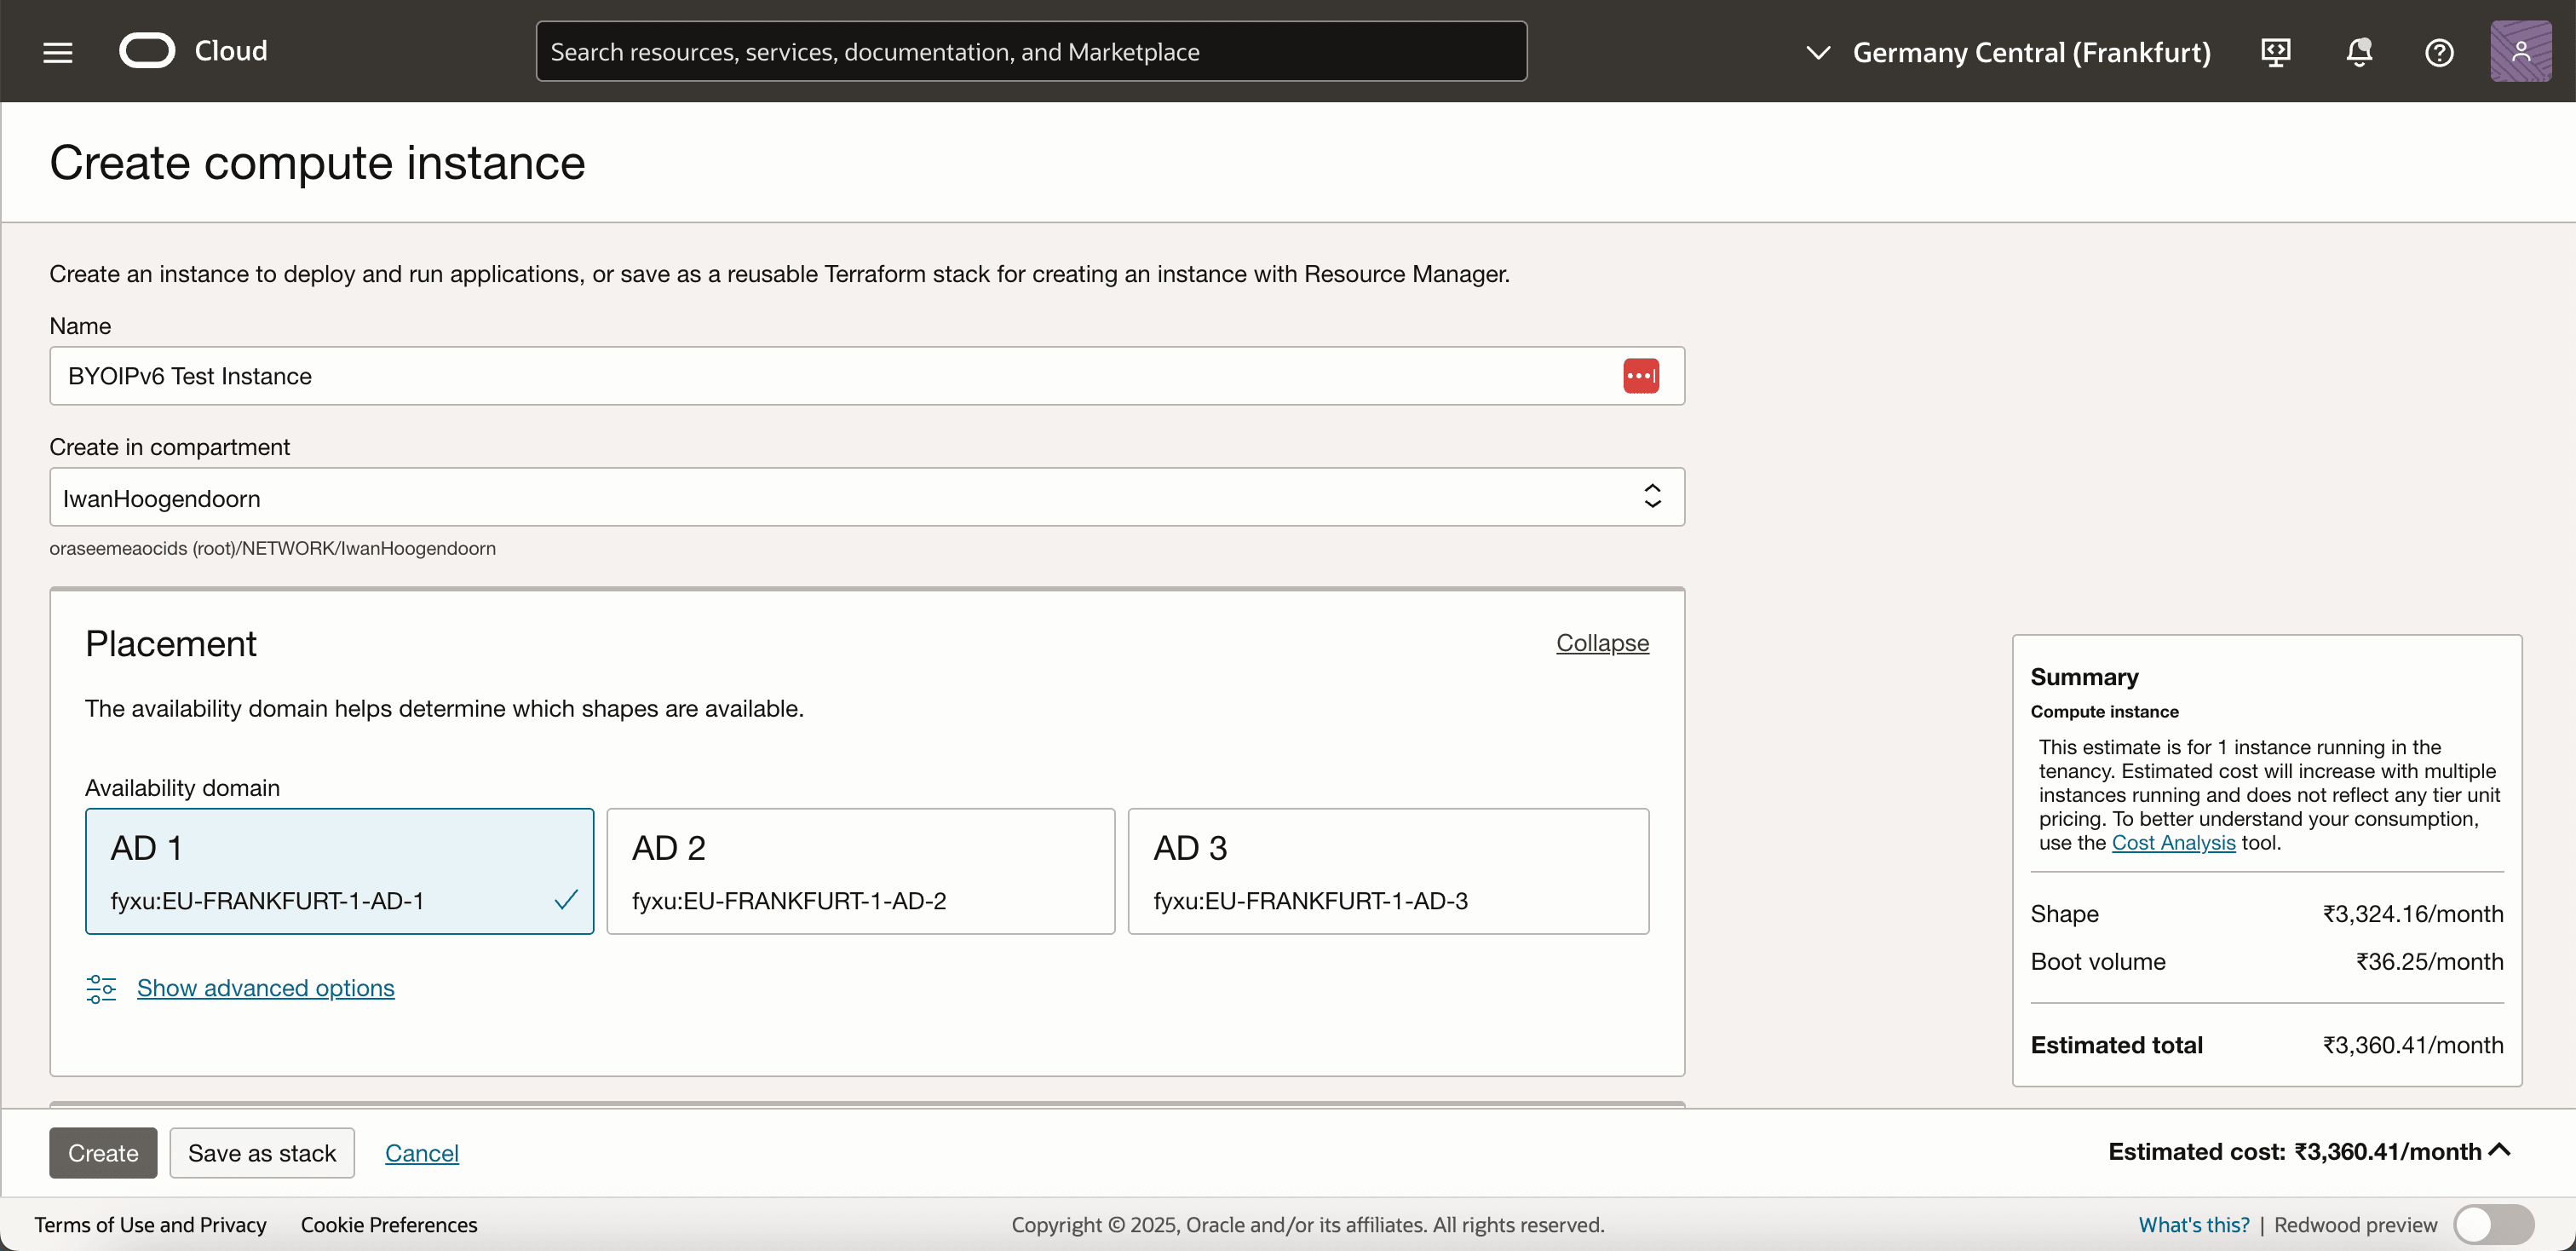
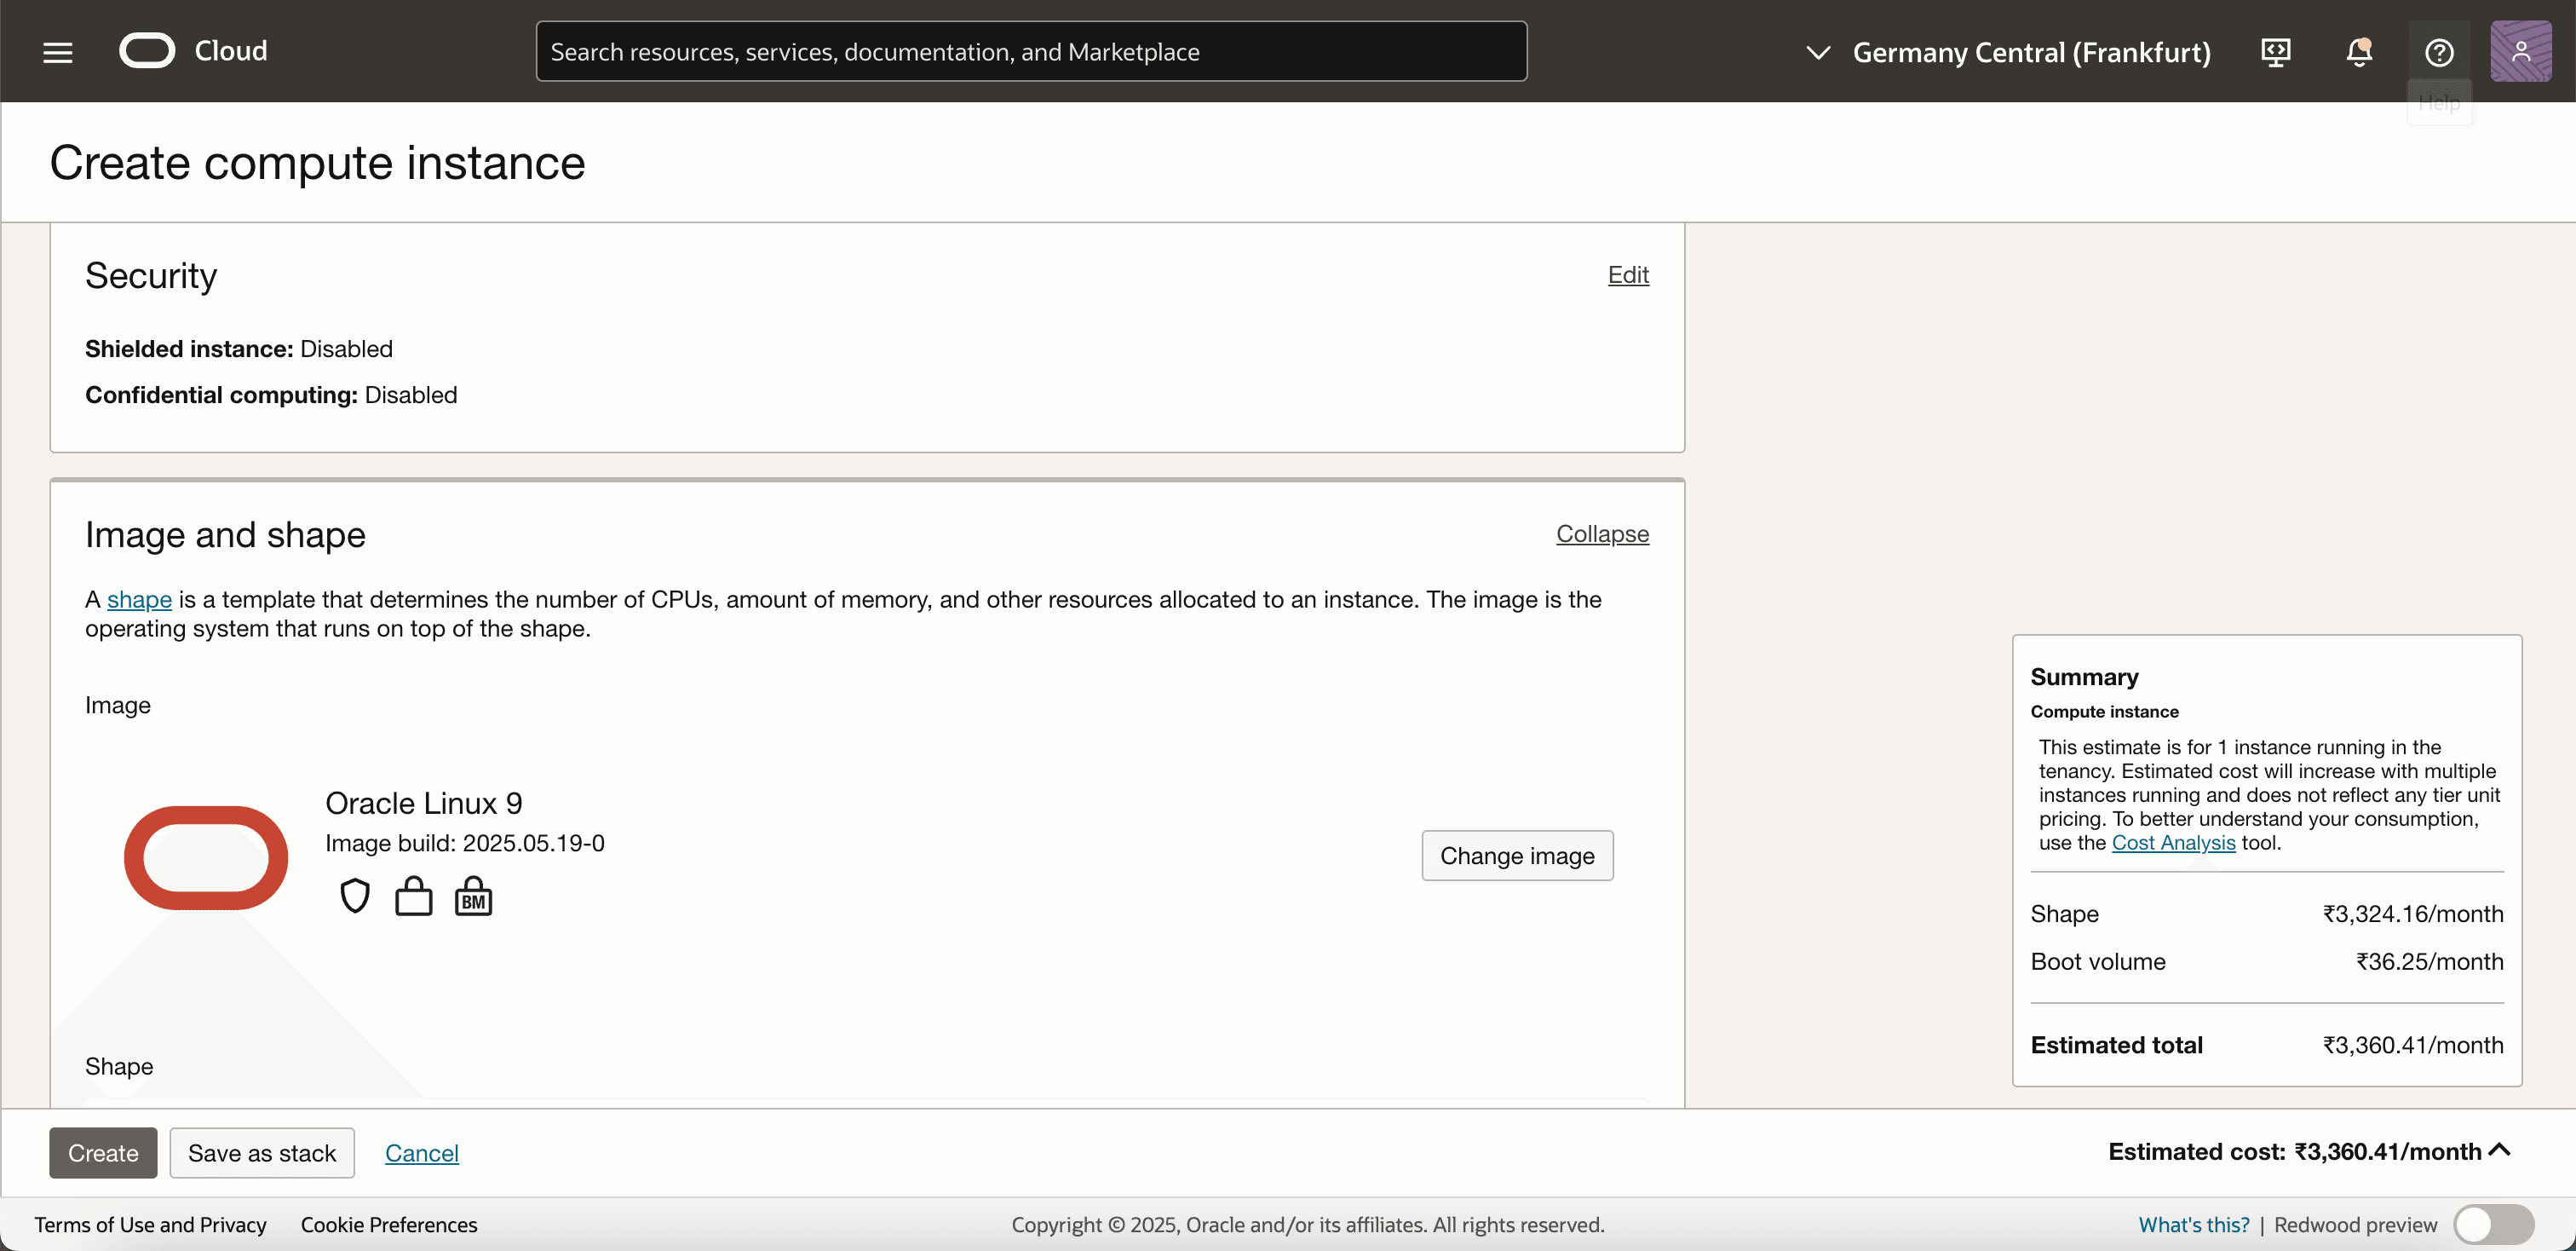
- Image and shape: Select your preferred OS image and shape. For example, Ubuntu and Oracle Linux.
-
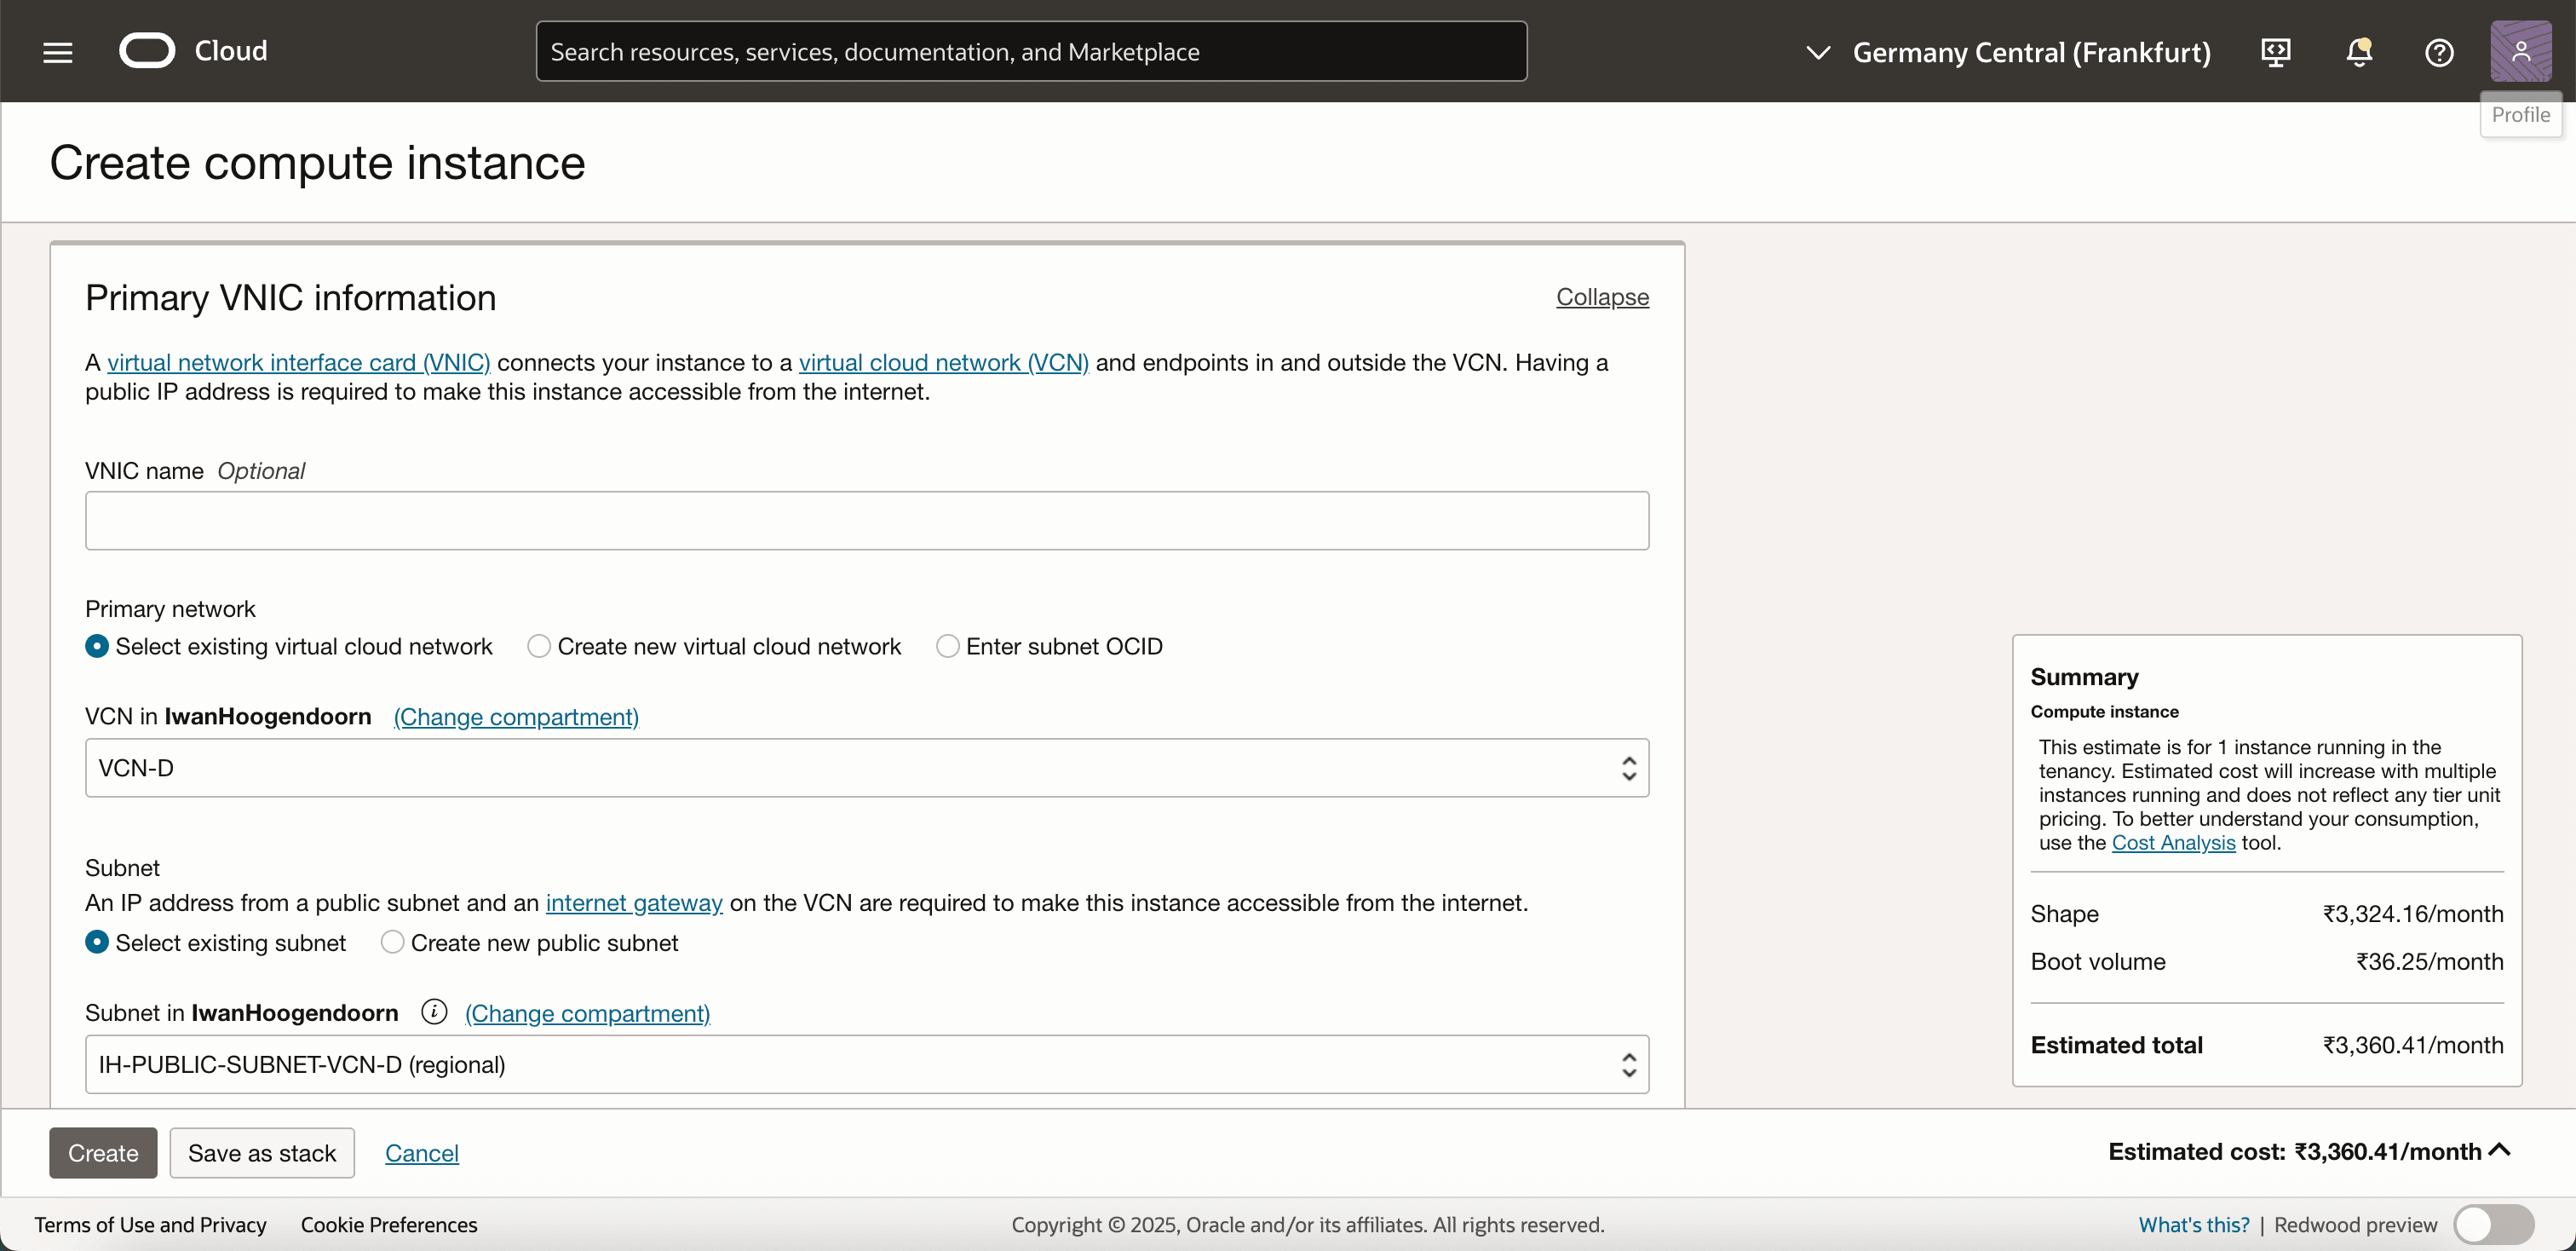
Select VCN and public subnet created in Task 9.
-
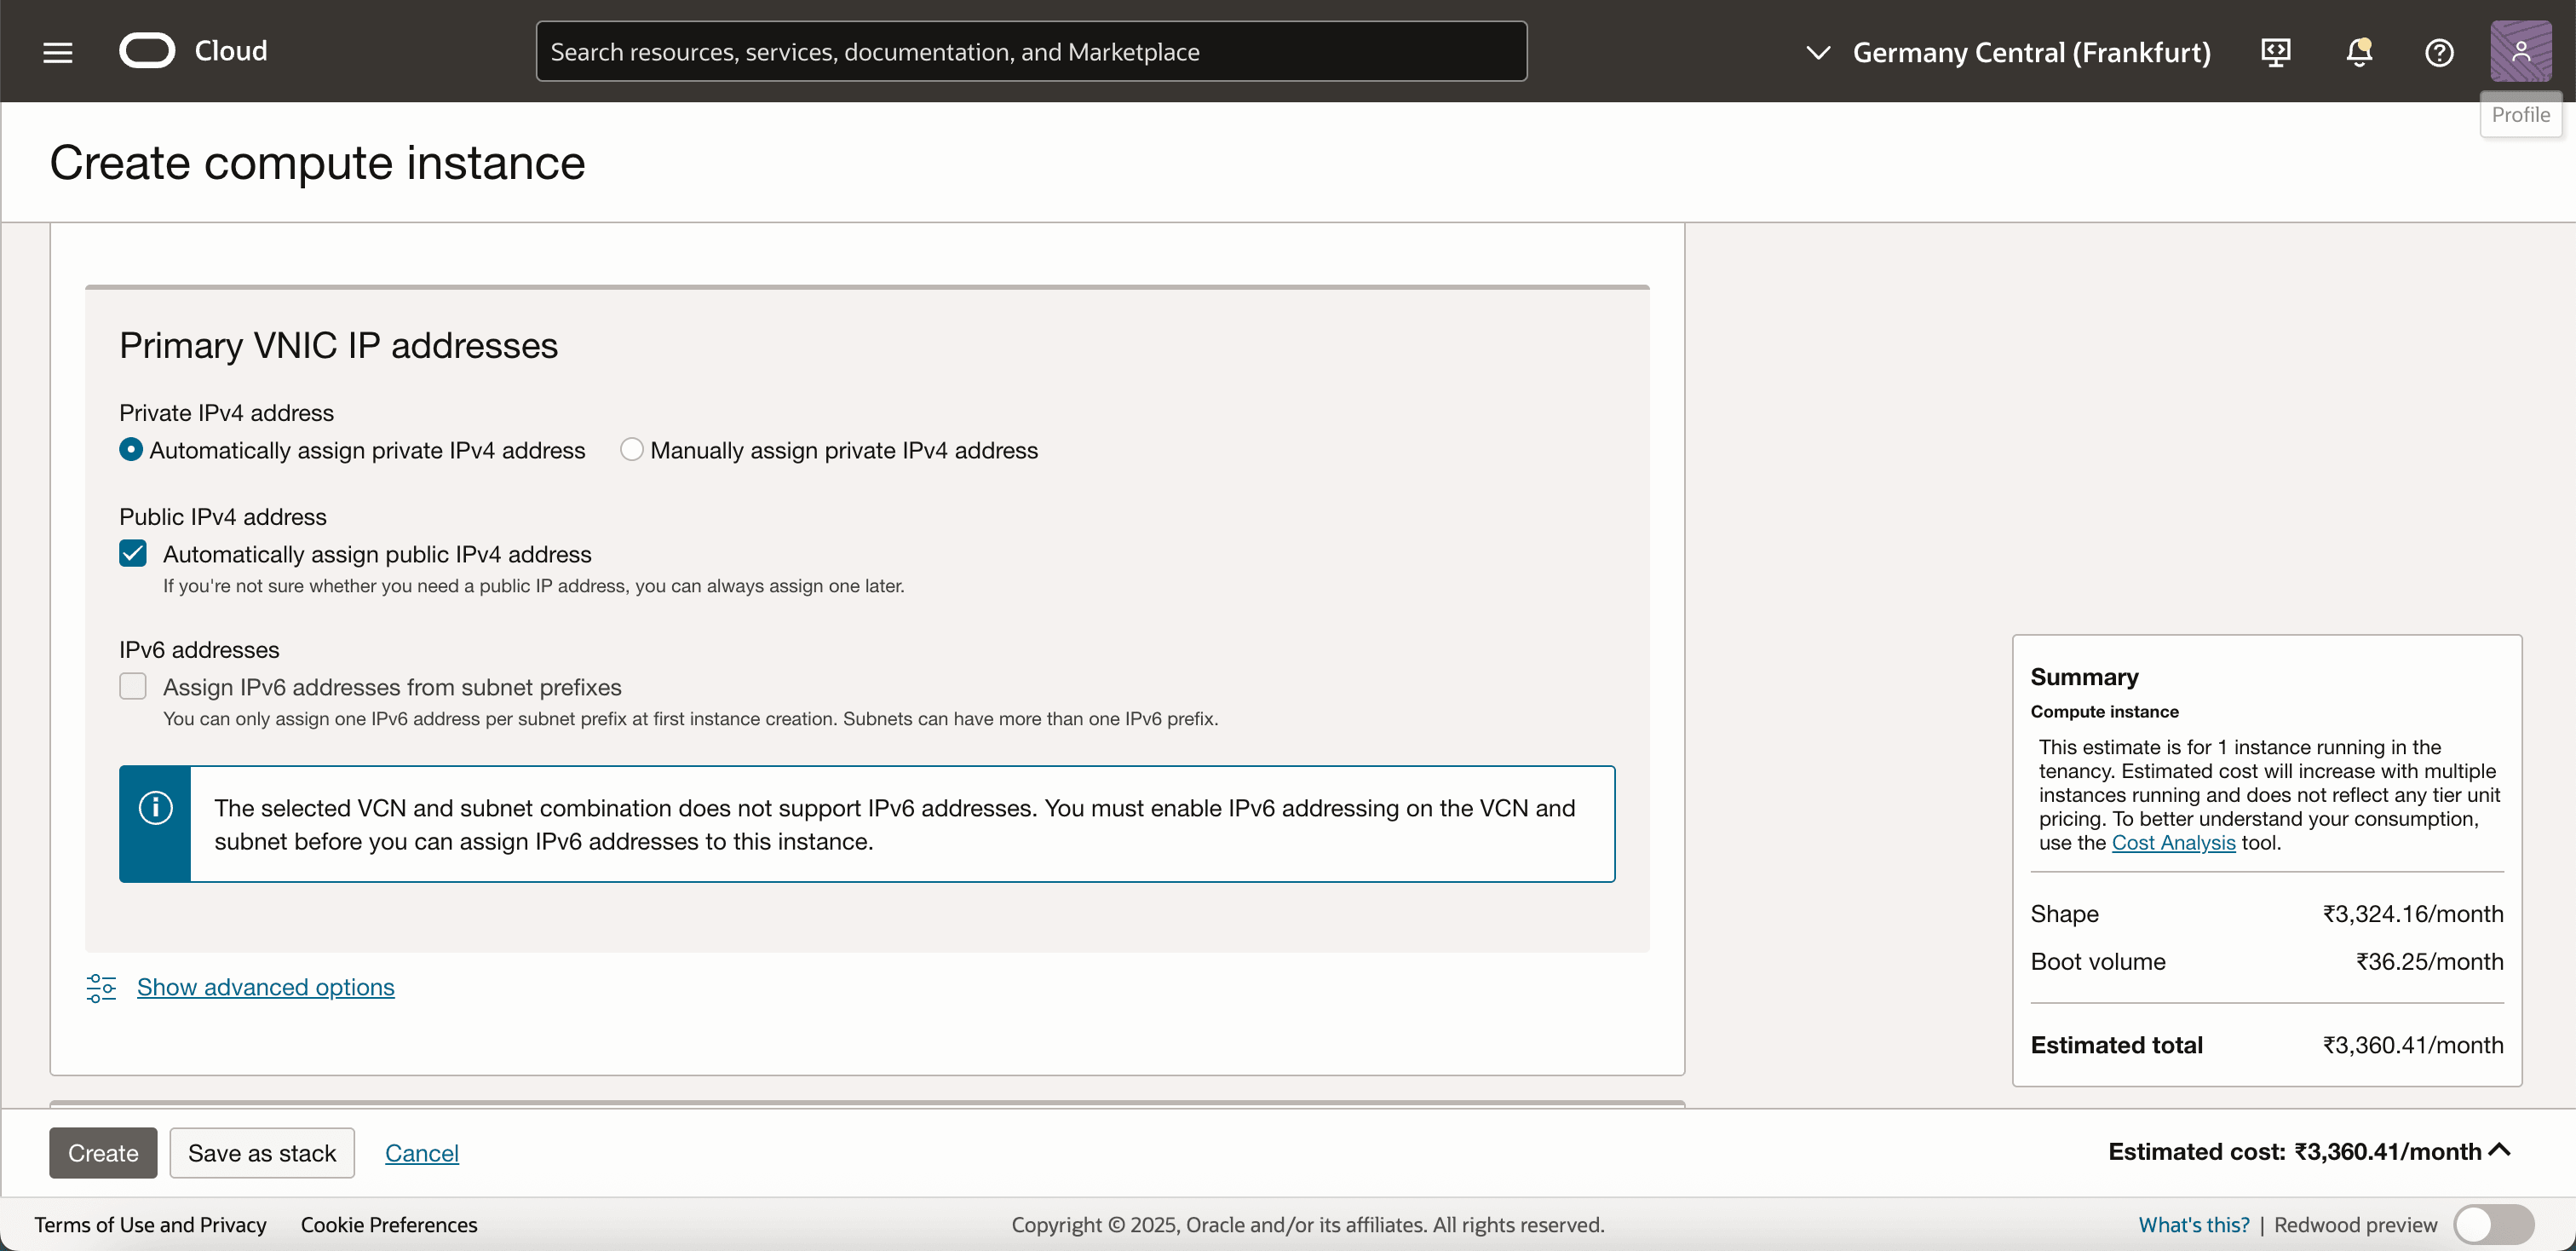
Enable IPv6 addresses, if you cannot enable IPv6 addresses, even though the VCN has a valid BYOIP IPv6 CIDR assigned, we can do it later.
-
(Optional) Attach SSH keys for secure access.
-
Click Create to create the instance.
-
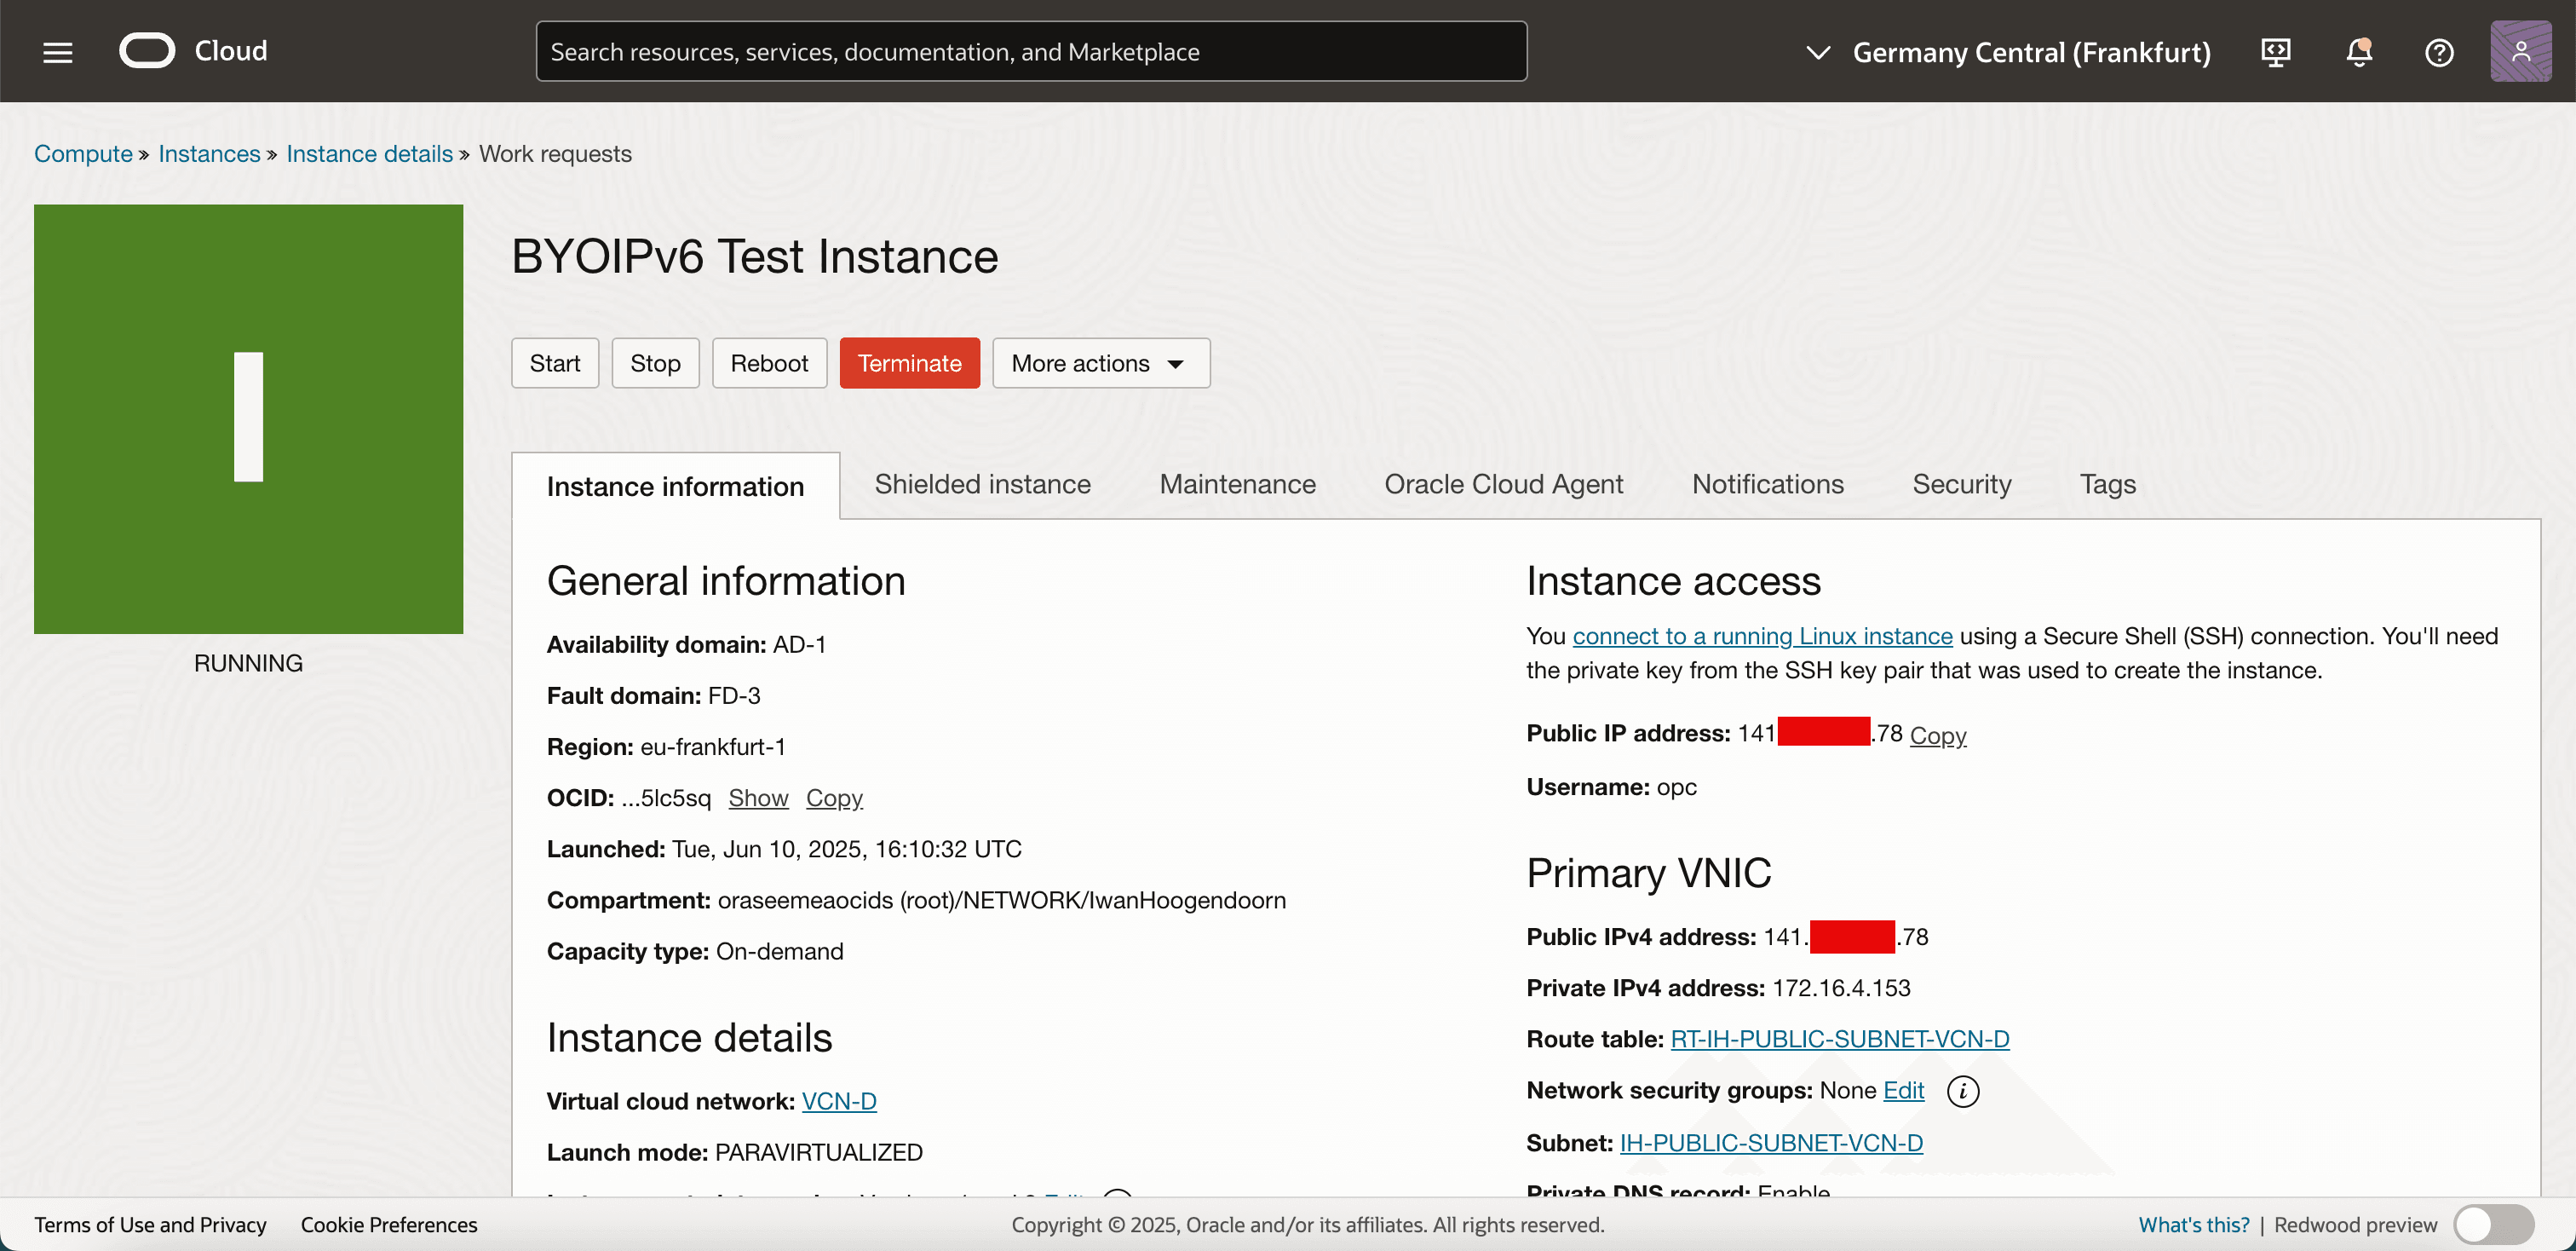
Note that there is no IPv6 address assigned to the instance (yet).
-
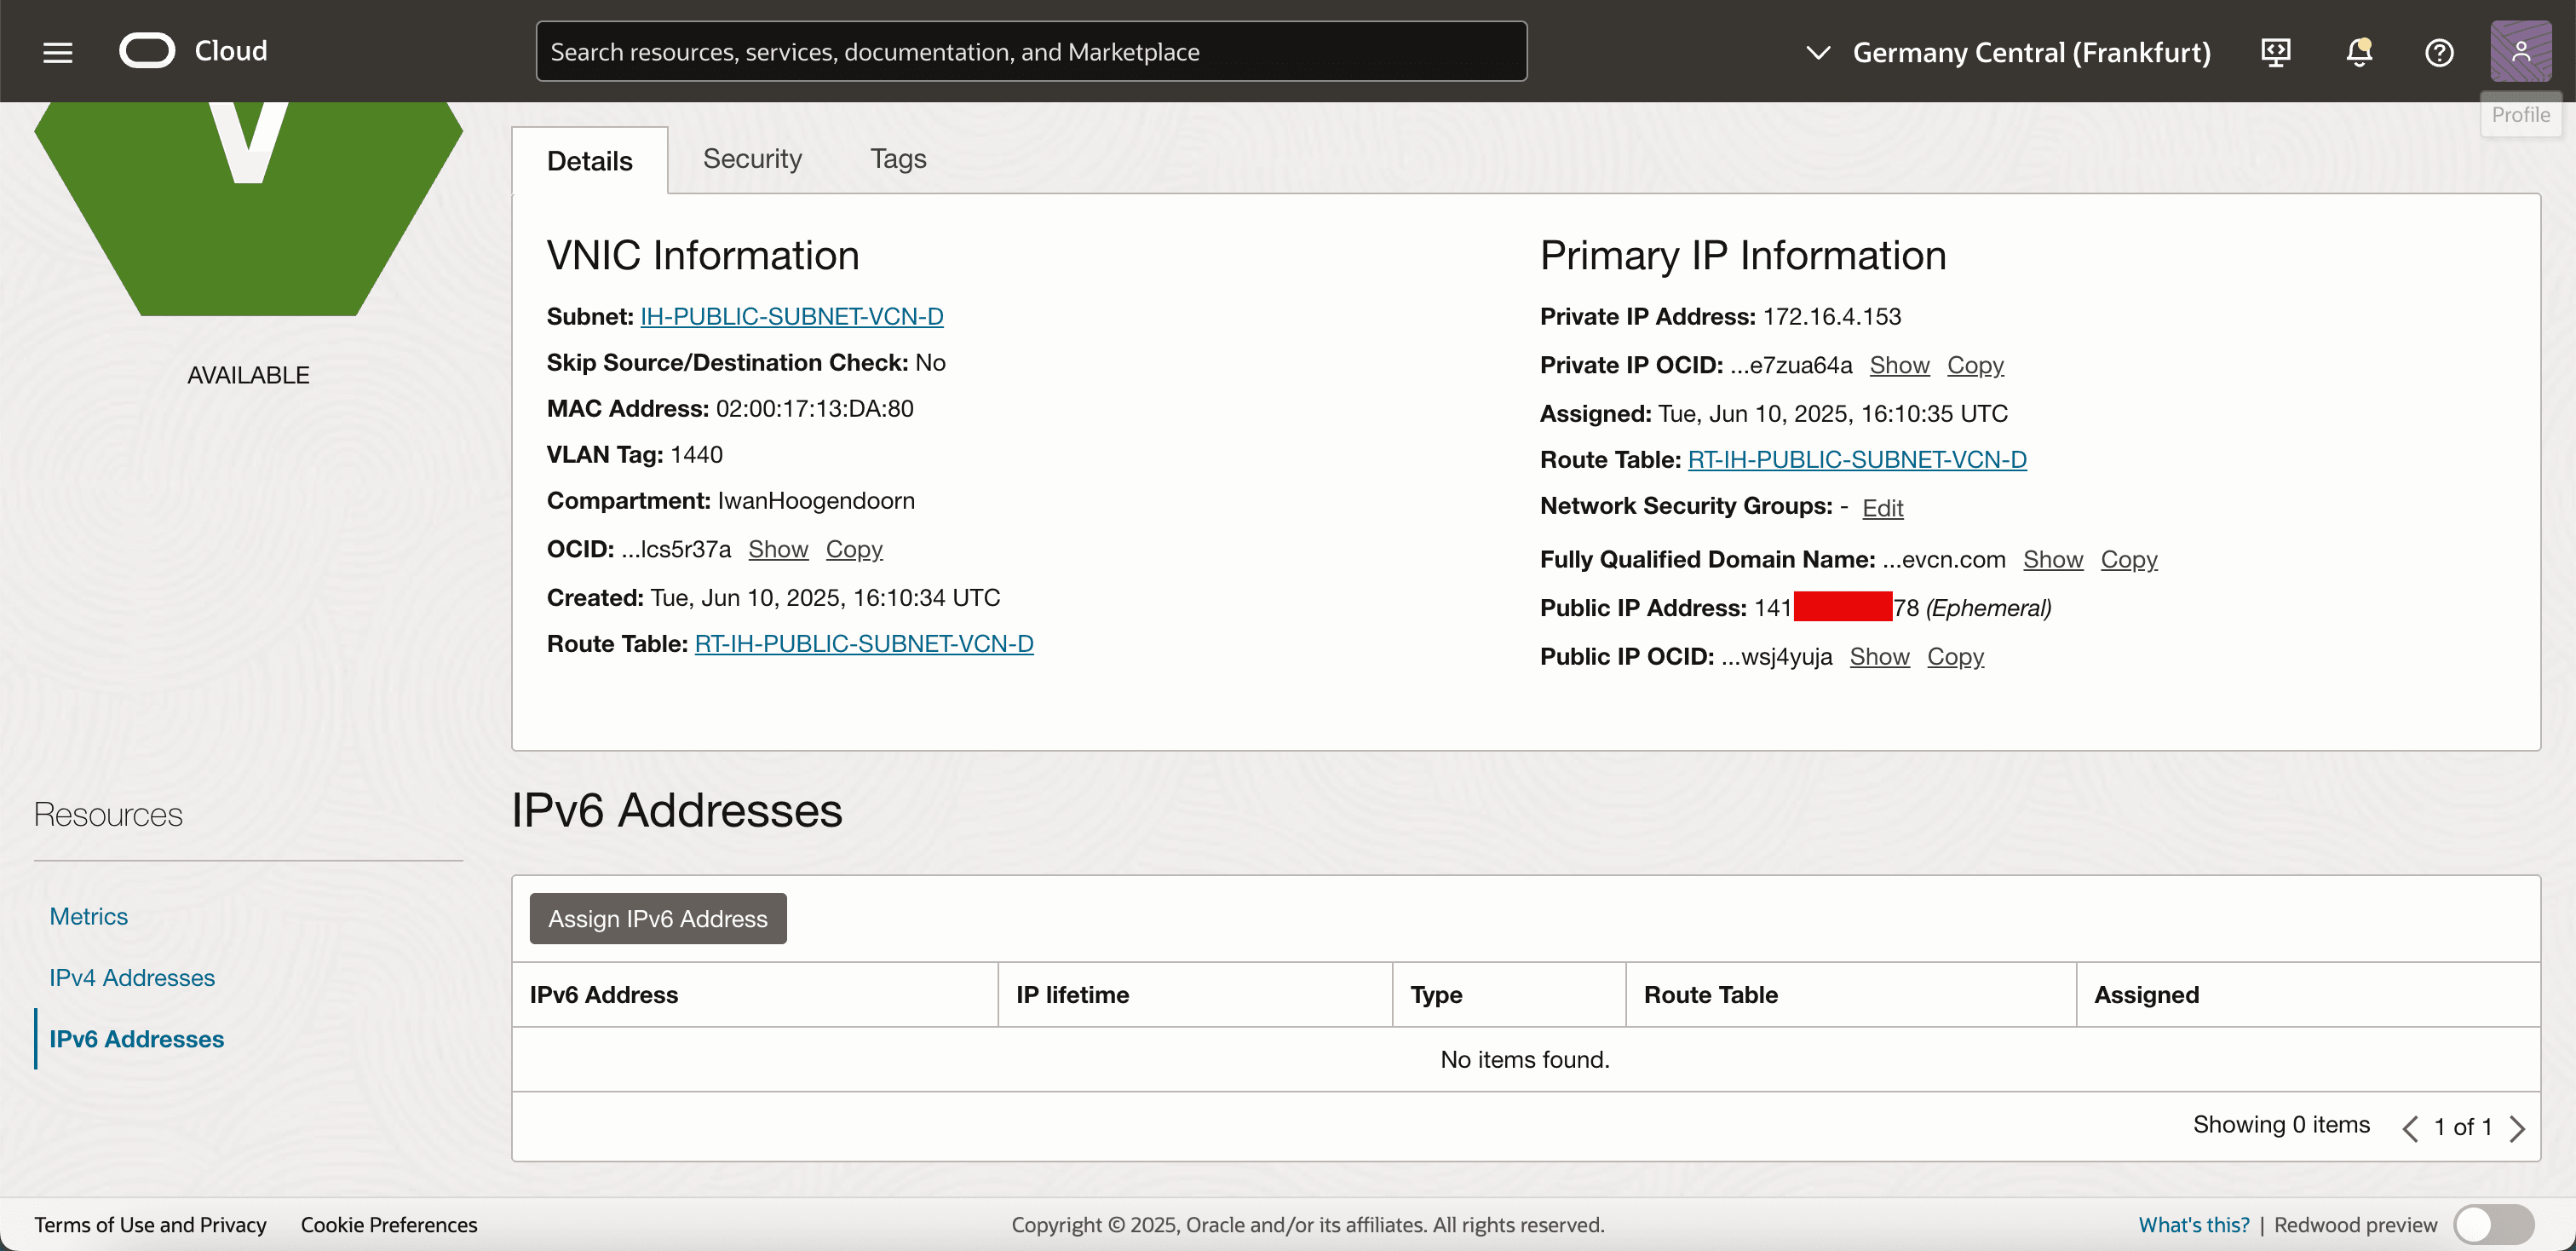
Click Attached VNICs and then click the existing VNIC of the instance.

-
Click IPv6 Addresses and Assign IPv6 Addresses.
-
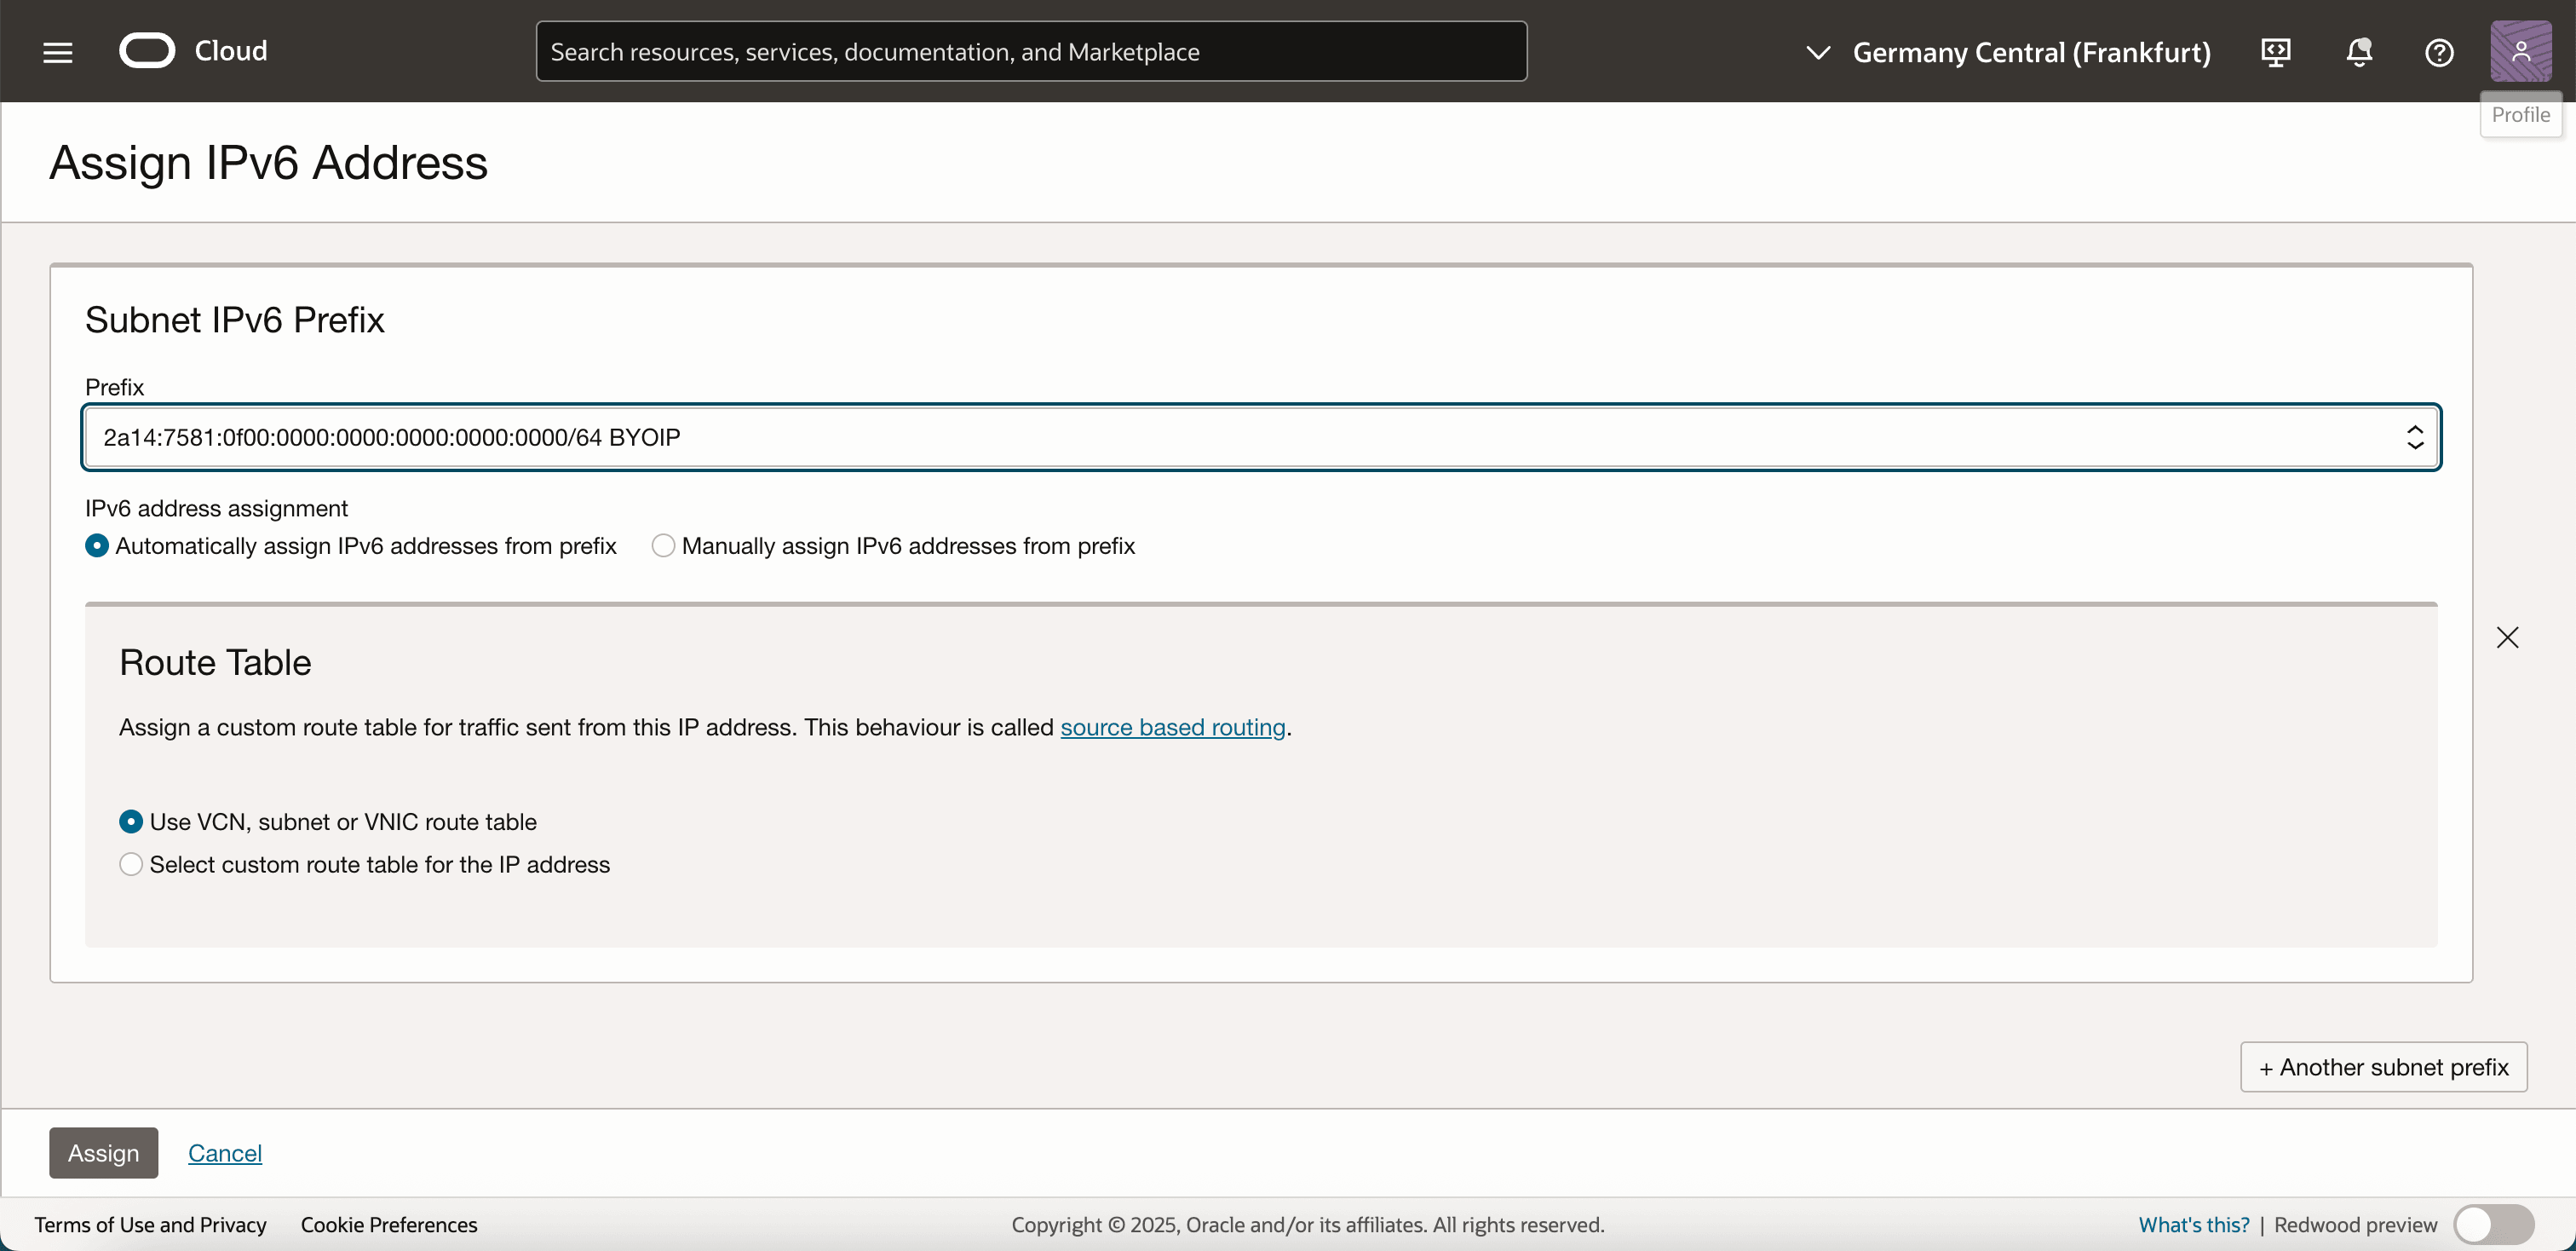
Enter the following information.
- Select the BYOIP IPv6 Prefix from the drop-down menu.
- Select Automatically assign IPv6 addresses from prefix.
- Click Assign.
-
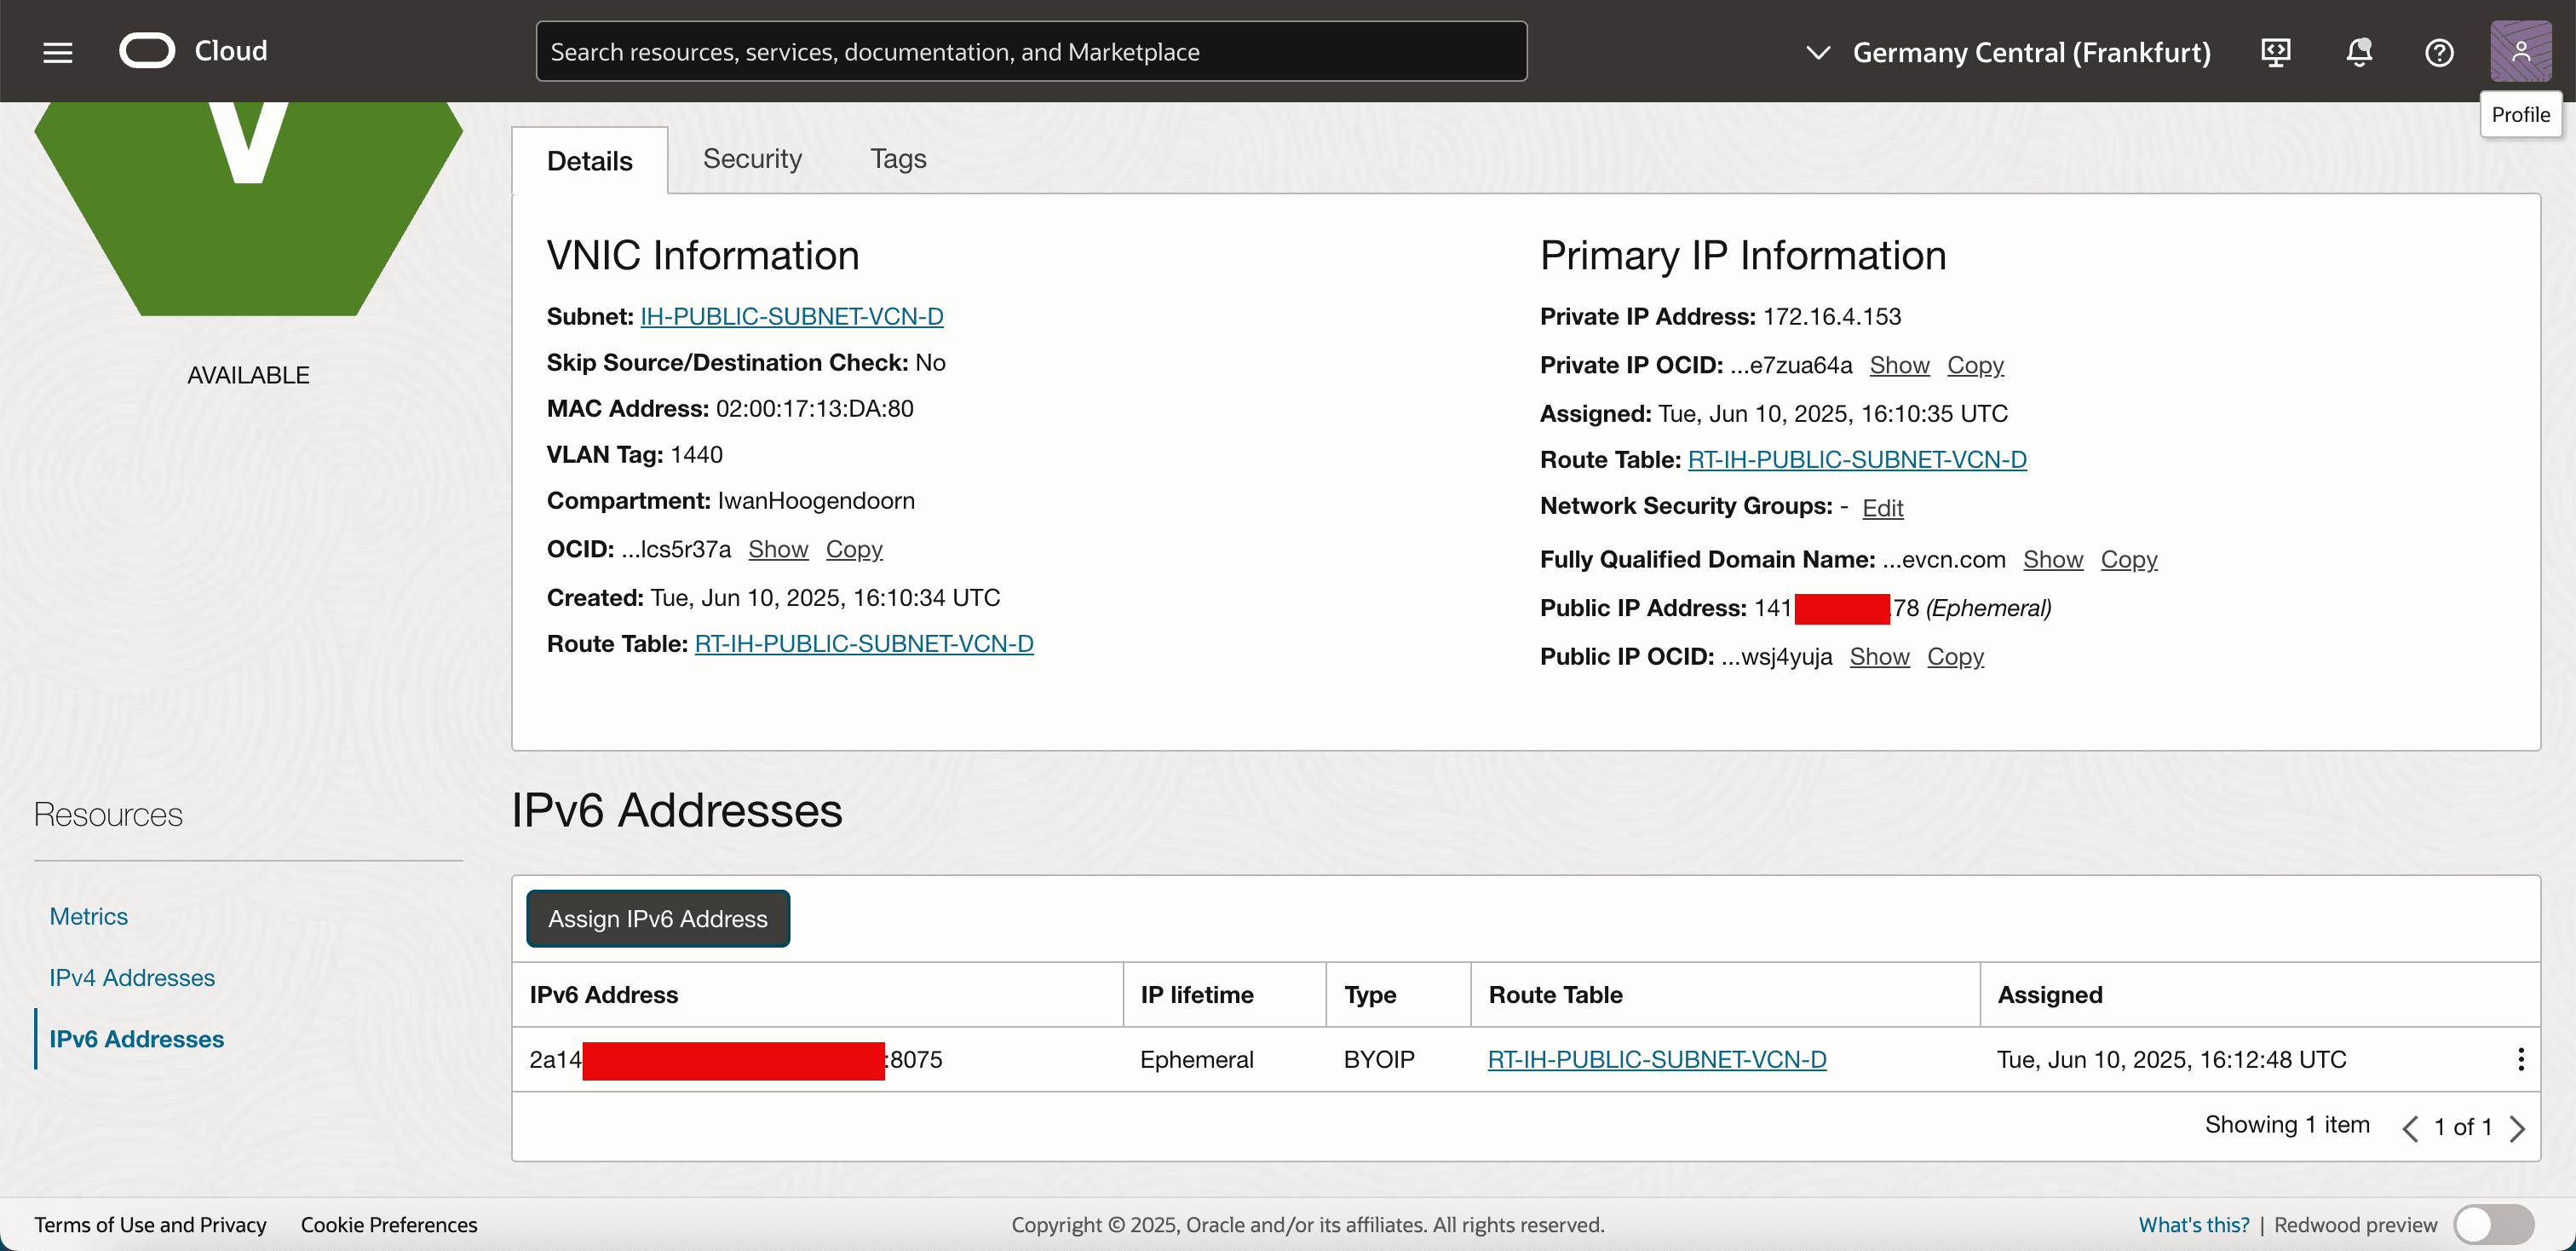
Note that a new IPv6 address has been assigned to VNIC.
-
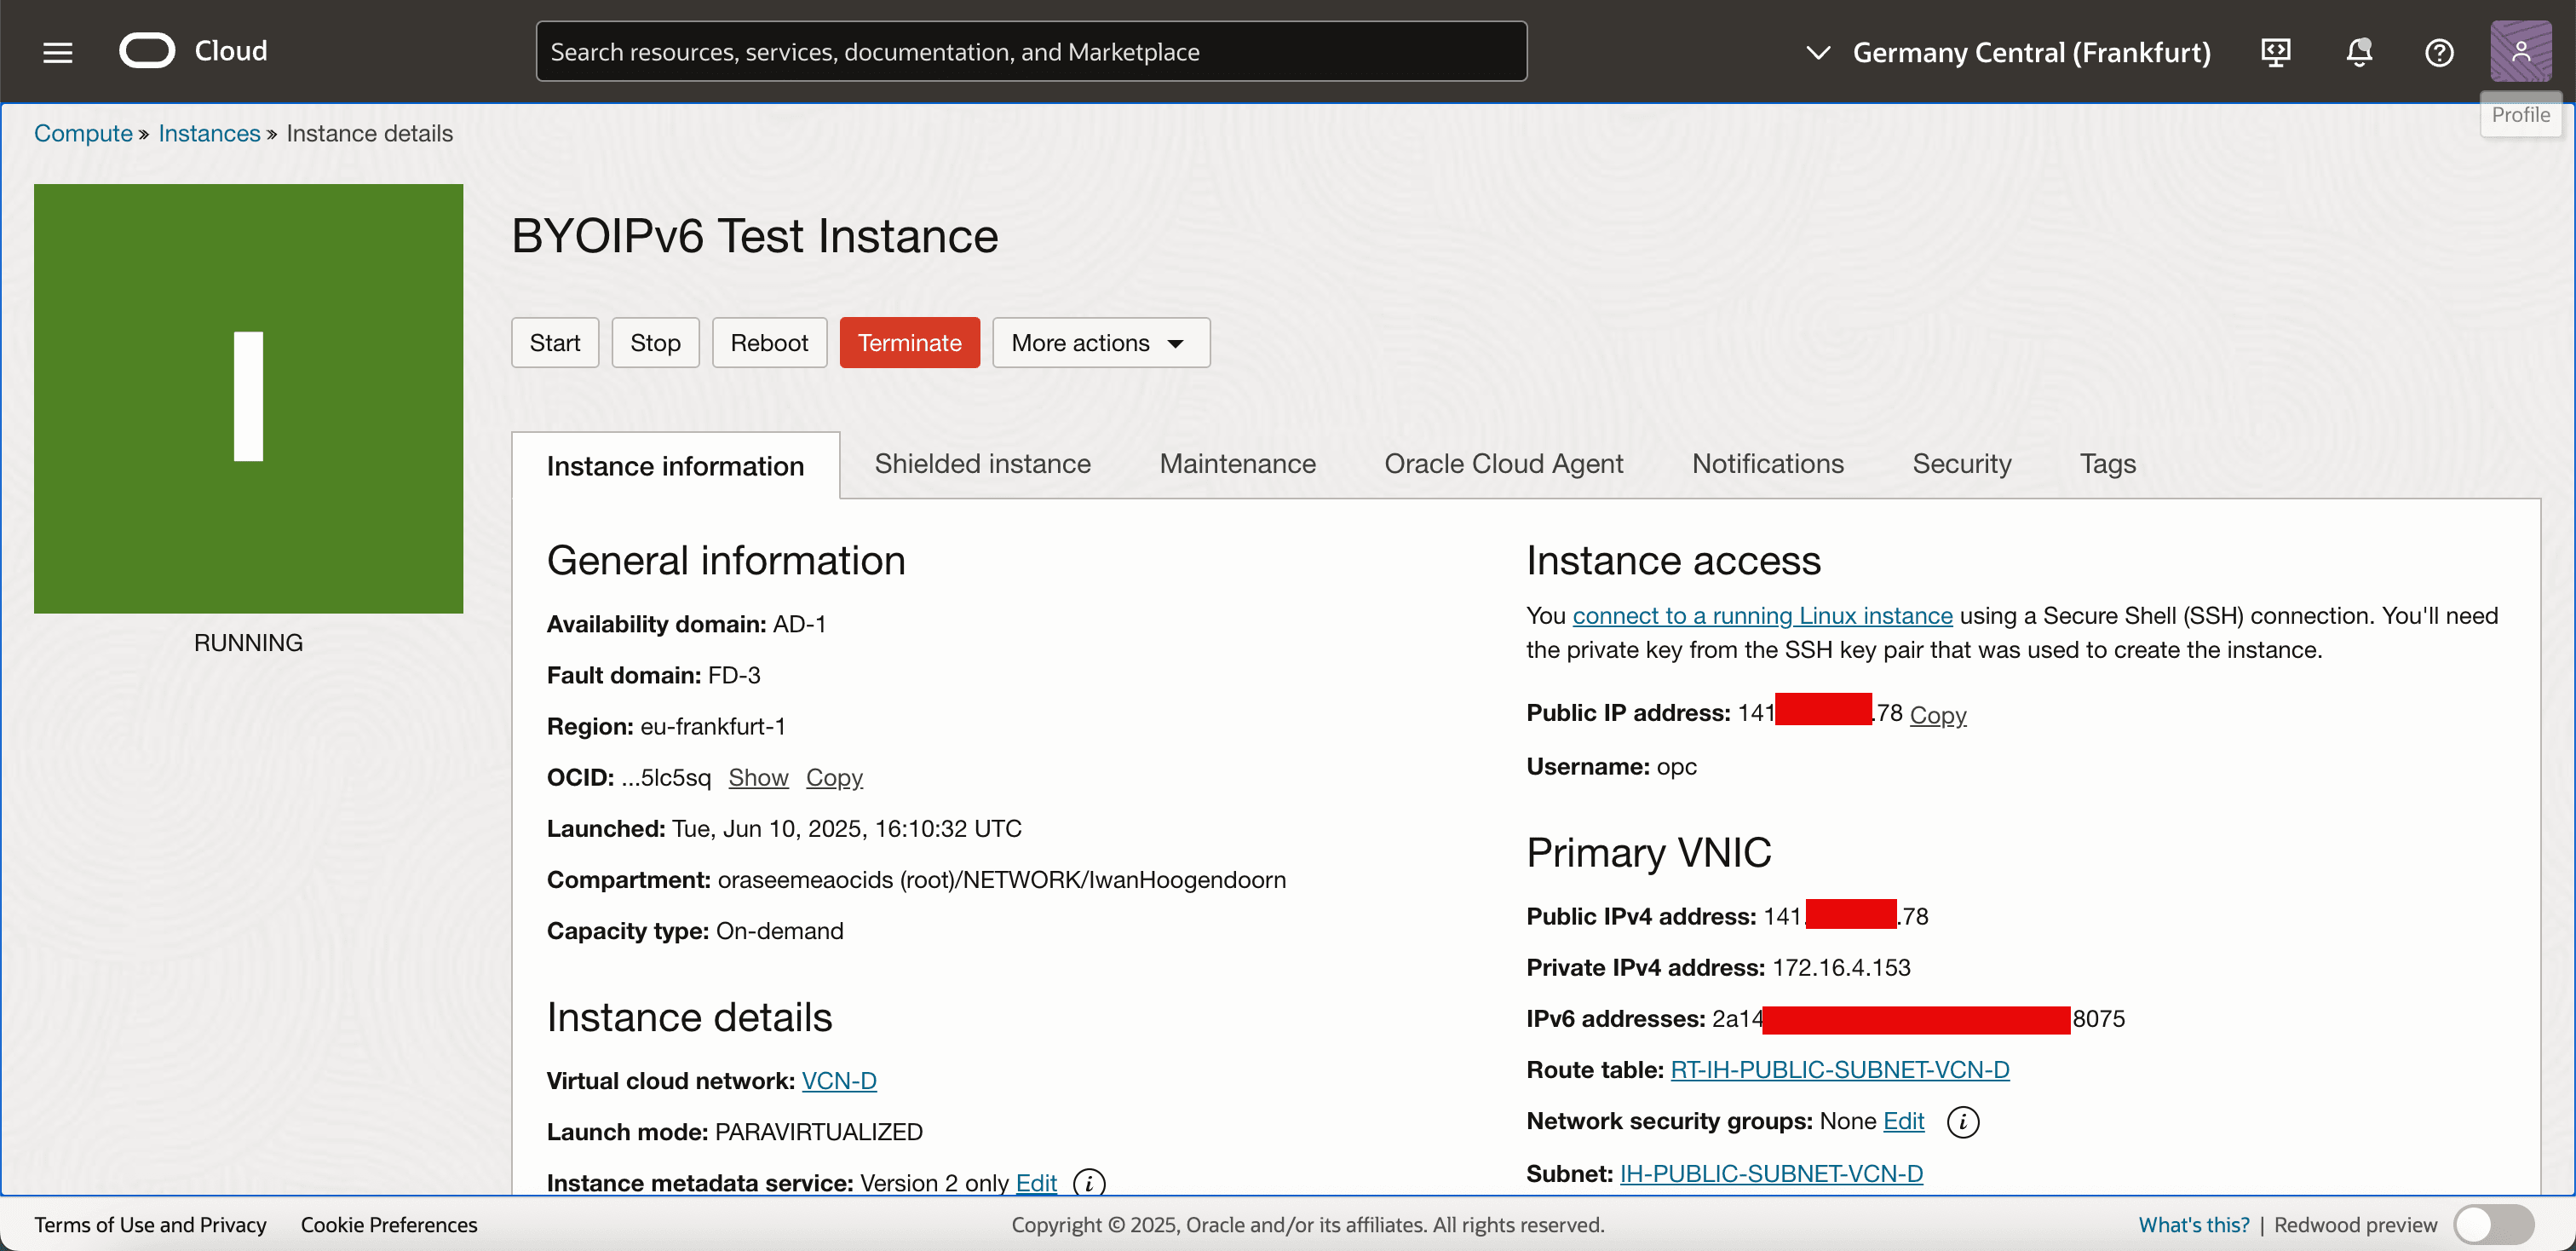
Go back to the details and note that the public IPv6 address from your BYOIP IPv6 range has been added.
-
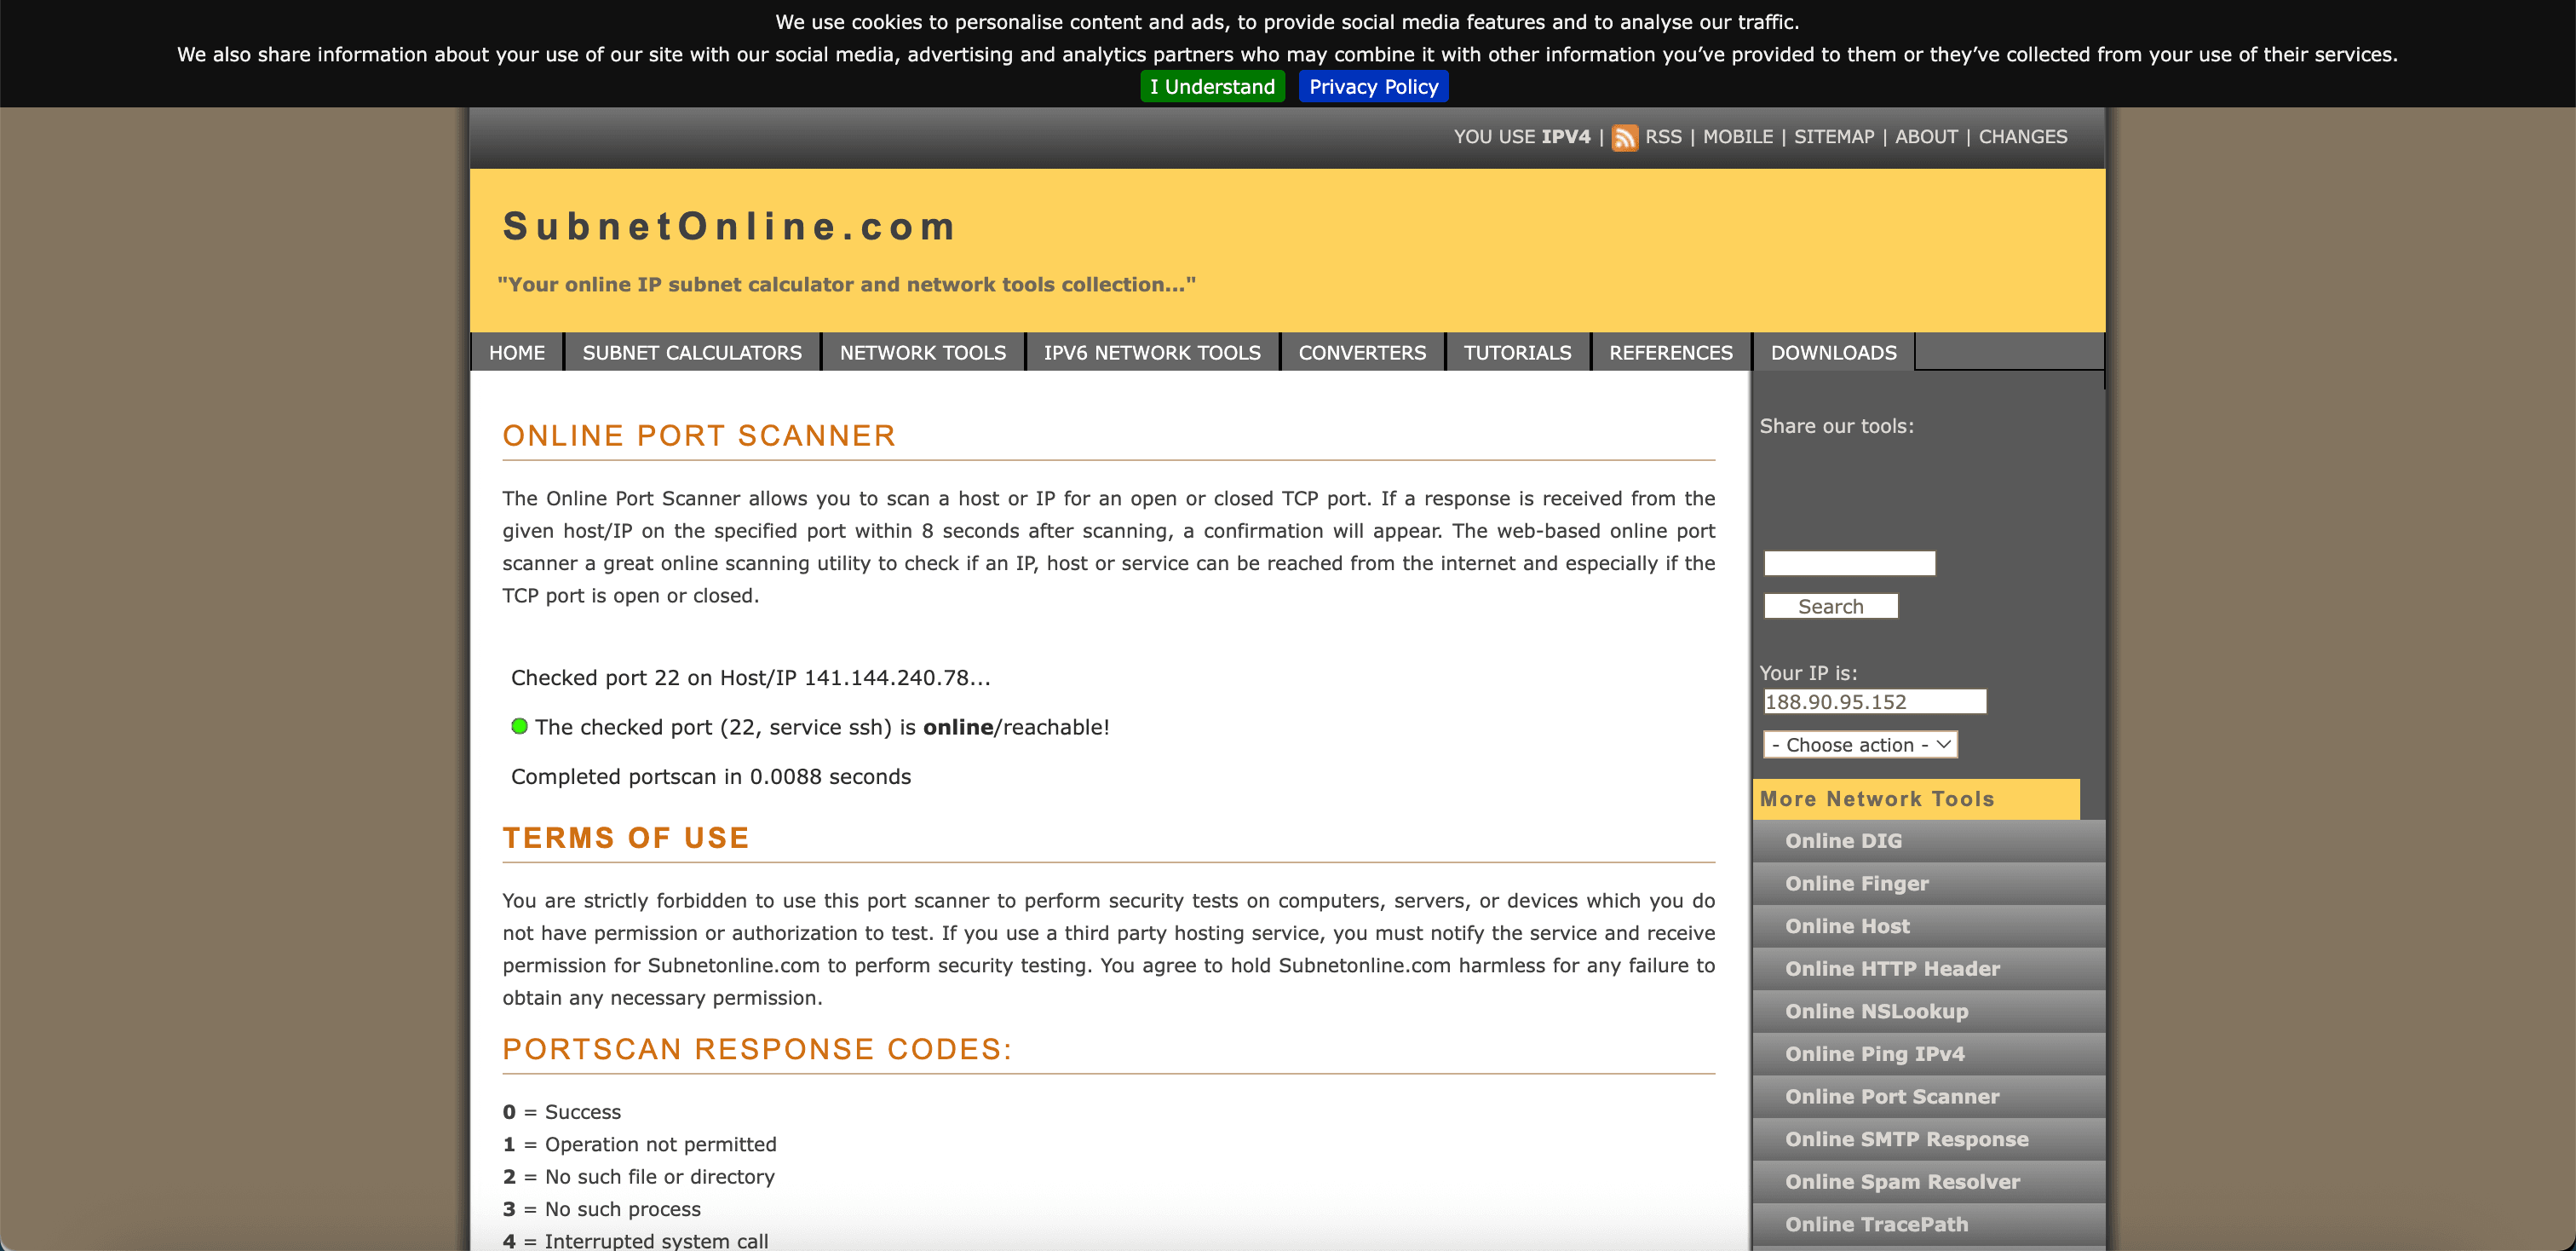
Go to an online IPv4 port scanner. For example, SubnetOnline. Use the public IPv4 address to verify what ports are open and notice that port TCP/22 is open.
-
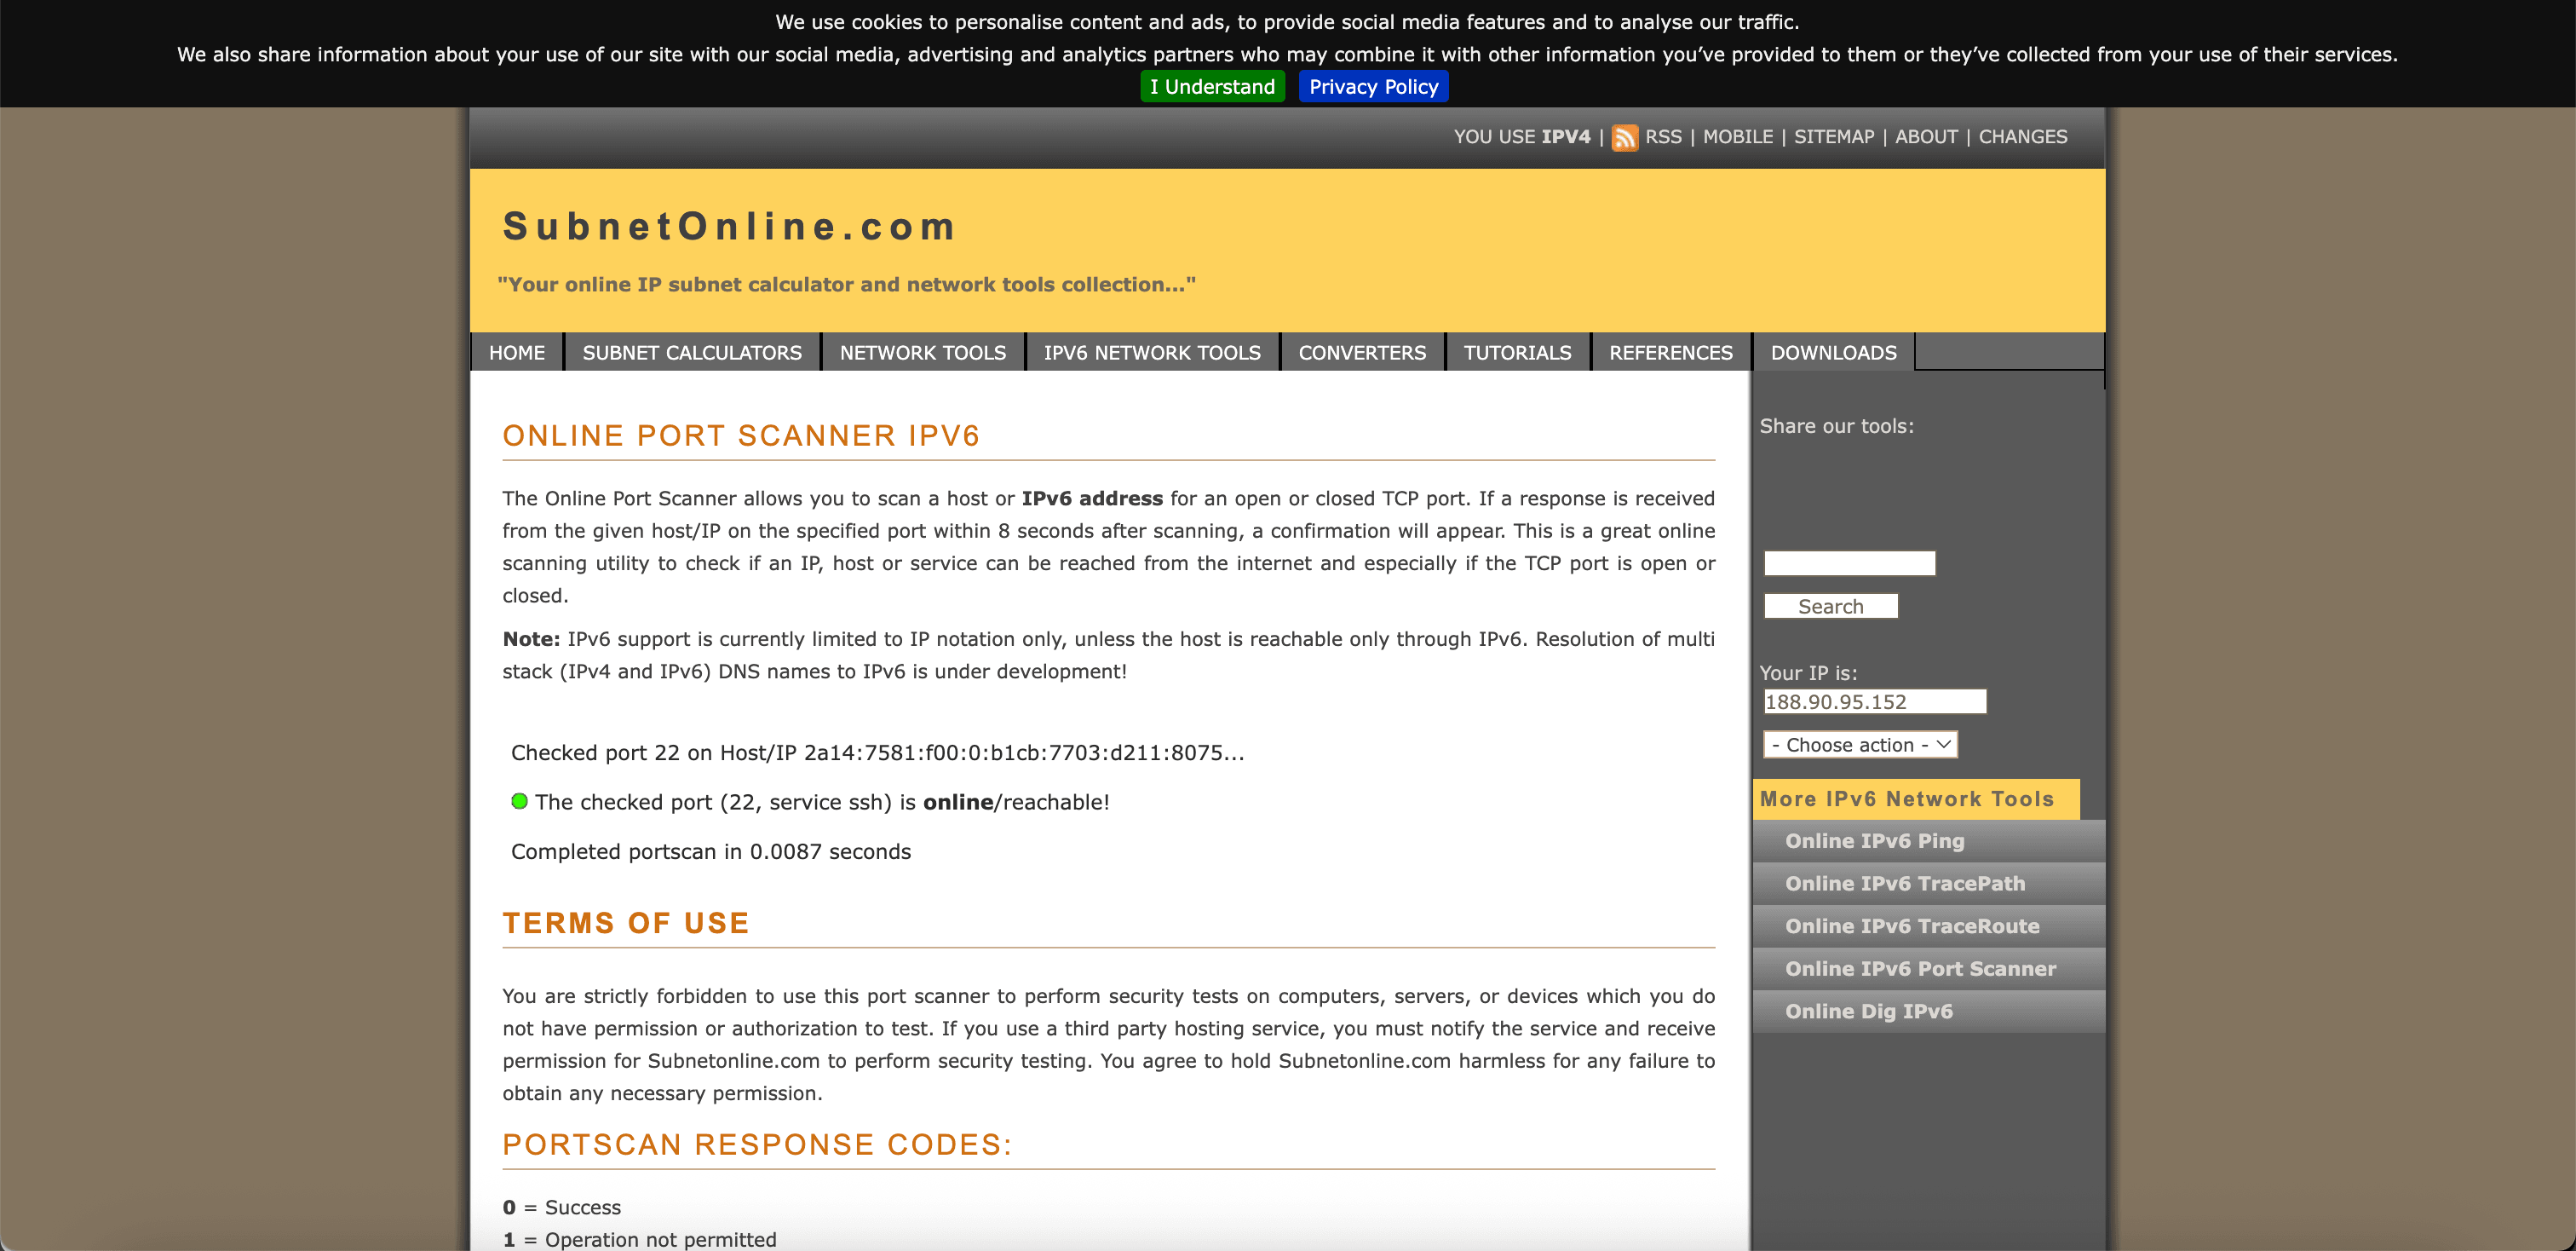
Go to an online IPv6 port scanner. For example, SubnetOnline.
-
Use the public IPv6 address to verify what ports are open.
-
Note that port TCP/22 is open.
-
This proves that our BYOIP IPv6 address is reachable from the Internet.
Note: Ensure your security lists or network security groups (NSGs) allow inbound and outbound IPv6 traffic. For example, ICMPv6, TCP port 22 for SSH, or other required ports.
-
-
We can also do one final check by logging in with SSH into the instance, we will connect to the public IPv4 address for now.
-
Run the
ip acommand. Note that the IPv6 address is configured on the instance.
You now have a fully functional OCI Compute instance using your own IPv6 address from a BYOIP CIDR, publicly routable and registered under your RIPE NCC administration.
Acknowledgments
- Author - Iwan Hoogendoorn (Cloud Networking Black Belt)
More Learning Resources
Explore other labs on docs.oracle.com/learn or access more free learning content on the Oracle Learning YouTube channel. Additionally, visit education.oracle.com/learning-explorer to become an Oracle Learning Explorer.
For product documentation, visit Oracle Help Center.
Configure BYOIP in Oracle Cloud Infrastructure Using an IPv6 CIDR from RIPE NCC
G38924-01
Copyright ©2025, Oracle and/or its affiliates.