Enable Inter-Database Access in OCI Database with PostgreSQL using the postgres_fdw and dblink Extensions
Introduction
Oracle Cloud Infrastructure Database with PostgreSQL (OCI Database with PostgreSQL) supports inter-database connectivity using extensions such as postgres_fdw and dblink. These extensions allow seamless access and data sharing across PostgreSQL databases, useful for analytics, federated queries, or legacy integration scenarios.
What is dblink.?
DBlink is a PostgreSQL extension that allows direct execution of SQL statements on a remote PostgreSQL database. It returns result sets as rows or executes commands on the remote server.
What is postgres_fdw.?
postgres_fdw (Foreign Data Wrapper) is a PostgreSQL extension that enables a database to connect to and query tables in a remote PostgreSQL server as if they were local tables. Unlike dblink, it maps remote tables as local objects and offers more procedural control.
In this tutorial, we will explore the setup of the postgres_fdw and dblink extensions in an OCI Database with PostgreSQL instance, along with examples for each.
Objectives
To enable secure and reliable network communication between two OCI Database with PostgreSQL database systems located in different Virtual Cloud Networks (VCNs) and different regions. This setup ensures that database connections work seamlessly across VCN boundaries. It includes configuring Local Peering Gateways (LPGs) for routing and setting up DNS resolution using private views. The goal is to support cross-VCN/cross-region connectivity for database extensions like postgres_fdw or dblink.
Prerequisites
- To create and manage the postgres_fdw or dblink extensions in an OCI Database with PostgreSQL database, the user must have:
- Database access privileges.
- The OCI_ADMIN_ROLE granted to user.
- OCI Database with PostgreSQL database systems (source and target) must have network connectivity.
Task 1: Enable the postgres_fdw and dblink Extension in OCI Database with PostgreSQL
-
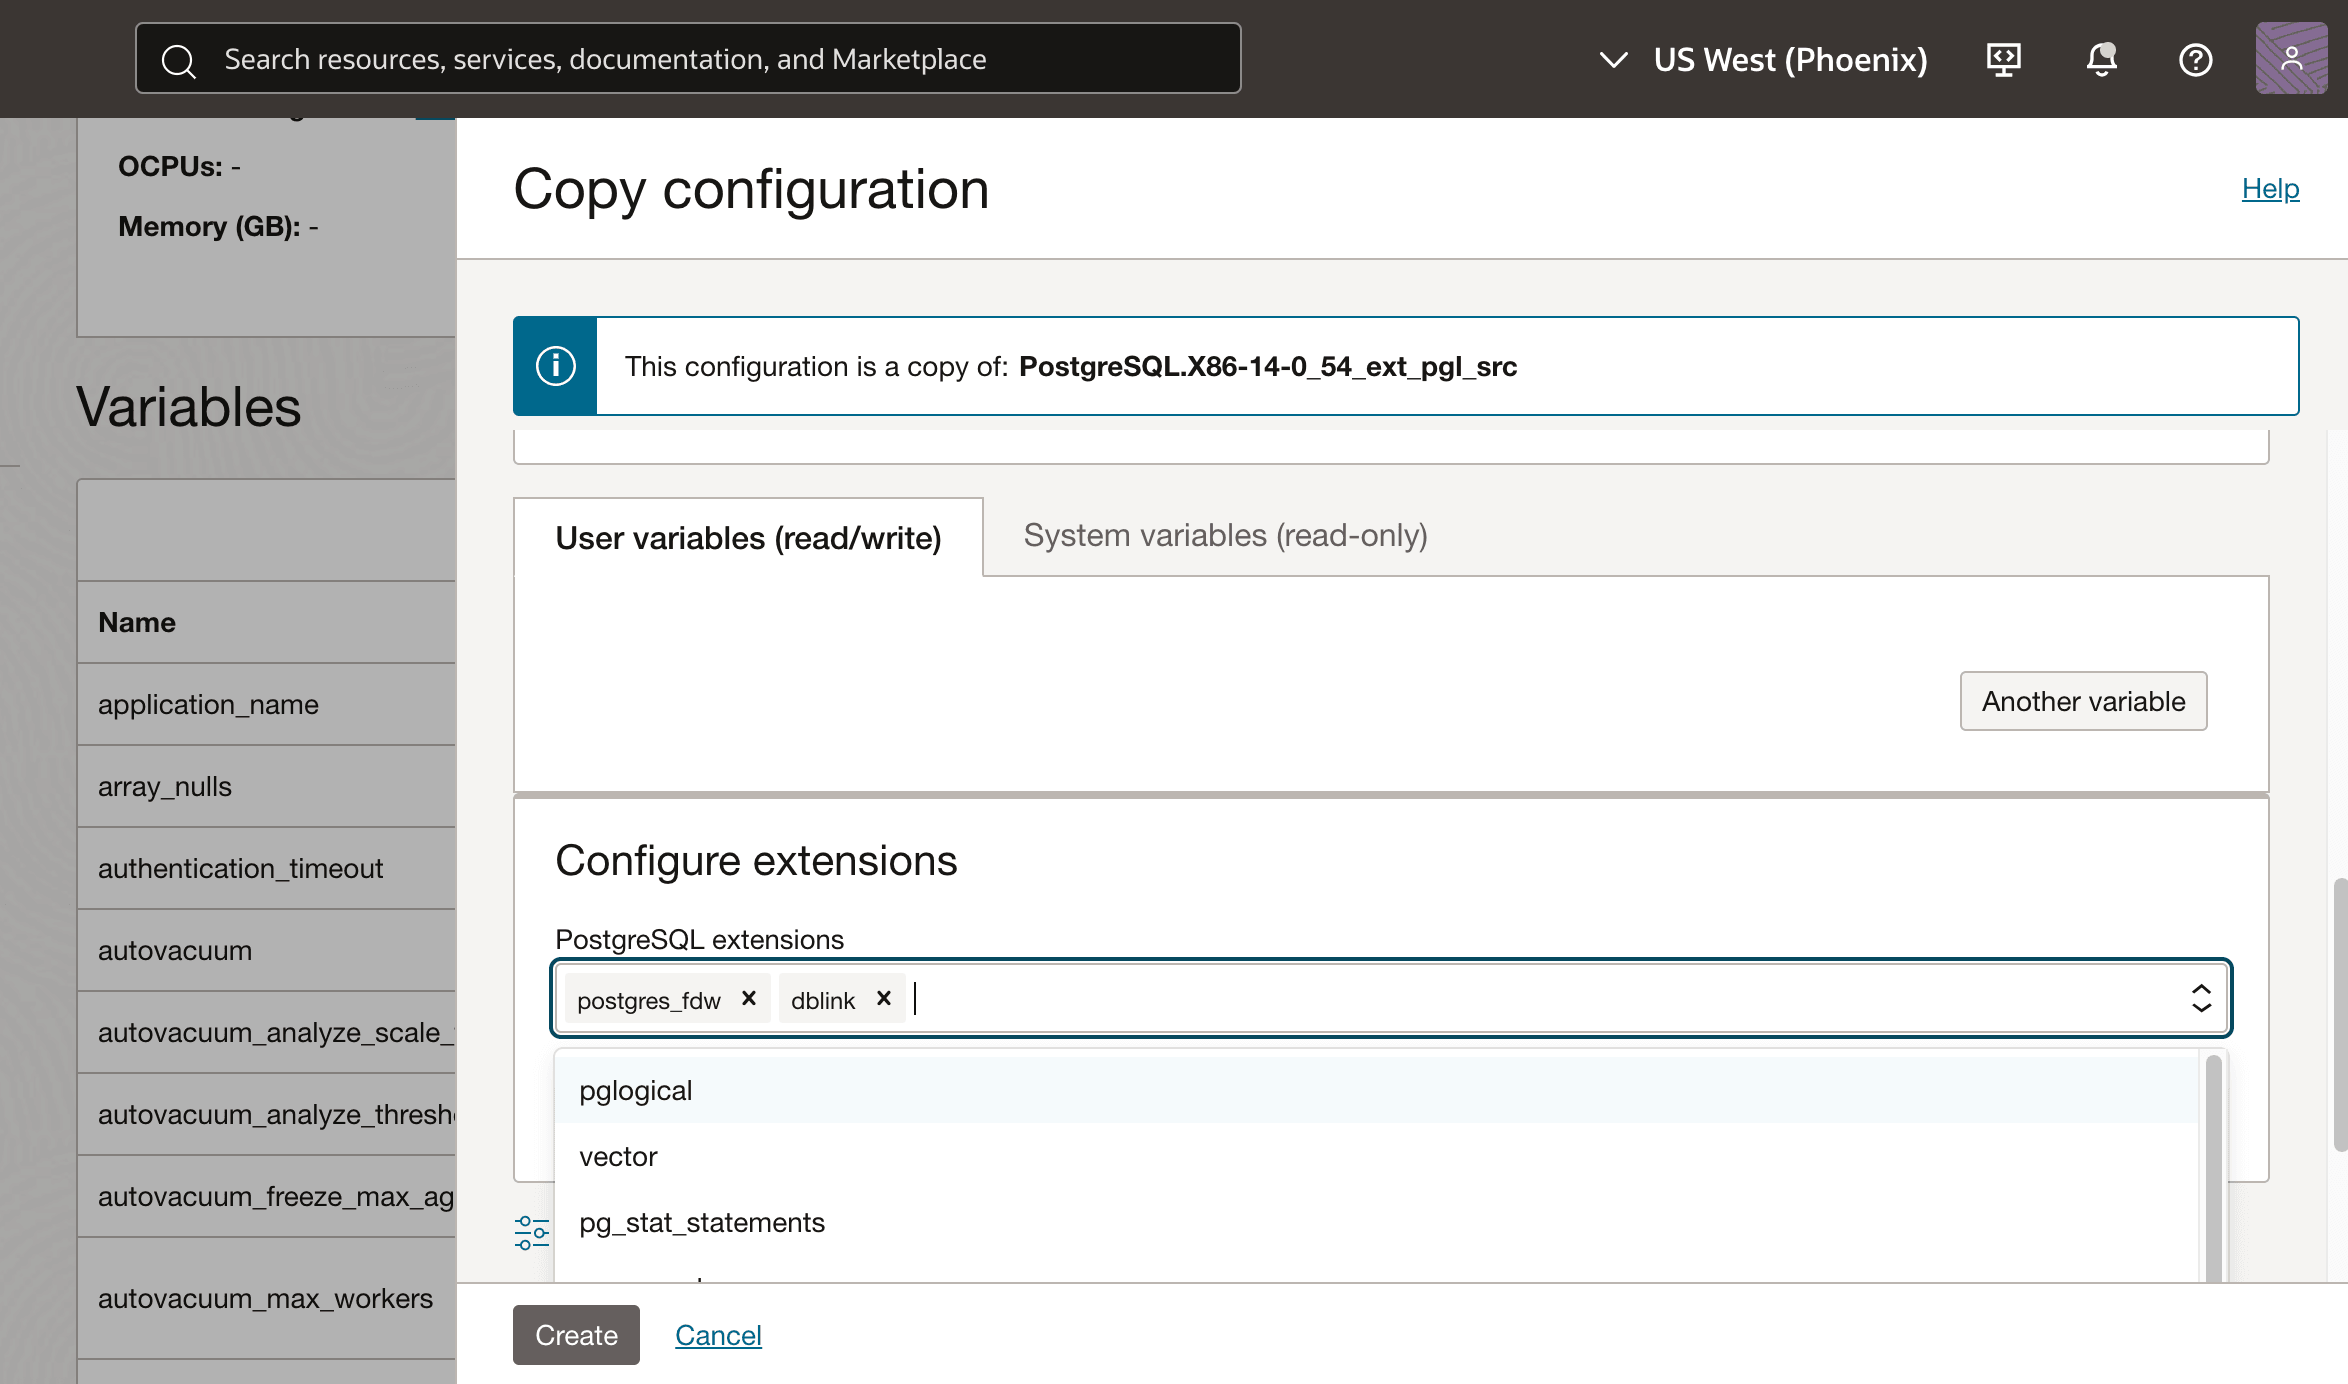
Enable the Extension from the OCI Console.
-
Create a configuration file enabling either for the dblink or postgres_fdw extension.

-
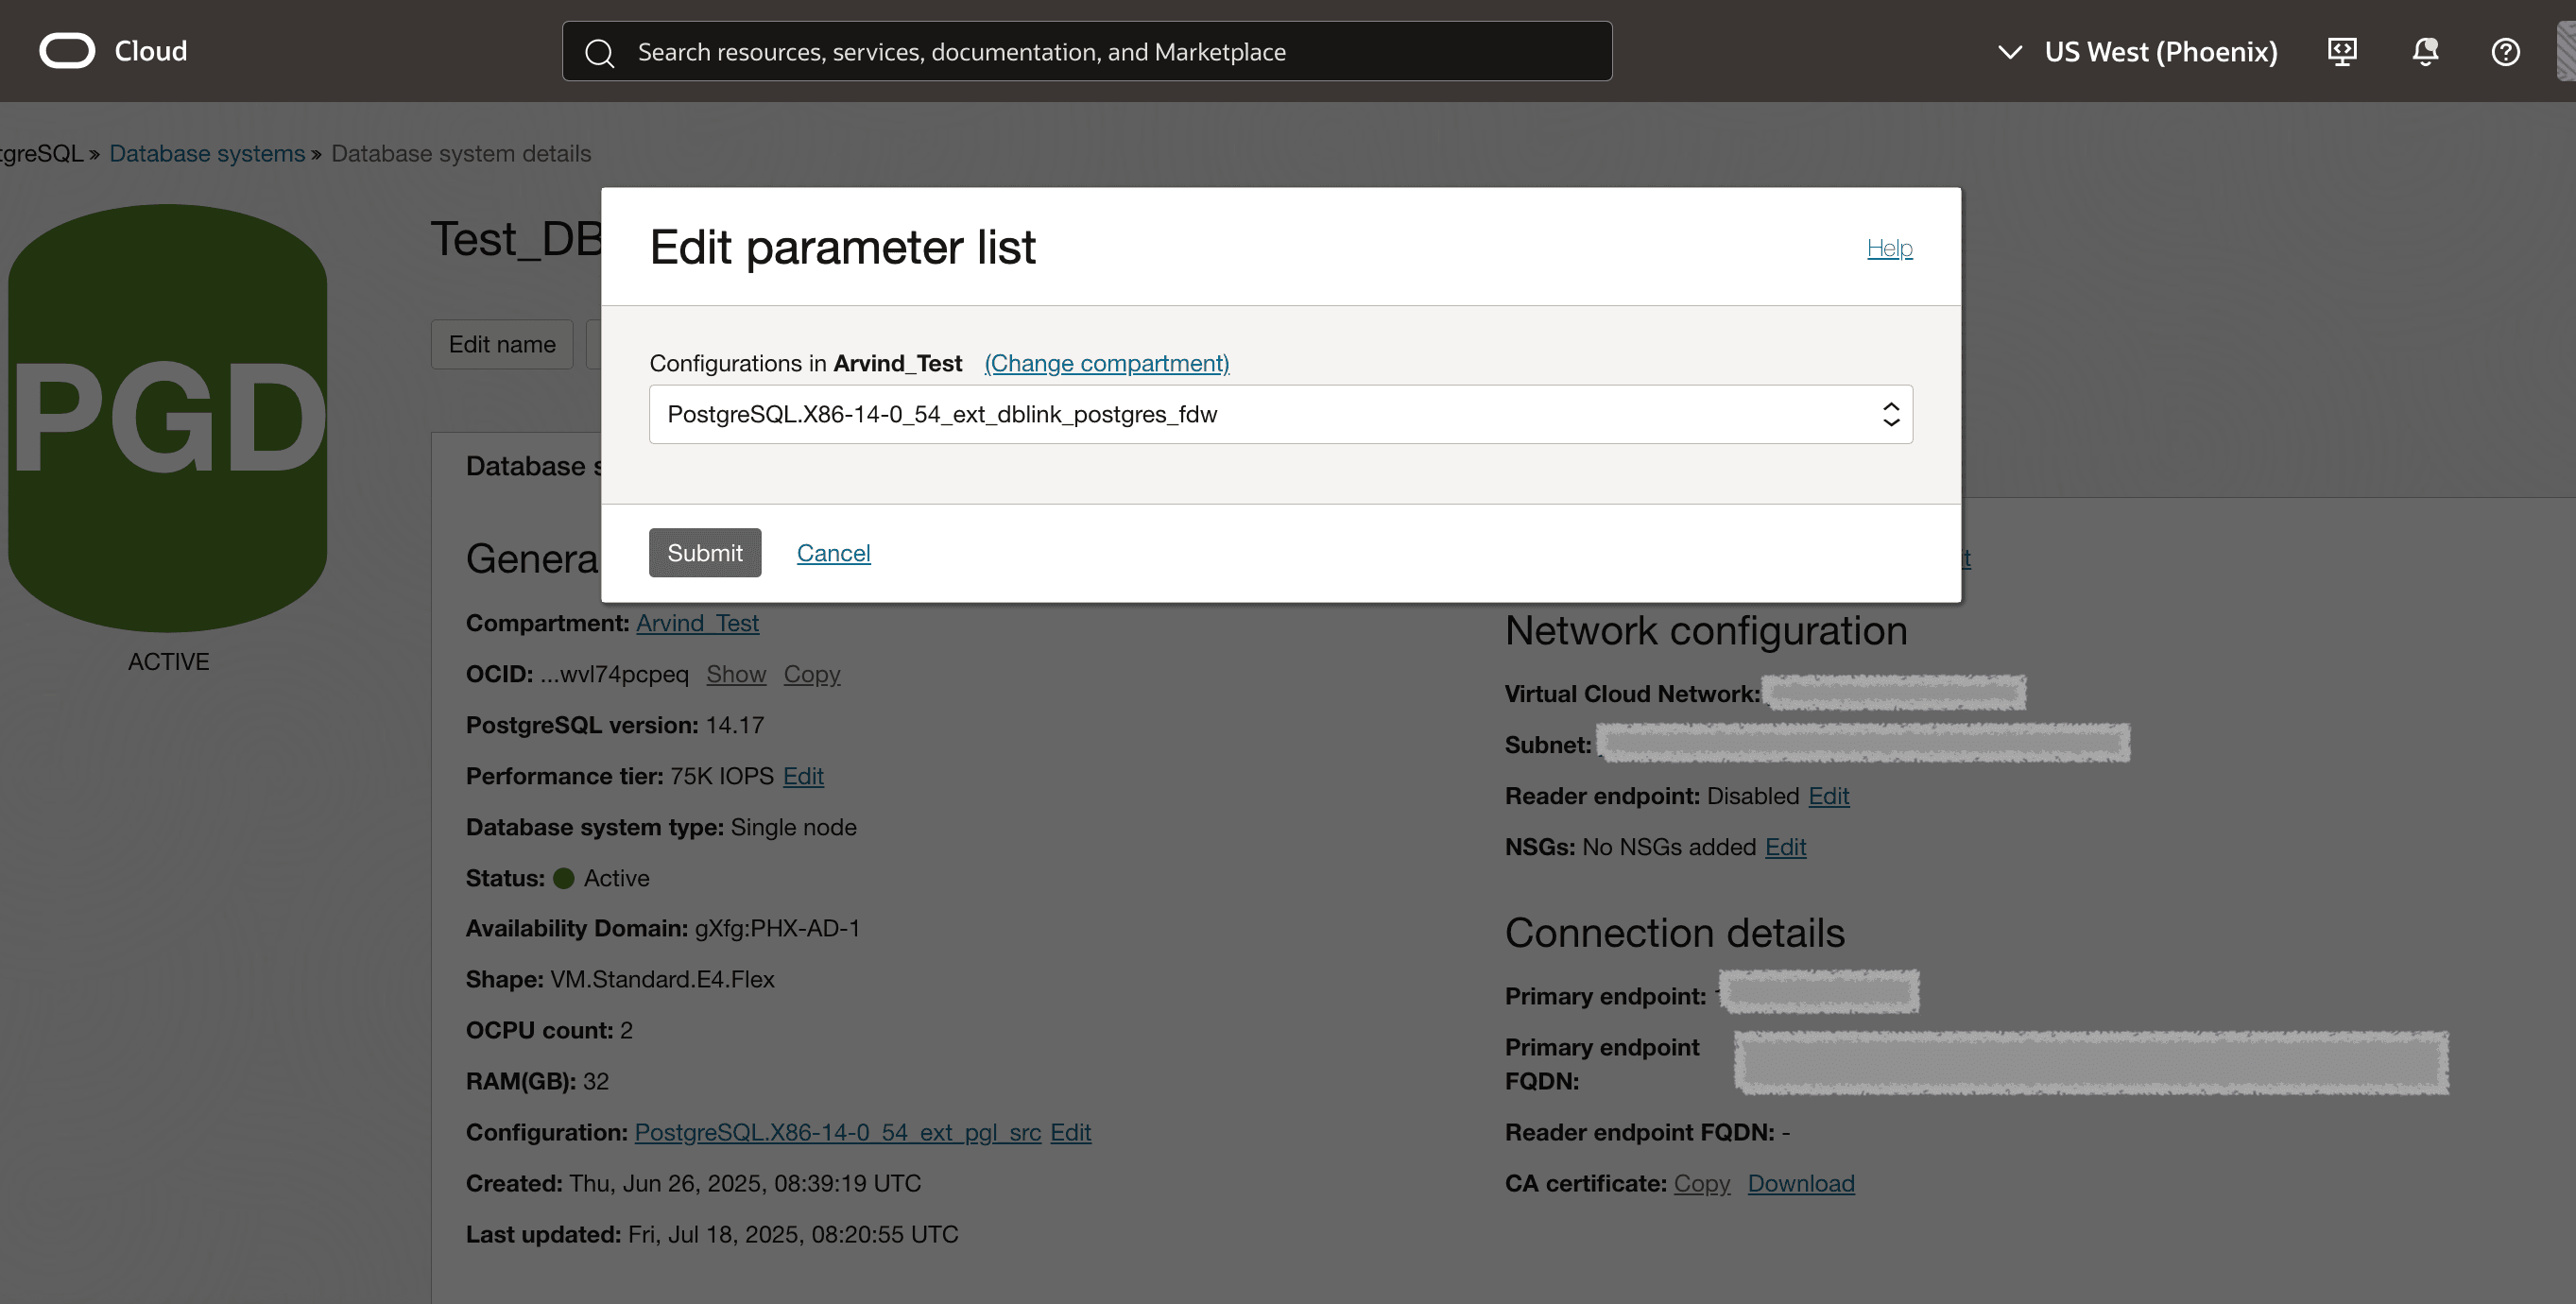
Apply the configuration to the database system.

-
-
Enable the Extension at the Database Level.
After enabling the extension in the OCI Console, connect to the database and run the following SQL command.
 CREATE EXTENSION postgres_fdw;

 CREATE EXTENSION dblink;
Task 2: Configure Network Connectivity Between Database Systems in Different VCNs
To enable communication between two OCI Database with PostgreSQL database systems located in different VCNs, follow the steps:
-
Create Local Peering Gateways (LPGs).
Create an LPG in each VCN to establish a peering connection between them.
-
Configure Route Tables.
-
For each VCN, update the route table associated with the LPG to include a route rule.
-
Set the destination CIDR block to the address range of the other target VCN, and specify the next hop as the corresponding LPG.
-
-
Set Up DNS Resolution Using Private Views.
-
Go to the OCI Console, search for Private Views to access the DNS configuration for both VCNs.
-
Open the private view of each VCN and create a zone entry.
-
-
Create a Zone Record for Each Database System.
In each VCN’s private view, add a zone that represents the Fully Qualified Domain Name (FQDN) of the database system in the other VCN.
-
Add DNS Records.
-
Click the three dot icon next to the new zone entry or click the FQDN link.
-
Select Manage Records and click Add Record.
-
Select Type A (IPv4 Address), set TTL to 500, and enter the Primary endpoint IP address of the target database system in the opposite VCN.
-
Click Add Record and then click Publish Changes.
-
Task 3: Configure Network Connectivity Between Database Systems in Different VCNs and Different Region
To enable communication between two OCI Database with PostgreSQL database systems located in different VCNs and different regions.
-
Create Dynamic Routing Gateways (DRGs).
Create a DRG in each region, attaching it to the respective VCN.
-
Configure Route Tables.
-
For each VCN, update the route table associated with the DRG.
-
Add a route rule with the destination CIDR block of the other VCN, specifying the next hop as the attached DRG.
-
-
Set Up DNS Resolution Using Private Views.
-
Go to the OCI Console, search for Private Views to access the DNS settings for each VCN.
-
Open the private view for each VCN and create a zone entry.
-
-
Create a Zone Record for Each Database System.
In each VCN’s private view, add a zone representing the FQDN of the database System in the other VCN.
-
Add DNS Records.
-
Click the three dot icon next to the new zone entry or click the FQDN link.
-
Select Manage Records and click Add Record.
-
Select Type A (IPv4 Address), set TTL to 500, and enter the Primary endpoint IP address of the opposite database system.
-
Click Add Record and then click Publish Changes.
-
Task 4: Configure the postgres_fdw extension with an example
-
Create Foreign Data Wrapper (FDW) Server.
The
CREATE SERVERcommand defines a foreign server namedfdw_servusing thepostgres_fdwwrapper. It specifies the connection details such as host, database name, and port of the source PostgreSQL database. This acts as a logical reference for accessing source data within the target PostgreSQL instance.CREATE SERVER <fdw_servername> FOREIGN DATA WRAPPER <fdw_servername> OPTIONS (host 'primary.xxxxxx.FQDN_Remote_source_DBSystem.... oci.oraclecloud.com', dbname 'remote_source_dbname', port '5432'); -
Map the User.
The
CREATE USER MAPPINGcommand associates a target PostgreSQL user (arvindya) with source database credentials. This allows target authentication when the target server connects to the defined foreign server. It ensures that queries executed target are properly authorized on the source server.CREATE USER MAPPING FOR <user_name> SERVER <fdw_servername> OPTIONS (user <user_name>, password <'user_password'>); -
Import Schema Source.
The
IMPORT FOREIGN SCHEMAcommand imports all tables from the public schema of the source server into the target database as foreign tables. These tables appear local but fetch data from the source database in real time.IMPORT FOREIGN SCHEMA <schema_name> FROM SERVER <fdw_server_name> INTO public;
For example:
-- Create extension
CREATE EXTENSION postgres_fdw;

-- Create FDW Server
CREATE SERVER fdw_serv FOREIGN DATA WRAPPER postgres_fdw OPTIONS (
    host 'primary.xxxxxx.Remote Source DBSystem FQDN.....xxxxx.oci.oraclecloud.com',
    dbname 'source',
    port '5432'
);

-- User Mapping
CREATE USER MAPPING FOR arvindya SERVER fdw_serv OPTIONS (
    user '<user_name>',
    password '<user_password>'
);

-- Import Schema from source
IMPORT FOREIGN SCHEMA public FROM SERVER fdw_serv INTO public;

-- Validate Data
SELECT * FROM emp;
Task 5: Configure the dblink extension with an example
The dblink_connect function establishes a connection from the target PostgreSQL database to a source PostgreSQL database using the provided connection string. It includes parameters such as database name, host, port, username, and password. The connection is identified by a unique name (myconn), which is used for subsequent dblink operations. A successful connection returns OK, indicating readiness for remote queries.
SELECT dblink_connect ('Conn_name', 'dbname=<Remote_source_DBName> port=5432 host=primary.xxxxxx..Remote_source_DbSystem FQDN..xxxx.oci.oraclecloud.com user=<user_name> password=<'user_password'>);
For example:
CREATE DATABASE target;
\c target
CREATE EXTENSION dblink;

-- Establish Connection
SELECT dblink_connect ('myconn', 'dbname=source port=5432 host=primary.xxxxxx..Remote_source_DbSystem FQDN..xxxx.oci.oraclecloud.com user=<user_name> password=<user_password>');

-- Select from Source
SELECT * FROM dblink('myconn', 'SELECT * FROM testing') AS t(a int);

-- Execute SQL remotely
SELECT * FROM dblink_exec('myconn', 'create table dblinking_table (id int)');
SELECT * FROM dblink_exec('myconn', 'insert into dblinking_table values(generate_series(1,10))');
SELECT * FROM dblink_exec('myconn', 'delete from dblinking_table where id <= 5');

-- Final Validation
SELECT * FROM dblink('myconn', 'SELECT * FROM dblinking_table') AS t(a int);
Related Links
Acknowledgments
- Author - Arvind Yadav (Principal Member Technical Staff)
More Learning Resources
Explore other labs on docs.oracle.com/learn or access more free learning content on the Oracle Learning YouTube channel. Additionally, visit education.oracle.com/learning-explorer to become an Oracle Learning Explorer.
For product documentation, visit Oracle Help Center.
Enable Inter-Database Access in OCI Database with PostgreSQL using the postgres_fdw and dblink Extensions
G40121-02