Enable Lazy Container Image Loadingin Oracle Cloud Infrastructure Kubernetes Engine (OKE) Using Stargz Store
Introduction
Lazy container image loading (sometimes called lazy pulling or on-demand image loading) is a technique that allows a container to start running before the full image is downloaded. Only the parts of the image needed at runtime are fetched, reducing startup time—especially for large images.
Normally, when you run a container:
- The container runtime (e.g., CRI-O, containerd) downloads the entire image from the registry.
- It unpacks all image layers.
- Only after all layers are downloaded and unpacked does the container start.
With lazy loading:
- The container starts immediately, using a virtual filesystem (the image is not locally present yet).
- When the application accesses a file, the runtime fetches just the required content from the remote registry on-demand.
- Additional files are downloaded only when actually used.
- The full container image is pulled in the background.
Container images need to be repacked to support lazy loading. Using the eStargz format, the image is repacked into small, independently decompressible chunks. This allows the container runtime to fetch only the necessary chunks when the container starts.
eStargz images contain a special file called a TOC (Table of Contents), which records metadata (e.g., name, file type, owners, offset) of all file entries in the eStargz layer, except the TOC itself. Container runtimes can use the TOC to mount the container’s filesystem without downloading the entire layer contents.
In this tutorial, you will learn how to:
- Repack an existing container image to use the Stargz format
- Configure Oracle Cloud Infrastructure Kubernetes Engine (OKE) CRI-O to use the Stargz Store plugin
- Run a sample workload to demonstrate the container startup time improvements
Prerequisites
- An Oracle Cloud Infrastructure (OCI) account with access to OKE
- A working OKE cluster
kubectlconfigured to access your OKE cluster- Docker or containerd installed locally
Setup
Rebuild the container image using nerdctl to use the eStargz format
-
Create an image repository in OCI Registry (OCIR). In this tutorial, the
tenancy-namespaceisidxzjcdxqjand we will create areponamedvllm/vllm-openai.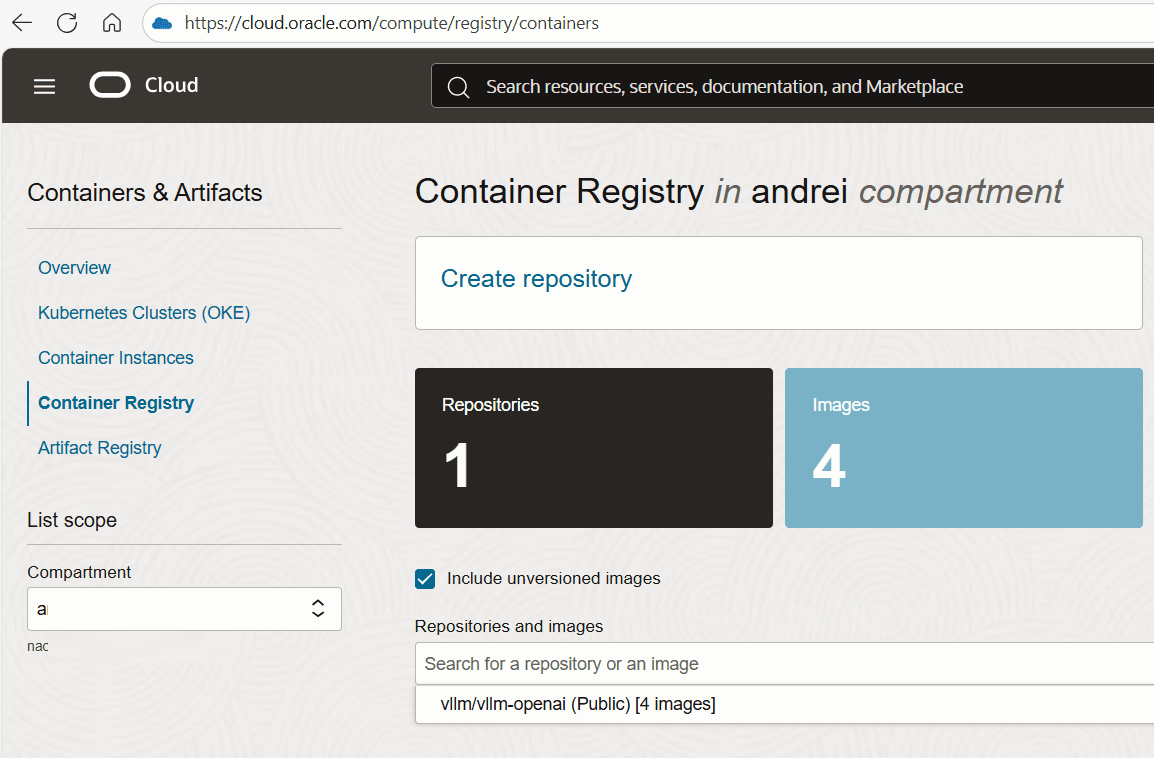
You can follow these instructions to authenticate to OCIR and create a new repository: Pushing Images Using the Docker CLI.
Make sure to replace
iad.ocir.iowith the OCIR domain of the OCI region you are working on. Here is a list of the region keys.docker login iad.ocir.io -
Download the latest version of nerdctl on the machine with Docker installed.
export NERDCTL_VERSION=2.2.2 wget https://github.com/containerd/nerdctl/releases/download/v${NERDCTL_VERSION}/nerdctl-${NERDCTL_VERSION}-linux-amd64.tar.gz tar -xf nerdctl-${NERDCTL_VERSION}-linux-amd64.tar.gz -
Authenticate
nerdctlto OCIR../nerdctl login iad.ocir.io -
Convert the vllm container image to the eStargz format.
./nerdctl image convert --estargz --oci docker.io/vllm/vllm-openai:v0.11.0 iad.ocir.io/idxzjcdxqj/vllm/vllm-openai:v0.11.0-esgz -
Push the eStargz vllm container image to OCIR.
./nerdctl image push iad.ocir.io/idxzjcdxqj/vllm/vllm-openai:v0.11.0-esgz -
You can use docker to pull/push the regular image to OCIR using docker.
docker image pull docker.io/vllm/vllm-openai:v0.11.0
docker image tag docker.io/vllm/vllm-openai:v0.11.0 iad.ocir.io/idxzjcdxqj/vllm/vllm-openai:v0.11.0-regular
docker image push iad.ocir.io/idxzjcdxqj/vllm/vllm-openai:v0.11.0-regular
Install Stargz Store Plugin on the OKE Nodes
Considering OKE uses CRI-O, we need to set up the Stargz Store plugin. This is an implementation of an additional layer store plugin for CRI-O/Podman. Stargz Store provides remotely-mounted eStargz layers to CRI-O/Podman.
-
SSH into one of the worker nodes and download the latest version from the stargz-snapshotter Github page.
export STARGZ_SNAPSHOTTER_VERSION=v0.18.2 wget https://github.com/containerd/stargz-snapshotter/releases/download/${STARGZ_SNAPSHOTTER_VERSION}/stargz-snapshotter-${STARGZ_SNAPSHOTTER_VERSION}-linux-amd64.tar.gz -
Extract the
stargz-storeto/usr/local/bin.tar -C /usr/local/bin -xvf stargz-snapshotter-v0.18.2-linux-amd64.tar.gz stargz-store -
Update the
/etc/containers/storage.conffile to includeadditionallayerstoresin the[storage.options]section.[storage] driver = "overlay" graphroot = "/var/lib/containers/storage" runroot = "/run/containers/storage" [storage.options] additionallayerstores = ["/var/lib/stargz-store/store:ref"] -
Ensure
fuseis installed and loaded.apt-get install fuse modprobe fuse -
Enable the
stargz-storeservice.wget -O /etc/systemd/system/stargz-store.service https://raw.githubusercontent.com/containerd/stargz-snapshotter/main/script/config-cri-o/etc/systemd/system/stargz-store.service systemctl daemon-reload systemctl restart stargz-store crio -
Confirm
crioandstargz-storeservices are running.systemctl status stargz-store systemctl status crio
Evaluate the performance
-
Update the
nodeNameandimagein the manifest below and create the test deployments:kubectl apply -f - <<EOF --- apiVersion: apps/v1 kind: Deployment metadata: name: test-estargz-cpu namespace: default labels: app: test-estargz spec: strategy: type: Recreate replicas: 1 selector: matchLabels: app: test-estargz template: metadata: labels: app: test-estargz spec: containers: ## Update the image to your own container repository - image: iad.ocir.io/idxzjcdxqj/vllm/vllm-openai:v0.11.0-esgz name: test command: ["/bin/bash", "-c", "echo started && sleep infinity"] ## Replace the nodename with the name of the node where stargz-store is configured. nodeName: 10.140.34.52 tolerations: - key: nvidia.com/gpu operator: Exists effect: NoSchedule --- apiVersion: apps/v1 kind: Deployment metadata: name: test-regular-cpu namespace: default labels: app: test-regular spec: strategy: type: Recreate replicas: 1 selector: matchLabels: app: test-regular template: metadata: labels: app: test-regular spec: containers: ## Update the image to your own container repository - image: iad.ocir.io/idxzjcdxqj/vllm/vllm-openai:v0.11.0-regular name: test command: ["/bin/bash", "-c", "echo started && sleep infinity"] env: - name: HF_HOME value: "/workspace" ## Replace the nodename with the name of the node where stargz-store is configured. nodeName: 10.140.34.52 tolerations: - key: nvidia.com/gpu operator: Exists effect: NoSchedule EOF -
Monitor the container start time.
kubectl get pods -w -
Cleanup resources.
kubectl delete deploy test-regular-cpu kubectl delete deploy test-estargz-cpu -
For a test deployment using the GPU, update the
nodeNameandimagein this yaml manifest and apply it using the command below:kubectl apply -f test-manifest-gpu.yaml
Results
The following results are based on tests executed on a BM.GPU4.8 shape using a 30B parameters large language model.
-
Pod start time is
33sfor eStargz and4mfor regular image.$ kubectl get pods -w NAME READY STATUS RESTARTS AGE test-estargz-5699988945-2zxmh 0/1 ContainerCreating 0 8s test-regular-55fbdf64c8-hn6hg 0/1 ContainerCreating 0 7s test-estargz-5699988945-2zxmh 1/1 Running 0 33s test-regular-55fbdf64c8-hn6hg 1/1 Running 0 4m -
Application starts on the pod using the eStargz image in
1m27s.INFO 12-11 07:59:02 [__init__.py:216] Automatically detected platform cuda. (APIServer pid=1) INFO 12-11 07:59:26 [api_server.py:1839] vLLM API server version 0.11.0 (APIServer pid=1) INFO 12-11 07:59:26 [utils.py:233] non-default args: {'model_tag': 'cpatonn/Qwen3-30B-A3B-Instruct-2507-AWQ-4bit', 'max_model_len': 8192, 'enforce_eager': True} ... (APIServer pid=1) INFO 12-11 08:00:29 [launcher.py:42] Route: /metrics, Methods: GET (APIServer pid=1) INFO: Started server process [1] (APIServer pid=1) INFO: Waiting for application startup. (APIServer pid=1) INFO: Application startup complete. -
Application starts on the pod using the regular image in
32s.INFO 12-11 08:01:19 [__init__.py:216] Automatically detected platform cuda. (APIServer pid=1) INFO 12-11 08:01:22 [api_server.py:1839] vLLM API server version 0.11.0 (APIServer pid=1) INFO 12-11 08:01:22 [utils.py:233] non-default args: {'model_tag': 'cpatonn/Qwen3-30B-A3B-Instruct-2507-AWQ-4bit', 'max_model_len': 8192, 'enforce_eager': True} ... (APIServer pid=1) INFO 12-11 08:01:51 [launcher.py:42] Route: /metrics, Methods: GET (APIServer pid=1) INFO: Started server process [1] (APIServer pid=1) INFO: Waiting for application startup. (APIServer pid=1) INFO: Application startup complete. -
The pod using the eStargz image is ready to serve traffic
1m22sfaster than the regular one.
Conclusions
The implementation of lazy image pulling using eStargz format in OKE demonstrates significant improvements in pod initialization time, reducing container startup from 4 minutes to just 33 seconds, an 87% reduction. While the application initialization time within the eStargz container takes approximately 1 minute longer than the regular image (1m27s vs 32s), the overall time to ready state is still 1m22s faster, making the pod available for traffic more quickly. This trade-off proves particularly valuable in production environments where rapid scaling, pod rescheduling, or cold starts are critical, as the substantial reduction in initial container pull time outweighs the modest increase in application startup overhead. For workloads using large container images, especially AI workloads, lazy pulling with eStargz offers a practical solution to accelerate deployment without requiring changes to application code or significant infrastructure modifications.
Related Links
- Stargz Snapshotter installation documentation
- Experimenting with eStargz image pulling on OpenShift
- nerdctl Stargz documentation
Acknowledgments
- Authors: Andrei Ilas (Master Principal Cloud Architect)
More Learning Resources
Explore other labs on docs.oracle.com/learn or access more free learning content on the Oracle Learning YouTube channel. Additionally, visit education.oracle.com/learning-explorer to become an Oracle Learning Explorer.
For product documentation, visit Oracle Help Center.
Enable Lazy Container Image Loading in Oracle Cloud Infrastructure Kubernetes Engine (OKE) Using Stargz Store
G56099-01