Specify a Filter's Selection Values
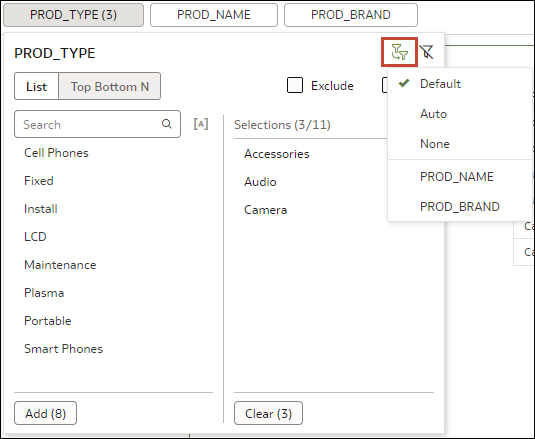
When you add a filter to a workbook, you can specify how the filter gets its selection values. For example, you can choose to use all column values for the filter, or you can choose another workbook filter to limit the filter's selection values.
You can choose from these options:
- Default - Limits the filter's selection values by other filters in the workbook. When you add a filter to the filter bar, the filter is set to Default.
- Auto - Preserves the default behavior (limits the filter by other filters in the workbook) when the Filter Bar Menu's Limit Values By option is set to None.
- None - Removes the filter's selection values limitations imposed by other filters.
- <Filter Name> - Limits the filter's selection values according to the filter that you choose. You can choose more than one filter.
For more information about the Limit Values By option on the Filter Bar Menu and how it controls an individual filter's selection values, see Enable or Disable the Limit By Setting from the Filters Bar.
- On the Home page, select a workbook, click the Actions menu, select Open, then click Edit.
- Navigate to a canvas, and display the Visualize pane.
- Drag and drop more than one workbook column to the filter bar, making sure to place them in the order that you want the filter selections to limit each other. For example, place Product Category before Product Name.
- Select a filter to set selection values for and click Limit Values.

- Select how you want to limit the filter's selection values.
- Click Save to save the workbook.