This 15-minute tutorial shows you how to install Android
Studio, which includes the Android SDK, and create an Android
Virtual Device (AVD) on which you install an Oracle JavaScript
Extension Toolkit (Oracle JET) hybrid mobile application during
a later tutorial. The time to complete doesn’t include
processing time as a result of your activities.
Background
The Oracle JET command-line interface invokes the Android SDK
that you install with Android Studio to build an Android
application package (APK) file from the source files of your
hybrid mobile application. This APK file is installed on an AVD
to enable you to test the hybrid mobile application.
Depending on the operating system of your computer, the Android
Studio installation wizard prompts you with dialogs where you
choose between standard or custom install types. Choose the
options recommended by the Android Studio installation wizard as
these options include the components that you require to create
and install a hybrid mobile application on an AVD. They also
include an Android emulator and an emulator accelerator
appropriate for your computer, be that Windows, Mac, or Linux.
Go to the Download page for Android Studio on the Android
Developer's website at https://developer.android.com/studio/
and click DOWNLOAD ANDROID STUDIO.
Review and accept the terms and conditions in the Download
Android Studio dialog that appears and click DOWNLOAD
ANDROID STUDIO FOR PLATFORM where PLATFORM
refers to the operating system of your machine, such as
Windows, Mac, or Linux.
If you run Android Studio behind a firewall or secure
network, an Android Studio First Run dialog appears which
displays a button (Setup Proxy) that you
click to enter the proxy server settings for your environment.
This allows Android Studio to complete the download of the
components for a standard install.
In the Welcome to Android Studio dialog, select Start
a new Android Studio project, and then, in the
Create New Project wizard, accept the default options to
progress to the final screen in the wizard and click Finish.
This enables the Android Studio toolbar with the
options that you need to create an AVD. It also downloads and
configures the Gradle build tool that the Android SDK invokes
to build the APK file when you complete the creation of your
Oracle JET hybrid mobile application.
If you run Android Studio behind a firewall or
secure network, a Proxy Settings dialog appears that enables
you to configure proxy settings for the Gradle build tool that
Android Studio downloads and configures. Provide the proxy
settings for your environment to ensure that the Gradle build
tool functions correctly.
Install
an Android SDK Platform Package
In the Android Studio toolbar, click the SDK Manager icon () to open
the Android SDK page in the Default Settings dialog.
Click OK in the confirmation dialog that
appears and accept the license agreement to proceed with the
installation.
Once the installation completes, click Finish
and then click OK to close the Default
Settings dialog.
Create
and Start an Android Virtual Device
In the Android Studio toolbar, click the AVD Manager icon () and click Create
Virtual Device in the Android Virtual Device
Manager dialog that opens.
In the Phone category of the Choose a
device definition page of the Virtual Device Configuration
dialog, select Nexus 5X and click Next.
In the Recommended tab of the Select a
system image page, click Download for the
Oreo entry with an API Level of 26.
Description of the
illustration downloadoreo.png
The SDK Quickfix Installation wizard opens.
Accept
the license agreement to proceed with the download of the
system image for Android 8.0 with API Level 26. Once the
installation completes, click Finish and
then click Next in the Select a system page.
In the Verify Configuration page, review and accept the
default settings such as the AVD Name value
of Nexus 5X API 26, then click Finish.
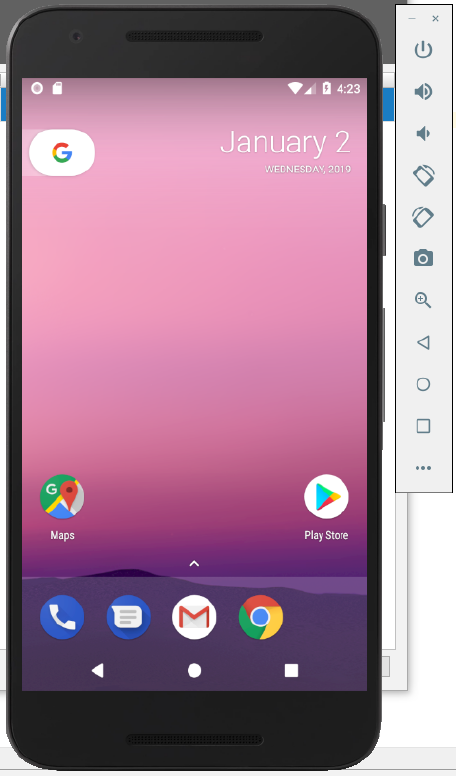
In the Android Virtual Device Manager dialog, click the
Launch this AVD in the emulator icon () under the Actions
column for the newly-created Nexus 5X API 26 AVD.
The Android emulator starts and loads the Nexus 5X API 26
AVD. A toolbar appears to the right of the AVD that provides
UI controls to interact with the AVD.
To function correctly, the Apache Cordova command-line
interface that the Oracle JET command-line interface
communicates with requires that you configure environment
variables. These environment variables reference the
installation location of the Android SDK that is installed by
Android Studio and the Java SE Development Kit 8.
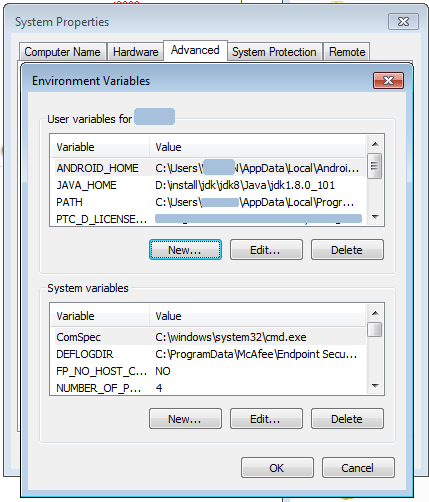
For Windows.
Open the Environment Variables dialog from the System
Properties dialog by navigating Control Panel
> System and Security > System
> Advanced System Settings > Environment
Variables.
Click New in the Environment Variables
dialog and set the values of the variables to the location
of the JDK and Android SDK locations, as shown in the
following image. You can obtain the Android SDK location
from the Android SDK page of the Default Settings dialog
that you access in Android Studio by clicking Tools
> SDK Manager.
Description of the
illustration envvar.png
For Mac and Linux-type systems, the settings depend upon
your default shell. For example, on a Mac system using the
Bash shell, add the following lines in ~/.bash
profile.
 Install
Android Development Tools
Install
Android Development Tools Before You Begin
 Install
and Set Up Android Studio
Install
and Set Up Android Studio Install
an Android SDK Platform Package
Install
an Android SDK Platform Package ) to open
the Android SDK page in the Default Settings dialog.
) to open
the Android SDK page in the Default Settings dialog.
 Create
and Start an Android Virtual Device
Create
and Start an Android Virtual Device ) and click Create
Virtual Device in the Android Virtual Device
Manager dialog that opens.
) and click Create
Virtual Device in the Android Virtual Device
Manager dialog that opens.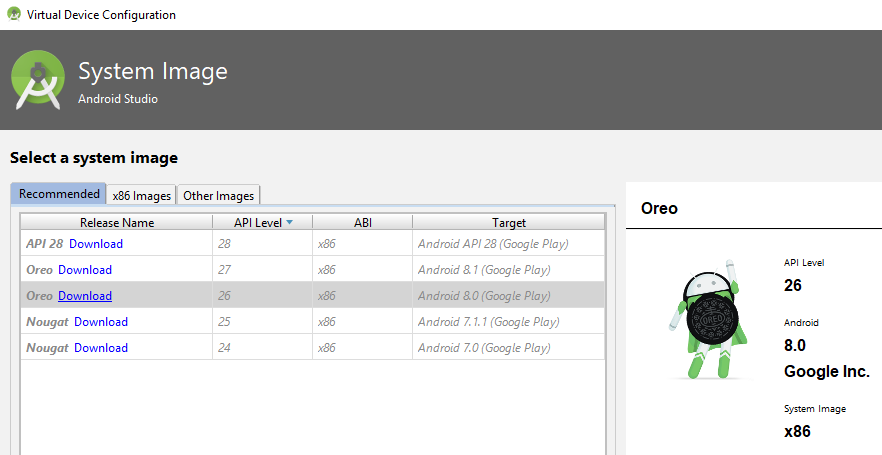
 ) under the Actions
column for the newly-created Nexus 5X API 26 AVD.
) under the Actions
column for the newly-created Nexus 5X API 26 AVD.
 Install
the Java SE Development Kit 8
Install
the Java SE Development Kit 8 Create
Environment Variables
Create
Environment Variables