 Install
the Universal Windows Platform Development Tools
Install
the Universal Windows Platform Development Tools Before You Begin
This 10-minute tutorial shows you how to configure your Windows 10 computer to develop Oracle JavaScript Extension Toolkit (Oracle JET) hybrid mobile applications that can be built as Universal Windows Platform (UWP) apps. This requires you to enable Developer Mode on your Windows 10 computer and to install an edition of Visual Studio 2017, an integrated development environment from Microsoft.
Background
The Oracle JET command-line interface invokes the Windows SDK that you install with Visual Studio 2017 to build a UWP application from the source files of your Oracle JET hybrid mobile application. This application is then installed on your Windows 10 computer.
What Do You Need?
- A Windows 10 computer
 Enable
Developer Mode on Windows 10
Enable
Developer Mode on Windows 10
Developer mode allows you to install any signed and trusted apps to your Windows 10 computer, whereas the default Windows 10 setting only permits the installation of apps from the Microsoft Store.
- Click the Start button and enter
For
                    developers
in the Type here to search input field, then select For developers settings from the Best match list that appears. - From the For developers settings dialog, choose Developer mode.
- Read the disclaimer in the dialog that appears and click Yes
to accept the change.
If your computer is owned by an organization, some options might be disabled. Contact your system administrator to enable Developer mode in this scenario.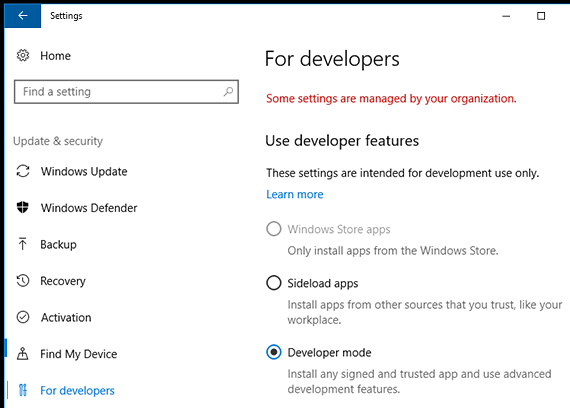
Description of the illustration devmode-pc-options.png
 Install
Visual Studio 2017
Install
Visual Studio 2017
Install Visual Studio as it includes the Windows 10 SDK and the Universal Windows App Development Tools that you require to develop and deploy an Oracle JET hybrid mobile application on your computer.
- Go to https://www.visualstudio.com/vs/ and download the Community edition of Visual Studio 2017.
- During installation, select the Universal Windows
Platform development workload.
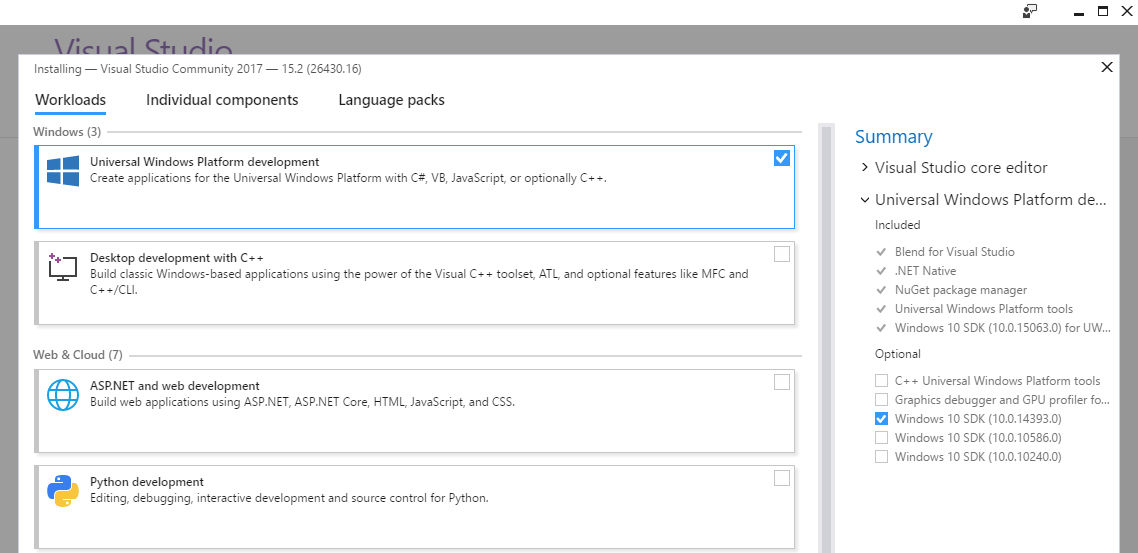
Description of the illustration visualstudio.png - Once you have downloaded and installed Visual Studio 2017, run it so that it completes the necessary set up tasks.
Microsoft offers Community, Professional, and Enterprise editions of Visual Studio 2017. The Visual Studio Community edition is a free, fully-featured IDE for students, open-source, and individual developers.
 Create
a System Environment Variable to Reference MSBuild Tools
Create
a System Environment Variable to Reference MSBuild Tools
After you install Visual Studio 2017, create a system
environment variable (MSBUILDDIR) that references
the location of the MSBuild Tools within the Visual Studio 2017
installation.
- Click the Start button and enter
Edit
                    the system environment variables
in the Type here to search input field, then select it from the Best match list that appears. - In the System Properties dialog that opens, click Environment Variables, then click New in the System variables section of the Environment Variables dialog.
- In the Variable name field, enter
MSBUILDDIR, and in the Variable value field, enter the directory location of the MSBuild Tools which is typicallyC:\Program Files (x86)\Microsoft Visual Studio\2017\Community\MSBuild\15.0\Binin a default Visual Studio 2017 installation. - Click OK to close the open dialogs.