 Create
and Use a Deployment Plan in Oracle WebLogic Server
Create
and Use a Deployment Plan in Oracle WebLogic Server Before You Begin
In this 15-minute tutorial, you will learn how to generate an initial deployment plan for an existing web application, edit the deployment plan, and then use the WebLogic Server Administration Console to redeploy your application with that plan.
Background
This tutorial is part of the Oracle WebLogic Server 12c series, and assumes that you have completed these tutorials, in this order:
A deployment plan is an XML document that you use to define an application's deployment configuration for a specific WebLogic Server environment, such as development, test, or production. A deployment plan resides outside of an application's archive file and contains deployment properties that override an application's existing Java Enterprise Edition and WebLogic Server deployment descriptors. Use deployment plans to easily change an application's WebLogic Server configuration for a specific environment, without modifying existing deployment descriptors.
This tutorial shows how to use the weblogic.PlanGenerator utility to generate a deployment plan. The weblogic.PlanGenerator utility is a Java-based command-line tool for developers who want to export portions of a WebLogic Server deployment configuration into a deployment plan file. With this utility, you can generate a new plan or append to an existing one. This tutorial covers deploying versioned applications that use the version name in the MANIFEST.MF file.
What Do You Need?
- An installation of Oracle WebLogic Server 12c. See http://www.oracle.com/technetwork/middleware/weblogic/downloads/index.html.
- A properly configured WebLogic Server domain containing an
Administration Server and one Managed Server with the
following settings:
- Domain directory:
/u01/domains/ExampleDomainwith Managed Server,server1 - Administration Server listen address and port number:
localhost:7001 - Managed Server,
server1, listen address and port number:localhost:7003
- Domain directory:
- An example application which is available for download here.
This application archive contains three files:
hrapp.war, a simple web application in an archive filedeploy.py, a WebLogic Scripting Tool (WLST) script to deploy the web applicationdeploy.sh, a shell script to deploy the web application
Conventions
This tutorial uses the following conventions:
| Variable |
Value |
ORACLE_HOME
Environment Variable |
/u01/app/fmw
|
DOMAIN_HOME
Environment Variable |
/u01/domains/ExampleDomain |
APP_HOME Environment Variable |
/tmp/downloads/DeployPlan |
 Deploy the Application
To deploy the supplied Java web application:
- If the Administration Server of the domain is not already
running, start it. In a terminal window, navigate to the
domain directory, and enter the command:
$ cd
At the prompt, enter the Administrator user name and password that you specified when you created the domain.${DOMAIN_HOME}/
$./startWebLogic.sh - After the Administration Server is running, start the
Managed Server,
server1. In another terminal window, navigate to theDOMAIN_HOME/bindirectory and enter the command:
$./startManagedWebLogic.sh server1 http://localhost:7001
Optionally, specify the host name and port of your domain's Administration Server in place oflocalhost:7001. - Deploy the web application
HRApplocated in thehrapp.warfile. - Open a new terminal window and navigate to the
APP_HOMEdirectory. - In this tutorial, we use the
deploy.shscript to deploy the application. This script contains default values for the Administration Server URL, the target server to which you deploy the application, and the fully qualified path to your WebLogic Server installation directory. To override any of these default values, you must specify an appropriate parameter along with a valid value in the command line while deploying the application.
For a complete list of supported parameters, run thedeploy.shscript without any arguments:$./deploy.sh
- Enter the command to deploy the application. Note that the
- The name of the application, represented by
-a. - The fully qualified path to the
hrapp.warfile, represented by -p. - The WebLogic Server Administrator user name,
represented by
-U. - The target server, represented by
-t. This is an optional argument. Thedeploy.shscript targets the application to the Administration Server by default. To target the application to any other server, you must specify the-tparameter along with the server name in the command line. In this tutorial, we target the application to the Managed Server,server1. - When prompted, enter the password for your WebLogic Server
Administrator user name. For example:
The application deploys successfully.Weblogic Server administrator password required. Enter administrator password for user 'username':
Note: Ignore the warning about>>>Deploying application from /tmp/downloads/DeployPlan/hrapp.war to targets server1 (upload=false) ... <Sep 17, 2018 9:59:08 PM PDT> <Info> <J2EE Deployment SPI> <BEA-260121> <Initiating deploy operation for application, HRAPP [archive: tmp/downloads/Deployplan/hrapp.war], to server1.> .Completed the deployment of Application with status completed Current Status of your Deployment: Deployment command type: deploy Deployment State : completed Deployment Message : no message >>>Application HRApp deployed. Exiting WebLogic Scripting Tool. <Sep 17, 2018 9:59:12 PM PDT> <Warning> <JNDI> <BEA-050001> <WLContext.close() was called in a different thread than the one which it created.>Context.close(). This warning displays when you run any WLST script.
Do not close this terminal window as you will need it later. - To verify that the deployment was successful, access the
WebLogic Server Administration Console. Open a web browser and
enter the URL:
Optionally, you can specify the host name and port of your domain's Administration Server in place ofhttp://localhost:7001/consolelocalhost:7001. - On the Welcome screen, enter the user name and password that you specified when you created the domain, and then click Login.
- In the left pane of the Console, under Domain Structure,
select Deployments. In the Deployments table, verify
that HRApp is in the Active State.

Description of the illustration deployments_table.png - Access the deployed application in another browser window.
Enter the host and port for the Managed Server,
server1, followed by/HRApp. In this tutorial, the URL is:
http://localhost.com:7003/HRApp
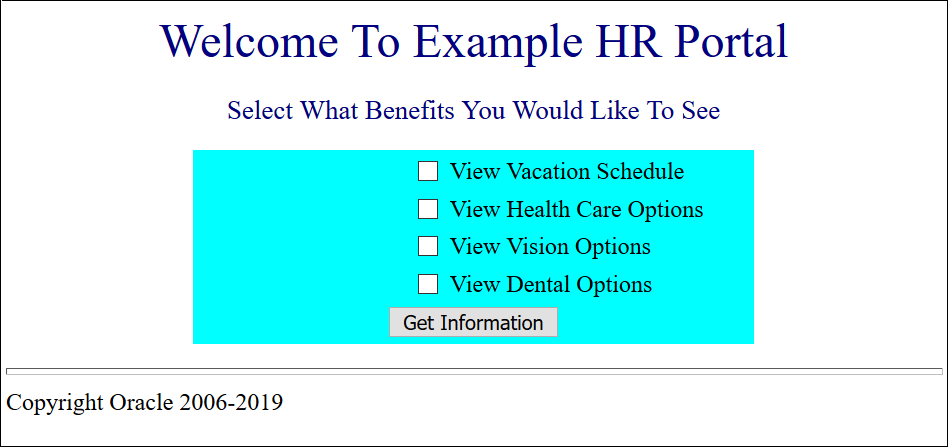
Description of the illustration app_page.png
deploy.sh script uses the WebLogic
Server Scripting Tool (WLST) to deploy the application.$./deploy.sh -a HRApp -p /tmp/downloads/DeployPlan/hrapp.war -U username -t server1In the command, enter the following values:
 Generate
and Edit a Deployment Plan
Generate
and Edit a Deployment Plan
To generate an initial deployment plan for the web application and then edit it:
- Return to the same terminal window that you used to run the
deploy.shscript. Ensure that the current directory is APP_HOME. Enter the command to run thePlanGeneratortool on thehrapp.warfile:$ java weblogic.PlanGenerator -all hrapp.war
Note: If you are using a new terminal window, then ensure that you run thesource setWLSEnv.shcommand before running thePlanGeneratortool. This command sets thePATHand theCLASSPATHfor executing any WLST script.
A message displays if the deployment plan is successfully generated for your application. Note that the deployment plan is saved to theplan.xmlfile in theAPP_HOMEdirectory.
Saving plan to /tmp/downloads/DeployPlan/plan.xml... <Sep 18, 2018 2:41:37 AM PDT> <Info> <J2EE Deployment SPI> <BEA-260072> <Saved configuration for application, hrapp.war> - Now, let's edit the deployment plan that you generated. Open
the
plan.xmlfile with a text editor and locate the<variable>element in the file.
<variable> <name>WeblogicWebApp_ContextRoots_15362645019586 </name> <value xsi:nil="true"></value> </variable> - From the
<value>tag in the<variable>element, deletexsi:nil="true". Then, change the value tag to the context root of the application/hr.
The modified<value>tag should resemble:
<variable> <name>WeblogicWebApp_ContextRoots_15362645019586 </name> <value>/hr</value> </variable> - Locate the
<variable-assignment>element with the same name as the<variable>element that you edited.
<variable-assignment> <name>WeblogicWebApp_ContextRoots_15362645019586</name> <xpath>/weblogic-web-app/context-root</xpath> <origin>planbased</origin> </variable-assignment> - Add a new
<operation>child element to the<variable-assignment>element, and set the value of the<operation>tag toreplaceas shown:
<variable-assignment> <name>WeblogicWebApp_ContextRoots_15362645019586</name> <xpath>/weblogic-web-app/context-root</xpath> <origin>planbased</origin> <operation>replace</operation> </variable-assignment> - Save the
plan.xmlfile.
This deployment plan overrides thecontext-rootelement in the WebLogic Server web application deployment descriptor,weblogic.xml. The new context root is/hr.
 Update
the Application with the Deployment Plan
Update
the Application with the Deployment Plan
To update the deployed web application with the new deployment plan:
- Go back to the WebLogic Server Administration Console. In the Change Center, click Lock & Edit.
- Under Domain Structure, select Deployments.
The Summary of Deployments page appears. A table that lists all the Java EE applications and standalone application modules currently installed on WebLogic Server appears in the right pane. - Select the check box for the HRApp application, and
click Update.
- From the Update Application Assistant window, click Change Path associated with the Deployment plan path.
- Select the plan.xml option, and click Next.
If necessary, use the hyperlink next to the Current Location field to navigate to theplan.xmldirectory.
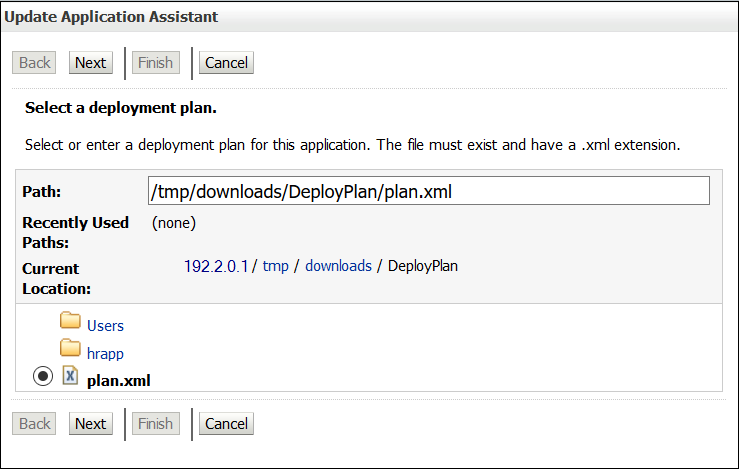
Description of the illustration plan_xml.png - Select Redeploy this application using the following
deployment files and click Next.
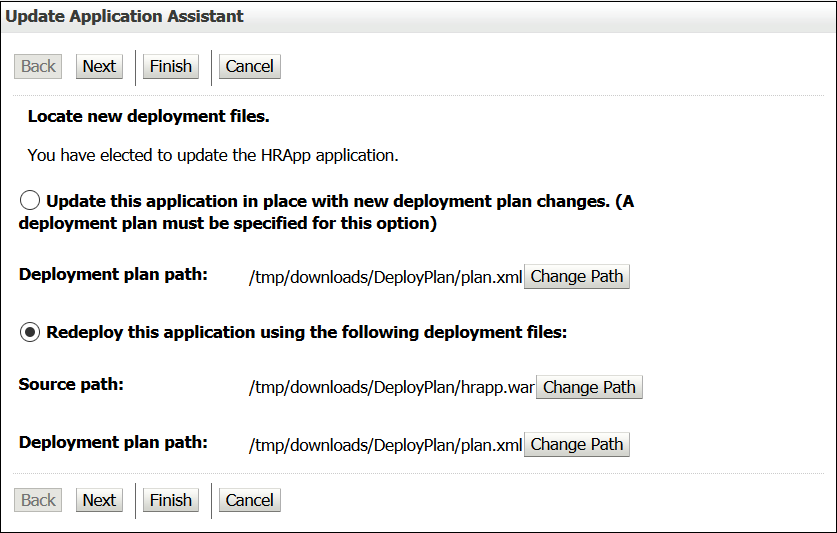
Description of the illustration final_deploy.png - Review your choices and click Finish.
- In the Change Center, click Activate Changes.
The Console displays the message:All changes have been activated. No restarts are necessary. - Verify the new context root of the application. In a web
browser, enter the host and port for the Managed Server
server1, followed by/hr.
http://hostname:7003/hr
Note that the previous context root/HRApphas changed to/hr.
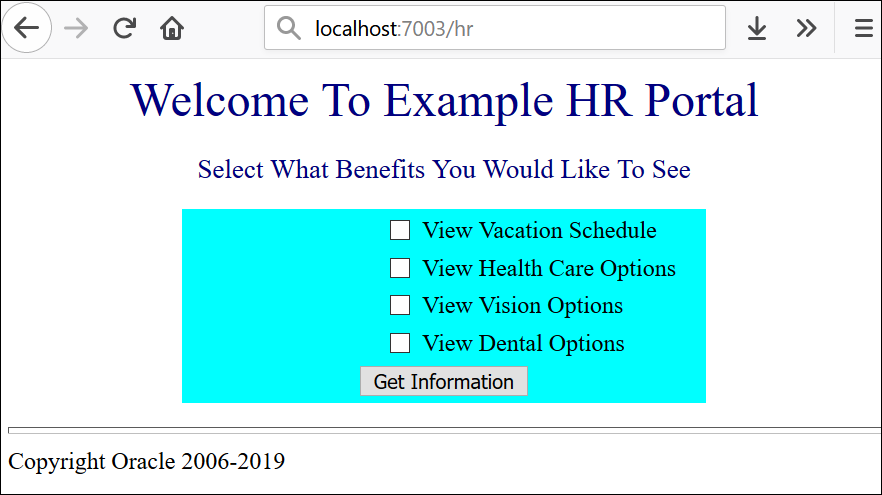
Description of the illustration final_app.png

 Next
Steps
Next
Steps
The WebLogic Server 12c collection contains a number of additional tutorials, covering a variety of topics. See the WebLogic Server 12c collection here for additional topics and content.