Get started with GoldenGate Free

Discover what you need and how to get started with GoldenGate Free.

What you need

To use Oracle GoldenGate Free, you need the following:

  • A system running one of the following:
    • Docker, or a compatible container runtime such as Podman
    • Linux
  • Internet connectivity to access the container registry or Oracle Technology Network (OTN)
  • A valid Oracle.com login

Get GoldenGate Free

You can get GoldenGate Free from the Oracle Container Registry (OCR) or Oracle Technology Network (OTN). Follow the applicable instructions to access GoldenGate Free.

From Oracle Container Registry

Follow these instructions to access the GoldenGate Free from Oracle Container Registry (OCR).

You must sign in to your Oracle account and accept the license agreement before you can pull the GoldenGate Free docker image from the Oracle Container Registry.
To access the GoldenGate Free docker image:
  1. Accept the license agreement.
  2. In your Docker client, enter the following command to log in to the Oracle Container Registry:
    docker login container-registry.oracle.com
    
  3. When prompted, enter your Oracle account username and password.
  4. Copy the docker pull command to pull the latest GoldenGate Free image, and run it in your Docker client:
    docker pull container-registry.oracle.com/goldengate/goldengate-free:latest

From Oracle Technology Network

Follow these instructions to access the GoldenGate Free from Oracle Technology Network (OTN).

You must sign in to your Oracle account and accept the license agreement before you can download the GoldenGate Free configuration assistant from the Oracle Technology Network.
To download the GoldenGate Free configuration assistant:
  1. Open Oracle Technology Network in your browser.
  2. On the Software Download page, scroll down, and then select Middleware.
  3. Under Middleware, select GoldenGate Free.
  4. On the Oracle GoldenGate Free Downloads page, select the available installer package.
  5. Accept the license agreement.
  6. When prompted, save the installer package to your local machine and take note of its location.

Start and run Oracle GoldenGate Free

Learn to start and run your GoldenGate Free instance. Ensure that you follow the applicable instructions for your docker image, or the GoldenGate Configuration Assistant.

Start and run the GoldenGate Free docker image

Learn to start and run GoldenGate Free after pulling the docker image from Oracle Container Registry.

To start and run GoldenGate Free:
  1. In your Docker client, you can enter a run command with default settings or enter a run command with parameter values:
    • To run GoldenGate Free with default settings:
      docker run -p 80:80 -p 443:443 container-registry.oracle.com/goldengate/goldengate-free:23.3.0.0-oracle

      A container instantiates with the following default options:

      • auto generated container name
      • 80 port for HTTP Server
      • 443 port for HTTPS Server
      • oggadmin for the name of the administrative account
      • auto generated the password for the administrative account
      • Local for the name of the deployment
      • Use container storage for /u02 and /u03 volume
      • auto generated self-signed certificate
    • To run GoldenGate Free with modified settings:
      docker run \
          --name <container-name> \
          -p <host port>:80 \
          -p <host port>:443 \
          -e OGG_ADMIN=<admin user name> \
          -e OGG_ADMIN_PWD=<admin password> \
          -e OGG_DEPLOYMENT=<deployment name> \
          -e OGG_DOMAIN=<domain name> \
          -v [<host mount point>:]/u02 \
          -v [<host mount point>:]/u03 \
          -v [<host mount point>:]/etc/nginx/cert \
          container-registry.oracle.com/goldengate/goldengate-free:23.3.0.0-oracle

      Parameter descriptions:

      • <container-name>: Name for the container. Auto-generated by default.
      • -p <host-port>:80: The host port to map the Oracle GoldenGate HTTP server. No mapping by default.
      • -p <host-port>:443: The host port to map the Oracle GoldenGate HTTPS server. No mapping by default.
      • -e OGG_ADMIN: The name of the administrative account to create. oggadmin by default.
      • -e OGG_ADMIN_PWD: The password of the administrative account. Auto-generated by default.

        Tip:

        Ensure the password meets the following requirements:
        • At least one lowercase character [a...z]
        • At least one upposercase character [A...Z]
        • At least one digit [0...9]
        • At least one special character [- ! @ % & * . #]
        • The length should be between 8 and 30 characters.
      • -e OGG_DEPLOYMENT: The name of the deployment. Local by default.
      • -e OGG_DOMAIN=<domain name>: The domain name to use for the self-signed certificate (default: hostname of the container). Not needed if you bring your own ssl certificates.
      • -v /u02: The volume used for persistent GoldenGate data. Use container storage by default.
      • -v /u03: The volume used for temporary GoldenGate data. Use container storage by default.
      • -v /etc/nginx/cert: The volume used for storing the SSL certificat for the HTTPS server. Creates a self-signed certificate by default.

      Data storage volumes

      • /u01: the volume for the GoldenGate system
      • /u02: the volume for persistent GoldenGate data
      • /u03: the volume for temporary GoldenGate data

      Administrative account password

      On first startup of the container, a random password is generated for the Oracle GoldenGate if one is not provided for OGG_ADMIN_PWD. You can find this password at the start of the container log:

      docker logs <container-name> | head -3
  2. After a few minutes, you should see Server started at: http://localhost:8080. GoldenGate Free is now ready for you to use.
  3. Launch a web browser, and go to http://localhost:8080.
  4. On the GoldenGate Free login screen, enter the username and password that you passed to the docker run command, and then click Log in.
After you log in successfully, you're brought to the GoldenGate Free Home page.

Install and run GoldenGate Free using the Configuration Assistant

Learn to use the GoldenGate Configuration Assistant to install and run GoldenGate Free on Linux.
To install and run GoldenGate Free using the GoldenGate Configuration Assistant on Linux:
  1. Navigate to the location on your local machine where you downloaded the Oracle GoldenGate Free installer.
  2. Create a temporary staging directory in which to install Oracle GoldenGate Free.
    For example, mkdir /u01/stage/oggf.
  3. Extract the installation .zip file to the temporary staging directory.
    For example,
    unzip ./fbo_ggs_Linux_x64_Oracle_services_free_shiphome.zip -d ./u01/stage/oggf
  4. From the expanded directory, run the fbo_ggs_Linux_x64_Oracle_services_free_shiphome/Disk1/runInstaller program. The Oracle GoldenGate Configuration Assistant opens.
  5. In the Oracle GoldenGate Configuration Assistant, on the Select Service Manager Options screen, select Create New Service Manager.
    1. For Service Manager Deployment Home, you can leave the default Service Manager Deployment Home location, or select a new location.
    2. (Optional) Select Register Service Manager as a system service/daemon.
    3. For Listening hostname/address, enter a hostname.
    4. For Listening port, enter a valid port number for Service Manager to use.
    5. Click Next.
  6. On the Select Configuration Options screen, select Add new GoldenGate deployment, and then click Next.
  7. On the Specify Deployment Details screen:
    1. For Deployment Name, enter a name for your deployment.
    2. For Software Home, you can leave the default location or select a new location.
  8. On the Specify Deployment Directories screen:
    1. You can leave the default Deployment Home location, or select a new one.
    2. (Optional) Select Customize directories to change the default GoldenGate directories.

      Note:

      You can ignore FIPS mode and Sharding options.
    3. Click Next.
  9. On the Specify Environment Variables screen, verify the environment variables settings, and then click Next.
  10. On the Specify Administrator Account screen, you can leave the default Administrator account username and password settings, or update the values as needed, and then click Next.
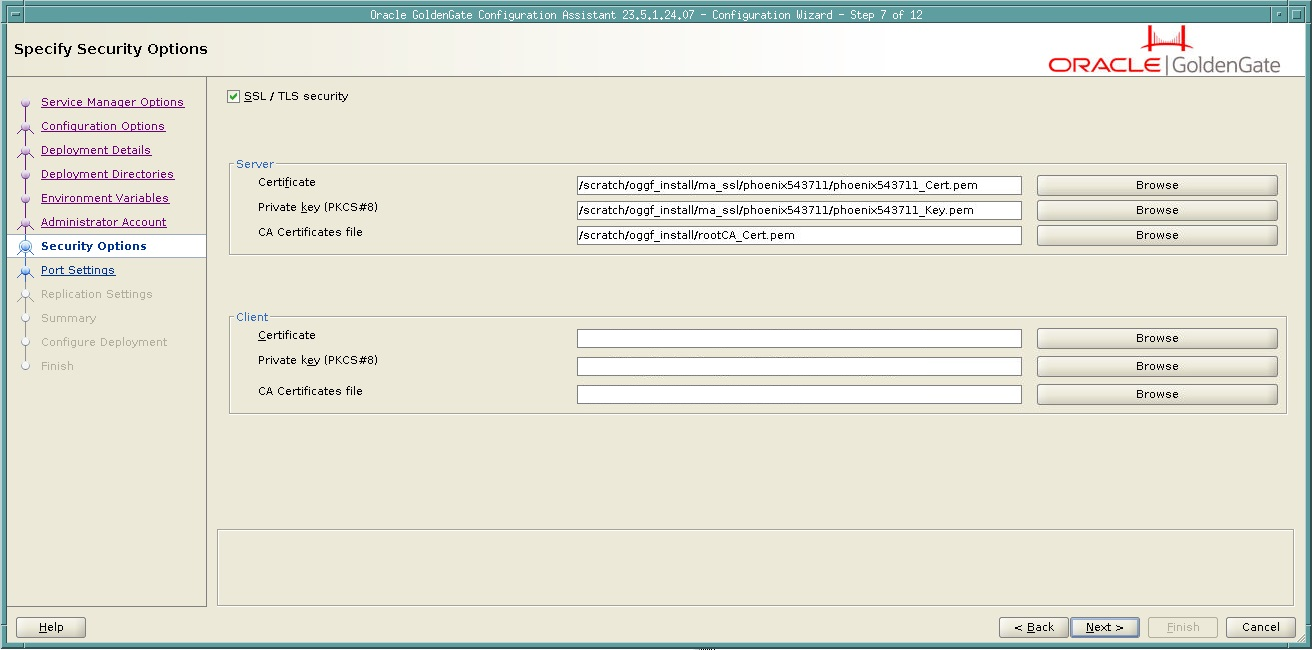
  11. (Optional) On the Specify Security Options screen, you can select SSL/TLS security, and then click Next.

    Note:

    This non-secure deployment will be used to send trail data to a secure deployment doesn't apply to GoldenGate Free and should be ignored.
  12. On the Specify Port Settings screen, you can leave the default port number selections or update them as needed, and then click Next.

    Note:

    (Optional) Disable Distribution Service in GoldenGate Free installer. Since GoldenGate Free uses only one deployment, you can deselect Enable Distribution Service. The Distribution Service is only used when data must be replicated in a distributed environment (requiring muliple deployments).
  13. On the Specify Replication Settings screen, review the default schema, and then click Next.
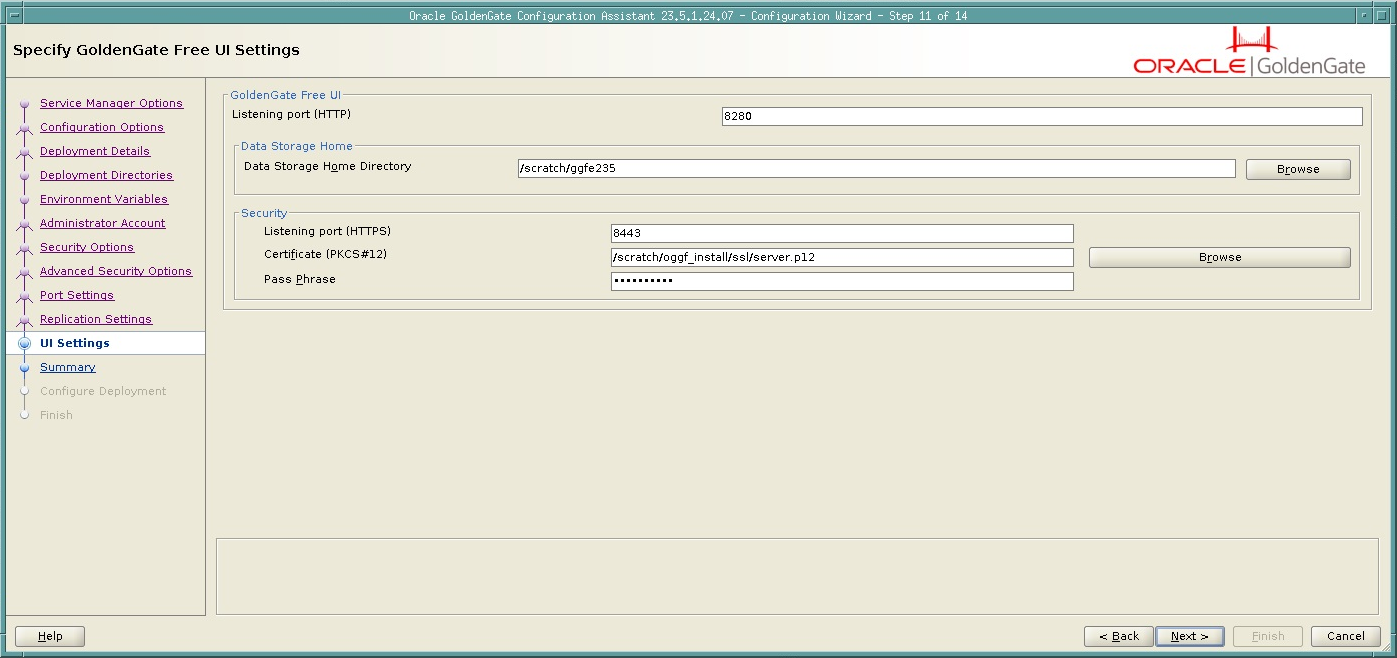
  14. On the Specify UI Settings screen, review the Listening port (HTTP) and Data Storage home settings, and then click Next.

    Note:

    If you enabled SSL/TLS on the Security Options screen, and additional Security section appears. This section includes the Listening Port (HTTPS), Certificate, and Passphrase fields.
  15. On the Summary screen, review your configuration settings, and then click Finish.
  16. On the Configure Deployment screen, the installation starts and you can review the status of each step in realtime.
    The Oracle GoldenGate Free start up script is also run. When completed, you can connect to the Oracle GoldenGate Free console in your web browser.
  17. On the Finish screen, you should see a confirmation message when the installation and configuration of your Oracle GoldenGate Free deployment completes successfully. Click Close.
  18. Launch the Oracle GoldenGate Free console in your web browser using one of the following URLs:
    • http://<listening-hostname>:<listening-port> if you didn't enable SSL/TLS in Step 11.
    • https://<listening-hostname>:<listening-port> if you enabled SSL/TLS in Step 11.
Log in using the Administrator Account username and password.

Next steps

Now that you're in GoldenGate Free, you can: