Adding
a Composite Component to an Oracle JET Web Application
Adding
a Composite Component to an Oracle JET Web Application Before You Begin
This 10-minute tutorial shows you how to add a composite
component to the navdrawer starter template of your Oracle
JavaScript Extension Toolkit (Oracle JET) web application. You
learn how to use Oracle JET tooling to create a composite
component named demo-name-badge that you add to
the Incidents tab of your web application.
Background
A composite component is a reusable piece of user interface that you can embed as a custom HTML element in your web application. Composite components can contain Oracle JET components, other composite components, HTML, JavaScript, or Cascading Style Sheets (CSS). Oracle JET tooling creates a folder in your web application where these elements of the composite component reside.
What Do You Need?
- A development environment set up to create Oracle JET applications, with JavaScript runtime, Node.js, and Oracle JET command-line interface installed
- Completion of the previous tutorials in this learning path
so that you have created the
JET_Web_Applicationfolder
 Create
a Composite Component
Create
a Composite Component
- Open a Command Prompt window if it isn't already open.
Change to the /
JET_Web_Applicationdirectory and create thedemo-name-badgecomposite component.ojet create component demo-name-badge - In your file system, navigate to the /
JET_Web_Application/src/js/viewModelsdirectory and open theincidents.jsfile in an editor. - In the
incidents.jsfile, edit thedefine()block to include the composite loader library.define(['ojs/ojcore', 'knockout', 'jquery', 'jet-composites/demo-name-badge/loader'], - Save the
incidents.jsfile. - In your file system, navigate to the /
JET_Web_Application/src/js/viewsdirectory and open theincidents.htmlfile in an editor. - Copy the following code block for the
demo-name-badgecustom HTML element.<demo-name-badge></demo-name-badge> - In the
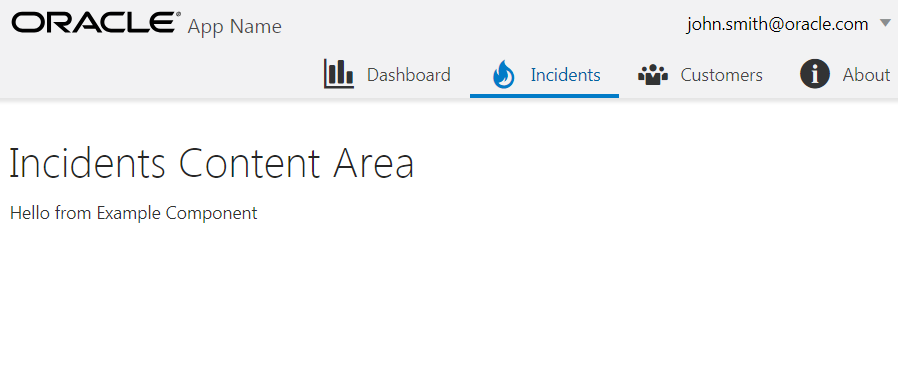
incidents.htmlfile, replace the content in the<div>tag of theIncidents Content Areawith the copied code.<div class="oj-hybrid-padding"> <h1>Incidents Content Area</h1> <div> <demo-name-badge></demo-name-badge> </div> </div> - Save the
incidents.htmlfile. - In the Command Prompt window, change to the /
JET_Web_Applicationdirectory and run the application.ojet serve - In the browser that displays your
JET_Web_Application,click the Incidents tab. - Leave the Command Prompt window and the browser that displays your web application open.
Oracle JET tooling creates the demo-name-badge
composite component in the /JET_Web_Application/src/js/jet-composites
directory. The composite component name contains a hyphen and
is lowercase, as required by the W3C naming conventions for
custom components.
The browser displays the navdrawer starter template with the components visible in the Dashboard tab of your web application.
The browser displays the navdrawer starter template with the default message visible in the Incidents tab of your web application.
The ojet serve command lets you
make changes to your application code that are immediately
reflected in the browser.
 Define
Custom Composite Metadata
Define
Custom Composite Metadata
- Navigate to the /
JET_Web_Application/src/js/jet-composites/demo-name-badgedirectory and open thecomponent.jsonfile in an editor. - Copy the following code snippet and replace the contents of
the
component.jsonfile with the copied code.{ "name": "demo-name-badge", "displayName": "demo-name-badge", "description": "Component for displaying a badge with a name and an image", "version": "1.0.0", "jetVersion": "^5.0.0", "properties": { "badgeName" : { "type" : "string" }, "badgeImage" : { "type" : "string" } } } - Save the file.
 Define
the Component view
Define
the Component view
- Navigate to the /
JET_Web_Application/src/js/jet-composites/demo-name-badgedirectory and open thedemo-name-badge-view.htmlfile in an editor. - Copy the following code snippet and replace the contents of
the
demo-name-badge-view.htmlfile with the copied code.<div class="badge-face"> <oj-avatar src="[[$properties.badgeImage]]" size="lg"></oj-avatar> <h3><oj-bind-text value="[[$properties.badgeName]]"></oj-bind-text></h3> </div> - Save the file.
 Define
the Component viewModel
Define
the Component viewModel
- Navigate to the /
JET_Web_Application/src/js/jet-composites/demo-name-badgedirectory and open thedemo-name-badge-viewModel.jsfile in an editor. - In the
demo-name-badge-viewModel.jsfile, edit thedefine()block to include the'ojs/ojavatar'library.define( ['ojs/ojcore', 'knockout', 'jquery', 'ojL10n!./resources/nls/demo-name-badge-strings', 'ojs/ojavatar'], - Save the file.
 Define
the Component CSS
Define
the Component CSS
- Navigate to the /
JET_Web_Application/src/js/jet-composites/demo-name-badgedirectory and open thedemo-name-badge-styles.cssfile in an editor. - Copy the following code snippet and replace the contents of
the
demo-name-badge-styles.cssfile with the copied code.demo-name-badge:not(.oj-complete){ visibility: hidden; } demo-name-badge{ display : block; width : 200px; height: 200px; margin : 10px; } demo-name-badge .badge-face { height : 100%; width : 100%; background-color : #80C3C8; border-radius: 5px; text-align: center; padding-top: 30px; } - Save the file.
 Add
Your Composite Component
Add
Your Composite Component
- Navigate to the /
JET_Web_Application/src/js/viewsdirectory and open theincidents.htmlfile in an editor. - In the
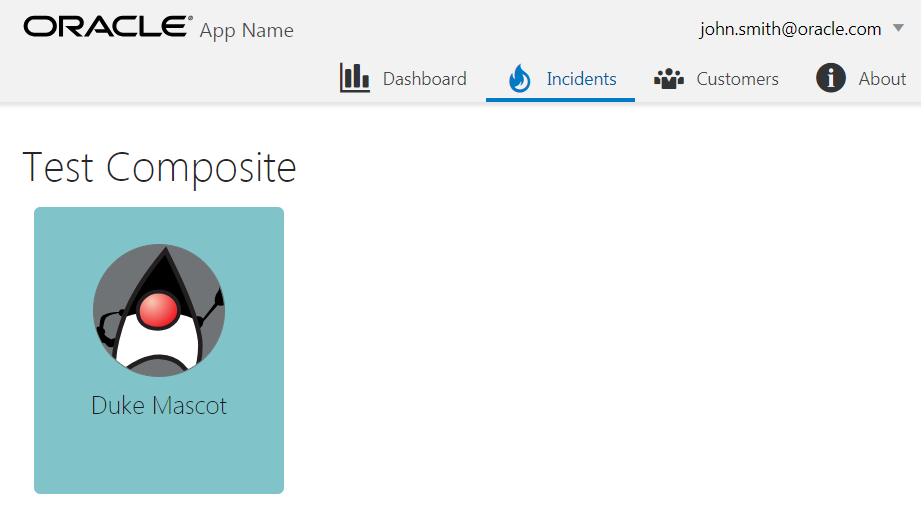
incidents.htmlfile, edit the<h1>tag to displayTest Compositeas the title for yourdemo-name-badgecomposite component.<h1>Test Composite</h1>
- In the
<div>tag of theTest Compositecomponent, edit thedemo-name-badgecustom HTML element to include thebadge-nameandbadge-imageattributes.<div class="oj-hybrid-padding"> <h1>Test Composite</h1> <div> <demo-name-badge badge-name="Duke Mascot" badge-image="https://upload.wikimedia.org/wikipedia/commons/b/b1/ThumbsUp.svg"> </demo-name-badge> </div> </div> - Save the
incidents.htmlfile. - Open the browser to view the dynamic changes in your web application.
- If you don't see the above format of the
demo-name-badgecomposite component, in the Command Prompt window, press Ctrl+c, and then enteryto terminate the Oracle JET tooling batch job. Now, run the application again.ojet serve
The browser now displays the navdrawer starter template with the composite component visible in the Incidents tab of your web application.