2 Adding Users/Groups to Pre-defined Roles

User roles determine the tasks or activities that a user can perform in the application. Users exist individually or in groups.

Before you can add users/groups to pre-defined roles, you need to:
  1. Create Users. See http://docs.oracle.com/html/E24401_02/taskhelp/security/DefineUsers.html for detailed instructions.

  2. Associate Users with Groups. See http://docs.oracle.com/html/E24401_02/taskhelp/security/ManageUsersAndGroups.html for detailed instructions.

  3. Create Groups. See http://docs.oracle.com/html/E24401_02/taskhelp/security/DefineGroups.html for detailed information.

Oracle Real-Time Integration Business Insight provides six pre-defined roles along with the installation. A Role is the group of users designed at the enterprise level and typically used to assign a privilege or permission. A role can also contain other roles as members. Application role is the set of privileges or permissions a user or a group of users has within the application.

If you need to edit/create roles, you must have Admin access to the Oracle Enterprise Manager Fusion Middleware Console.

Editing Users Associated with a Role

To add/delete users or groups associated with an existing role:

  1. Log in to the Oracle Enterprise Manager console as an administrator.
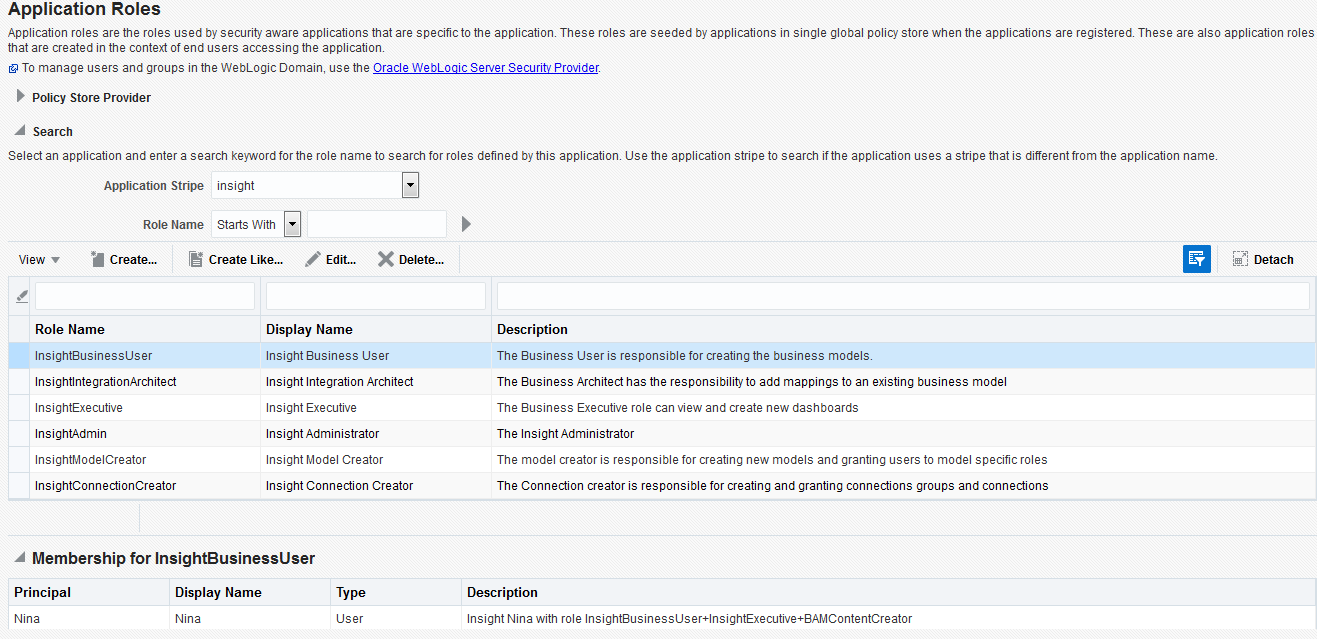
  2. Go to WebLogic Domain > Security > Application Roles.
    The Application Roles page opens.

    Figure 2-1 Application Roles Page

    Description of Figure 2-1 follows
    Description of "Figure 2-1 Application Roles Page"
  3. Select Insight as the Application Stripe.
  4. Click the arrow against the Role Name field to populate all the existing roles.
  5. Select the role to which you want to add/delete users and click Edit.
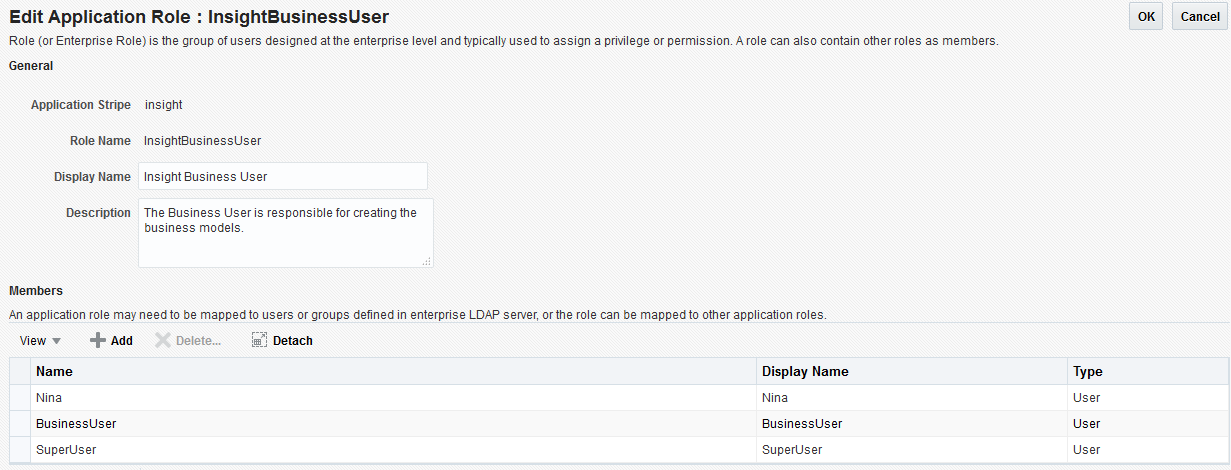
    The Edit Application Role page opens.

    Figure 2-2 Edit Application Role Page

    Description of Figure 2-2 follows
    Description of "Figure 2-2 Edit Application Role Page"
  6. Edit the Display Name and Description if required.
  7. Click Add.
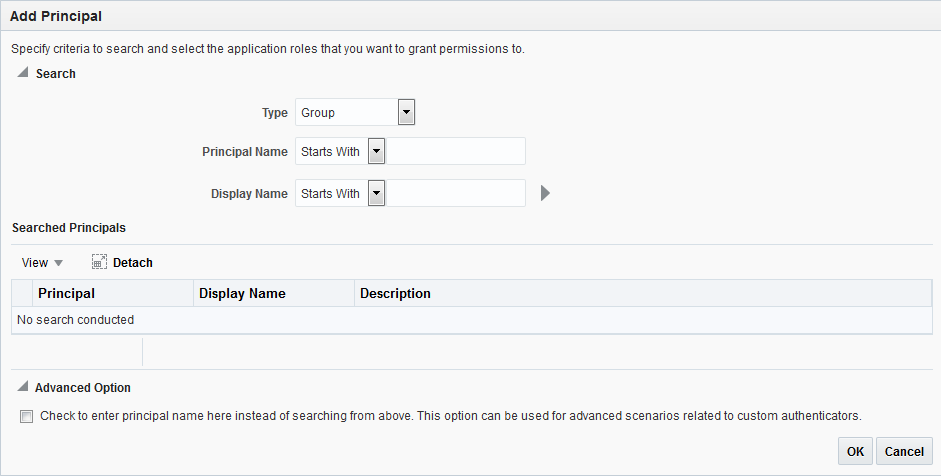
    The Add Principal dialog opens.

    Figure 2-3 Add Principal Dialog

    Description of Figure 2-3 follows
    Description of "Figure 2-3 Add Principal Dialog"
  8. Select Application Role, Group or User as the Type. If you select Group, all the users in that group will be affected.
  9. Search for the user or the group based on the Principal Name or the Display Name.
  10. Select the check box under the Advanced Options to enter principal name instead of searching.
    1. Enter a Principal Name. This is a mandatory field.
    2. Enter a Display Name.
  11. Click OK.

    The selected role permission is edited.

    Important:

    Any user who needs permission to access the consoles and the dashboards must be associated with the BAMContentCreator group. For detailed instructions about associating users with groups, see http://docs.oracle.com/html/E24401_02/taskhelp/security/AddUsersToGroup.html.

    For instructions about deleting groups and users, see http://docs.oracle.com/html/E24401_02/taskhelp/security/ManageUsersAndGroups.html.

Application Roles that have Access to SOA Servers

Users need special role permissions to access the SOA Servers and deploy composites on them.

The users with the following application roles have access to the SOA Servers:

  • SOAAdmin

  • SOADesigner

  • MiddlewareAdministrator

  • MiddlewareOperator

  • SOAMonitor

  • SOAOperator

  • BPMWorkflowAdmin

Application Roles that can Configure Connections

Users need special permissions to configure Connections.

The following role permissions are required to configure Connections:

  • BPMWorkflowAdmin

  • BPMWorkflowCustomize

  • BPMAGAdmin

  • BPMOrganizationAdmin