Mounting block volumes across multiple compute instances
By Mike Riley - Solutions Architect, Oracle for Research
Content Updated May 2021
A block volume can be shared READ/WRITE by multiple instances (maximum of 8 within OCI).
However for READ/WRITE a cluster file system is required. The information within this document shows the OCI console screens for READ/WRITE attachment for sharing a block volume. There are also links to existing content relating to Oracle Linux and some high level commands for achieving this on Ubuntu.
The following example uses node1 & node2 and shares a block volume between them using OCFS2. It is assumed that the 2 compute instances are already created and that they and the block volume are all within the same Availability Domain (AD).
To create the Block Volume:-

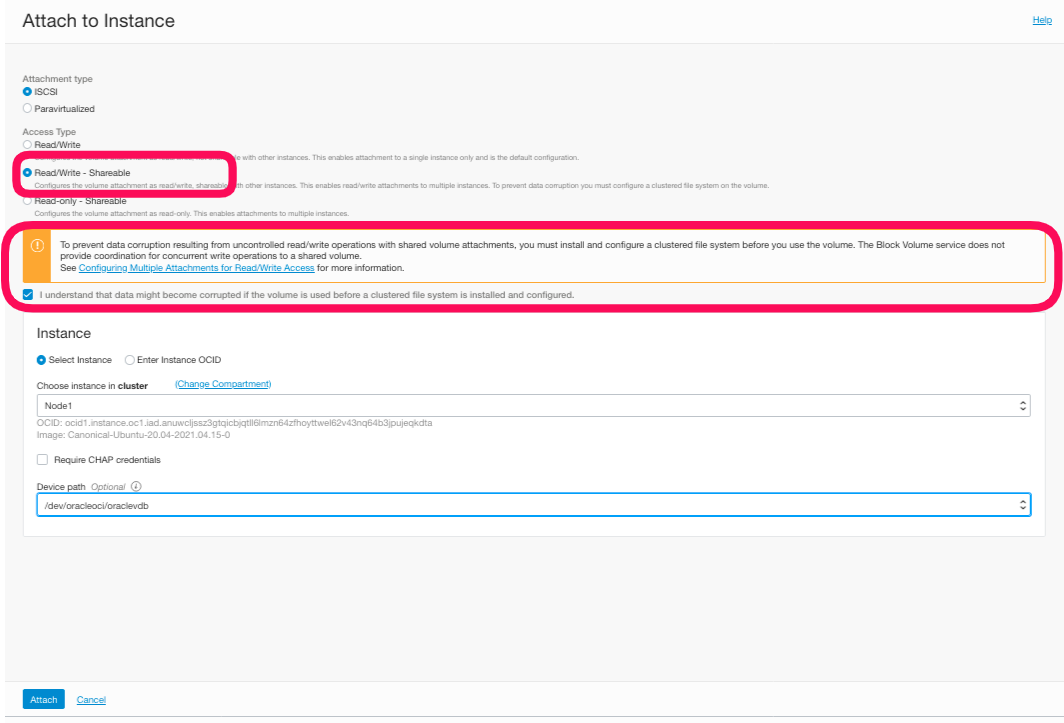
Once created the Block Volume now needs to be attached to both instances. Note the READ/WRTE select & the acknowledgment that it is understood that a clustered file system is required.
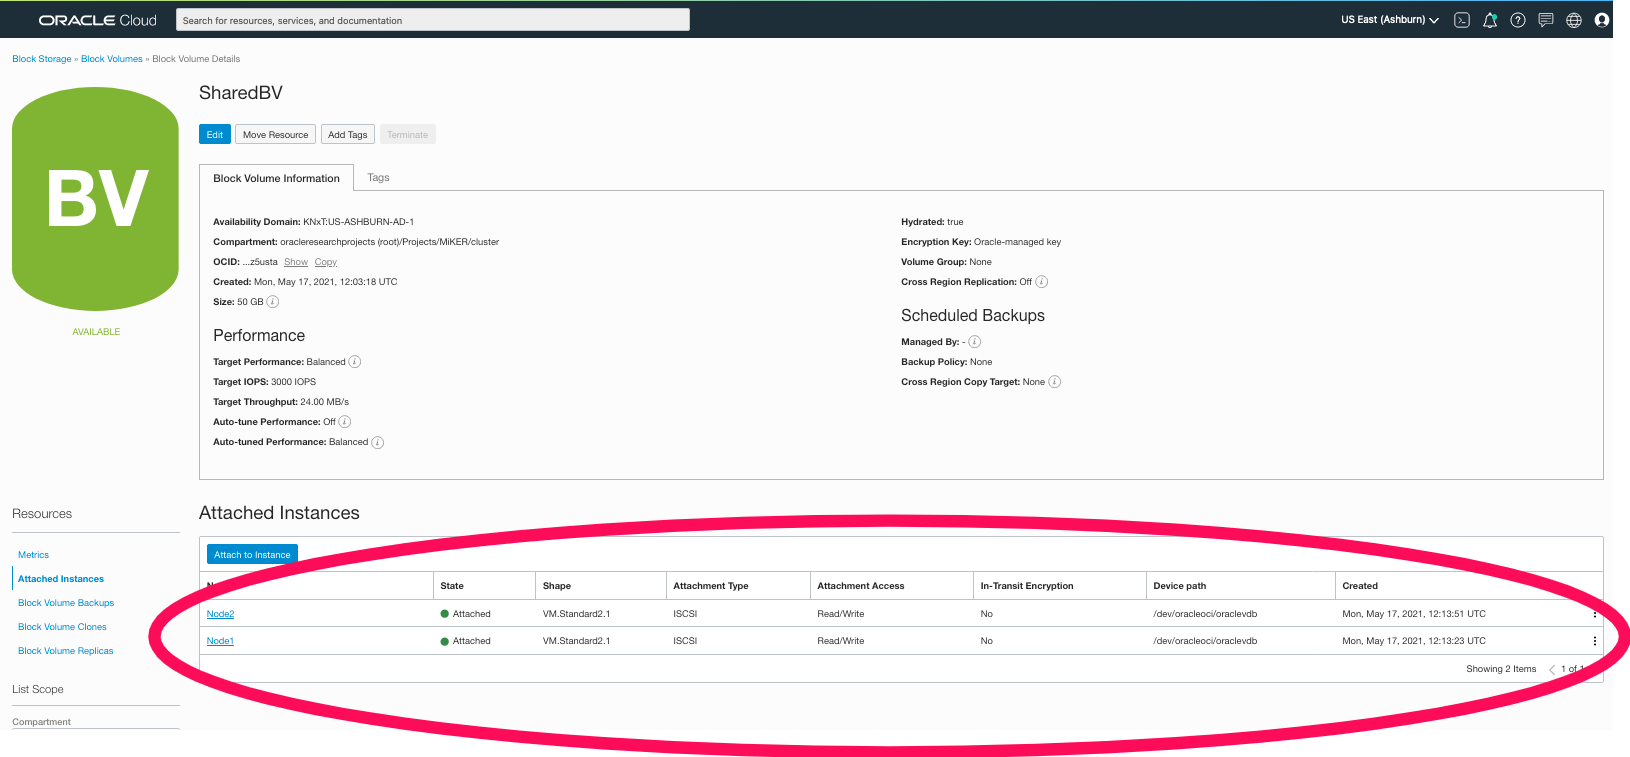
This shows volume attached to both instances
For both of these to access the volume READ/WRITE then a cluster volume HAS to be created on the volume.
Brief instructions to implement OCFS2 on Ubuntu 20 are described here below
The following assumes that you have attached the shared block volume to the instances - see the previous screenshots for attaching READ/WRITE to multiple instances.
-
Allow Ingress Rules within VCN - for example within the subnet ensure ports 7777 & 3260 allow traffic.


-
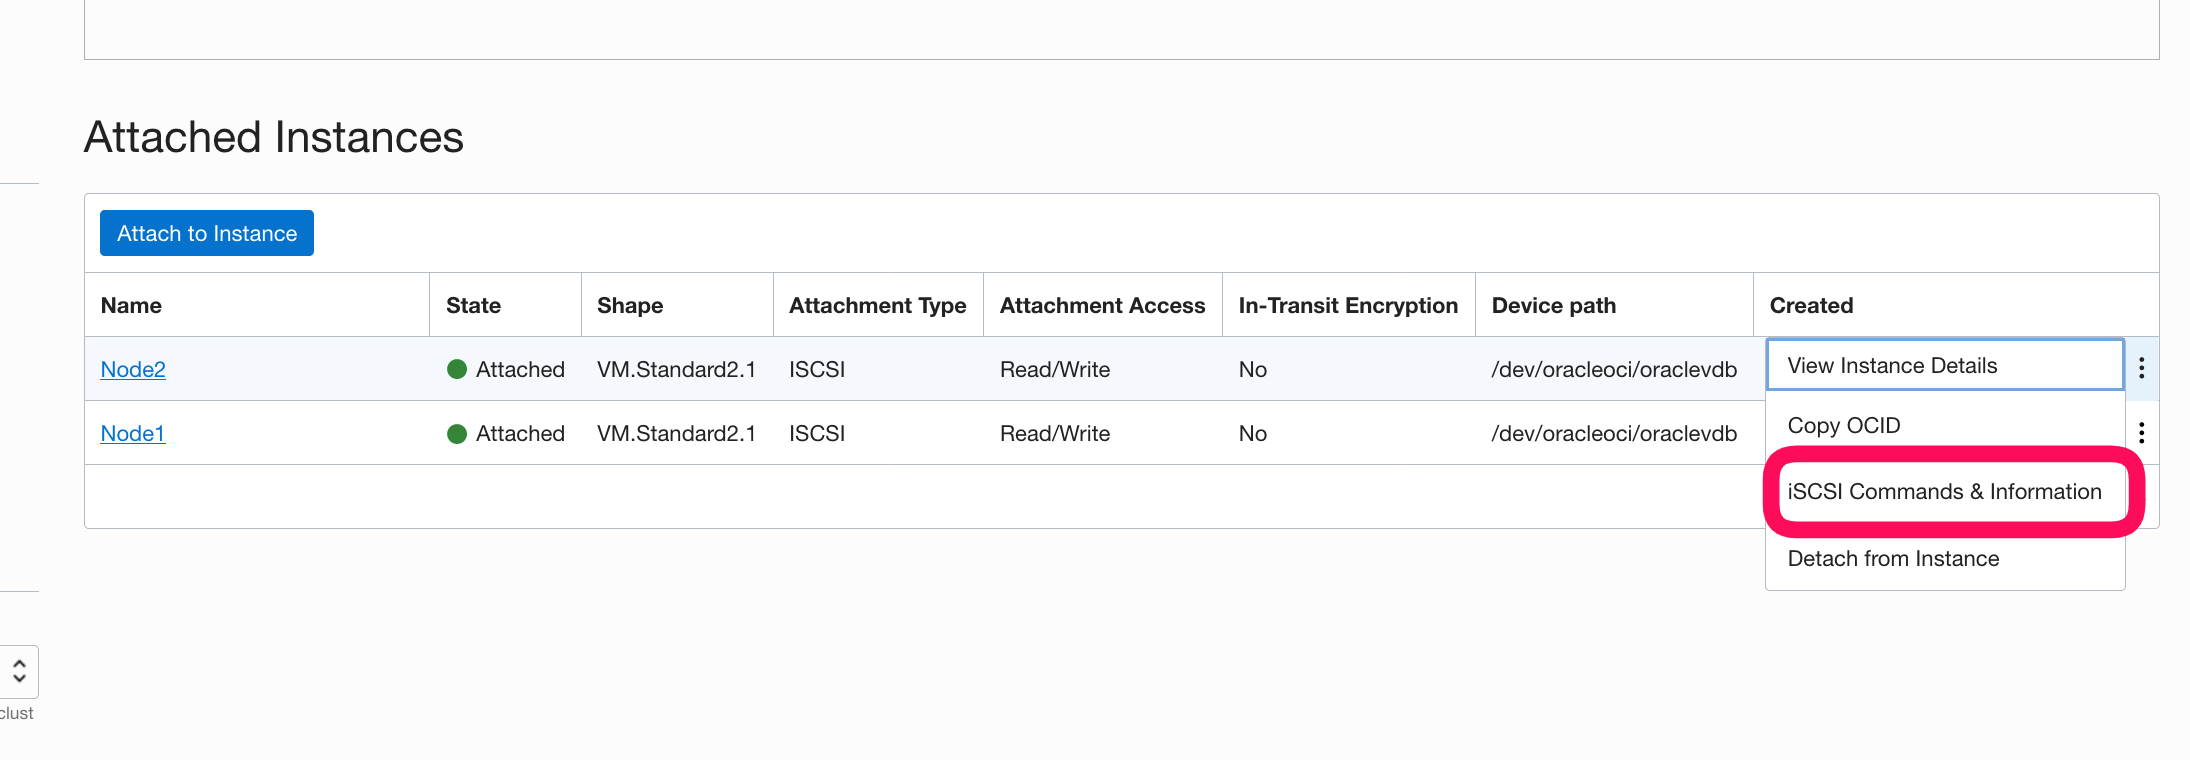
Run the isci commands on all nodes. The commands can be seen from the attached block volume instances.
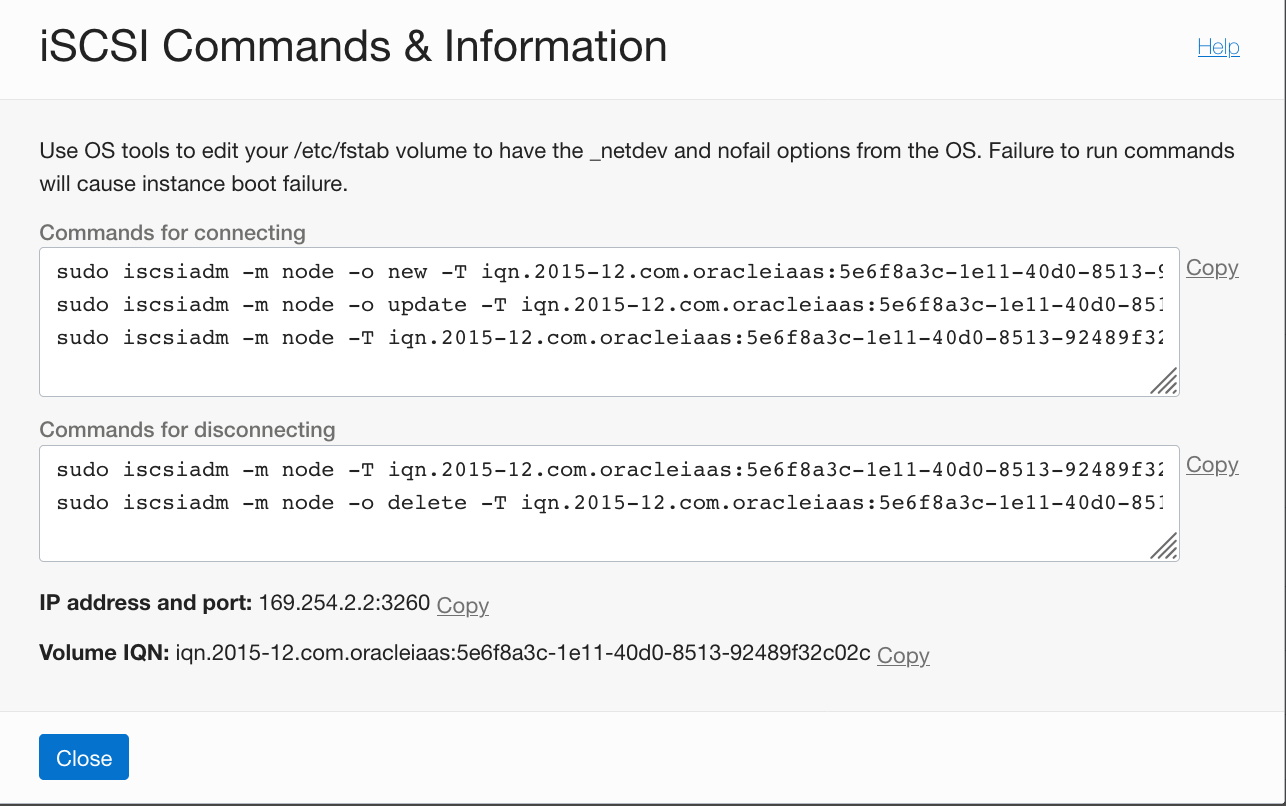
 Copy these commands & run them on BOTH instances.
-
Change the firewall on BOTH node.
sudo iptables -I INPUT -m state --state NEW -p tcp --destination-port 7777 -j ACCEPT
sudo iptables -I INPUT -m state --state NEW -p tcp --destination-port 3260 -j ACCEPT
sudo su -
iptables-save > /etc/iptables/rules.v4

- On all nodes run.
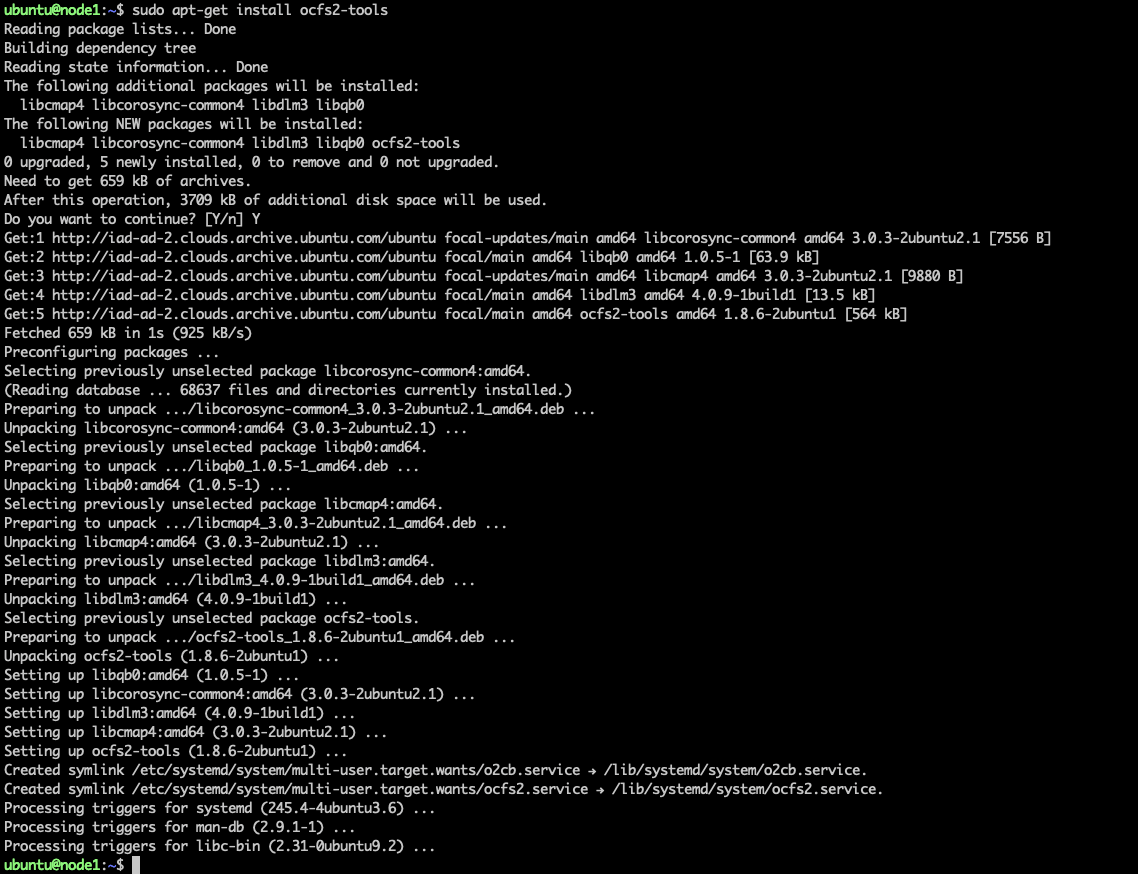
sudo apt-get install ocfs2-tools
- Edit /etc/hosts on ALL nodes
Place short node names & FQDN (retrieve from the oci console main page for each instance). The FQDN can be found from the console for each instance.
sudo vi /etc/hosts

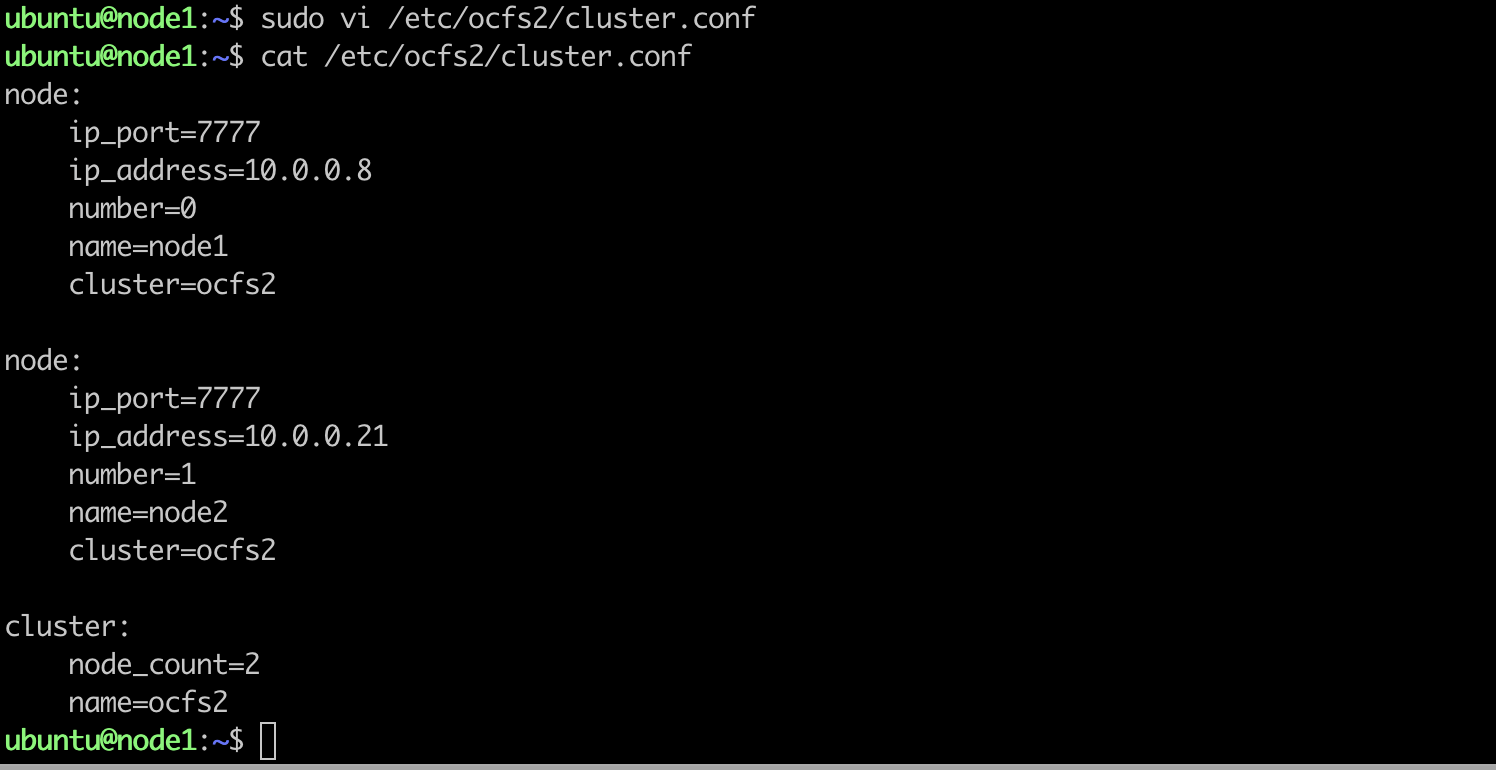
- edit the /etc/ocfs2/cluster.conf file on ALL nodes.
change this file on both nodes - ensuring IP address, node short names match your configuration
-
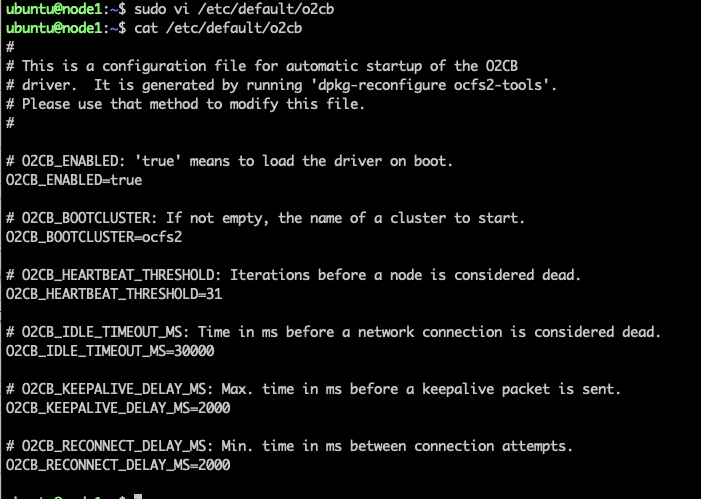
edit the o2cb file on BOTH nodes.
change O2CB_ENABLE to true O2CB_BOOTCLUSTER=ocfs2
- Restart the OCFS services on ALL nodes.
sudo service o2cb restart
sudo service ocfs2 restart

- Create a directory on ALL nodes.
sudo mkdir /data-share

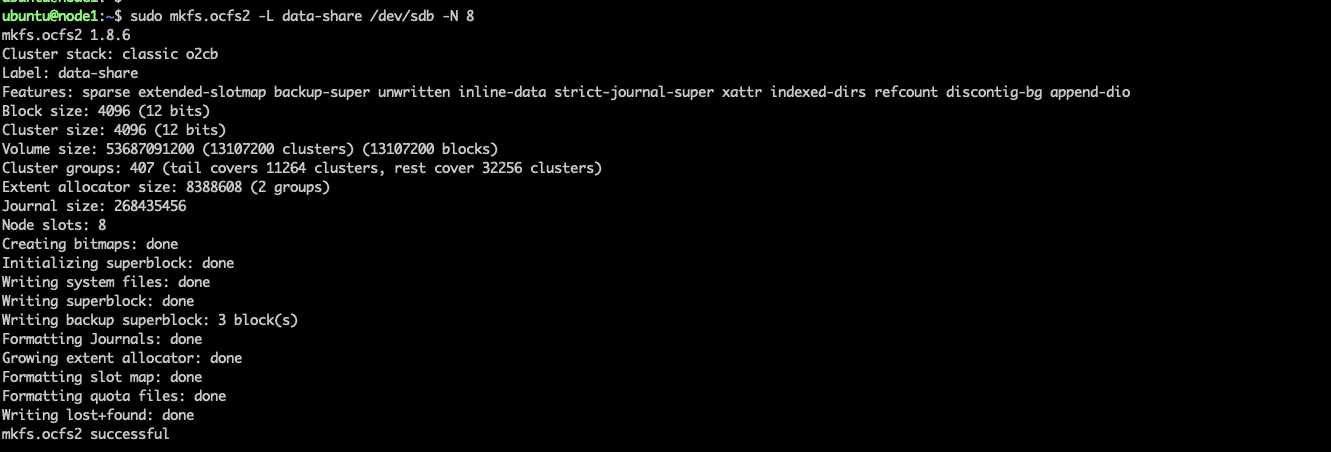
- On one of the nodes make an OCFS2 file system on the block volume
make a OCFS2 file system - ONLY required on ONE of the nodes. Note for this worked example the device name allocated when block volume was shared was /dev/sdb. This can also be seen at the OS level once the iscsi commands have been run by calling lsblk.
sudo mkfs.ocfs2 -L data-share /dev/sdb -N 8
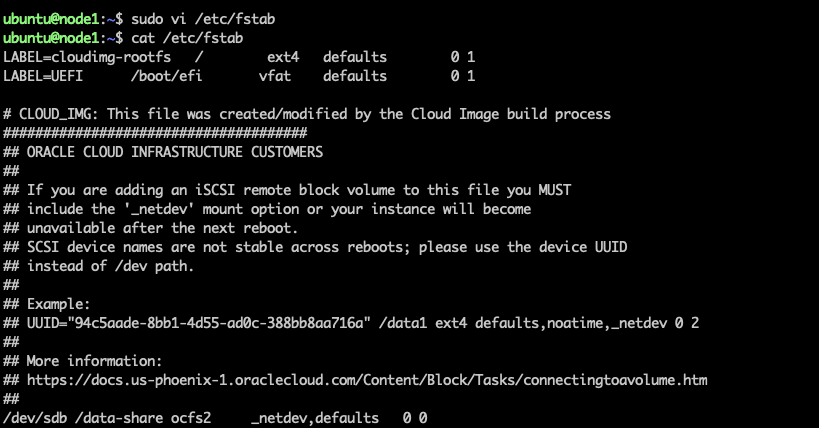
- On ALL nodes edit fstab for the shared volume
add an entry like the one shown below e.g.
$ sudo vi /etc/fstab
/dev/sdb /data-share ocfs2     _netdev,defaults   0 0
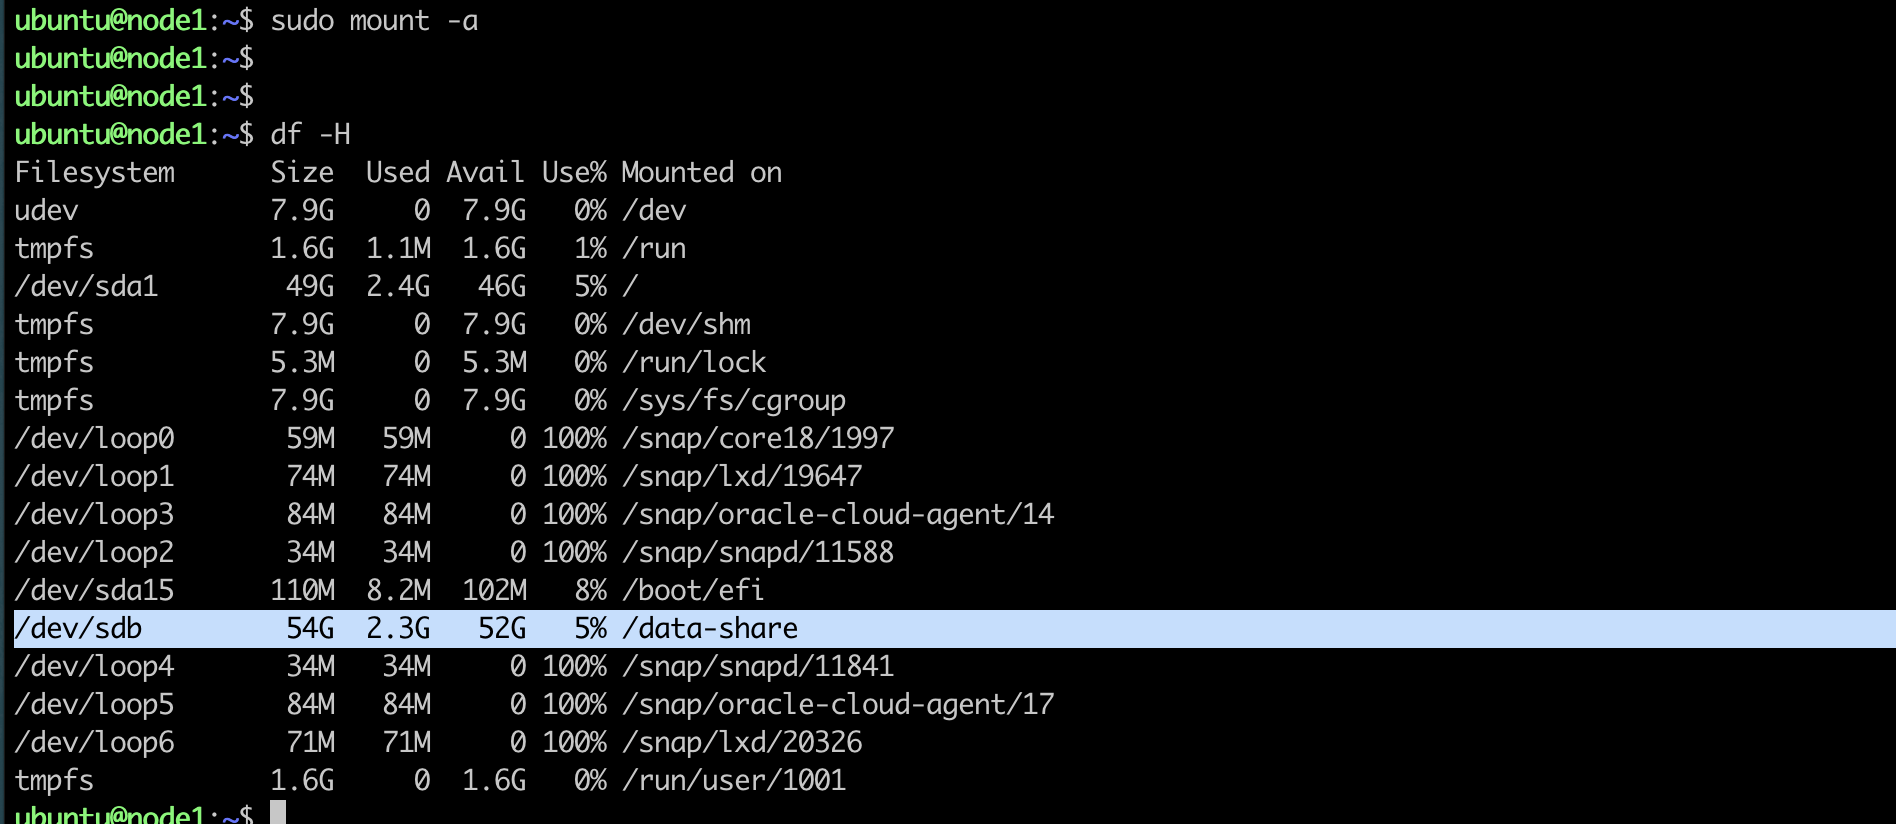
- Now mount the OCFS2 filesystem on ALL nodes
sudo mount -a
Other References
Setting fstab options for block volumes using consistent device paths
Attaching a block volume - end-to-end