Overview
There are 3 ways to resize a block volume:
-
Expand an existing volume in place – this is the riskiest method, steps are below
-
Restore from a volume backup to a larger volume – steps here
-
Clone an existing volume to a new larger volume – steps here
If you do either the second or the third, you will need to remount the new, larger drive to the virtual machine.
Steps
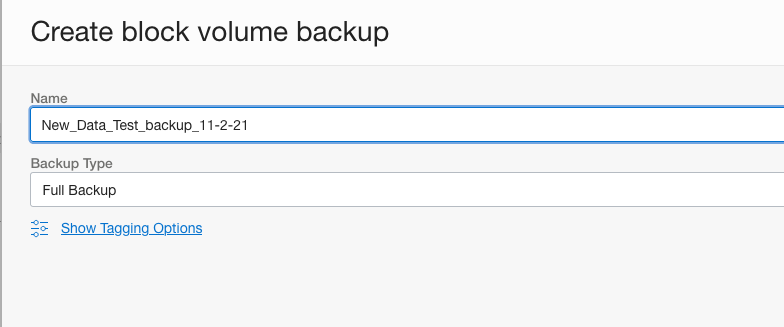
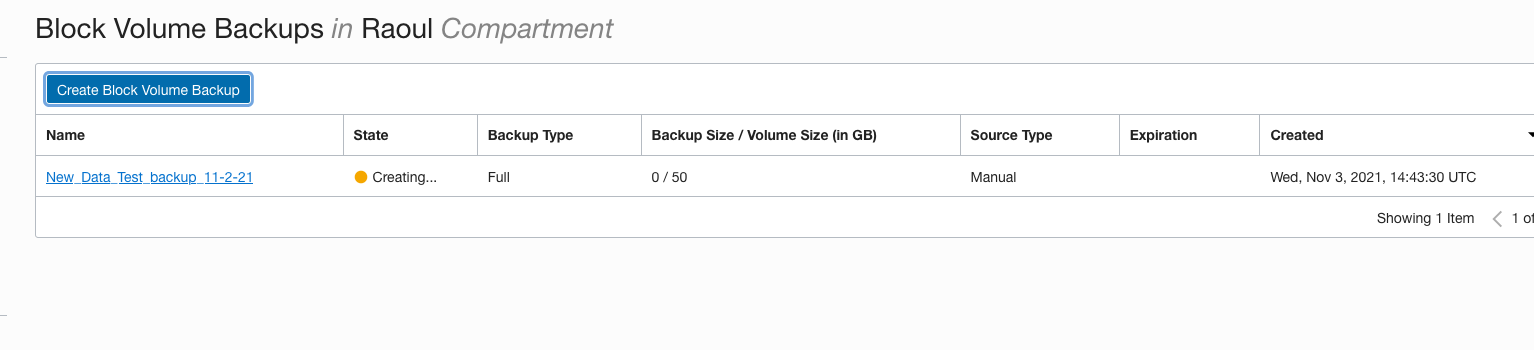
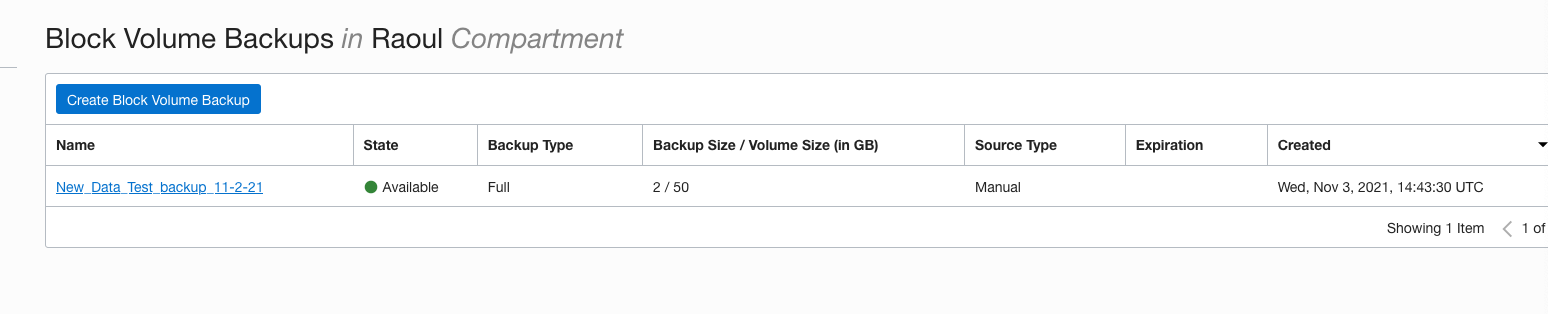
IMPORTANT – there is a risk of data loss, so you should always have a backup of the boot volume before making any changes.
-
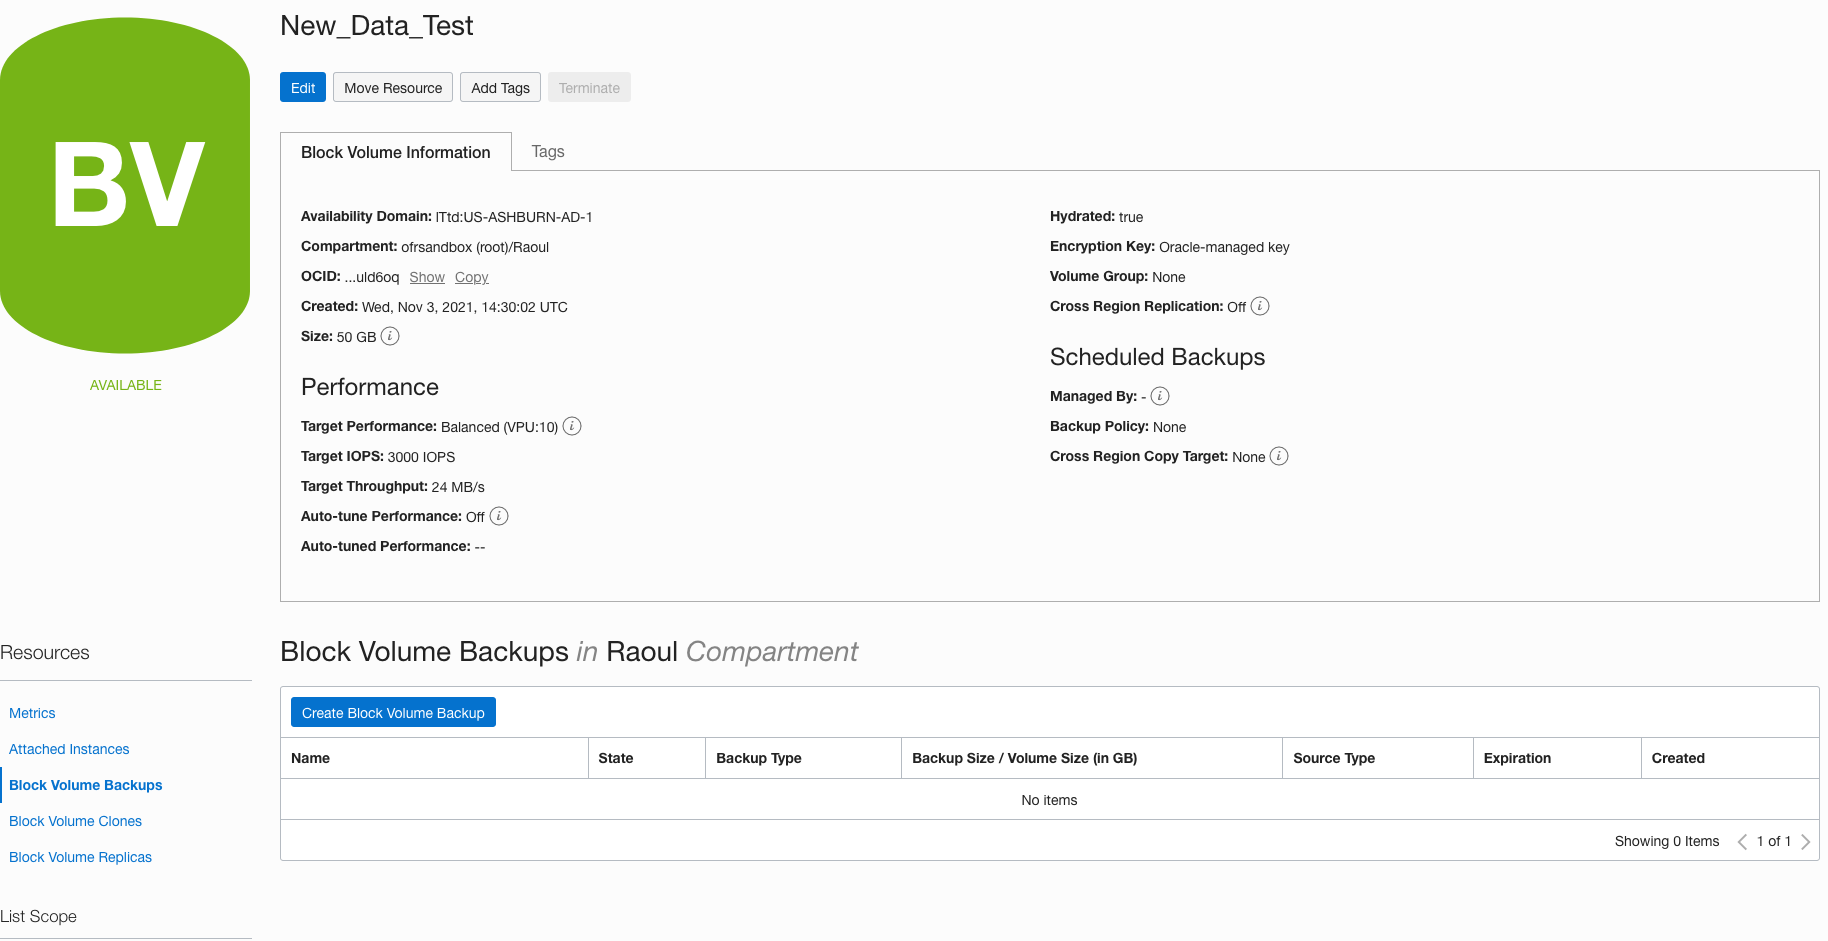
Open the navigation menu and click Storage. Under Block Storage, click Block Volumes.
-
In the Block Volumes list, click the block volume you want to resize.
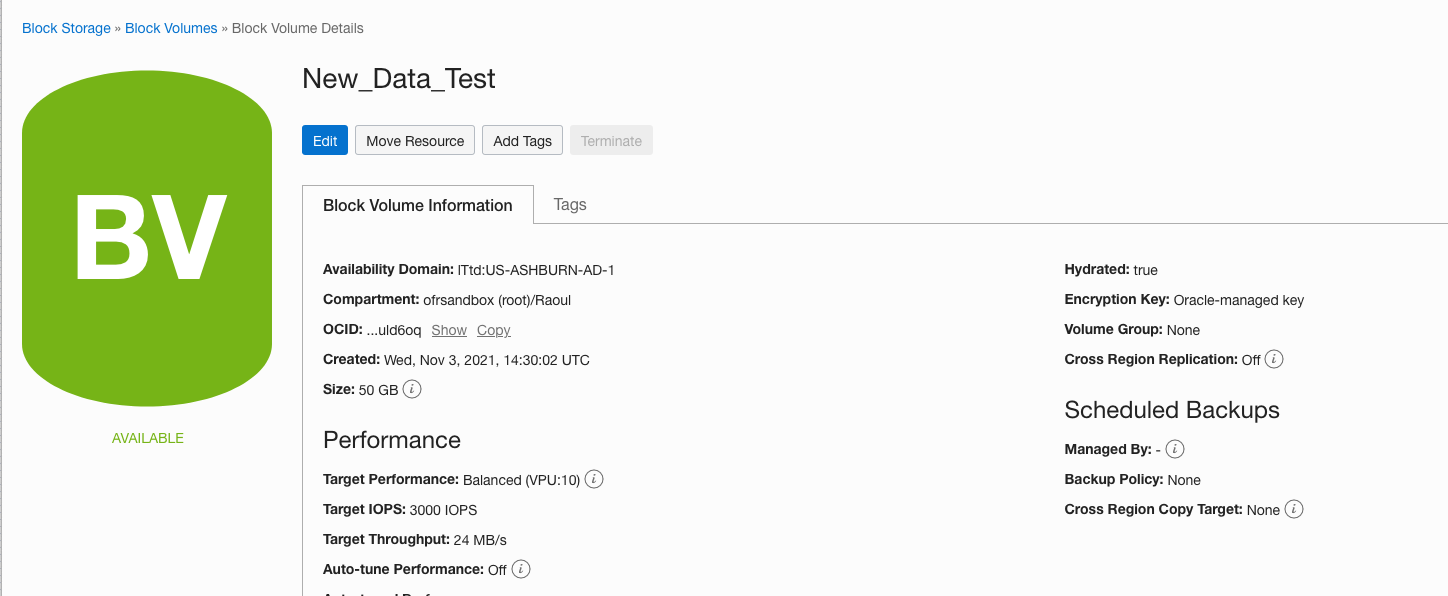
- Click Edit Size or Performance.
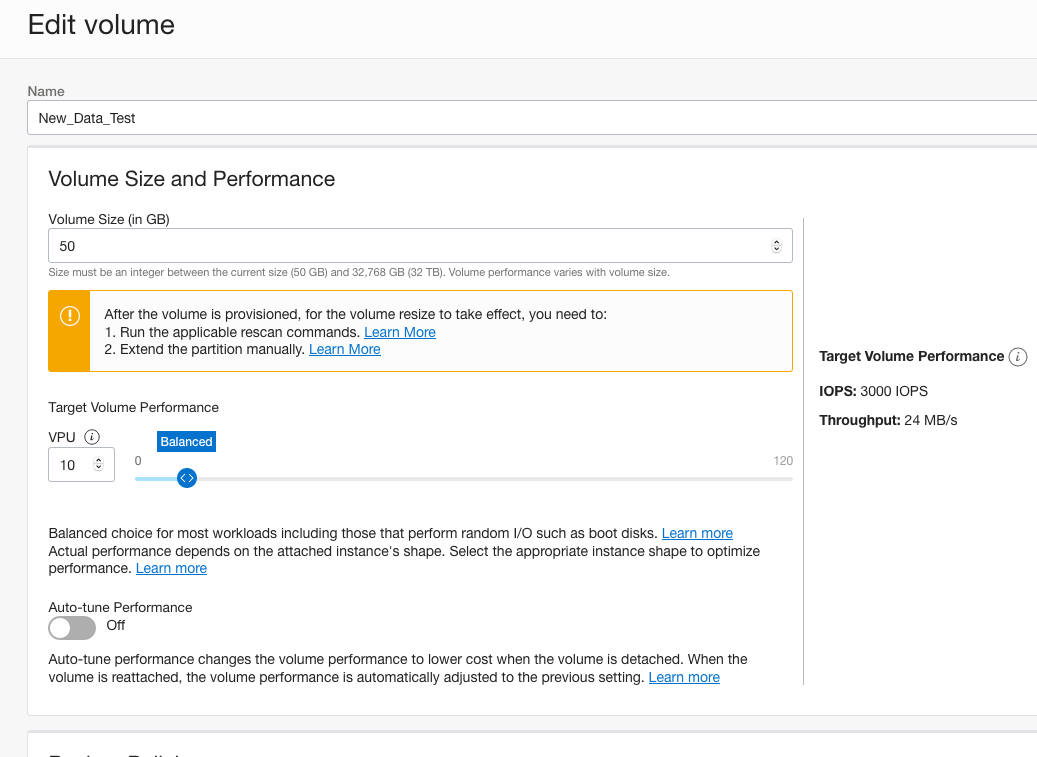
- Specify the new size in VOLUME SIZE (IN GB). You must specify a larger value than the block volume's current size.

- Click Save Changes. This opens a dialog that lists the commands to rescan the disk that you need to run after the volume is provisioned. You need to run these commands so that the operating system identifies the expanded volume size. Click the Copy link to copy the commands, and then click Close to close the dialog.

NOTE – these commands make a lot of assumptions:
-
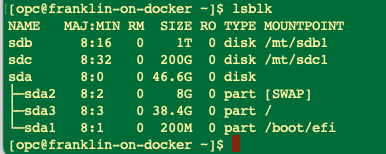
In our case we mounted the disk at /dev/sdc – not the path shown in here. You may need to dig into your instance and figure out where the block volume is mounted
-
These commands from the documentation are better
sudo dd iflag=direct if=/dev/*sdc* of=/dev/null count=1
echo \"1\" \| sudo tee /sys/class/block/*sdc*/device/rescan
- To identify the volume that you want to extend the partition for, run the following command to list the attached block volumes:
Copy
lsblk
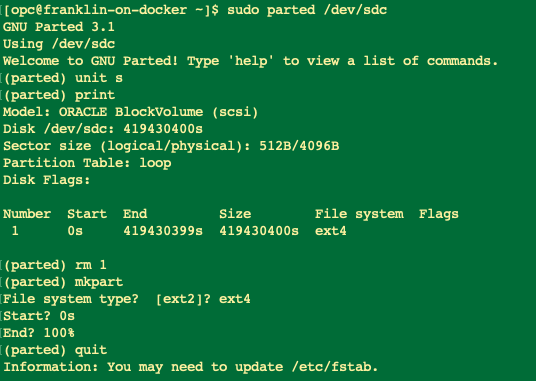
- Run the following command to edit the volume's partition table with parted:
Copy
parted *\<volume_id\>*<volume_id> is the volume identifier, for example /dev/sdc.
-
When you run parted, you may encounter the following error message:
-
Warning: Not all of the space available to <volume_id> appears to be used,
-
you can fix the GPT to use all of the space (an extra volume_size blocks)
or continue with the current setting?
You are then prompted to fix the error or ignore the error and continue with the current setting. Specify the option to fix the error.
- Run the following command to change the display units to sectors so that you can see the precise start position for the volume:
Copy
(parted) unit s
- Run the following command to display the current partitions in the partition table:
Copy
(parted) printMake note of the values in the Number, Start, and File system columns for the root partition.
- Run the following command to remove the existing root partition:
Copy
(parted) rm *\<partition_number\>*<partition_number> is the value from the Number column.
- Run the following command to recreate the partition:
Copy
(parted) mkpartAt the Start? prompt, specify the value from the Start column. At the File system type? prompt, specify the value from the File system column. Specify 100% for the End? prompt.
- Run the following command to exit parted:
Copy
(parted) quitThis command forces a rewrite of the partition table with the new partition settings that you specified.
- To verify that the root partition was extended, run the following command to list the attached block volumes:
Copy
lsblk
After you extend the root partition you need to grow the file system. The documentation only shows steps for xfs file systems.
As we are using Ext4, we will use the resize2fs command:
Run df -h to show existing file systems:
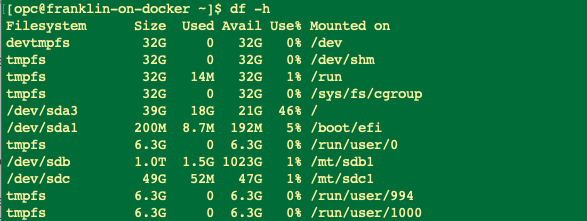
NOTE that even though we have extended the partition the /dev/sdc file system is still only 50GB

Resize2fs is easy – you can exclude the size option and it will resize the file system to fill the extended partition. Running df -h again shows the file system is now 200GB.