Remove an SMOD

Perform this procedure to access internal SMOD components, such as the HBA card, the internal USB ports, the ESM, or the system battery.

Note:

Internal USB ports are not used.

For component serviceability, locations, and designations, see Replaceable Components.

Obtain labels and a pen for labeling cables.

  1. Prepare the server for cold service.

    This is a cold-service component. Do the following before performing this procedure.

    • 8 Socket SMOD0 removal: Power down the system and disconnect all AC power cables from the back of the server.

    • 8 Socket SMOD1 removal: Power down the system and disconnect all AC power cables from the back of the server.

      Note:

      SMOD1 System Summary LEDs/buttons, recessed reset buttons, NET Management ports, Serial Management ports, and USB ports do not function.

    • 4 Socket SMOD0 removal: Power down the system (Side A) and disconnect the SMOD0 AC power cables AC2 and AC3 from the back of the server.

    • 4 Socket SMOD1 removal: Power down the system (Side B) and disconnect the SMOD0 AC power cables AC0 and AC1 from the back of the server.

    See Preparing the Server for Component Replacement.

  2. Label and disconnect all cables from the SMOD panel.

    Access this component directly from the back of the server.

  3. Disengage the SMOD from the server midplane.
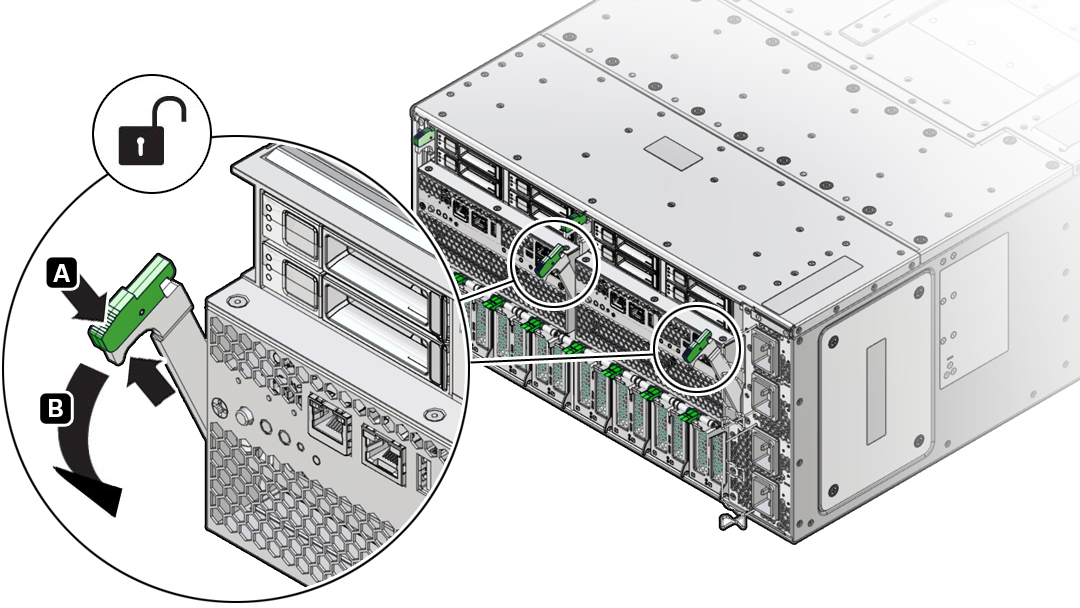
    1. To unlock the SMOD handles, squeeze together the release latches on the end of both handles.

      Image showing how to unlock the SMOD handles.
    2. To disengage the SMOD from the server midplane, simultaneously rotate both handles downward to their fully open position.

      This action disengages the connectors on the SMOD from the connectors on the server midplane.

    Caution:

    Physical harm or component damage. Do not use the SMOD handles to remove the SMOD from the server.

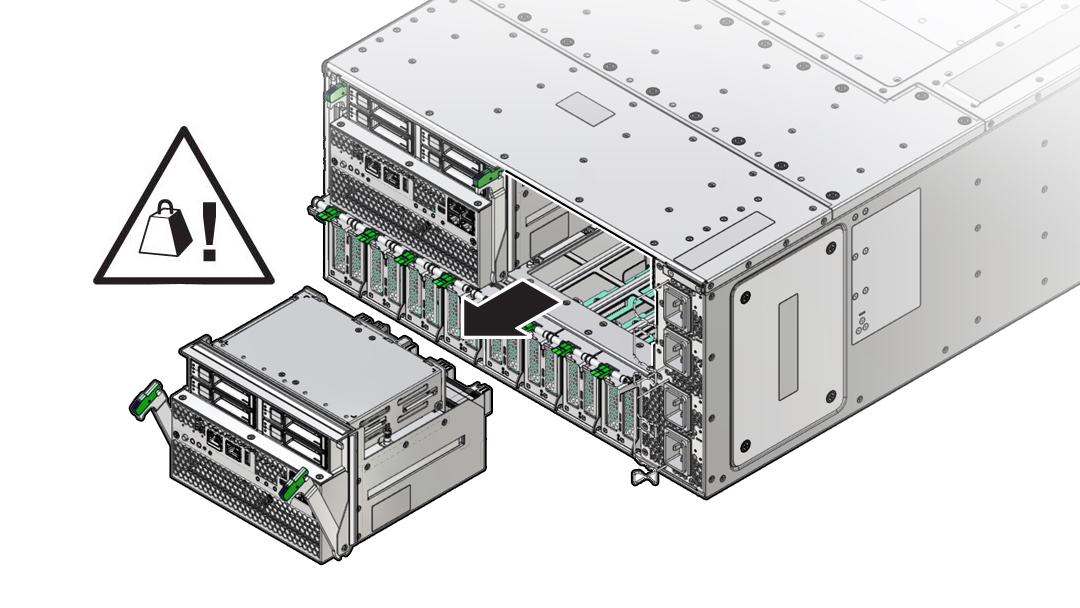
  4. To remove the SMOD, hold the SMOD by its sides and slide it out of the server.

    Image showing the removal of the SMOD.

    Caution:

    The SMOD is heavy. Be prepared to hold it firmly when it is clear of the slot.

Related Topics