Cloning a Snapshot in a Replication Package (BUI)

Note:

Cloning is a licensed feature. For details, refer to the "Oracle Software License Agreement ("SLA") and Entitlement for Hardware Systems with Integrated Software Options" and the appropriate Licensing Information User Manual for your product.

Note:

Snapshots within a replication package can be temporary. It is possible for a replication snapshot to be destroyed by replication updates, to accommodate new snapshots from the source. Therefore, this procedure recommends disabling replication updates for the package before cloning the replication snapshot.

Use the following procedure to clone a replication snapshot within a replication package.

  1. Go to the package that contains the share you want to clone.
    1. From the Shares menu, select Projects.
    2. Click Replica above the list of projects.
    3. Hover over the package, and click the edit icon image showing the edit icon .
  2. Suspend replication updates for the replication package.

    This will disable replication updates for a package entirely, which will cancel any ongoing updates and cause new updates from the source appliance to fail.

    1. In the replication package details page, select Replication.
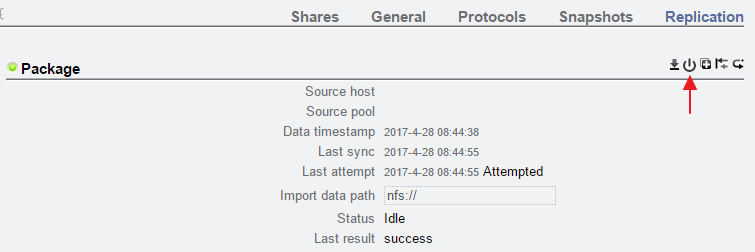
    2. Click the power icon image showing the power icon to disable replication updates.

      Figure showing power button location for disabling replication package updates.

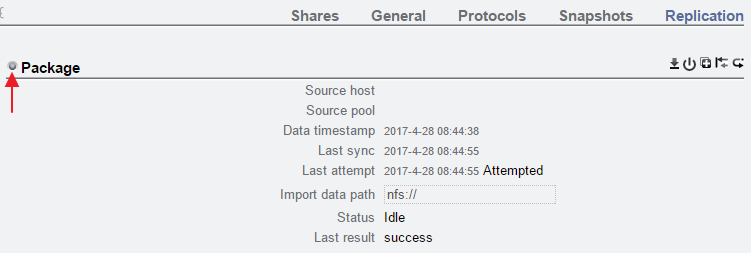
      The status icon on the left indicates the status of the Package.

      Figure showing status of replication package updates.

      The Package remains disabled until you re-enable it using the same power icon image showing the power icon .

  3. Navigate to the share you want to clone.
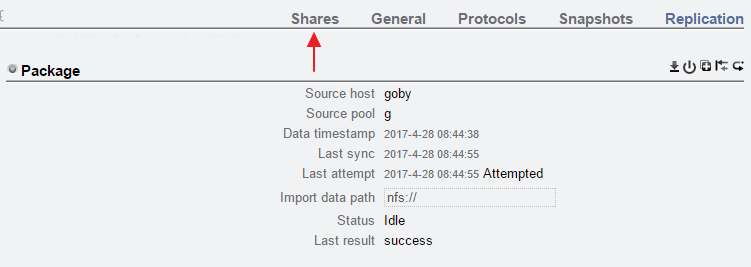
    1. In the replication package details page, select the Shares tab.

      Figure showing 'Shares' tab in replication package.

    2. Hover over a filesystem or LUN and click the edit icon image showing the edit icon .
    3. Click the Snapshots tab.
  4. Hover over the snapshot you want to clone, and click the clone icon image showing the clone icon .
  5. In the Create Clone dialog box, set the following fields.
    1. From the Project drop-down menu, select the destination project.

      The clone is created within the current project, by default, but you can specify a different project.

    2. Type a name for the clone.
    3. Optional: Click the lock icon image showing the lock icon next to Mountpoint, and set a mountpoint for the clone.

      If you leave this field locked, the mountpoint for the clone remains as /export/<sharename>.

    4. Optional: Click the lock icon image showing the lock icon next to Resource name, and enter one of the following values:
      • off - To disable SMB.

      • on - To enable SMB, so you can share the clone over SMB. The name of the clone in SMB matches the name of the clone in the appliance.

      • <resource_name> - SMB is enabled, so you can share the clone over SMB. The name of the clone in SMB is the name you specify here instead of the name of the clone in the appliance.

      If you leave the Resource field locked, the Resource name property is inherited from the snapshot you are cloning.

    5. Optional: Check the Inherit key check box, or uncheck the check box and select the keystore and the name of the encryption key that you want the clone to inherit.

      If the box is checked, the keystore and keyname of the clone will be that of the destination project.

      If the box is unchecked, the keystore and keyname of the clone will be that of the parent share. Alternatively, select a different keystore and keyname from the drop-down menu.

    6. Optional: Check the Retain Other Local Settings check box to cause any inherited properties to be preserved as local settings in the new clone.

      This field determines whether inherited properties will come from the parent dataset or the destination project. By default, the box is unchecked, meaning that all inherited properties will come from the destination project for the new clone. If you check the box, all currently inherited properties will be preserved as local settings in the new clone.

  6. Click APPLY to confirm the settings and create the clone.

    The clone appears in the list of shares for the destination project you set. You can work with a clone just like any other share.

    Note:

    After a replication package snapshot is cloned, it can no longer be destroyed by replication updates from the source.
  7. Re-enable replication updates for the replication package.
    1. Navigate to the parent project of the share you just cloned.
    2. Click the Replication tab.
    3. Click the power icon image showing the power icon .

      Ensure that the status icon on the left is green, indicating that replication updates have been enabled.