Replacing an Oracle ZFS Storage ZS5-2 HDD

HDDs are hot-swappable and can be removed and installed while the storage controller is running without affecting other hardware capabilities. Use the following procedure to replace an Oracle ZFS Storage ZS5-2 HDD.

Note:

If you have more than one failed drive, replace only one drive at a time. Removing more than one drive in quick succession will cause a hardware/pool fault. Also, do not perform a pool configuration operation while a disk firmware upgrade is occurring. To check if an upgrade is in progress, from the Maintenance BUI menu, select System, or navigate to maintenance system updates in the CLI.
  1. Identify the faulted HDD.
    • If you are not physically at the system, from the Maintenance BUI menu, select Hardware, and open the detailed view of the controller. The faulted drive has either an amber or a blue-on-amber (ready to remove) status icon. Note the ID of the faulted drive. Click the entry for that drive in the table to highlight the location of the drive in the controller illustration. To view details about the faulted drive, click its information icon information icon and then click Active Problems.

    • If you are physically at the system, the amber Service Action Required indicator on the HDD should be lit. Additionally, you can click the locator icon locate icon in the BUI to light the locator LED on the faulted drive.

  2. Verify that the faulted drive is ready to be removed.

    Caution:

    Removing the drive before it is ready to be removed can result in loss of data.

    Use any of the following methods to verify that the faulted drive is ready to be removed:

    • In the BUI:

      • The status icon for the faulted drive in the detail view in Maintenance: Hardware has changed from amber to blue-on-amber.

      • The Component Details information window (click the information icon Image showing the information icon ) for the faulted drive shows Yes as the value for the Ready to remove property.

    • In the CLI (and RESTful API), the value of the readytoremove property for the faulted drive is true:

      hostname:maintenance chassis-000 disk-001> get readytoremove
                       readytoremove = true
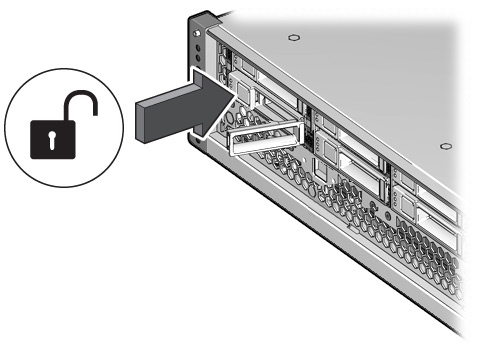
  3. To remove a faulted drive, press the release button and pivot the release lever open to the right.

    The illustration shows pressing the release button.
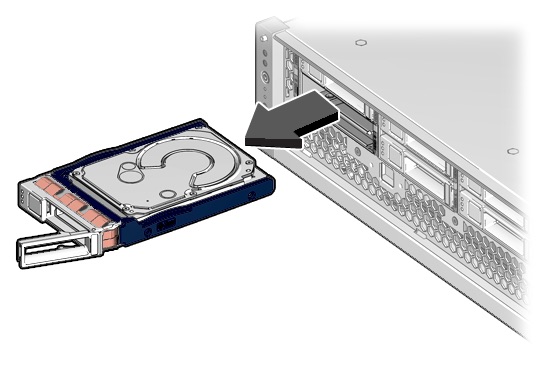
  4. Grasp the release lever, pull the drive out of the chassis, and set the drive aside.

    The illustration shows removing the drive.
  5. After at least 30 seconds, from the Maintenance BUI menu, select Hardware, and click the right-arrow icon apply icon on the system controller to verify that the software has detected that the drive is not present.
  6. To insert the replacement drive, push the release button of the drive.

    The release lever opens.

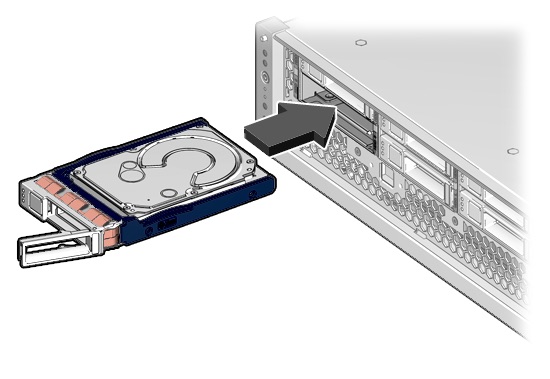
  7. Align the replacement drive with the chassis slot.

    The illustration shows installing the drive.

    The connector is at the rear of the drive and the release button is on the left.

  8. Slide the drive into the chassis until the release lever moves slightly inward.
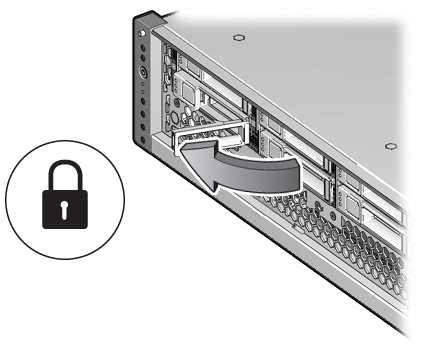
  9. Press the release lever fully closed until it clicks, securing the drive into the chassis.

    The illustration shows securing the drive.

    The Oracle ZFS Storage Appliance software automatically detects and configures the new drive.

  10. From the Maintenance BUI menu, select Hardware. Click the right-arrow icon apply icon for the controller, and verify that the status icon light on icon is green for the newly installed drive. To view details about the new drive, click its information icon information icon .
  11. If a fault does not self-clear, see Repairing Active Problems.