 corresponding
to the Output pane to open the filter group.
The filter group opens where you can add filter conditions.
corresponding
to the Output pane to open the filter group.
The filter group opens where you can add filter conditions.You can configure a filter by defining various filter conditions. For more information on defining conditions, see Defining Filter Conditions.
To configure a filter, follow these steps:
1. Navigate to the Output pane.
2. Click Add corresponding
to the Output pane to open the filter group.
The filter group opens where you can add filter conditions.
3. Click Add in
the Output pane to create a filter condition.
The filter condition is displayed.
Figure 33: Filter window
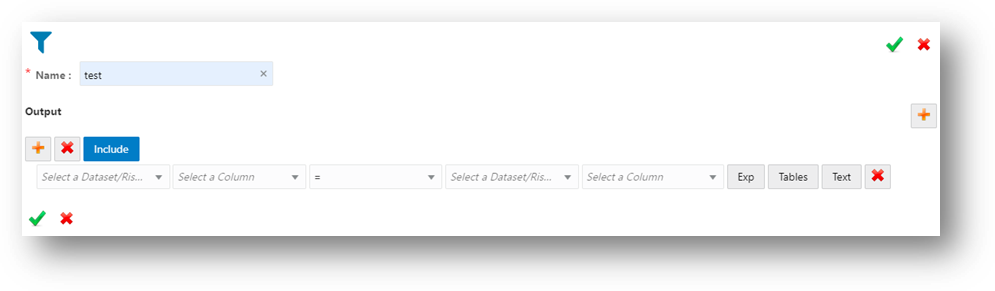
4. Define the filter condition. For more information, see Defining Filter Conditions.
5. Click Include to include the filter in the widget. The filter is included and is functional in the widget.
6. Click Save  to
save the changes. The filter is created. The entire expression that is
formed as part of filter creation is displayed in the Output
pane.
to
save the changes. The filter is created. The entire expression that is
formed as part of filter creation is displayed in the Output
pane.
You can define the filter conditions using one of the following:
· Expression Builder
· Tables
· Text
You can form filter conditions using all the operators given in the Expression Builder. Expression Builder is used to define free flown text filter conditions.
To define filter condition using expression builder, follow these steps:
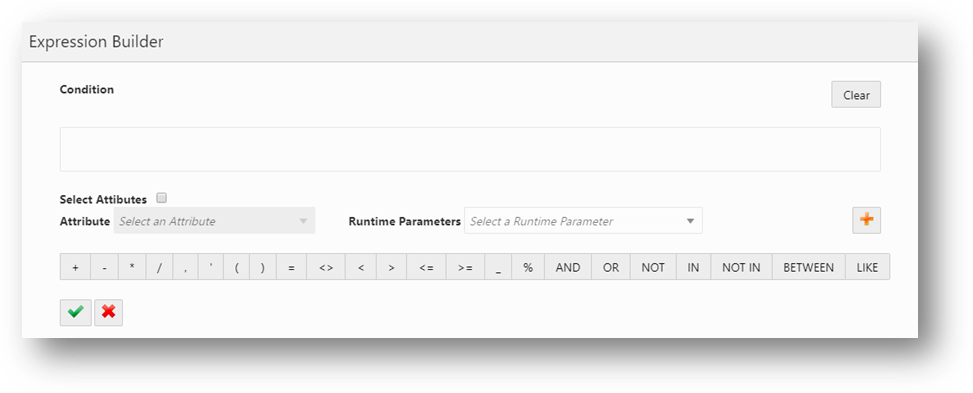
7. Click Exp. The Expression Builder dialog box is displayed.
Figure 34: Expression Builder for Defining Filter Condition

8. Select the required Dataset, Attribute and Runtime Parameters and operators. The resulting condition is displayed in the Condition field.
9. Click Save  to
save the changes.
to
save the changes.
You can define filter conditions using the various columns of tables. The columns of the two tables are compared with each other using the required operators.
To define filter condition using tables, follow these steps:
1. Click Tables.
2. Select the dataset or risk indicator and column on the left-hand side and right-hand side, and then select the operator.
You can define filter conditions using text. A particular column in a table is compared with the input text using the required operators.
To define filter condition using text, follow these steps:
1. Click Text.
2. Select a dataset and column on the left-hand side, operator, and then enter the text in the field on the right-hand side.
3. Click Save  to
save the changes.
to
save the changes.
Runtime parameter is a variable whose value can be set at the runtime.
To create a runtime parameter, follow these steps:
1. Configure a filter. For more information, see Configuring Filter.
2. Define the filter condition using Expression Builder. For more information, see Defining Filter Condition Using Expression Builder.
Figure 35: Expression Builder for Creating Runtime Parameter
3. Click Add .
The New Runtime Parameter dialog box is displayed.
.
The New Runtime Parameter dialog box is displayed.
Figure 36: New Runtime Parameter window
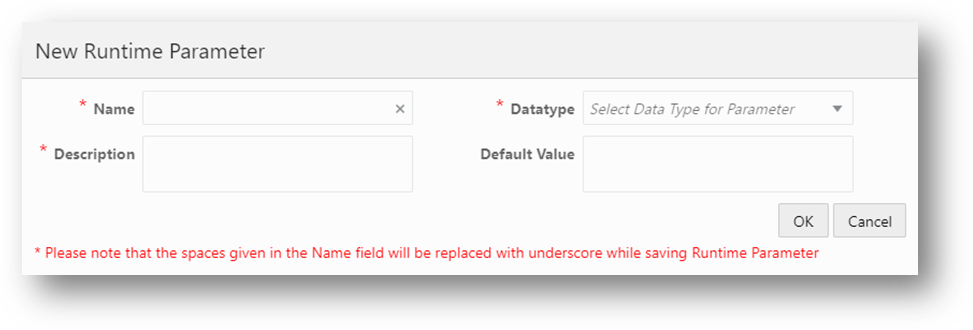
4. Provide the details as described in the following table:
Table 31: Fields on New Runtime Parameter and their Descriptions
Field |
Description |
Name |
Enter the name for the runtime parameter. |
Datatype |
Enter the datatype for the runtime parameter. |
Description |
Enter the description for the runtime parameter. |
Default Value |
Enter the default values for the runtime parameter. |
5. Click OK.
6. The runtime parameter is created.
To modify a widget, follow these steps:
1. Navigate to the Pipeline Designer page.
2. Select the widget that you want to modify.
3. Hover on the
widget and click  . A dialog box is displayed.
4. Modify the required details.
5. Click  to
save the changes. The widget details are modified.
to
save the changes. The widget details are modified.
To delete a widget, follow these steps:
1. Navigate to the Pipeline Designer page.
2. Select the widget that you want to delete.
3. Hover on the
widget and click  .
.
4. The Pipeline Delete dialog box is displayed. Click Confirm. The widget is deleted.