A Configuring Standalone Installation Topology for Standalone Agent
A.1 Pre-requisite
Oracle Data Integrator Master and Work Repository Schema are already created.For more details, see
https://docs.oracle.com/middleware/1212/odi/ODING/create_schemas.htm#ODING860 > Chapter 3 Creating the Oracle Data Integrator Master and Work Repository Schema.
A.2 To configure a standalone agent:
-
Start the configuration wizard.
To begin domain configuration, navigate to the ORACLE_HOME/oracle_common/common/bin directory, and start the WebLogic Server Configuration Wizard.
-
On Unix—./config.sh
-
On Windows—config.cmd
The Configuration Wizard appears.
-
-
Create Domain—Select Create a new Domain, verify the domain location, and click Next.
-
Templates—From the list of available templates, select Oracle Data Integrator - Standalone Agent - 12.2.1.0 [odi], and click Next.
-
JDK Selection—Select the JDK installed on Host, and click Next.
-
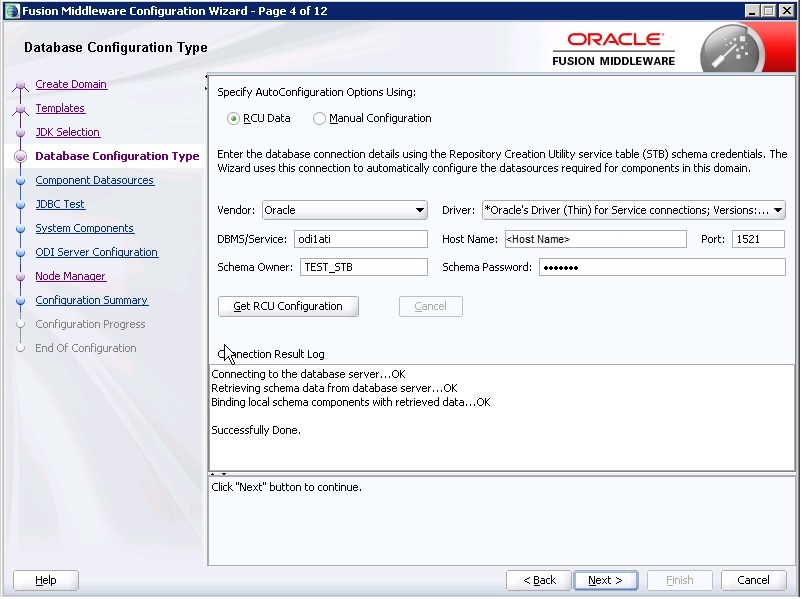
Database Configuration Type—Select RCU.
Enter the Repository Details, and click Get RCU Configuration.
When the Connection Result log displays the message Successfully Done, click Next.
-
Component Datasources—The details of schemas created using RCU appears. Verify the schema details, and click Next.
-
JDBC Test—Test the database connection, and click Next.
-
System Components—Make sure that the System Components is same as the name of the physical agent present in the ODI Studio. That is, the Physical Agent Name in the ODI Studio must be same as System Component (Agent Name).
Click Next.
-
ODI Server Configuration—Select Server Listen Address as the IP address of the Host
Enter Server Listen Port as the port number defined for the physical agent in the ODI Studio.
Click Next.
-
Node Manager—Select Per Domain Custom Location, verify the path, and click Next.
-
Configuration Summary—The Agent Name appears under System Component > ODI.
Click Create.
-
Configuration Progress—The progress of the domain creation process appears.
On successful completion of the Agent, a message stating Domain Created Successfully. appear.
Click Next.
-
End of Configuration—Domain Configuration Succeeded appears with the Domain Name and the Domain Location.
Click Finish to exit the wizard.