4 Review Your Cases
Find an Existing Case
-
On the Home page, hover over the Case Actions menu and click Open.

-
On the Case Search Criteria page, select the applicable search criteria and click Search.
-
When the system displays the search results, locate the case in the list.
-
Click the link associated with the Case ID to open that case in the Case Form.
Enter Case Search Criteria
| Field/Control | Description |
|---|---|
| Search For | You can search for cases based on multiple study identifiers. The option, Pri/Stdy/Othr/Cntr/Rptr/Pat supports the entry of Project ID, Study ID, Other ID, Center ID, Reporter ID, and Patient ID values separated by the / (forward slash) character. |
| Date Range | To enter a customized date range, select Custom Date Range from the list.
|
| Advanced Condition | Click AC to create a new advanced condition.
Select an Advanced Condition for the case, if applicable. |
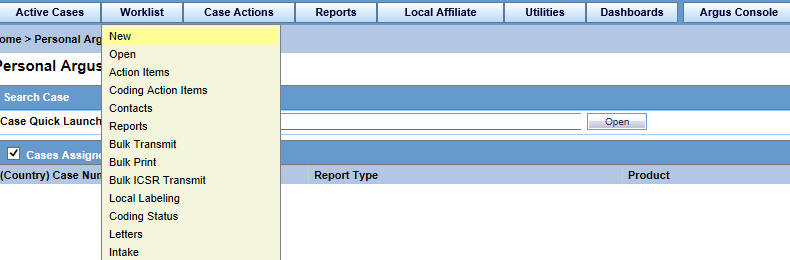
Open or View New Cases in the Worklist
-
On the Home page, hover over the Worklist menu and click New/Open.
-
On the New/Open page, enter the required information and click Search.
-
When you select New, the system displays new worklist items that have been assigned but not yet accepted. You can also see unassigned cases.
-
When you select Open, the system displays all cases that have been assigned and accepted.
Note:
Once you have accepted the case, it is Open. -
The New/Open Worklist displays the Workflow Group and the Workflow State currently associated with the case.
-
If the user has cases open, the system skips those cases.
You can filter the results based on the following:
| Option | Description |
| Workflow State | Displays only those workflow states that occur in the given worklist, considering other filter elements such as Case Owner, Assigned to, and so on. |
| Product | Displays only those products that occur in the given worklist, considering other filter elements such as Case Owner, Assigned to, and so on. |
| Event Preferred Term (PT) | Displays only those Event PTs that occur in the given worklist, considering other filter elements such as Case Owner, Assigned to, and so on. |
| Event as Reported | Displays the name of the event as reported. |
| Case Report Type | Displays only those report types that occur in the given worklist, considering other filter elements such as Case Owner, Assigned to, and so on. |
| Product Group | Displays product groups where the Primary Suspect Drug occurs. |
The default filter is Case Number. This lets you enter a Case Number to search for results matching a specified case number.
The search results are displayed in the Total Number of Rows section. The following table lists and describes the fields in this section.
| Field | Description |
|---|---|
| Lock Status | Enables the user to view the Locked state of the case by the icon. The type of case (Initial or Follow-up) is also displayed along with the icon.
If the case is a Follow-up, additionally, the Follow-up number is also displayed. For example: Initial or F/U: 1. The icon (displayed in the lock state column) denotes a SUSAR (Suspected Unexpected Serious Adverse Reaction) case. |
| Receipt Date | If the option Display Initial Receipt Date always is configured, the Initial Received date of the case is displayed in the Receipt Date column on the Worklist screen.
If the option Display Initial Receipt Date or the latest Follow-up Receipt Date is chosen, and if a Follow-up entry exists, the latest Follow-up Received Date regardless of significant or not is displayed in the Receipt Date column on the Worklist screen. If Follow-ups do not exist, the Initial Received date of the case is displayed in the Receipt Date column on the Worklist screen. |
| Aware Date | The Aware date is the latest significant Follow-up which is received in the case or the Initial Receipt Date if there are no Significant Follow-ups present in the case. |
| Days Open | Displays the number of days that have elapsed between the Initial Receipt Date or the latest significant Follow-up Receipt Date (if it exists) and the current system date (Database server). |
| Days Remaining | Displays the number of days that are remaining, as configured in the Administration module for Case Processing. |
| Event PT | Displays the Preferred term of the Primary Event. |
| Event Verbatim | Displays the Verbatim text for the Primary Event. |
| S/U/R | Displays the Case Level Assessments:
|
| F, LT or H |
If any of the above are present together, then Fatal takes precedence followed by LT followed by H. If the case is neither of the above, No is displayed. |
| Study ID | Displays the Study ID of the study cases.
If Study ID is not present, this field is blank. |
| Reporter Type | Displays the Reporter type for the Primary Reporter in the case.
If Reporter type is not present, this field is blank. |
| Assigned To | Displays the current owner or text Unassigned to indicate the assignment status of the Case. This option is not available if the user selects the Individual option from View. |
| Owner | Displays the Owner of the case. If Owner is not present, this field is blank.
By default, the first user to accept a case after book-in becomes the Case Owner. The Case Owner has access rights to assign cases that he owns to another user. A Case Owner cannot be reassigned automatically after the initial assignment. However, he can be reassigned manually by a Workflow Manager. |
| Print List Button | Allows the user to print the current worklist for reference. |
| Routing Details | Displays the case routing details. |
Find Cases Assigned to you
-
On the Home/Personal Argus Status page, check the Cases Assigned checkbox.
The list of cases assigned to you is displayed.
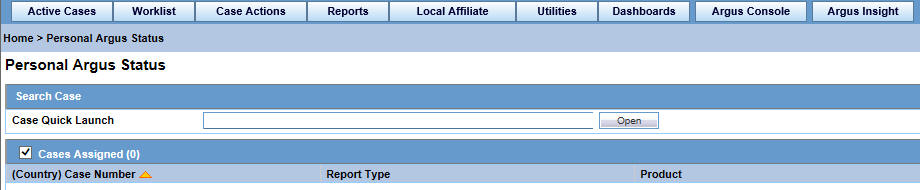
If the Personal Argus Status Page is not your default home page, go to Utilities and click Personal Argus Status.
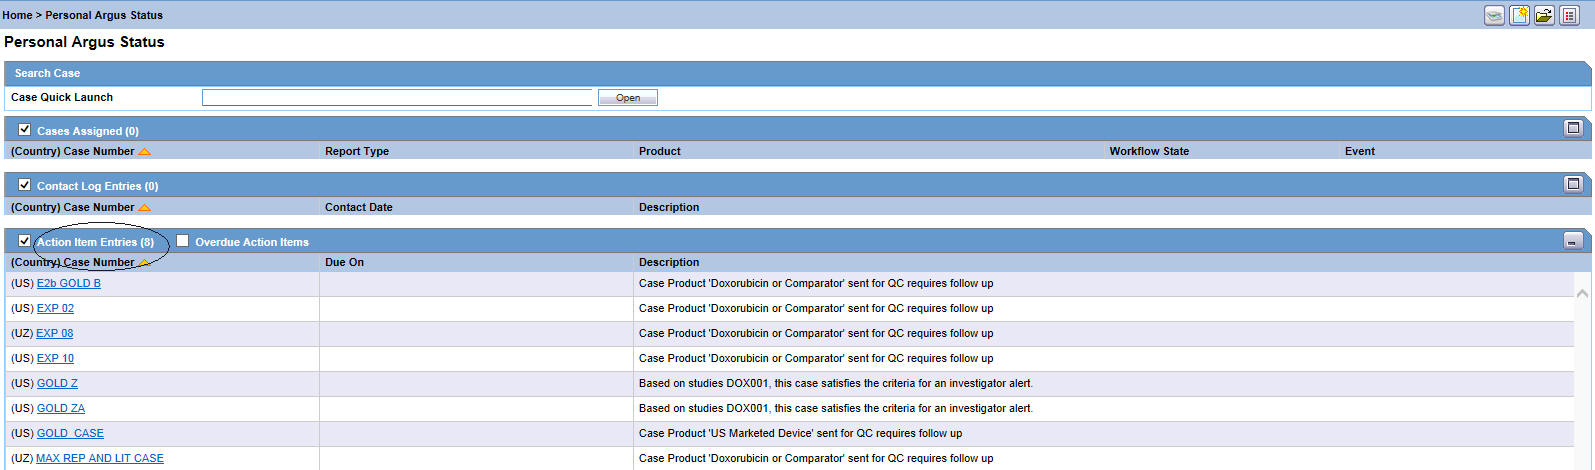
View your Pending Action Items
-
On the Home/Personal Argus Status page, check the Action Item Entries checkbox.
The list of your pending action items is displayed.
View your Case Workload
The Case Workload feature is available for Workflow Managers only (administrator). For example, if a user belongs to a group which has access to this menu option but is not a Workflow Manager, this option will not be displayed.
To view the case workload for individuals and one or more sites, select Dashboards > Case Workload.
The Case Workload parameters display the specific Worklist where the user can view the case numbers. Click + to view the next level and expand the parameter.
| Site | Expands either the Workflow State or Workflow Group. |
| Workflow State | Expands to User Name.
Click the Header to toggle between Workflow Group or Workflow States. |
| Workflow Group | Expands to User Name.
Click the Header to toggle between Workflow Group or Workflow States. |
| Week Forecast | Displays the number of cases projected in the next 5 days for the current workflow state or group.
If a case is routed to multiple workflow states or groups, it is counted multiple times within the Week Forecast. The Projected Week Forecast is based on the Dynamic Workflow calculation for the entire case, as per the configuration settings. |
| User Name | Displays the user to whom the cases are assigned.
Expands to Priority. Online Users can view the Online icon and their User Names appear in bold. |
| Priority | Click the link to view the specific Worklist where the user can view the case numbers. |
| # of Cases | Click the link to view the specific Worklist where the user can view the case numbers. |
| Refresh | Enables you to only refresh the number and the entities but not the entire page.
Enter a value in the text field to Auto-Refresh the data every N minutes up to a maximum of 99 minutes. |
| Prints the Load Balancing Dashboard in PDF format. | |
| Export to XLS | Exports the Load Balancing Dashboard in Excel format. |
Open Case Summary Reports
To view a summary of all the open cases, select Dashboards > Open Case Summary.
-
The case summary appears in PDF format.
-
The cases are sorted in ascending order as per the number of days the case has been open.
-
The Date Received column prints the initial receipt date or the latest follow-up date for the case.
-
If there are no follow-ups for a case, the system calculates open cases based on the initial receipt date.
-
If there are follow-ups for a case, the system calculates the days open based on the most recent follow-up in the case. If the latest follow-up date is older than the previous follow-up, it considers only the last follow-up.
View Workflow Status
You can view the workflow status based on case owner, site, case seriousness, and other criteria.
-
Select Dashboards > Workflow Status.
-
In the Search Case fields, enter the parameters, and click Search.
Workflow Status appears on the Worklist Group menu.
-
To open the list of cases, click a bar graph, and select from a dashboard menu.
To drill down on the specific workflow state details, click the graphical bars.
-
If no updates are made to cases during case processing, the cases are displayed based on the number of cases you clicked during the drill down.
-
If one or more cases change workflow state between loading the dashboard screen and loading the worklist-specific screen, a discrepancy in case numbers may occur.
-
The system maintains user preferences when you return to the Workflow Status Dashboard.
-
By default, only the first filtering results appear, to view other filter options, click More Filtering.
Use CTRL and Shift keys to make multiple selection for a filter.
-
The Site filter displays all active (undeleted) sites in the Argus Code List. However, the LAM sites are not displayed.
-
The Workflow State filter displays all active (undeleted) workflow states, except archived or closed in the Argus Utilities - Configuration.
-
The Date Range function selects last month as the default value for the range.
The Aware Date is evaluated to fall in between the date range specified in the Date Range filter.
-
The Serious or Non-Serious filter further provides more sub-filtering options.
-
For Project ID filter, the values are configured in the Argus Utilities Protocol ID Code List.
-
The Default Report Configuration filter returns all cases for the current month when no other filters are used. The cases are evaluated based on the Aware Date.
-
-
To go to worklist specific screen, double-click the Bar Graph.
Bar graph colors indicates: the following statuses:
-
Red—Late cases
-
Yellow—Outside of normal cases
-
Green—Normal cases
-
-
View your Worklist Action Items
-
Hover over the Worklist menu and select Action Items.
-
When the system opens the Action Items screen, enter the information in the fields as necessary.
The Worklist Action Items displays the entire description of the action item selected in the Description field on the dialog box.
Manage your Queries
The system generates open Query Action Items based on the advanced conditions rules for the action item type.
-
When the user saves the case or clicks the Generate Query icon on the Quick Launch toolbar, the system creates an open action item based on the profile switch.
-
The Due Date for the action item is the System Date + the Due Date (in days) as defined in the codelist.
-
The Open Date is the system date on the day the Query was created for the case.
When you click the Generate Queries icon, the system generates the action item queries. These queries are based on the rules defined for the action item types in codelist Maintenance where the Advance Condition satisfies the case criteria.
This item displays on the Quick Launch Toolbar when the case is open.
Short cut key: CTRL+ALT+X
If, after the system schedules the action item query, unresolved queries are resolved or there are queries that do not meet the criteria of the Advance Conditions, the system closes the action item and uses the system date as the close date.
If there are open query action items, the system does not create new action items with the same name when the system tries to resolve the open queries list in the Case Form.
Query your Action Items
-
You can query only query action items by selecting View Query Action Items.
-
You can filter only overdue action items by clicking Overdue Action Items. The Worklist displays those action items where the due date is before today's date (system date).
-
The system allows all open query type action items to be populated in a Letter template by adding the place holder: [OPEN_QUERY]. This populates the open queries letter template content as configured in the codelist when the letter is being generated in a separate line for each open query.
| Attribute | Tool Tip | Example |
|---|---|---|
| Query Name | Name of Query to be included in the letter template. | QUERY_Preg_LMP (must begin with QUERY_). |
| Query Condition | Advanced condition. If the condition is true, then insert text into the generated letter. | Patient is pregnant and date LMP missing (Advanced Condition). |
| Query Letter Text | Text to be inserted in generated letter if Query Condition is True. If Query Condition is no true, the no query item is created. | Please provide the Date of Last Menstrual Period (LMP) for the patient. |
| Query Item Text | Text to be display on the list of open queries. | Patient missing Date of LMP. |
For example:
-
Please provide Reporter Name (Adv. Cond is Reporter name is null)
-
Please provide Physician's address (Adv. Cond is Reporter address is null)
-
Please provide Physician's phone number (Adv. Cond is Reporter phone number is null)
-
If the case is saved and the Reporter Name exists, the system creates two action items.
View your Contacts
-
Hover over the Worklist menu and select Contacts.
-
When the system opens the Contacts screen, enter the information in the fields as necessary.
The search results are displayed in the Total Number of Rows section. The following table lists and describes the fields in this section.
| Field | Description |
|---|---|
| Study ID | Allows the user to view the Study ID present in the case. |
| Description | Displays the description of the action item in question. |
| Product Name | Allows the user to view the Product Name of the Primary Suspect Drug. |
Review your Contact Log
The Contact Log section of the Activities tab lets you:
-
Track correspondence related to individual cases
-
Display scheduled letters
Use the Contact Log Section
The number displayed in parenthesis in the header of each section - Contact Log, Action Item, Routing Comments, Case Lock/Archive - displays the total number of entities within the section.
The system remembers the sort order for the duration of the case.
| Field/Control Name | Description |
|---|---|
| Date | The date is inserted by the system when a letter is scheduled or generated through the Letters menu. You can enter the date on which the letter is manually scheduled or generated.
Click the letter icon to open the Letter Preview dialog box. This allows you to view a letter or to modify it if it has not been sent already. |
| Code | Select from a list of values to set the contact code for this entry. Contact your system administrator to adjust the information in this list. |
| Description | Enter a brief explanation for the letter, for example, Initial Letter, or the details of a phone conversation. |
| Group/User | Select a group responsible for the Contact Item. From the list below, select a user from the selected group who is responsible for the action. The Contact Item appears in the Worklist for the selected user. If Any is chosen as the group, the Action Item appears in all the users' Worklist. Contact your system administrator to adjust the information in these lists. |
| Date Sent | The date is inserted when a letter is sent through the letter menu. You can also manually enter the date the letter was sent. If this field is completed, the letter becomes read-only. |
Generate Letters
-
Select Contact Log from the Activities tab and click New Letter.
The Custom Letter Templates dialog box opens.
-
Select the required letter template from the list and click OK to open the letter in a separate window.
-
Make the necessary changes to the letter text and Save.
-
If you modified the letter, select Yes.
This attaches the letter to the Case Form by browsing to the location where you saved the changes.
-
After saving the letter, the system displays it in the Contact Log section of the Activities tab.
-
The system creates an action item for following-up on this letter in the Action Items section of the Activities tab.
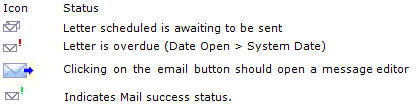
The following image displays the meaning/status of various letter icons:
-
A letter is only added to a search if the Correspondent checkbox is checked.
-
Contact your system administrator to configure the system to generate letters automatically and to schedule them for a specific number of days after receiving details of an adverse event. For example, the system might schedule an Initial Response Letter to be sent the day after an adverse event is received. Auto letter scheduling is triggered when a case is initially saved.
-
If the Primary Reporter is marked as a correspondence contact, the system sends auto-scheduled letters to the Primary Reporter. Otherwise, the letter is sent to the first correspondence contact.
-
Auto-scheduled letters appear in the Contact Log section of the Case Form. You can view or print them by double clicking the letter icon. You can also edit letters that have not been sent. You must send or remove letters manually.
-
In addition to auto-scheduling letters, you can also configure auto action items, which prompt you to follow-up with a correspondent after a letter has been scheduled and sent. Auto action item scheduling is triggered once the sent date has been entered for a letter.
-
The system uses the following naming convention to when saving letters in the Uploaded letters folder:
XXXX_YYYY.RTF
where:
XXXX Is the current case number YYYY Is the current letter numbering format (that is, date and time the letter was generated) -
The system replaces all special characters in the case number with an underscore ( _ ) character.
-
The CFG_PLACEHOLDER SQL limit is 4000 characters
Schedule Action Items for Letters
When specifying or changing the Date Sent field in a letter, you can schedule an action item.
-
Any action item can be updated on the screen immediately after a case has been saved.
-
Unless the action item has already been marked as completed, each time the Date Sent field is changed for a letter, the corresponding action item (if one exists) is also updated with a new Due Date of Date Sent of the Letter and the number of days specified for the Action in the Letter configuration
Open a Message Editor
-
Click the letter icon to open the message editor.
-
The system opens the message editor. All fields are editable.
| Field/Control Name | Description |
|---|---|
| To | Displays the email address specified for the Primary Reporter in the Case Form. |
| From | Displays the email address specified in the Return Email Address in Argus Console > Code Lists > Letter Configuration. |
| Subject | Displays the Case Number and the Description of the Contact log. |
View and Print Letters Due
This Worklist functions displays a list all emails across all cases.
-
Hover over the Worklist menu and select Letters.
-
When the system opens the Letters page, enter the appropriate information.
Enter Case Search Criteria for Letters
| Field | Description |
|---|---|
| Current Letter | Select the current letter from this list |
| Date Range | Allows the user to select a date range from which cases may be selected. The selection made from the Date Range drop-down list automatically populates the From and To fields. |
| Show only those cases with no previous notifications | Allows the user to filter the case list search to only those cases that have not had any correspondence letters sent. |
| AC | Creates a query for an Advanced Condition |
Perform a Medical Review
-
Hover over the Case Actions menu and select Medical Review.
The system opens the Medical Review form.
-
Click on the appropriate tab.
Use the Medical Review Tab
The system displays the user-defined fields in the Medical Review dialog box, if they have been enabled on the Case Form Analysis tab.
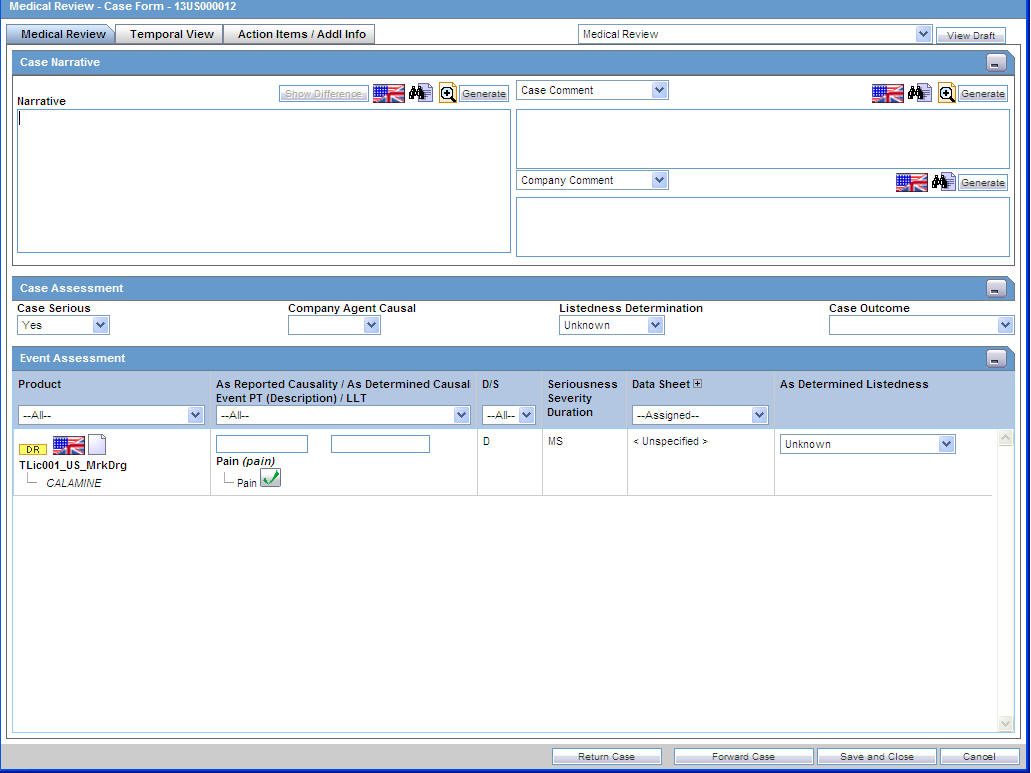
Enter information in the Case Narrative, Case Assessment and Event Assessment sections.
Enter Case Narrative Information
You can choose from the drop-down options associated with the fields to view any of the other narrative fields. The system saves the view as a default and uses it when you open the Medical Review for another case.
Enter Case Assessment Information
This section enables you to provide information about case details.
Select whether the case is serious or not from the Case Serious drop-down list. In a similar manner, select relevant information about Company Agent Causal, Listedness, and Case Outcome from the drop-down lists.
Enter Event Assessment Information
| Field | Description |
|---|---|
| Product | Populated when events are entered in the Products tab and is displayed in the following format:
Product Name Generic Name |
| Causality as Reported/
Causality as Determined Event PT (Description)/LLT |
Causality as Reported - Indicates the degree of reported causality.
Causality as Determined - This field is populated with information entered in the Reported Causality field. Event PT/Description/LLT - This field is populated when events are entered in the Events tab and displays in the following format: Event PT Verbatim LLT |
| D/S | Displays the Diagnosis/Symptom details by D or S in line with the Events. |
| Seriousness Severity Duration | Displays the Seriousness, Severity and the Duration of the Event. |
| Data Sheet | Displays the data sheets for the agent. |
| License | Displays the licenses for the agent. |
| As Determined Listedness | Indicates whether the system found the event on the datasheet for this product. |
Filter in the Event Assessment Section
The following table describes how the each field of the Event Assessment section is filtered:
| Field | Description |
|---|---|
| Product | The product filter drop-down list contains all products listed in the event assessment. The user can filter on all products that are present in the Event Assessment dialog box. |
| Event | Contains a drop-down of values of distinct Event PT. The user can filter on all products that are present in the Event Assessment dialog box. |
| Diagnosis | Contains a drop-down list of values of D for Diagnosis or S for Symptoms. |
| Data Sheet | Contains a drop-down of values of distinct data sheets. All blank data sheets display as a single row of <Unspecified>. |
| Licenses | Contains a drop-down of values of distinct countries of the licenses. All licenses not associated with a data sheet appear under <Unspecified> or are aligned with the data sheet view. |
Only the assessment rows that match the selected criteria are displayed in the filtering results.
User Actions—Event Assessment Section
| User Action | Result |
|---|---|
| Click Datasheet column's plus icon | Displays the license, data sheet views and the license column and enables the - for the License Column. |
| Click Product Name | Displays the Product Information dialog box for the selected product. |
| Click Event Description | Displays the Event Information dialog box for the selected event. |
| Click License Description | Displays the Product Information as defined in the License Configuration. |
| Click Datasheet Description | Displays all the configured terms in the data sheet. |
Attach Cases from the Medical Review Screen
The Notes and Attachments and Contact Log sections appear on the Case Form Additional Info tab to the Medical Review screen. The system displays user-defined fields in the Medical Review dialog box if they have been enabled on the Case Form Analysis tab.
Use the Temporal View Tab
Click the Temporal View tab to view a read-only version of the case before routing.
The information displayed in the Temporal View tab is taken from the information entered in the Case Form section.
View the Summary Section
| Field | Description |
|---|---|
| First Suspect Product | Displays the name of the primary suspect product. |
| Generic Name | Displays the generic name of the primary suspect product. |
| Coded Indication | Displays information about the product indication. |
| Company Agent Causal | Displays the case causality status. |
Enter Display Options Information
| Field | Description |
|---|---|
| Suspect Products | Check the checkbox to view Suspect Products in the Event Assessment Section. |
| Non-Suspect Products | Check the checkbox to view Non-Suspect Products in the Event Assessment Section. |
| Patient History | Check the checkbox to view Patient History in the Event Assessment Section. |
| Patient Lab Data | Check the checkbox to view Patient Lab Data in the Event Assessment Section. |
| Relevant Tests | Check the checkbox to view Relevant Tests in the Event Assessment Section. |
| Events - All Events, Serious Events Only | Check the checkbox as required to view All Events/Serious Events Only in the Event Assessment Section. |
View the Event Assessment Section
| Field | Description |
|---|---|
| ID | Denotes the type of event. For example, HOSP means Hospitalized. |
| Info | Click the Info icon (i) to view details about the selected entity. |
| Item | Displays the item name. |
| Start | Displays the date from when the event assessment began. |
| Stop | Displays the last date of the event assessment. |
| Duration | Displays the duration of the event assessment. |
The system opens a unique dialog box for the event you have chosen to view.
| View Death Information | The system presents death information in this dialog box. |
| View Event Information | The system presents event information in this dialog box. |
| View Hospitalization Information | The system presents hospitalization information in this dialog box. |
| View Patient History | The system presents patient history information in this dialog box. |
| View Product Information | The system presents product information in the Temporal Information Product dialog box. |
Enter Relevant Tests Information
| Field | Description |
|---|---|
| Relevant Tests | Displays information about any relevant tests, if any. |
| Zoom/Unzoom | Click the Zoom icon to view the report on a bigger scale.
Click the Unzoom icon to revert to the earlier view. |
| Flag Icon | This icon displays the language text that is supported. |
| Notes Icon | Click this icon to view/enter notes. |
Perform a Coding Review
Hover over the Case Actions menu and select Coding Review.
Use the Coding Review Function
The Coding tab provides a single entry point for viewing and coding several kinds of information.
Review General Information
| Field | Description |
|---|---|
| Report Type | Identifies the case type. |
| Study Info | Displays study information about of the case. |
| Patient Info | Identifies the patient's age and gender. |
| Literature Info | Displays information about the Primary Literature of the case. |
Review Product Information
| Field | Description |
|---|---|
| Product Name | Displays the product name. |
| Formulation | Select the formulation from the drop-down list.The Administrator can adjust the information in this list. |
| Concentration / Units | Displays the configured Concentration and Units for the drug. |
| Reported Indication | Enter the indication as reported. |
| Coded Indication LLT | Enter the indication to be coded. Click Encode to display the associated coding dictionary. |
Review Event Information
| Field | Description |
|---|---|
| Preferred Term (LLT) | Displays the Preferred term for the selected term. |
| Seriousness | Displays the Event Seriousness for the Event. |
| Intensity | Displays the Event Intensity for the Event. |
| Duration | Displays the Event Duration for the Event. |
Review Death Information
| Field | Description |
|---|---|
| Verbatim | Displays the coded or un-coded event verbatim for cause of death. |
| Coded PT (LLT) | Displays the Coded PT with LLT in parenthesis. |
Review Patient Information
| Field | Description |
|---|---|
| Condition Type | Displays the condition type of the patient's previous history. |
| Verbatim | Displays the condition of the patient's previous history. |
| Coded PT (LLT) | Displays the Coded PT with LLT in parentheses. |
Review Lab Data Information
| Field | Description |
|---|---|
| Test Name (LLT) | Displays the Lab Data Verbatim for the Lab Data. |
| Results | Displays the entered Results for the Lab Data. |
| Units | Displays the entered Units for the Lab Data. |
| Coded PT (LLT) | Displays the Coded PT with LLT in parenthesis. |
| Normal High | Displays the configured Normal High with Units for the Lab Data. |
| Normal Low | Displays the configured Normal Low with Units for the Lab Data. |
Review your Coding Action Items
The Coding Review > Action Items section lets you view or enter details of action items for the case and assign responsibilities for actions.
Note:
You can also view this screen by hovering over the Worklist menu and selecting Coding Action Items.Review Action Items Information
| Field/Control Name | Description |
|---|---|
| Date Open | Enter the date the action item was created. Open action items appear in the Worklist of the user who is responsible for it. They also appear in the Open Action Items report. |
| Code | Select an action item code from the drop-down list. This displays the description of the selected Action Item Code. Contact your system administrator to adjust this list. |
| Description | Selecting an Action Item code automatically enters information into this field. The text can be modified. The Administrator can adjust this list. |
| Group /Responsibility | Select a group responsible for the action item from the given drop-down list. From the drop-down list below this, select a user from the selected group who is responsible for the action. The action item appears in the Worklist for the selected user. If Any is chosen as the group, the action item appears in all the users' Worklist. Contact your system administrator to adjust these lists. |
| Due | Enter the date on which the action item is to be completed. |
| Completed | Enter the date on which the action item was completed. A red border indicates a completed action item while a green border indicates an incomplete action item. |
| Sent in Letter | Identifies that the Query Type Action item has been sent as a part of the letters. Displays only for those action items that are configured as Query Action in the Argus Console's Action Type codelist. |
Open Action Items Reports
To view all outstanding action items, select Dashboards > Open Action Items.
The Open Action Items Report appears in the PDF format and is sorted as per the Case ID of the listed cases.
| Field | Description |
|---|---|
| Action Item | Status of the case and the action that needs to be taken |
| Date Assigned | Date when the case was opened/assigned |
| Assigned To | Workflow/Case Owner |
View Coding Status
-
Hover over the Worklist menu and select Coding Status.
-
When the Coding Status screens appear, enter the information in the fields as necessary.
Coding Status Icons
| Icon | Description |
|---|---|
| Displays that the verbatim text has not yet been coded. | |
| Displays that the verbatim text has been successfully coded. | |
| Is displayed if the verbatim text has been submitted to Central Coding, but no result has been returned to Argus yet. | |
| Is displayed if the term was submitted to Central Coding for coding and returned a status of error either from Central Coding or Argus. |
Enter Case Search Criteria
| Field | Description |
|---|---|
| Date Range | Select a relevant Date Range, if applicable.
To enter a customized date range, select Custom Date Range from the list. |
| Advanced | Select an advanced condition for the case, if applicable.
Click AC to create a new advanced condition. |
The search results are displayed in the Total Number of Rows section. The following table lists and describes the fields in this section.
| Field | Description |
|---|---|
| Seriousness Criteria | Displays the Case level Seriousness Criteria. In case the case has any Fatal or Life Threatening event, it is displayed as such. |
| Aging (Days) | If all codeable items of the case are coded completely, Aging is displayed as the Number of days from the Initial Receipt Date to the date when latest item of the case was coded.
If any code-able item of the case is not coded, Aging is displayed as the Number of days from the Initial Receipt Date to the system date (Database Server). |
| Coding State | If all the events / products are encoded, the coding state is denoted with a green check mark.
If the case has even a single code-able item as not coded, the coding state is shown as a red cross mark. |
Review your Case for Regulatory Submission
The Analysis tab enables you to generate or view a narrative description of the case along with other notes. It also enables you to enter information required for generating the MedWatch 3500A, BfArM, and AFSSaPS reports.
Use this tab to:
-
Make a medical assessment of the case
-
Approve the case for completeness and accuracy
Use the Case Analysis Section
Use this section to enter narrative information about the adverse event.
Enter Case Analysis Information
| Field/Control Name | Description |
|---|---|
| Narrative | Click Generate to generate an auto narrative.
Contact your system administrator to configure this feature. If you are not utilizing the auto narrative feature, enter the narrative here. The narrative is printed on Expedited reports. |
| Case Comment | You can enter comments in this area. If you are not permitted to edit the auto narrative, you can use this field to provide additional details important to the interpretation of the case. Comments appear on certain Expedited reports. |
| Abbreviated Narrative | Enter brief comments in this field. This item maps only to the PSUR report. |
| Company Comment | Enter comments in this area. This information does not appear on Expedited reports. |
| Evaluation in light of similar events in the past | Enter an evaluation comment that takes in to consideration similar events that have occurred in the past. |
To generate or add narrative templates:
-
Click the button to view the Custom Auto Narrative Templates dialog box.
-
Select the required Autonarrative from the list.
-
Click Append to append this Autonarrative to the existing narrative.
-
Click Append if this is the first narrative being added to the text area.
-
Click Replace to replace the existing narrative with the selected narrative.
Note:
Contact your system administrator to configure allowing modification of the Autonarrative text.If an Autonarrative template has been configured in multiple languages, icons representing the languages appear above the text area.
View Differences in Case Narratives
You can view the differences in case comments from previously locked versions of the case. To view these differences, click the Show Difference button in the Case Analysis section of the Analysis Tab.
When you choose to view the differences in the two narratives, the system does the following:
-
Displays the differences in red with a strike out and a yellow highlight.
-
Displays additions to the narrative in black with green highlights.
-
The system displays the last revision number of the case and date and time stamp in the following format:
-
(Last revision # X as of YYYY MMMM)
where:
X Is the revision number of the last case. YYYY Is the date the case was locked. MMMM Is the time the case was locked in 24-hour format. -
The system disables the button if there is no previously locked version of the case.
Use the Case Summary Section
The Case Summary section of the Case Analysis tab enables you to enter summary information about the adverse event.
Enter Case Summary Information
| Field/Control Name | Description |
|---|---|
| Case Serious | This list indicates whether the overall adverse event case is serious or non-serious. This assessment is performed by the system from the Seriousness Criteria of the Events tab. If any of the Seriousness Criteria was selected for any event in the Event tab, Yes is selected in the list. No is selected if the Seriousness Criteria is cleared for all events in the Events tab. You can modify the selection after entering a justification, if you have the access rights to do so. |
| Case Serious Notes | A justification for overriding the system determination appears in the Notes area. Click the green dot to revert to the automatic calculation for seriousness or to view the overriding notes. |
| Causality considered expeditable | The system determines this value from the As Determined causality in the Event Assessment section. This field is displayed as Yes if the As Determined causality is Yes and vice versa. If the As Determined causality is Unknown, this field will be Yes. |
| Causality considered expeditable Notes | A justification for overriding the system determination appears in the Notes area. Click the green dot to revert to the automatic calculation or to view the overriding notes. |
| Listedness Determination | The value for this field is calculated from the Event Assessment section in the Events tab. If any row there displays Unlisted under the Listed column, this value is set to unlisted. |
| Listedness Determination Notes | A justification for overriding the system determination appears in the Notes area. Click the green dot to revert to the automatic calculation or to view the overriding notes. |
| Case Outcome | The value for this field is calculated from the Events tab. If the outcome for any event is Fatal, the case outcome is set to Fatal. If the case outcome is changed here, that change is not made to the event outcome in the Events tab. |
| Company Diagnosis/Syndrome | The company diagnosis or syndrome is entered in this field. |
| Notes | A justification for overriding the system determination appears in the Notes area. Click the green dot to revert to the automatic calculation or to view the overriding notes. |
Use the MedWatch Info Tab
The MedWatch Info tab enables you to enter additional details required for the MedWatch 3500A Drug Report.
The values in the Form section column refer to specific sections of the MedWatch 3500A Drug Report form.
| Form Section | Field Description |
|---|---|
| B. Adverse Event or Product Problem | Select Adverse Event when a product is suspected to have caused an adverse outcome in a patient.
Select Product Problem when the defect or malfunction in the product could lead to a death or serious injury. Check both checkboxes if a malfunction or product problem caused a death or serious injury. |
| C. Suspect Medications (NDC#) | Enter the National Drug Code if you have checked the Product Problem checkbox. |
| F1. Check one | Indicate whether this report is from a user facility or an importer. You can suppress printing of Block F of the MedWatch 3500A report by selecting Suppress Block F Printing. |
| F2. UF/Dist report number
Consider UF / Importer data from |
Enter the complete number of the report exactly as entered in the upper right corner of the front screen.
Select User Facility or Importer information from the Case Form or the Reporting Destination. |
| F3. User facility or Importer Name
Address1/Address 2/City / State/ Country/Postal code |
Enter the full name and address of the user facility or distributor reporting site. |
| F4. Contact person
Sal/First Name/MI/Last Name |
Enter the full name of the medical device reporting (MDR) contact person. This is the person who is designated as the device user facility/distributor contact for this requirement. The FDA will conduct its MDR correspondence with this individual. The contact person may or may not be an employee of the facility. |
| F6. Date aware of event | Enter the date when the user facility's medical personnel or the distributor became aware that the device may have caused or contributed to the reported event. |
| F10. FDA codes Patient
FDA Device Codes |
Click the first row and column of the FDA Patient and Device Codes section and then click Select. You can enter up to 6 FDA Patient Codes. If the entered code is not present in the FDA Codes list, it is erased. |
| F11. Report sent to FDA | Check this checkbox if a report has been sent to the FDA. If you select it, enter the date when the report was sent to FDA. |
| F13. Report sent to mfr? | Check this checkbox if a report has been sent to the manufacturer. If you select it, enter the date when the report is sent to manufacturer. |
| G. All Manufacturers | - |
| G3. Report Source | Check the Report Source checkboxes as applicable, to match all report sources specified with the Reporter Type.
See the guidelines below this table for checking the checkboxes. |
| G5. STN# Pre-1938 / OTC Product | Enter the PLA number.
If the product pre-dates 1938, select Pre-1938. If the product is an over-the-counter product, select OTC product. |
Check G3 Report Source Checkboxes
| If this condition is true | Check the following checkbox |
|---|---|
| Country of Incidence is not USA. | Foreign |
| Report Case type is configured to contain cases from Literature. | Literature |
| Report Case Type is configured to contain cases from Clinical Trials. | Study |
| Any reporter with Health Professional set to Yes. | Health Professional |
| Any Reporter Type is selected as Company Representative. | Company Representative |
| Any Reporter (Primary or Other) exists in a case with a Reporter Type of Other. If the selected Report Type is a Regulatory Authority (text value) within the Argus Case, the Other checkbox should be checked and the text Regulatory Authority should be entered in the text box. | Other |
| Any Reporter Type is selected as Consumer AND none of the reporters is identified as Health Care Professional. | Consumer |
The User Facility and Distributor checkboxes must be checked manually.
Enter the text if you have selected Other as a report source.
Use the BfArM Info Tab
-
Open the BfArM Info tab.
-
Select the choices that apply to the patient from the items in the form.
-
If you do not know if a particular condition applies for the patient, select Unk.
Note:
If any of the relevant items are entered in the Current Medical Status form in the Patient tab, the system enters them here. If you change any of those items in the BfArM Info tab, the system will not enter the data in the Patient tab.Use the AFSSaPS Info Tab
Use the AFSSaPS Info tab to enter the imputability assessment information for the suspect product along with the Adverse Events.
| Field/Control Name | Description |
|---|---|
| Event | Displays included terms for all events. |
| Product | Enter the suspect product. You cannot enter a concomitant product. |
| Chronology | Select a Chronology code. The fixed set of values is C0, C1, C2, and C3. Click the icon to select the Time to onset, Readministration and Drug Stopped Values.
The user's selection auto-calculates the Chronology for the Product - Event combination. |
| Semiology | Select a Semiology code. The fixed set of values is S1, S2, and S3.
Click the icon to select the Semiology Outcome, Complementary Test, and Other Explanation. The user's selection auto-calculates the Semiology for the Product - Event combination. |
| Bibliography | Select a Bibliography code. The fixed set of values is B0, B1, B2, and B3. |
| Imputability | Imputability Calculation: |
| ~ | Check from one or more of the following checkboxes:
The text box after Autres supports fifty characters. If the Autres checkbox is not checked, the field is disabled. You can click Copy to Local Evaluator Comment to copy imputability values to the Local Evaluator Comment field and place the imputability text-equivalent at the beginning of the text that currently exists in the field. Copy to Local Evaluator Comment is visible only if the language for the Local Evaluator Comment field is French. |
| Future Actions | Enter a text description for future actions. |
Route a Case to the Next Workflow Step
The Routing Comments section displays workflow routing information and comments for the case. It also contains a read-only sub-section on Case Locking/Closure.
-
Select Route from the Activities tab of the Case Form menu to open the Case Routing dialog box.
-
From the Route to Next State drop-down list, select the state to which you would like to route the case.
If only one workflow state can be selected for the Next Route state, that state is selected by default in the Route to Next State field.
-
From the Route to User drop-down list, select the user or user group to route the case to.
-
Enter the routing comments in the Comments field.
OR
Click Select to select a comment from a list of pre-defined routing justifications.
| Field/Control Name | Description |
|---|---|
| Date | The date the case was routed to a new workflow state. Automatically generated when a case is routed. |
| User | Displays the name of the user who routed the case. Automatically generated when a case is routed. |
| Comment | Displays the routing comment. |
| Route button | Routes the cases. |
| Return button | Returns the case to the previous state. |
Route Cases
If the case meets the routing rules specified by the Administrator, you can use the Case Routing dialog box to route a case to the next workflow state.
-
Non-Enterprise Workflow managers cannot view all the Workflow States below the line if the Workflow States are assigned to sites in the Workflow Configuration.
-
Only Enterprise Workflow Managers have access to all sites for routing cases ahead in the Workflow.
-
If the Workflow state does not have defined sites, all Workflow Managers can see it.
Routing Comments Log and Case Print
Local Lock/Unlock details are displayed as part of the Routing Comments log in the Case Form > Activities tab.
The text Case Locally Locked for JP or Case Locally Unlocked for JP is populated before the user added comments in the Local Lock screen, corresponding to the local lock or unlock action. JP is the standard A2 country code for Japan defined in the Argus Console > Countries codelist.
When a case is globally/locally locked or globally/locally unlocked at the same time, only one entry is added to the Routing Comments log.
The text Case Globally and Locally Locked for JP is added for single lock operation.
The text Case Globally and Locally Unlocked for JP is added for single unlock operation.
The system records the corresponding routing comments even in scenarios where the system user (for example, AGservice) performed the local lock/unlock action.
To select text from the pre-defined list of routing justifications
-
Click the Select button in the Case Routing dialog box to open the Routing Justification dialog box.
-
Select the required justification from the justification list displayed under Select a standard justification for this field. The system highlights the selected row.
-
Click OK.
-
The system closes the Routing Justification dialog box and displays the selected justification text in the Comments field in the Case Routing dialog box.
-
Click OK.
Note:
The system displays disabled users in the user drop-down list in alphabetical order with an asterisk (*) at the end. You can view the total number of times the case has been routed in the header section, excluding the blank rows.Return Cases
If necessary, you can return a case to its previous workflow state.
-
Open the case.
-
Click the Return button in the Activities tab of the Case Form.
-
When the system opens the Case Routing dialog box, enter your password.
-
From the Route to User drop-down list, select the user or group the case needs to be returned to.
-
Enter any routing comments in the Comments field.
-
Click OK.
Close, Save or Copy a Case
Close a Case
-
Hover over the Case Actions menu and select Close.
-
On the Save Case dialog box, click Yes to save and close the case.
OR
Click No to close the case without saving it.
-
The system opens the next active case, if you have active cases that you are working on. If there are no active cases, the system displays the default Worklist.
-
If the default Worklist option is <None>, the Personal Argus Status appears.
-
Save a Case
-
Click the Case Number of the case you want to save.
-
When the system opens the Case Form, hover over the Case Actions menu and select Save.
-
When the system opens the Case Form Saving dialog box, click OK.
Copy a Case
Argus enables you to save all or part of a case and stores the copy in the database as a separate case. Clicking the case reference in any copied case opens the original case.
If your system is configured for manual case numbering, the system prompts you to enter a new Case ID. Otherwise, the system automatically assigns a new Case ID.
-
Hover over the Case Actions menu and select Copy.
-
When the system opens the Case Copy - Webpage dialog box, enter the number of copies you want to make and click Yes to copy the case.
-
When the system displays the Case Copy dialog box, check the appropriate checkboxes to select the portions of the case you want to copy
OR
Click Select All to copy the entire case.
-
Click Copy.
Depending on whether the system is configured for automatic case numbering, the system either generates a case ID or enables you to enter the case ID for this case.
Null flavor data is copied along with Case Form data on Case Copy.
Use the Print Function
Print a Case Form
-
Open a case.
-
Hover over the Case Actions menu and select Print > Case Form.
The system opens the Print Case tabbed dialog box.
-
Check the checkbox for each section of the Case Form you want to print
OR
Click Select All to select all the sections of the Case Form.
-
Click Print to print the case.
Print a Medical Summary
-
Open a case.
-
Hover over the Case Actions menu and select Print > Medical Summary.
The system opens the Medical Summary Report.
-
Select File - Print in the PDF to take a printout of the medical summary.
View and Print Letters
The Letters tab enables you to view and print completed letters.
-
Click the Description link to display the letter.
-
When the system opens the letter, click Print.
View and Print Attachments
The Attachments tab enables you to view and/or print case attachments. The system prints date/time information:
-
As footers on all printouts (except letters).
-
In the following format: dd-mmm-yyyy hh24: mm: ss.
-
Click the Description link to display the attachment.
-
When the system opens the letter, click Print to print it.
Unblind a Study
When a study is complete, you can unblind all the cases associated with the study at the same time instead of unblinding them one by one.
-
From the Utilities drop-down menu, select End of Study.
The End-of-Study-Unblinding (EOSU) dialog box appears.
EOSU does not pick a case that is globally or locally unlocked, or pending local or global report submission.
-
From the End-of-Study Unblinding drop-down list, select a study.
-
In the Dosage Regimens dialog box, enter the drug dosage information.
-
Click OK.
Note:
For each case that is unblinded by this method, the Blinding Status is adjusted to "Broken After Study" if the study type is single or double blinded and enters the following information: \-
Unblinding Date
-
Study Drug
-
Follow-up Received Date
-
Mark case as Significant
-
Dosage Regimen
-
Lock or Unlock a Case
The Case Lock/Close section enables you to lock a case, unlock a locked case, and formally close a case. You must lock the case before you can generate a report.
Lock a Case
-
In the Case Lock/Close section of the Activities tab, click Lock.
The system opens the Case Locking dialog box.
-
Enter your Argus Safety password in the Password field.
-
Enter any notes in the Notes field.
-
Click OK.
-
The system displays the locking notes in the Notes field of the Case Lock/Close section.
| Field/Control Name | Description |
|---|---|
| Case Status | Enables you to unlock, lock, or close a case after entering user information.
|
| Closure Date | Date on which the case was locked or closed. If a locked case is being viewed by a user, any other user who tries to access the same case will have read-only access to the case.
|
| Lock or Closed By | Displays the name of the user who locked or closed the case. |
| Notes | Displays relevant information about the case lock or closure. |
Understand Lock Statuses
| Lock Status with Icon | Description |
|---|---|
| Global Locked |
Denotes a locked case that does not have local reporting needs. |
Global Unlocked  |
Denotes an unlocked case that does not have local reporting needs or where the Local PRPT case is both globally and locally unlocked. |
| Global Locked and Local Locked |
Denotes a Local PRPT case that is locked at both global and local levels for all local countries for the case. |
| Global Locked and Pending Local Lock |
Denotes a Local PRPT case that is locked global but pending local lock for any local country for the case. |
When a user clicks on the Local Lock icon on a case that has been Global Locked but is pending Local Lock for Japan, the system displays a pop-up window to validate the user who attempts to perform the local lock on the case.
Enter the password and notes to perform the local lock on the case.
When a user clicks the Local Lock icon on a case that has already been Local Locked for Japan, the system checks that the common profile switch Enable Local Unlocking for the current enterprise is set to Yes. If this option is set to No, it displays a message that the Local Unlocking feature is not enabled.
If the option is set to Yes, the system checks if the case has any Local Japan report, that is pending generation, and displays a warning message.
If there are no Local Japan reports that are pending generation, the system prompts the user (on Case Local Unlock dialog box) on whether they want to proceed with Local Unlock.
On clicking Yes for Local Unlock, the system validates the user again.
After the user has been validated, the system stops any local Japan report that is pending generation from being generated and enables all the Local Fields for editing.
After a case has been globally locked and a local user (Argus J user) opens that case, the application allows the local user to enter local data, as follows:
-
All local fields remain editable for the Argus J user.
-
All existing Case Form fields and tabs that remain editable after global lock retain the same behavior (irrespective of English or local users).
-
Any operation that updates the global value such as Re-arrange, Add, Delete, Up / Down buttons, Relationships, Copy Japanese to English button, Lab data import is not allowed. One exception to this is Case Classification field - the Add and Delete buttons remain available.
-
The Copy English to Japanese button allows the user to copy information from English to Japanese data entry. No global values are updated with the Copy action.
On global lock, all the qualifying reporting rules are executed as follows:
-
All the qualifying Global (that is, non-Japan) and Japan Local reports are scheduled.
-
The Global (that is, non-Japan) reports are generated/transmitted as per the existing functionality.
However, the Japan Local reports cannot be generated before local lock is performed.
Use the One-Step Global and Local Lock
In some scenarios, when a Japanese user enters a domestic case, both the local data entry and English translation may happen before the global lock, which necessitates the Global and Local Lock be done in a single step by the Japanese user.
When a local user (Argus J user) performs a global lock, the system displays the existing Case Locking dialog box but enhances it with an option to perform Local lock additionally for a Local PRPT case.
Note:
This functionality is applicable for global case locking done from any place via the application's UI including Case Form, E2B, Incoming Review, and so on.This checkbox appears only for a Local PRPT case, when the user has Allow Local Locking enabled under Argus Console > Access Management > Users.
When the user clicks OK on this screen to perform Global Lock and if the Local Lock option is checked, the system performs both the global and the local lock for the case.
Unlock a Case
-
In the Case Lock/Close section, select Unlocked from the Case Status drop-down list.
-
When the system opens the Locked Case dialog box:
-
Type your password in the Password field.
-
Type any relevant information in the Notes field.
-
Click OK.
-
-
When the system opens the Case Unlock dialog box, click one of the following:
-
Significant F/U
-
Non-significant F/U
-
Other
-
When a user performs global unlock for a case, the system checks if the case has local or global reports in pending generation state (scheduled and new data available states as identified by the configured SQL explained below) or pending lock (for Local PRPT case), as explained below:
The checks for reports pending generation are applicable only when DLP_EXPEDITED_E2B_REPORTS is set to 0 (that is, DLP is not enabled for Expedited reporting).
The system checks the value returned by running the SQL (if any) configured in the SQL to prevent case unlock when reports are pending generation common profile switch under Case Processing. If the value returned is 0 or no SQL has been configured, the system allows users to global unlock the case without any of the other checks.
If the value returned is greater than 0, the system behaves as follows:
-
If the Value of Allow forced unlock (Global and Local) is No and the Report status (Global or Local) is Pending (that is, the configured SQL returned a value > 0), the case is not unlocked and an error message is displayed.
-
If the Value of Allow forced unlock (Global and Local) is Yes and the Report status (Global or Local) is Pending (that is, the configured SQL returned a value > 0), a warning message is displayed. The case is unlocked using the Locked Case dialog box if the user selects Yes on the warning message.
-
If the Value of Allow forced unlock (Global and Local) is N/A and the Report status (Global or Local) is Generated /Submitted (that is, the value from SQL check returned 0 or no SQL has been configured), the case is unlocked.
This switch functions independent of the Allow Local Lock and Enable Local unlocking privileges. For example, a local user who does not have the Allow Local Lock privilege but has the Allow forced unlock (Global and Local) privilege can globally and locally unlock the case on Global unlock.
When a user performs a global unlock for a case that has pending local lock (for a Local PRPT case), a warning message is displayed.
When a user performs global unlock for a case that has pending local lock (for a Local PRPT case):
-
If the value of Allow Global Unlock on Pending Local Lock is set to Yes, a warning message is displayed. If the user selects No, the case is NOT unlocked. If the user selected Yes, further checks on reports are implemented.
-
If the value of Allow Global Unlock on Pending Local Lock is set to No, the case is NOT unlocked and an error message is displayed.
-
If the case has both local lock pending and reports scheduled, the pending local lock check takes precedence over the pending report generation check.
-
This functionality is applicable for case unlocking done from any place via the application's UI including Case Form, LAM, E2B, Incoming Review, and so on.
This feature is NOT applicable to End of Study Unblinding (EOSU).
Create a Follow-up Event
After unlocking a case, the system sets the focus for significant/non-significant follow-up events as follows:
-
When you click the Significant F/U button on the Case Unlock dialog box, the system displays the case General tab, checks the Significant checkbox for both drugs and devices (if enabled by the profile switch), and sets the focus on the Follow-up Received Date.
Argus > Case Actions > Open > (Select a Case) > General Tab > General Information Section > Follow-ups sub-section (middle of screen).
-
The system checks to determine whether the Significant checkbox is checked.
-
The system sets the focus on the Follow-up Received Date.
-
-
When a case is unlocked and you select the Non-Significant F/U button from the case unlock pop-up window, the system displays the case General tab and sets focus on the Follow-up Received Date.
Argus > Case Actions > Open > (Select a Case) > General Tab > General Information Section > Follow-ups sub-section (middle of screen)
-
The Significant checkbox is not checked.
-
Focus is on the Follow-up-Received Date.
-
You can add multiple follow-ups.
Argus > Case Actions > Open > (Select a Case) > General Tab > General Information Section > Follow-ups sub-section (middle of screen)
-
If you add a single Follow-up, the Add button remains available for the user to add additional Follow-ups.
-
The Add button disappears after the user adds a single Follow-up. The user must save, close, and reopen the case before they can add an additional Follow-up.
-
-
A hyperlink in the Follow-ups section enables you to open the link in a different dialog box.
-
Delete or Undelete a Case
Delete a Case
-
Hover over the Case Actions menu and select Delete.
-
When the system opens the Action Justification dialog box, do one of the following:
Enter the justification manually in the Please enter a justification for performing this action: field
OR
Select a pre-defined justification from the Select a standard justification field.
-
Type your Argus login password in the Password field.
-
Click OK.
When you delete a case, you can no longer access it from the application. However, the system retains the case information from the database. Before the system permits you to delete a case, you must provide a justification.
Undelete a Case
-
To restore deleted cases, hover Utilities, and click Case Undelete.
-
To retrieve deleted cases, in the Case Search Criteria fields, enter the value, and click Search.
The search results appear in the Total Number of Rows section.
-
Check the checkbox for the case number to restore it.
-
Click Case Undelete.
-
In the Action Justification dialog box:
-
In the Please enter a justification for performing this action field, enter the justification manually.
-
From the Select a standard justification for this field drop-down list, select a pre-configured justification.
-
-
Click OK.
View Case Revisions
-
Open a case.
-
Hover over the Case Actions menu and select Case Revisions.
The system opens the Argus Safety Case Details dialog box. The dialog box provides the following information for the current case:
-
Scheduled Reports
-
Submitted Reports
-
Case Revisions
-
-
Select the desired report from this list.
The system displays the Audit Log Details screen containing a list of all revisions.
-
Revision History dialog box of Case Actions | Case Revisions displays the Lock icon for the revisions in which the case is in locked state.
-
Unlock icon is displayed for the revisions where the case is in unlocked state.
-
Archive icon is displayed for the revisions where the case is in archived state.
You can track the revision where follow-up information was appended to the case. The follow-up designations are as follows:
-
(S) F/U - Indicates that Significant Follow- up information is attached to the case.
-
(NS) F/U -Indicates that the Follow-up information attached to the case is not Significant.
View Audit Logs
Logs are a repository of all the cases in the database, displaying the following entries:
-
Activity
-
Audit Data
-
User ID
-
Date.Time
The audit log is a chart that show modifications that have been made to a particular case since the case's inception.
It also shows which user made the changes, the date and time the changes were made, and the old and new field values. Run the AG Service Audit Log update to log all the cases.
To view an audit log, from the Utilities drop-down menu, select Logs > View Audit Log.
-
To search the logs, in the Search Conditions section, enter or select a criteria, and click Search.
To view all the updates performed by the user, from the Category drop-down list, Select All.
You can select a category and filter on a specific field elements, and you can view all revisions at the same time by clicking the checkbox near the Revisions column.
-
The search results appear in the Total Number of Rows section. The following table lists and describes the fields in this section.
Field Description Action Displays the Audit Log Details Screen. Activity Displays the status of the activity. Displays whether it has changed or not. Audit Data Displays the audit data in the following format: Name of the entity (such as Advanced Condition): deleted or changed (as applicable) in entity (such as Advanced Condition)
User Displays the last user who made changes to the case. Date/Time Displays the last time the case was changed. Note: The time displayed is as per GMT.
-
To print all the logs, click Print List.
Audit Log Details Screen
The Audit Log functionality tracks all central coding activities for the code-able event and products.
-
Click the Action icon.
-
To display the details, click a row with a revision.
Audit log for the case has the record of the central coding related changes. These changes display the Username as the associated Central Coding Username concatenated with Central Coding.
Multiple selections can be made to view the details of revisions.
LAM Audit Log
To track changes made while using the LAM module, from the Utilities drop-down menu, select LAM Audit Log.
-
Argus Safety Audit Logs:
-
To view all updates made by a user, from the Category drop-down list, select <ALL>.
-
To enable the Search button, from the drop-down list, select a User Name.
The default User Name is updated as the name of the user who is logged in.
-
The category is identified on the UI.
-
The print list displays the Category.
-
The element field label is updated based on the selected category. If you do not enter an element value, the audit details are returned as-is.
-
You can view all revisions at the same time by selecting the checkbox near the revisions column. The entire audit trail for the elements is displayed.
-
-
Argus Affiliate Audit Log
-
You can filter for a specific Affiliate event in the audit log.
-
You can view all revisions at the same time by selecting the checkbox near the revisions column. The entire Audit trail for the elements is displayed.
-
You can view all LAM user updates made for Argus Safety cases under the LAM Audit Trial.
For example, the Action Items which can be closed or perform local labeling by a Affiliate user is visible under the LAM audit trail.
-
Central User updates do not display under the LAM audit trail.
-
Any user who has access to LAM Audit Log can view All cases associated with that site.
-
The audit trail detail print includes only the revisions that you have selected.
-
-
Search Conditions
The Search Conditions section enables you to enter information for retrieving the audit logs you want to view.
-
Total Number of rows
The search results are displayed in the Total Number of Rows section. The following table lists and describes the fields in this section.
Field Description Action Displays the Audit Log Details Screen. Activity Displays the status of the activity. User Displays the last user who made changes to the case. Date/Time Displays the last time (as per GMT) the case was modified. Print List button Prints the list of all the logs.
View the Error Log
To view the error log for information about errors that occurred during case processing:
-
From the Utilities drop-down menu, go to Logs > View Error Log.
-
To search for error logs based on pre-defined or custom date ranges, in the Search Conditions section, enter a value, and click Search.
The search results appears in the Total Number of Rows section.
-
Locate the error log you want to view, and click to view the error message text.
Click the Zoom icon to view the complete text.