6 Customizing Data Entry Behavior
You can customize the behavior of data entry in RDC by modifying the DCI Form Runtime settings and several reference codelists in Oracle Clinical.
This chapter assumes you are familiar with modifying forms and reference codelists in Oracle Clinical. For general information about how to modify forms and reference codelists, see the Oracle Clinical Administrator's Guide.
This chapter includes the following topics:
6.1 Configuring the DCI Form Runtime Settings
The DCI Form Runtime settings let you customize the RDC application, including the following options:
In Oracle Clinical, you can configure the DCI Form Runtime settings at the database level or at the study level.
At the database level, the DCI Form Runtime settings define the default values when a new study is created. For each setting, you can choose to enforce the default value across all studies in the database or allow modification at the study level. You define the default values in the DCI Form Local Database Settings form.
6.1.1 Defining the DCI Form Runtime Settings at the Database Level
To define the DCI Form Runtime settings at the database level:
-
Open Oracle Clinical.
-
Navigate to Admin and select DCI Form Local Database Settings.
-
Expand the DCI Form Runtime node. See Figure 6-1.
Figure 6-1 DCI Form Runtime Settings for RDC
Description of ''Figure 6-1 DCI Form Runtime Settings for RDC''
-
Change the value of the settings you want. The sections that follow provide provide more information about each setting.
-
Select the Enforce Local DB Setting check box to always use this value as the default value.
If not selected, a user who has privileges to the DCI Form Study Database Settings form at the study level can override the default values.
Note that the Enforce Local DB Setting check box is always selected for the Suppress warning for non-migrated CRFs setting because you cannot change its value at the study level.
-
Save your changes.
6.1.2 Defining Report Settings at the Study Level
To define the DCI Form Runtime settings at the study level:
-
Open Oracle Clinical.
-
Navigate to Design and select DCI Form Local Study Settings.
-
Expand the DCI Form Runtime node.
-
Deselect the Inherit From Local DB Setting check box for any value you want to change.
-
Change the value of the settings you want. The sections that follow provide more information about each setting.
-
Save your changes.
6.1.3 Enabling HTML Data Entry for RDC
To allow RDC to collect data by presenting HTML forms to the user, you must configure the correct settings in Oracle Clinical. You enable data entry with DCI Forms at the study level. If you do not enable this setting, RDC does not display the study to the user.
To enable a study to use HTML data entry:
-
Open Oracle Clinical.
-
Navigate to Conduct, Security, and then select Clinical Study States.
-
Query for your study.
-
Select the study from the results of your query.
-
Enable the DCI Forms Entry Enabled? check box.
-
Save your changes.
Note:
The DCI Forms Definition Enabled? setting, which is also in the Clinical Study States form, controls the ability to define DCI Forms for the selected study.6.1.4 Displaying the Visit-Owning Interval on the Casebooks Page
Use the Display Visit Owning Interval on MPC Page? setting to customize the spreadsheet heading on the RDC Casebooks page.
-
If set to Y, the spreadsheet heading on the Casebooks page displays the name of the interval — phase, period, or subperiod — along with the name of the current visit.

Description of the illustration ''interval_mcp_page.gif''
-
If set to N, the spreadsheet heading on the Casebooks page displays only the name of the current visit. The default value is N.
6.1.5 Allowing Investigator Comments
Use the Enable Entry of Investigator Comments setting to specify whether the RDC application allows users to enter and update investigator comments.
-
If set to Y, RDC allows the entry of investigator comments. Users with UPDATE privileges can add investigator comments to a response field and update existing investigator comments. All users can review investigator comments in the Data Entry window and on the Review Investigator Comments page.
-
If set to N, RDC does not allow the entry of any investigator comments by any user, regardless of privileges.
6.1.6 Adding a Customized Reference Field to the Search Pane
You can customize the RDC application to include an additional patient-level search field on the Home page and the Casebooks page.
This patient attribute field:
-
Lets you search for a particular patient or a set of patients based on the contents of the field
-
Can be up to 25 alphabetic, numeric, and special characters
-
Supports wildcard searches (%)
To configure the customized field, you need to:
-
Specify values for two DCI Form Runtime settings that define a label for the field and enable the customized field
-
Write a procedure to populate the Patient Positions table with the user-entered value
6.1.6.1 Searching and Viewing Enhancements for the Customized Field
If you define and enable the custom field, RDC adds the following search and view enhancements to display the patient data associated with your customized field:
-
Searching enhancements
-
RDC adds your customized field to the Patient Search pane on the Home page and to the Search pane on the Casebooks page.
-
When you specify search information in the field, the search runs against the Reported Patient Reference field in the Patient Positions table.
-
The customized field supports wildcard searches (%).
-
-
Viewing enhancements
-
On the Home page, RDC adds a column to the Patient List and populates the column with the information defined in the Reported Patient Reference field in the Patient Positions table. The column heading uses the same name as the label you defined for your customized field.
-
On the Casebooks page, you can position the cursor over the patient icon or the patient number to reveal the data associated with your customized field.
-
On the Review CRFs page, Review Discrepancies page, and Review Investigator Comments page, you can position the cursor over the patient number to reveal the data associated with your customized field.
-
6.1.6.2 Labeling and Enabling Your Customized Search Field
To change the label (or name) of your customized search field, and to enable the field, use the following DCI Form Runtime settings:
-
Label for customizable patient identifier — Specifies the text that labels the field. RDC uses this label for the additional search field displayed on the Home page and the Casebooks page, and as the column heading in the Patient List on the Home page. The default value is Reference.
-
Use customizable patient identifier? — Defines whether to show or hide your customized search field. If set to Y, RDC enables your customized field, and adds searching and viewing enhancements to the application pages. If set to N, no changes occur in the RDC application. The default value is N.
You can set the default values at the database level, and then change the setting as needed at the study level.
6.1.6.3 Writing the Derivation Procedure to Use Your Customized Field
Your customized patient-level search field on the Home page and the Casebooks page lets RDC users search for a patient based upon the Reported Patient Reference value stored in the Patient Positions table.
To support population of the field, the ocl_utils.update_pat procedure includes an optional parameter (vRepPatRef), which allows the Reported Patient Reference value in the Patient Positions table (rxa_des.patient_position) to be updated.
To populate your customized field:
-
Write a procedure that will be triggered by a DCM of your choosing, such that when the response is entered, the Reported Patient Reference field in the Patient Positions table is populated with a value determined by your procedure.
-
Define your procedure to call the ocl_utils.update_pat procedure to update the Patient Positions table. The ocl_utils.update_pat package includes an optional parameter (vRepPatRef) for the customized Reported Patient Reference field.
If you do not want to change a particular field value for the patient, use rxcpdstd.patients_rec.field-name as a value for that parameter.
Table 6-1 describes the parameters in the ocl_utils.update_pat procedure.
Table 6-1 Parameters in the ocl_utils.update_pat
| Parameter | Description | Example Values (assuming alias for DCM Question Group is d) |
|---|---|---|
|
vMode |
|
rxcpdstd.v_mode |
|
npatpos |
ID for the patient that should be updated |
rxcpdstd.patients_rec.patient_position_id |
|
vSex |
Value to use to update patient's gender:
|
rxcpdstd.patients_rec.reported_sex or d.sex |
|
vbirthdate |
Value to use to update patient's date of birth |
rxcpdstd.patients_rec.reported_birth_date or d.birthdate |
|
vinits |
Value to use to update patient's initials |
rxcpdstd.patients_rec.reported_initials or d.inits |
|
vRepPatRef |
Value to use to update the patient attribute; the value must be 25 characters or less |
rxcpdstd.patients_rec.reported_patient_reference or d.reportedPatientRef Note: This parameter, which is new with this version of the ocl_utils.update_pat procedure, is optional. Therefore, if you have used previous versions, your existing procedures will continue to work. |
For example, you can add the following lines to your procedure to update the patient reference using the d.reportedPatientRef question without updating the other values for the patient:
ocl_utils.update_pat (
  rxcpdstd.v_mode,
  rxcpdstd.patients_rec.patient_position_id,
  rxcpdstd.patients_rec.reported_sex,
  rxcpdstd.patients_rec.reported_birth_date,
  rxcpdstd.patients_rec.reported_initials,
d.reportedPatientRef)
6.1.7 Controlling the Display of Conditional Blocks within a CRF
When defining the questions for a CRF (that is, DCM questions), you can associate one or more conditions with a question. You can define a data response value so that when the user enters that value, other questions and fields become active, and the cursor automatically moves to a specified question within the same CRF. This action is called conditional branching.
With conditional branching, you can define a path through the CRF based on the responses enter. For example, you can use conditional branching to bypass pregnancy-specific questions if the patient is male.
You can the Represent Disabled Blocks As setting to control how RDC displays the conditional blocks within a CRF. You can choose one of the following options:
-
Select Greyed if you want RDC to gray out the section in the CRF with the conditional questions. In this case, the user can see the section, but the questions remain disabled until a response value triggers the condition defined for the source question.
-
Select Hidden if you want RDC to completely hide the section in the CRF with the conditional questions. The next expected questions, if any, are displayed in the same area, so there is no empty space. The section remains hidden until a response value triggers the condition defined for the source question.
For multi-page CRFs, RDC preserves the locations of page breaks relative to the questions in the form. Therefore, when conditional blocks are hidden, questions from the next CRF page are not moved to fill the resulting additional blank space on the page.
6.1.8 Suppressing Prompts and Warnings
You can use the DCI Form Runtime settings to suppress the:
-
Change reason prompt for new responses
-
Change reason prompt for new investigator comments
-
Warning for non-migrated CRFs
Description of the illustration ''dci_form_db_sup_prmt.gif''
6.1.8.1 Suppressing the Change Reason Prompt for New Responses
By default, RDC requires users to specify a change reason whenever they update any data in a CRF previously saved complete. Updating data includes adding new responses, modifying existing responses, and deleting responses.
If the Suppress Change Reason for New Responses setting is Y, RDC does not prompt users for a change reason when they add a new response (that is, a response entered for the first time) to a CRF previously saved complete. RDC automatically saves the change reason as RESP_ADDED.
Note that RDC considers a response to be new only if:
-
The response value is null.
-
The response has no audit history.
The existence of an investigator comment or any investigator comment history does not factor into the audit history of a response. If a response is null and has always been null but has an investigator comment, the response is still considered new (that is, being entered for the first time).
You can suppress the change reason prompt when the user updates RDCI comments in accessible documents. For more information, see Section 6.5.2, "Making a Reason for Change Optional for Updates to RDCI Comments in Accessible Documents."
6.1.8.2 Suppressing the Change Reason Prompt for Investigator Comments
If the Suppress Change Reason Prompt for New Investigator Comment setting is Y, RDC does not prompt investigators for a change reason the first time they enter a comment on a particular response.
6.1.8.3 Suppressing the Warning for Non-migrated CRFs
Use the Suppress Warning for Non-migrated CRFs setting to control whether RDC displays a warning message when the user opens a non-migrated CRF.
The Allow HTML Data Entry for Non-migrated CRFs configuration setting controls whether RDC users are able to open and update CRFs that were entered via batch load operation, Oracle Clinical data entry, or RDC Classic data entry, and you choose NOT to migrate those CRFs to DCI Forms.
The Suppress Warning for Non-migrated CRFs setting has meaning only if you allow data entry for non-migrated CRFs:
-
If the Allow HTML Data Entry for Non-migrated CRFs configuration setting is set to Y and the Suppress Warning for Non-migrated CRFs setting is set Y, RDC does not display a warning message when the user opens a non-migrated CRF.
-
If the Allow HTML Data Entry for Non-migrated CRFs configuration setting is set to Y and the Suppress Warning for Non-migrated CRFs setting is set N, RDC displays a message that the data in the CRF was originally entered using another interface.
See Section 3.3.8, "Allowing Access to CRFs Entered via Oracle Clinical" for more information on allowing data entry for non-migrated CRFs.
6.2 Using DCI Book Assignment
Use DCI Book assignment in any study that uses multiple DCI Books, either sequentially for protocol amendments or in parallel for multi-arm studies. Assigning patients to DCI Books ensures that the correct forms are used for each patient.
Your options for assigning patients to DCI Books are:
-
Manually Assigning Patients to DCI Books Using Oracle Clinical
-
Automatically Assigning the DCI Book upon Initial Data Entry
Changing the book assignment, either manually or in a validation or derivation procedure, is one way to move a patient from a screening book to a treatment protocol, or from one treatment protocol to another. Likewise, protocol amendments can be introduced in a new DCI Book definition, and patients can be re-assigned to the new book as the protocol amendment is rolled out.
The OCL_STATE local codelist has two values, BOOK_CHANGE and BOOK_ASSIGN, that you can use for DCI Book assignment and re-assignment. Table 6-2 describes the codelist values for assigning DCI books.
Table 6-2 Using DCI Book Assignment
| Short Value | Valid Long Values | Description |
|---|---|---|
|
BOOK_ASSIGN |
|
Specifies whether RDC automatically assigns a DCI book to the patient upon initial data entry. |
|
BOOK_CHANGE |
|
Determines whether the DCI book assignment for a patient can change. |
6.2.1 Manually Assigning Patients to DCI Books Using Oracle Clinical
To use Oracle Clinical to manually assign patients to DCI Books:
-
Open Oracle Clinical.
-
Navigate to Design, Patient Positions, and then select Patients.
-
Select your study from the list of clinical studies.
-
Click Patient Positions to open the Patient Positions form.
-
Scroll to the right of the form.
-
Enter the DCI Booknames for one or more patients.
6.2.2 Automatically Assigning the DCI Book upon Initial Data Entry
As an alternative to pre-assigning DCI Books by manually updating the Patient Positions table, you can specify that RDC automatically assign each patient to a book upon initial data entry.
Automatic book assignment works as follows:
-
You provide instructions, if necessary, to your RDC users as to what book to use for initial data entry.
-
If only one book is active in a study at a time, no instructions are necessary.
-
If you have multiple active books defined, instructions are needed. When first invoked, the RDC Casebooks page always displays the default casebook you specified at study definition time. RDC uses this casebook for entering data for unassigned patients. However, the user can select another casebook on the Casebooks page.
-
-
When an RDC user enters and saves the first CRF for a patient, RDC automatically assigns the patient to the book in context; that is, RDC updates the Patient Positions table for that patient. Note that the assignment is ONLY made if the patient is currently unassigned.
-
Once a patient is assigned to a casebook, RDC enforces use of the casebook for future data entry. The user can no longer change the casebook used simply by changing the casebook in context on the RDC Casebooks page.
To set up automatic book assignment at study definition time:
-
Open Oracle Clinical.
-
Define the DCI Book that RDC uses by default for entering data for patients.
-
Navigate to Definition, DCIs, and then select DCI Books.
-
Select the Default check box for the DCI Book to use as the default.
-
Save your changes.
-
-
Turn on automatic book assignment.
-
Navigate to Admin, Reference Codelists, and then select Local Codelists.
-
Query for the OCL_STATE local reference codelist. (Enter OCL_STATE in the Name field, and then press F8 to execute the query.)
-
Scroll to the BOOK_ASSIGN short value.
-
Set the long value to Y.
When set to Y, RDC automatically assigns the DCI Book you defined as the default for the study to each patient when data is first entered for the patient.
-
Save your changes.
-
6.2.3 Allowing Patient Book Assignments to Change
If you make use of a patient book assignment, you may expect the book assignment to change during the course of the study. The following are two examples where this may be the case:
-
You define a new DCI Book to account for a protocol amendment. On a site-by-site basis, you update the Patient Positions table to assign patients to the new book.
-
You use a Screening book for initial data entry, and based on responses in the Screening CRFs, you assign the patient to one of the arms (casebooks) of a multi-arm study.
To allow a change in the patient or book assignment:
-
Open Oracle Clinical.
-
Navigate to Admin, Reference Codelists, and then select Local Codelists.
-
Query for the OCL_STATE local reference codelist.
-
Enter OCL_STATE in the Name field.
-
Press F8 to execute the query.
-
-
Scroll to the BOOK_CHANGE short value.
-
Set the long value to ALLOW.
-
Save your changes.
6.3 Specifying CRFs for Single Use
Using options on the Casebooks page, RDC users can add unplanned CRFs and visits for a patient. You can use the SINGLE DCI TYPES installation reference codelist to specify the CRFs that the user cannot add.
The SINGLE DCI TYPES codelist contains the DCI types that do not allow duplicates. The user cannot add any DCI specified in this codelist as unplanned pages to a visit. In addition, if the user adds an unplanned visit to the study, the new visit includes only those DCIs that are not listed in the SINGLE DCI TYPES codelist.
By default, the SINGLE DCI TYPES codelist has the following values:
-
DEMOGRAPHY
-
COMPLETION
6.4 Customizing the Display of a List of Values
A discrete value group (DVG) is a set of responses (answers) that are acceptable for a given question. In other words, a DVG constrains the response to a distinct list of values (LOV) that are valid for the question. Some examples of questions with a limited list of values are:
-
Gender: male, female
-
Heart exam: normal, abnormal, not done
-
Pain level: 1 (none), 2 (minor), 3 (moderate), 4 (severe), 5 (unbearable)
Using the DVG LOV STYLE setting in the local reference codelist, you can customize the way that Oracle Clinical and RDC display the list of values during data entry for questions associated with a DVG.
This section only describes the effects of the DVG LOV STYLE setting for RDC. For its effect on how Oracle Clinical displays a list of values during data entry, see the Oracle Clinical Administrator's Guide.
To customize how RDC displays a list of valid values for a question:
-
Open Oracle Clinical.
-
Navigate to Admin, Reference Codelists, and Local Codelists.
-
Query for the OCL_DE_CONFIG reference codelist.
-
Enter OCL_DE_CONFIG in the Name field.
-
Press F8 to execute the query.
-
-
Scroll to the DVG LOV STYLE short value.
-
Specify the long value for DVG LOV STYLE. You can select either SEQ or SHORT.
The long value determines the column order that RDC uses to display the columns of information in the Acceptable List of Values dialog box.
The long value does not determine how RDC sorts the list of values. RDC always sorts the list of values by sequence number.
If you specify SEQ, RDC places the columns in the following order:
-
Sequence number, which is titled Display Seq in the LOV. In addition, the sequence number is prefixed with A if it is an alpha DVG value.
-
DVG Short Value, which is titled Value in the LOV.
-
DVG Long Value, which is titled Description in the LOV.
If you specify SHORT, RDC places the columns in the following order:
-
DVG Short Value, which is titled Value in the LOV.
-
Sequence number, which is titled Display Seq in the LOV. In addition, the sequence number is prefixed with A if it is an alpha DVG value.
-
DVG Long Value, which is titled Description in the LOV.
-
Note:
If you specify SHORT and no alpha DVG is associated with the DCM question, RDC displays only two columns in the LOV: DVG Short Value and DVG Long Value. It does not display the sequence number column.6.5 Defining the List of Allowable Change Reasons
By default, RDC requires users to specify a change reason whenever they update data in a CRF previously saved as complete.
As soon as the user updates a field and navigates away from it (by tab or mouse click), RDC displays the Reason for Change dialog box. The user must select one of the allowable reasons from the list.
Description of the illustration ''change_reasons.gif''
This section describes how to:
-
Customize the list of change reasons that RDC presents to the user, including how to access the codelists and how to define the default reason
-
Suppress the Reason for Change dialog box
6.5.1 Accessing the Codelists to Customize the Change Reason Values
You customize the list of change reasons presented in RDC by using the following installation reference codelists:
-
DATA CHANGE REASON TYPE CODE — Use this codelist to customize the list of acceptable change reasons for updates made to response or data fields, that is any field except a header field.
-
RDCI CHANGE REASON TYPE — Use this codelist to customize the list of acceptable change reasons for updates made to header fields such as Visit date, Visit time, CRF comment, blank flag, lab, or qualifying value.
To access the codelists for customizing the change reasons:
-
Open Oracle Clinical.
-
Navigate to Admin, Reference Codelists, and then select Installation Codelists.
-
Query for the codelist you want to modify.
Table 6-3 lists the initial values in the Data Change Reason Type Code codelist.
Table 6-3 Initial Values for the DATA CHANGE REASON TYPE CODE Codelist
| Short Value | Description |
|---|---|
|
DATA ENTRY ERR |
Data Entry Error |
|
BATCH |
Batch |
|
CRA CORR |
CRA Correction |
|
CRA CORR-INV |
CRA Correction, Inv consulted |
|
CRA CORR-SRC |
CRA Correction, Src Data consulted |
|
INV CORR |
Investigator Correction |
|
STUDY ASSUMP |
Study Assumption |
|
THES CLARIF |
Thesaurus Clarification |
|
ANALYSIS CORR |
Analysis Correction |
|
REMOVED |
Received DCI Removed |
|
COND VIOLATION |
Target responses deleted due to mismatch with conditional response |
|
VAL STATUS CHG |
Validation Status changed |
|
COND RESP UPDT |
Target responses deleted due to update to conditional response |
|
DATA ENTRY MODE |
Data entry mode |
6.5.1.1 Reserved Change Reason Values
Oracle Clinical and RDC reserve the following change reasons for system use:
-
BATCH
-
BROWSE
-
KEY CHANGE
-
PASS1
-
PASS2
-
RECONCILIATION
-
REMOVED
-
TRANSLATION
-
UPDATE
You cannot specify these reserved change reasons in either the DATA CHANGE REASON TYPE CODE codelist or the RDCI CHANGE REASON TYPE codelist.
6.5.1.2 Identifying the Default Change Reason
In both the DATA CHANGE REASON TYPE CODE codelist and the RDCI CHANGE REASON TYPE codelist, select a Default check box to mark one of the change reasons as the default. See Figure 6-2.
In a given RDC user session, the first Reason for Change dialog box pre-selects the default change reason, allowing the user to select any other change reason from the list. If the user selects another change reason, subsequent displays of the Reason for Change dialog box pre-select that change reason.
6.5.1.3 Identifying Change Reasons NOT for Use in RDC
RDC data entry uses the same change reason reference codelists that are referenced by Oracle Clinical data entry. To mark any change reason that should not be used in RDC, specify NOTRDC in the Long Value field for the appropriate change reason entry. Figure 6-2.
Note that the NOTRDC setting applies only to RDC. Specifying NOTRDC for a change reason does not affect the use of the change reason in Oracle Clinical data entry or in pre-4.5.3 versions of RDC data entry.
Figure 6-2 DATA CHANGE REASON TYPE CODE Codelist
Description of ''Figure 6-2 DATA CHANGE REASON TYPE CODE Codelist''
6.5.2 Making a Reason for Change Optional for Updates to RDCI Comments in Accessible Documents
As described earlier in Section 6.5, "Defining the List of Allowable Change Reasons," RDC requires users to specify a change reason whenever they update data in a CRF previously saved as complete. As soon as the user updates a field and navigates away from it (by tab or mouse click), RDC displays the Reason for Change dialog box. The user must select one of your pre-defined reasons from the list.
You can suppress the change reason prompt when the user updates RDCI comments in accessible documents.
You can, however, choose to make a change reason optional for updates to RDCI comments in accessible documents.
To suppress the Reason for Change dialog box:
-
Open Oracle Clinical.
-
Navigate to Admin, Reference Codelists, and then select Local Codelists.
-
Query for the OCL_DE_CONFIG reference local codelist.
-
Enter OCL_DE_CONFIG in the Name field.
-
Press F8 to execute the query.
-
-
Scroll to the COMMCHGREAS_REQ short value.
-
Set the long value to N to make a change reason optional for updates to RDCI comments in accessible documents.
-
Save your changes.
6.6 Setting the Format of Dates
You use the Data Entry Preferences form in Oracle Clinical to specify the display and input formats for date fields in RDC. Table 6-4 describes the date preferences that you can set.
The Data Entry Preferences form is available at the database level and at the user level. The database-level preferences for date formats are in effect unless you override that specification at the user level. In addition, if the Preferences link is enabled in RDC, the user can override the values for these options.
Note:
Although user-level settings generally override database-level settings, when a data type discrepancy is raised for a date field, the resulting warning message displays the discrepant date in the format specified at the database level. Therefore, Oracle recommends that you always specify STANDARD (DD-MON-YYYY) as the Data Entry Display Format at the database level.The other possible values can be misconstrued: US (MM-DD-YYYY), European (DD-MM-YYYY), and Swedish (YYYY-MM-DD).
Note:
Oracle Clinical uses all the preference settings in the Data Entry Preferences form. However, RDC uses only the Data Entry Display Format and the Data Entry Input Format preference settings.Table 6-4 Data Entry Preferences
| Preference | Description | Format |
|---|---|---|
|
Data Entry Display Format |
For DCI and DCM dates and data entry format, the Data Entry Display Format setting determines the format to use for displaying dates. The data entry display format must either be Standard or must match the input format. You can suppress the day and/or month portion of the data depending on how the question is defined. The display is controlled by the Date Time Format of the DCM question on which it is based. The valid Date Time Formats for a date field are as follows:
|
US (mm-dd-yyyy); default EUROPEAN (dd-mm-yyyy) SWEDISH (yyyy-mm-dd) STANDARD (dd-mon-yyyy) |
|
Data Entry Input Format |
For DCI and DCM dates and data entry fields of type date, the Data Entry Input Format setting determines how date formats are applied to interpreting data that is input to the field. Must be the same as the Data Entry Display Format setting, unless the display format is set to STANDARD. The standard format is always accepted. |
US (mm-dd-yyyy); default EUROPEAN (dd-mm-yyyy) SWEDISH (yyyy-mm-dd) |
6.6.1 Setting Date Formats at the Database Level
To modify date preferences at the local database level:
-
Open Oracle Clinical.
-
Navigate to Admin, DE Admin, and then select DE User Prefs.
-
Set your preferences for the Data Entry Display Format and the Data Entry Input Format.
-
Click Save as Default to save your changes.
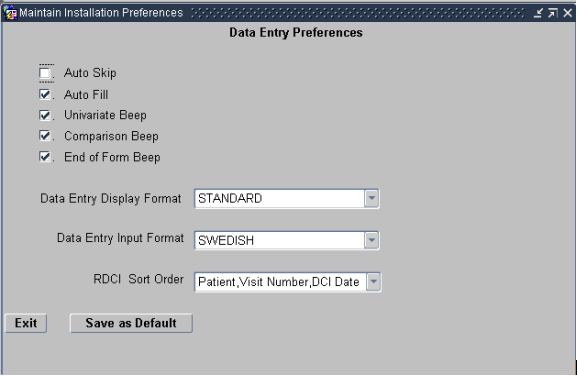
Description of the illustration ''depref.gif''
-
Redeploy RDC for the changes to take effect. See "Redeploying RDC with Customizations" for instructions.
6.6.2 Setting Date Formats for Individual Users
To modify the date preferences for an individual user:
-
Open Oracle Clinical.
-
Navigate to Admin, Users and Roles, and then select Oracle Accounts.
-
Press F7 to open the query screen.
-
Enter name of user or enter an account name.
-
Press F8 to display all users that match your specified search criteria. Navigate to the applicable user.
-
Open the Special menu, and then select DE Prefs.
Users can also override the display and entry format by clicking the Preferences link in RDC. This method permanently changes the preference for the user and has the same effect as setting it through Oracle Accounts.
You can customize the RDC application to not display the Preferences link. See Section 3.3.2, "Hiding the Preferences Links" for more information.