7 Gene Sets
This section describes the gene set tab in OHPM. It contains the following sections:
7.1 Introduction
The Gene Sets tab is a way to collect genes into groupings or lists. There will be a list of genes you work with regularly, which may be as small as a couple of genes or large, consisting of hundreds of genes.
Often you may keep several such sets, each characterizing a group of genes with particular attributes; for example, transcription factors, genes involved in some regulation mechanism, genes that have been implicated to contribute to a particular characteristic and so on. The concept of Gene Set lets you group genes into convenient collections for reuse.
7.2 Gene Sets List
My Gene Sets section lists the recently updated gene sets. Clicking the selected gene sets loads it in the Manage Gene Sets/Manage window.
7.3 Adding or Editing Gene Sets
The Gene Sets New/Edit section helps you group genes as a set. You can group a few genes for quick search retrieval or for use in a cohort query. For example, if you have a set of 10 genes that you plan to work with or always search for results based on genes from within this particular array of 10, you can create a new Gene Set to collect these 10 genes into one group.
A gene can be part of many different Gene Sets. Also, you can create many different gene sets, each gene set with a different combinations of genes.
Note:
-
There are no restrictions regarding genes that can be included in any particular Gene Set. You can mix genes from multiple species, or assembly versions.
-
Gene Sets are Private only and cannot be shared among users.
-
Gene Set names are not case- sensitive.
-
The file size limit for the Upload from File option is less than 5MB when genes are matched using Equals. When using Contains or Starts With option, the list of genes cannot be longer than 512 characters.
Perform the following steps to create a new gene set:
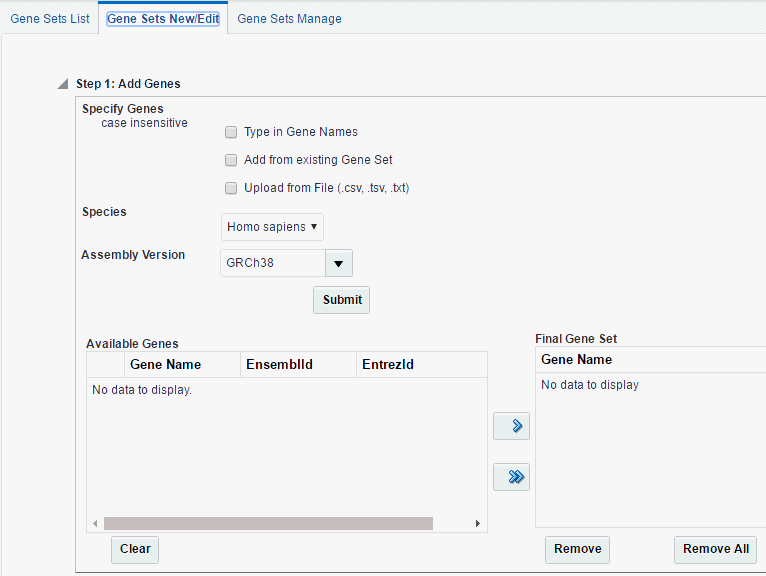
Description of the illustration ''fig25.gif''
-
Specify genes either by:
-
selecting Type in Gene Set. You can search for genes using their Ensembl or HUGO names. You can enter multiple gene names separated by space, comma or semicolon.
-
selecting Add from Existing Gene Set.
-
selecting Upload from File. Select a file from your desktop where the genes are delimited by comma, space or tab.
-
-
Select the Species.
-
Select the Assembly Version.
-
Click Submit.
-
A list of genes appears in the Available Genes section. Using the arrow buttons, move the required genes to the Final Gene Set section. These are the genes that will comprise a gene set.
You can select to move all genes from the left hand side panel to the right hand side panel using the following icon:
-
After you have selected all required genes, enter a Gene Set Name. You can either preserve the selection as a new Genet Set or save over an existing one.
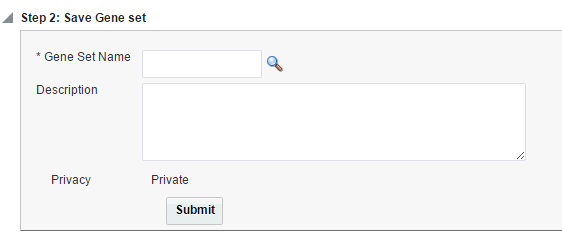
Description of the illustration ''fig26.gif''
-
Enter a description for the gene set.
-
Click Submit. Your gene set is created.
7.4 Managing Gene Sets
The Gene Sets Manage screen lets you view the individual genes (members) included in a given Gene Set and its metadata. You can select a specific Gene Set to view by using its name and click Submit to view the Gene Set's detailed information.
-
Enter a Gene Set.
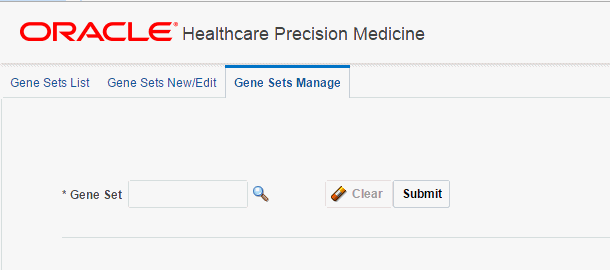
Description of the illustration ''fig29.gif''
You can search for a gene set by clicking the magnifying glass icon.
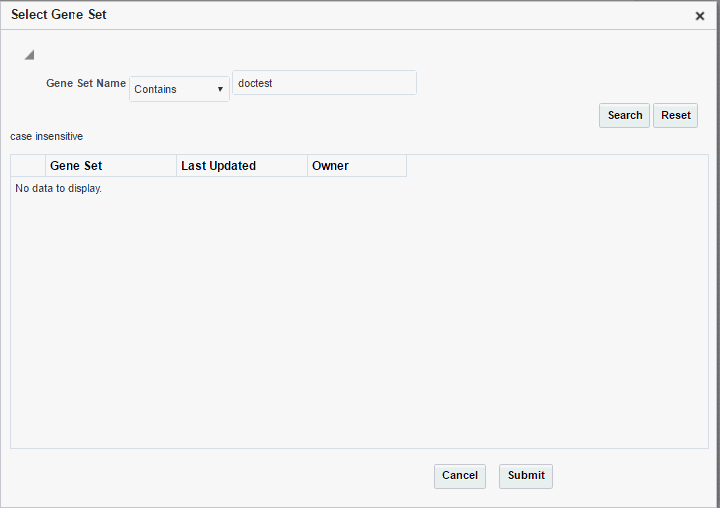
Description of the illustration ''fig28.gif''
-
After selecting the gene set, click Submit. Detailed information for the gene set is displayed.
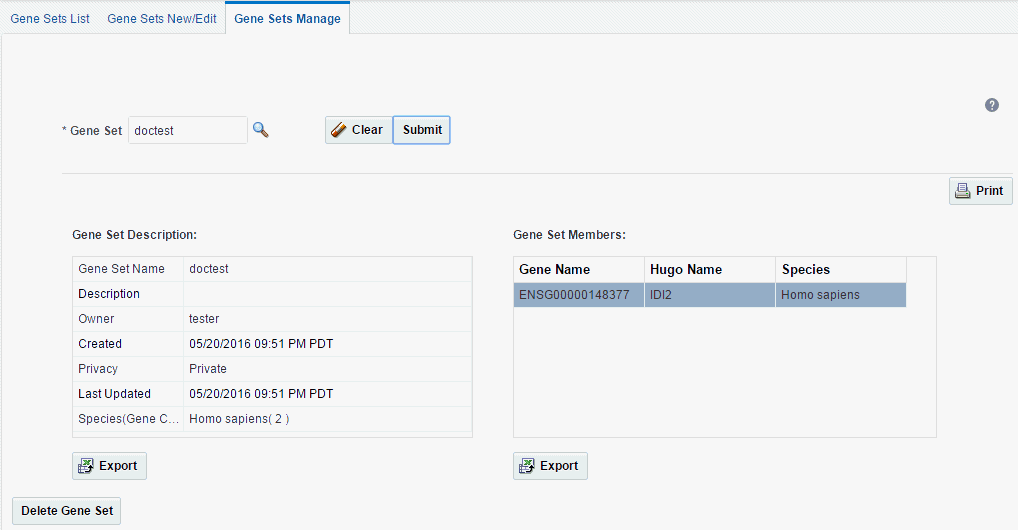
Description of the illustration ''fig30.gif''
Each Gene Set's metadata includes the name, description given by the user, owner of the gene set, privacy setting, the creation and update dates and summary of how many genes are in a gene set.
7.4.1 Exporting a Gene Set
You can export the gene set data to a Microsoft Excel worksheet (.xls) file. Perform the following steps to export a gene set:
-
In the Gene Set Manage tab, search for the gene set you want to export.
-
Click Export to export the Gene Set Description or Gene Set Data.
-
You will receive a warning that the export process will take a while. Click OK to proceed or Cancel to stop the export.
Finally, you can delete a Gene Set using the Delete button. A confirmation box appears to ensure you are performing the proper action.
7.4.2 Printing Gene Set Data
Perform the following steps to print gene set data:
-
In the Gene Set Manage tab, search for the gene set you want to print.
-
Click Print on the right. Your printer settings appear.
-
Select the printer and click OK.
7.4.3 Deleting a Gene Set
Perform the following steps to delete a gene set:
-
In the Gene Set Manage tab, search for the gene set you want to delete.
-
Click Delete Gene Set.
-
A confirmation box appears. Click Yes to delete the gene set.
Note:
This deletion will only soft-delete a Gene Set. This implies that the actual Gene Set record is still in the database, but it can only be restored with the help of a System Administrator.